Table of Contents
Advertisement
Advertisement
Table of Contents

Related Manuals for ADJ VIZI BSW 300


Summary of Contents for ADJ VIZI BSW 300
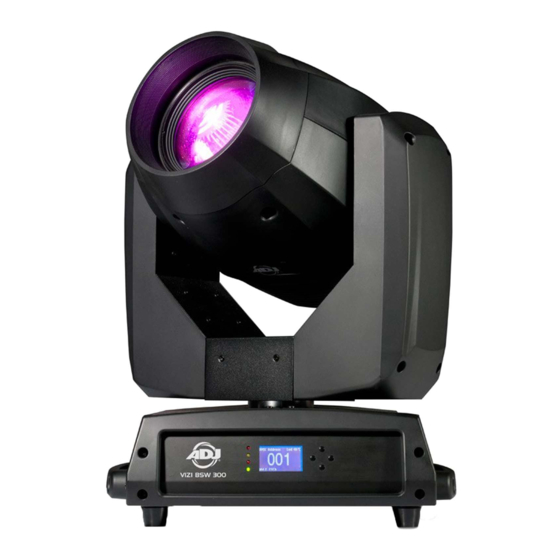
- Page 1 VIZI BSW 300 User Instructions...
- Page 2 ©2022 ADJ Products, LLC all rights reserved. Information, specifications, diagrams, images, and instructions herein are subject to change without notice. ADJ Products, LLC logo and identifying product names and numbers herein are trademarks of ADJ Products, LLC. Copyright protection claimed includes all forms and matters of copyrightable materials and information now allowed by statutory or judicial law or hereinafter granted.
-
Page 3: Table Of Contents
C O N T E N T S General Information Limited Warranty (USA Only) Safety Guidelines Overview Color Wheels Gobo Wheel Gobo Replacement Fixture Installation DMX Set Up System Menu Offset Menu Dimmer Curve Chart Photometric Charts DMX Traits: Channel Functions & Values Error Codes Power Linking | Fuse | Cleaning | Troubleshooting Technical Specifications... -
Page 4: General Information
G E N E R A L I N F O R M AT I O N INTRODUCTION Please read and understand all instructions in this manual carefully and thoroughly before attempting to operate these products. These instructions contain important safety and use information. UNPACKING The products in this kit have been thoroughly tested and have been shipped in perfect operating condition. -
Page 5: Limited Warranty (Usa Only)
All shipping charges must be pre-paid. If the requested repairs or service (including parts replacement) are within the terms of this warranty, ADJ Products, LLC will pay return shipping charges only to a designated point within the United States. If the entire instrument is sent, it must be shipped in its original package. No accessories should be shipped with the product. -
Page 6: Safety Guidelines
To guarantee a smooth operation, it is important to follow all instructions and guidelines in this manual. ADJ Products, LLC is not responsible for injury and/or damages resulting from the misuse of this fixture due to the disregard of the information printed in this manual. Only qualified and/or certified personnel should perform installation of this fixture and only the original rigging parts included with this fixture should be used for installation. - Page 7 S A F E T Y G U I D E L I N E S RISK GROUP 3 - RISK OF EXPOSURE TO ULTRAVIOLET UV RADIATION! FIXTURE EMITS HIGH INTENSITY WAVELENGTH OF ULTRAVIOLET UV LIGHT FROM THE UV COLOR FILTER. WEAR PROPER EYE AND SKIN PROTECTION.
- Page 8 LEDs. This issue is not specific only to ADJ lighting fixtures, it is a common issue with lighting fixtures from all manufacturers. Although there is no true way to fully prevent this issue from happening, the guidelines below can prevent any potential damage from occurring if followed.
-
Page 9: Overview
O V E R V I E W Lens Position Locks Handle IP65 Locking LED Indicators: Note: Do Not Mounting Plate for 3-Pin/5-Pin attach Safety Master Omega Brackets DMX In/Out Slave Cable & Safety Cable Sound Mounting Point Buttons: Fuse: T 10A Menu Down IP65 Locking Power... -
Page 10: Color Wheels
C O L O R W H E E L S... -
Page 11: Gobo Wheel
G O B O W H E E L S... -
Page 12: Gobo Replacement
G O B O R E P L A C E M E N T The glass gobo’s are the only gobo’s that are interchangeable in this unit. Remember when changing these gobo’s they are glass. This process must be done carefully so as not to break the gobo. Note: There is one metal gobo in this wheel which is also interchangeable. -
Page 13: Fixture Installation
F I X T U R E I N S TA L L AT I O N FLAMMABLE MATERIAL WARNING Keep fixture at least 7.9in. (0.2m) away from any flammable materials, decorations, pyrotechnics, etc. ELECTRICAL CONNECTIONS A qualified electrician should be used for all electrical connections and/or installations. - Page 14 F I X T U R E I N S TA L L AT I O N NOTICE: The suitable environmental temperature for this lighting fixture is between -25˚ C to 45˚ C. Do not place this lighting fixture in an environment where the temperatures are under or above the temperatures stated above.
- Page 15 FIXTURE WILL NOT DROP IF THE CLAMP FAILS. The Vizi BSW 300 is fully operational in three different mounting positions, hanging upside-down, mounted sideways on trussing, or set on a flat level surface. Be sure this fixture is kept at least 0.2m (7.9in.) away from any flammable materials (decoration etc.).
-
Page 16: Dmx Set Up
DMX chain. Data Cable (DMX Cable) Requirements (For DMX and Master/Slave Operation): The Vizi BSW 300 can be controlled via DMX-512 protocol. The Vizi BSW 300 has 2 DMX channel modes; 17 channel mode, and 20 channel mode. The DMX address is set electronically using the controls on the front panel of the unit. - Page 17 DMX channels of each fixture. That means changing the settings of one channel will only affect the selected fixture. In the case of the Vizi BSW 300, when in 17 Channel mode, you should set the starting DMX address of the first unit to 1, the second unit to 18 (1 + 17), the third unit to 35 (18 + 17), and so on.
-
Page 18: System Menu
S Y S T E M M E N U The fixture includes an easy to navigate system menu display where all necessary settings and adjustments are made. Turn the unit on, press the MENU button to access the menu mode, and press the UP/DOWN arrow buttons until the required function is displayed on the monitor. - Page 19 S Y S T E M M E N U Menu Submenu Options Description DMX Address mode 1(17) DMX Channel DMX Functions Mode mode 2(20) Master/Slave DMX State Blackout Last State Show 0 Show Mode Show 4 Master Slave Mode Slave 1 Show Setting Slave 2...
- Page 20 S Y S T E M M E N U System Menu: When making adjustments press ENTER to confirm your setup then press and hold the MENU button for at least 3 seconds. To exit without making any adjustments press the MENU button.
- Page 21 S Y S T E M M E N U Sound Mode - In this menu you can activate sound active mode. 1. Access the main menu, and press the UP or DOWN buttons so that “Show Setting” is highlighted, then press ENTER.
- Page 22 S Y S T E M M E N U DISPLAY SETTINGS Display Invert - With this function, you can “flip” the display 180 degrees. 1. Access the main menu, and press the UP or DOWN buttons so that “Display Setting” is highlighted, then press ENTER.
- Page 23 S Y S T E M M E N U FIXTURE INFORMATION - Fixture Use Time - With this function, you can check the fixture running time. 1. Access the main menu, and press the UP or DOWN buttons so that “Fixture Information” is highlighted, then press ENTER.
-
Page 24: Offset Menu
O F F S E T M E N U Menu Submenu Options Tilt Color1 Color2 Gobo1 -128 Offset Menu R-Gobo1 Gobo2 Prism Prism2 R-Prism Angle/Frost Focus To enter the Offset Menu, press the ENTER button for at least 3 seconds. In this submenu you are able to adjust the home position of the pan, tilt, shutter, color wheel, both gobo wheel’s, RGobo (Rotating) wheel, prism, R (Rotating) Prism, and focus position. - Page 25 Color Reset Fail, Gobo Reset Fail, R-Gobo1 Reset Fail, Gobo2 Reset Fail, Prism Reset Fail, R-Prism Reset Fail, Prism2 Reset Fail, Focus Reset Fail, Angle/Frost Reset Fail. These Error messages may appear when turning on or reseting the unit. Please contact ADJ customer support.
-
Page 26: Dimmer Curve Chart
D I M M E R C U R V E C H A R T... -
Page 27: Photometric Charts
P H O T O M E T R I C C H A R T S... -
Page 28: Dmx Traits: Channel Functions & Values
D M X T R A I T S : C H A N N E L F U N C T I O N S & VA L U E S 17 Channels 20 Channels Values Functions PAN MOVEMENT 8-BIT: 000-255 PAN FINE 16-BIT: 000-255... - Page 29 17 Channels 20 Channels Values Functions GOBO WHEEL 2 OPEN 7-13 APERTURE 1 14-20 APERTURE 2 21-27 APERTURE 3 28-34 GOBO 1 35-41 GOBO 2 42-48 GOBO 3 49-55 GOBO 4 56-62 GOBO 5 63-69 GOBO 6 70-83 OPEN 84-087 APERTURE 1 SHAKE 088-092 APERTURE 2 SHAKE...
- Page 30 17 Channels 20 Channels Values Functions SHOWS 1-21 SHOW 1 22-41 SHOW 2 42-61 SHOW 3 62-81 SHOW 4 82-255 SHOW 0 DIMMER CURVES 0-20 STANDARD 21-40 STAGE 41-60 61-80 ARCHITECTURAL 81-100 THEATRE 101-255 DEFAULT TO UNIT SETTING PAN/TILT SPEED FAST - SLOW 0-255 SPECIAL FUNCTIONS 0-69...
-
Page 31: Error Codes
Color Reset Fail, Gobo Reset Fail, R-Gobo1 Reset Fail, Gobo2 Reset Fail, Prism Reset Fail, R-Prism Reset Fail, Prism2 Reset Fail, Focus Reset Fail, Angle/Frost Reset Fail. These Error messages may appear when turning on or reseting the unit. Please contact ADJ customer support. -
Page 32: Power Linking | Fuse | Cleaning | Troubleshooting
1. The stepper motor might be damaged or the cable connected to the PCB is broken. 2. The motor’s drive IC on the PCB might be out of condition. Error Codes: 1. See previous page for Error warnings and contact ADJ customer service. -
Page 33: Technical Specifications
S P E C I F I C AT I O N S Optical • Light Source: 300W White LED • Beam Angle: 8° to 17° ( Spot Mode) • •Beam Angle: 1° to 7° (Beam Mode) • Beam Angle: 18° to 26° (Wash Mode) Frost Filter Specifications •... - Page 34 DIMENSIONS...
- Page 35 FCC STATEMENT This device complies with Part 15 of the FCC Rules. Operation is subject to the following two conditions: (1) this device may not cause harmful interference, and (2) this device must accept any interference received, including interference that may cause undesired operation. FCC RADIO FREQUENCY INTERFERENCE WARNINGS &...
Need help?
Do you have a question about the VIZI BSW 300 and is the answer not in the manual?
Questions and answers