Advertisement
Quick Links
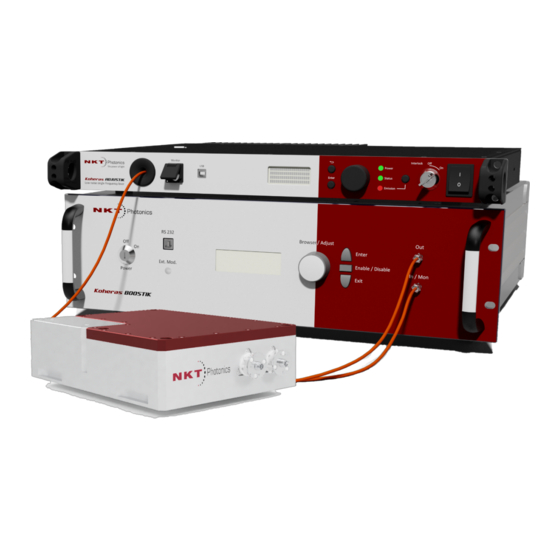
Koheras HARMONIK
Fiber Coupler Installation Guide
Item# 800-634-01
General overview
Using four attachment bolts and washers, the fiber coupler
flange adapter is bolted onto the front panel of the
HARMONIK module. An iris diaphragm is used to coarsely
align the adapter with the output beam. Coarse alignment
is achieved by using a power meter to measure the
transmitted power and then maximize it by laterally shifting
the adapter. This ensures the adapter is accurately
centered on the output beam. Once the coarse alignment
is completed, the fiber coupler is inserted and fixed to the
flange adapter and then finely adjusted.
Installation environment
It is important that the installation environment is clean and
free from dust or other contaminants. Further, the output
windows should be free from any dust particles before
installation of the fiber couplers.
Safety precautions
Align both the fundamental and second harmonic laser
apertures using an appropriate beam dump. To further
prevent damage and accidental exposure to personnel,
ensure the beam path is safely contained and known.
All nearby personnel must wear suitable clothing and be
aware of the laser operations and the danger involved.
Warning:
Koheras HARMONIK lasers are Class 4 lasers. Before any operation is attempted, ensure the procedures and notices
within this Installation Guide and the hazard labels on the product are read, noted, and adhered to. In addition, make sure to follow
all safety recommendations listed in the Koheras HARMONIK Safety, Handling and Regulatory Information document shipped with
your laser. If in doubt, consult your laser safety officer.
Warning:
Do not install the fiber coupler with the laser powered on. Ensure power to the laser is removed before proceeding with
the installation.
Warning:
Use of controls or adjustments or performance of procedures other than those specified herein and in the document
Koheras HARMONIK Product Guide may result in hazardous radiation exposure.
Item list
1 Koheras HARMONIK
2 aeroGUIDE Power cable
3 Flange adapter
4 Four M2x6 hex screws with washers
5 Fiber coupler for second harmonic and/or fundamental
output
Tools required
1 Adjustable iris diaphragm
2 50HD-15 hex screw driver
3 9D-12 screw driver
4 Eccentric key
5 Power meter
Removal of protection caps
To prevent contamination, the fiber couplers come with
dust protection caps. Remove the caps before continuing
the installation.
1
Koheras HARMONIK Fiber Coupler Installation Guide
Revision 1.0 01-2022 W-10456
Advertisement

Related Manuals for NKT Photonics Koheras HARMONIK


Summary of Contents for NKT Photonics Koheras HARMONIK
- Page 1 Warning: Koheras HARMONIK lasers are Class 4 lasers. Before any operation is attempted, ensure the procedures and notices within this Installation Guide and the hazard labels on the product are read, noted, and adhered to. In addition, make sure to follow all safety recommendations listed in the Koheras HARMONIK Safety, Handling and Regulatory Information document shipped with your laser.
-
Page 2: Step 2: Align The Adapter
Koheras HARMONIK Fiber Coupler Installation Guide Step 1: Mount the optical flange adapter a Turn off laser power. b Insert the four M2x6 mounting screws with washers through the holes in the flange of the adapter. c Make sure the adapters are orientated with the fundamental/SHG output as shown with respect to the radially arranged pin screws. - Page 3 Koheras HARMONIK Fiber Coupler Installation Guide Step 4: Connect the external DC power supply a Insert the fiber into the fiber coupler’s receptacle. The fiber connector has a thin notch mark indicating its orientation. b Make sure the orientation of the fiber cable is as depicted.
- Page 4 Koheras HARMONIK Fiber Coupler Installation Guide Step 5: Adjust the coarse tilt a Loosen the three tilt locking screws. b Turn the tilt adjustment screws in sequence over a wide range in both directions while observing the power meter. c If there is no measurable light coupled into the fiber while turning the adjustment screws, perform steps “d”...
-
Page 5: Step 6: Adjust The Focus
Koheras HARMONIK Fiber Coupler Installation Guide Step 6: Adjust the focus “grub screws” a While monitoring the power meter, rotate the eccentric key until the maximum signal is attained. b Iteratively repeat steps “5g” (tilt optimization) and “6a” (focus optimization) until the maximum signal cannot be increased further. - Page 6 Koheras HARMONIK Fiber Coupler Installation Guide Support https://www.nktphotonics.com/lasers-fibers/ support/technical-support-and-customer-service/ Shipping Address NKT Photonics A/S Blokken 84 3460 Birkerød Denmark...
Need help?
Do you have a question about the Koheras HARMONIK and is the answer not in the manual?
Questions and answers