
Subscribe to Our Youtube Channel
Related Manuals for Delta OHM HD2301.0


Summary of Contents for Delta OHM HD2301.0
- Page 1 English Operating manual Thermohygrometer HD2301.0 www.deltaohm.com Keep for future reference.
-
Page 2: Table Of Contents
CONTENTS GENERAL CHARACTERISTICS ................. 3 DESCRIPTION OF THE FUNCTIONS ..............6 THE PROGRAMMING MENU ................9 PROBES AND MEASUREMENTS ..............10 ..............10 EASUREMENT OF RELATIVE HUMIDITY ................ 10 ERFORMING THE MEASUREMENT ......... 11 ALIBRATION OF THE COMBINED HUMIDITY TEMPERATURE PROBE Pt100 Pt1000 T ........ -
Page 3: General Characteristics
GENERAL CHARACTERISTICS The Thermohygrometer Model HD2301.0 is a portable instrument that measures an environment's temperature and relative humidity. It is fitted with a large LCD display for excellent visualization of the measured data. The Thermohygrometer Model HD2301.0 measures: • relative humidity and temperature using combined probes, fitted with a Pt100 temperature sensor or thermocouple;... - Page 4 Thermohygrometer HD2301.0 - 4 - HD2301 V1.7...
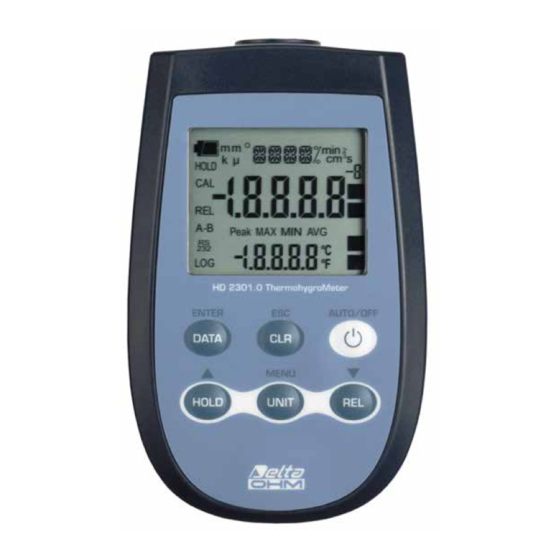
- Page 5 HD2301.0 1. Input for probes, 8-pole DIN45326 connector. 2. Battery symbol: displays the battery charge level. 3. Function indicators. 4. Secondary temperature display line. 5. DATA/ENTER key: during normal operation displays the maximum (MAX), the minimum (MIN) and the average (AVG) of current measurements; in the menu, confirms the current selection.
-
Page 6: Description Of The Functions
DESCRIPTION OF THE FUNCTIONS The keyboard of the thermohygrometer HD2301.0 is composed of double-function keys. The function on the key is the "main function", while the one above the key is the "secondary function". When the instrument is in standard measurement mode, the main function is active. - Page 7 Disabling of the automatic turning off The instrument has an AutoPowerOff function that automatically turns the instrument off after about 8 minutes if no key is pressed during the intervening time. Press simultaneously the ON/OFF key and the HOLD key to disable this function. In this case, remember to turn the instrument off using the ON/OFF key: disabling of the automatic turning off is shown by the blinking battery symbol.
- Page 8 : once the MENU has been opened with the DATA+UNIT keys, the key will • allow to increase the value of the selected parameter. Pressed together with the ON/OFF key, during turn on, the AutoPowerOff function is disabled (see the description of the ON/OFF key). UNIT/MENU The UNIT key is used for the following functions: UNIT: by pressing this key the unit of measurement of the main input quantity is...
-
Page 9: The Programming Menu
THE PROGRAMMING MENU To access to the menu press simultaneously the following keys: The items to be set are listed in this order: 1. Probe type: the "PRBE_TYPE" message is displayed in the comment line. The main line in the center of the display shows the type of probe connected to the instrument. -
Page 10: Probes And Measurements
The Delta OHM Pt1000 probes are automatically detected while the direct 4 wire Pt100 temperature probe is not automatically detected by the instrument and must be set up in the Probe type menu item (please see the menu description on previous chapter). -
Page 11: Calibration Of The Combined Humidity / Temperature Probe
ALIBRATION OF THE COMBINED HUMIDITY TEMPERATURE PROBE Caution! To calibrate the probes correctly, a knowledge of and abiding by the physical phenomena on which the measurement is based is fundamental: this is the reason why it is recommended to abide by what is reported below carefully and only to perform new calibrations if technically proficient. - Page 12 Calibrating the points at 33% RH and 11% RH Repeat the points from 3) to 9) using the saturated salts at 33% RH and 11% When completed, unscrew the ring with the cap, and screw the protection grid back on the sensors. The calibration is now complete. Important notes: 1) Do not let hands touch the RH sensor.
-
Page 13: Direct Input Into Pt100 And Pt1000 Temperature Probes
A tolerance according to norm IEC751 - BS1904 - DIN43760. The probes with SICRAM module and the Delta Ohm Pt1000 probes are detected by the instrument; the model configuration is required for the other probes (please see the description of the Probe Type menu item on page 9). - Page 14 5. open the two module shells: the printed circuit to which the probe must be connected is housed inside. On the left there are the 1…4 points on which the sensor wires must be welded. The JP1…JP4 jumpers are in the center of the board. These must be closed with a tin bead for some type of sensors: Not Used Ni1000...
-
Page 15: Irect Connection Of Wire Pt100 Sensors
8. Insert the gasket in the module; 9. Screw the fairlead and the ring. 10.At the other end of the module, enter the ring with the O-Ring as indicated in the picture. 11.Make sure the cable is not twisted while you are screwing the fairlead. Now the probe is ready. -
Page 16: Warnings
WARNINGS 1. Probes are not insulated from their external casing; be very careful not to come into contact with live parts (above 48V). This could be extremely dangerous for the instrument as well as for the operator, who could be electrocuted. -
Page 17: Instrument Signals And Faults
INSTRUMENT SIGNALS AND FAULTS The following table lists all error indications and information displayed by the instrument and supplied to the user in different operating situations: Indicazione a display Spiegazione This appears in the display central line when a temperature only probe is connected. -
Page 18: Low Battery Warning And Battery Replacement
LOW BATTERY WARNING AND BATTERY REPLACEMENT The battery symbol on the display constantly shows the battery charge status. To the extent that batteries have discharged, the symbol "empties". When the charge decreases still further it starts blinking. In this case, batteries should be replaced as soon as possible. If you continue to use it, the instrument can no longer ensure correct measurement. -
Page 19: Instrument Storage
INSTRUMENT STORAGE Instrument storage conditions: • Temperature: -25...+65 °C. • Humidity: less than 90% RH without condensation. • Do not store the instrument in places where: • humidity is high; the instrument may be exposed to direct sunlight; • the instrument may be exposed to a source of high temperature; •... -
Page 20: Notes About Working And Operative Safety
NOTES ABOUT WORKING AND OPERATIVE SAFETY Authorized use The technical specifications as given in chapter TECHNICAL CHARACTERISTICS must be observed. Only the operation and running of the measuring instrument according to the instructions given in this operating manual is authorized. Any other use is considered unauthorized. -
Page 21: Technical Characteristics
TECHNICAL CHARACTERISTICS ECHNICAL INFORMATION ON THE HERMOHYGROMETER Instrument Dimensions (Length x Width x Height) 140 x 88 x 38 mm Weight 160 g (complete with batteries) Material Display 2x4½ digits plus symbols Visible area: 52 x 42 mm Operating conditions Operating temperature -5…+50 °C Warehouse temperature... -
Page 22: Technical Data Of Probes And Modules In Line With The Instrument
ECHNICAL DATA OF PROBES AND MODULES IN LINE WITH THE INSTRUMENT Pt100 SICRAM EMPERATURE PROBES SENSOR USING MODULE Application Model Type Accuracy range TP472I Immersion 196 °C…+500 °C TP472I.O Immersion -50 °C…+300 °C TP473P.I Penetration -50 °C…+400 °C TP473P.O Penetration -50 °C…+300 °C TP474C.O Contact... -
Page 23: Relative Humidity And Temperature Probes Using Sicram Module
ELATIVE HUMIDITY AND TEMPERATURE PROBES USING SICRAM MODULE Application range Accuracy Temp Model sensor Temperature Temp. HP472ACR Pt100 0…100% RH -20 °C…+80 °C ±0,3 °C HP473ACR Pt100 0…100% RH -20 °C…+80 °C ±0,3 °C ±1.5% HP474ACR (0…85%RH) Pt100 0…100% RH -40 °C…+150 °C ±0,3 °C ±2.5% HP475ACR... -
Page 24: Ordering Codes
ORDERING CODES HD2301.0 The kit is composed of the instrument HD2301.0, 3 1.5V alkaline batteries, operating manual, and case. The probes must be ordered separately. SICRAM ROBES COMPLETE WITH MODULE COMBINED RELATIVE HUMIDITY AND TEMPERATURE PROBES HP472ACR Combined probe %RH and temperature, dimensions Ø26 x 170 mm. - Page 25 PBT and 10 µm stainless steel grid protection for probes Ø14, thread M12x1. Operating temperature: -40…120 °C. HD75 Saturated solution for checking the Relative Humidity sensor at 75% RH, with screw adaptor for Ø14 probes, thread M12×1. HD33 Saturated solution for checking the Relative Humidity sensor at 33% RH, with screw adaptor for Ø14 probes, thread M12×1.
- Page 26 SICRAM EMPERATURE PROBES WITHOUT MODULE TP47.100.O Immersion probe, sensor Pt100 direct 4 wires. Probe's stem Ø3 mm, length 230 mm. 4-wire connection cable with connector, length 2 metres. TP47.1000.O Immersion probe, sensor Pt1000. Probe's stem Ø3 mm, length 230 mm. 4-wire connection cable with connector, length 2 metres.
- Page 28 | sales@deltaohm.com WARRANTY Delta OHM is required to respond to the "factory warranty" only in those cases provided by Legislative Decree 6 September 2005 - n. 206. Each instrument is sold after rigorous inspections; if any manufacturing defect is found, it is necessary to contact the distributor where the instrument was purchased from.
Need help?
Do you have a question about the HD2301.0 and is the answer not in the manual?
Questions and answers