Table of Contents
Advertisement
Quick Links
REV. 1.1
10/06/2016
HD21ABE
HD21ABE17
IAQ MONITOR
ENGLISH
The quality level of our instruments is the result of the continuous development of the
product. This may produce some differences between the information written in this
manual and the instrument you have purchased. We cannot completely exclude errors in
the manual, for which we apologize.
The data, images and descriptions included in this manual cannot be legally asserted. We
reserve the right to make changes and corrections with no prior notice.
Advertisement
Table of Contents

Subscribe to Our Youtube Channel
Related Manuals for Delta OHM HD21ABE


Summary of Contents for Delta OHM HD21ABE
- Page 1 REV. 1.1 10/06/2016 HD21ABE HD21ABE17 IAQ MONITOR ENGLISH The quality level of our instruments is the result of the continuous development of the product. This may produce some differences between the information written in this manual and the instrument you have purchased. We cannot completely exclude errors in the manual, for which we apologize.
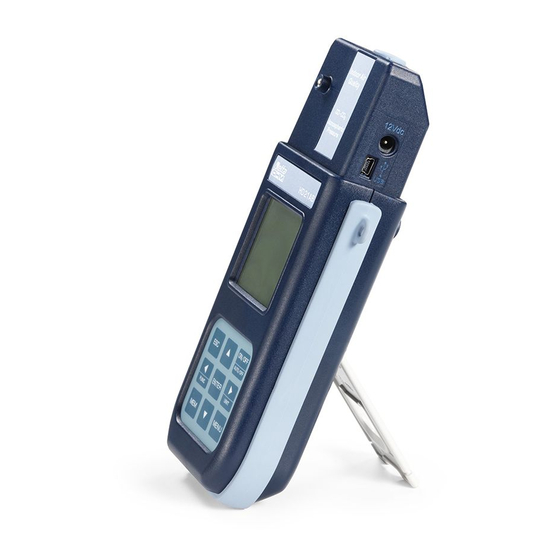
- Page 2 HD21ABE Indoor Air Quality Monitor...
- Page 3 HD21ABE 1. Backlit graphic display. 2. ESC key: It allows to exit from the menu or, in case of a submenu, to exit from the current level display. 3. Navigation key ▲: It allows navigation through the menus. During normal operation, it is used to select the resetting of the statistical data and to scroll the displayed quantities upwards.
- Page 4 HD21ABE17 Indoor Air Quality Monitor...
- Page 5 HD21ABE17 1. Backlit graphic display. 2. ESC key: It allows to exit from the menu or, in case of a submenu, to exit from the current level display. 3. Navigation key ▲: It allows navigation through the menus. During normal operation, it is used to select the resetting of the statistical data and to scroll the displayed quantities upwards.
-
Page 6: Table Of Contents
TABLE OF CONTENTS 1. GENERAL CHARACTERISTICS ........................7 2. THE USER INTERFACE ............................ 8 2.1 T HD21ABE D ............................8 ISPLAY 2.2 T HD21ABE17 D ........................... 9 ISPLAY 2.3 T ..............................10 EYBOARD 3. OPERATION ..............................12 ... -
Page 7: General Characteristics
The HD21ABE17 instrument also measures Temperature and Relative Humidity, and it calculates Dew Point, Wet Bulb Temperature, Absolute Humidity, Mixing Ratio and Enthalpy. HD21ABE and HD21ABE17 are dataloggers with a memory capacity of 67600 recordings, divided in 64 blocks. They use the DeltaLog10 software from version 0.1.5.3. -
Page 8: The User Interface
The parameter displayed with a larger character is called main quantity. In order to select the parameter to be displayed as main quantity, use the ▲▼ keys. For some quantities, you can select the unit of measurement; temperature can be displayed as °C or °F. 2.1 T HD21ABE D ISPLAY HD21ABE 2010/02/10 08:00:00... -
Page 9: The Hd21Abe17 Display
2.2 T HD21ABE17 D ISPLAY HD21ABE17 2010/02/10 08:00:00 Carbon Dioxide 0 ppm Patm 1000 hPa 25.0 % 17.0 °C 1. Battery’s charge status and instrument code. In case the logging function is on, this line shows the current logging number and the time elapsed from logging start. 2. -
Page 10: The Keyboard
2.3 T EYBOARD The keys on the instrument perform the following functions: ON-OFF/AUTO-OFF key It turns the instrument on and off. When turning the instrument on, the first screen will be displayed. After few seconds the measured quantities will be displayed. Auto Power Off The instrument has an AutoPowerOff function that automatically turns the instrument off after about 8 minutes if no key is pressed. - Page 11 Key ◄/FUNC ◄ allows navigation through the menus. FUNC: In normal view, it allows to select the statistical data: maximum, minimum, and average. Key ▲ It allows navigation through the menus. During normal operation, it is used to select the resetting of the statistical data and to scroll the displayed quantities.
-
Page 12: Operation
During turning on, the following message is displayed for about 10 seconds: Model HD21ABE17 Indoor Air Quality Firm.Ver.=01.00 In addition to the Delta Ohm logo the instrument code and the firmware version are displayed. After about 10 seconds, the measurements will appear on the display: HD21ABE HD21ABE... -
Page 13: Unit
3.1 “►/UNIT” KEY FOR THE UNIT OF MEASUREMENT It allows navigation through the menus. During normal operation, it changes the unit of measurement of the main quantity (solo HD21ABE17). If the main quantity is Relative Humidity (solo HD21ABE17), by repeatedly pressing the UNIT key you can display the following quantities: Relative Humidity (%) Dew Point (°C - °F) -
Page 14: Instrument Setup
Function: AVG 1min RUNNING 00:00:48 Carbon Dioxide 0 ppm Patm 1000 hPa 25.0 % 17.0 °C After 1 minute the instrument emits one long beep and displays the calculated average on the LCD. Function: AVG 1min AVG 1min 00:00:00 Carbon Dioxide 0 ppm Patm 1000 hPa... -
Page 15: Main Menu
4. MAIN MENU To access the programming menu press MENU: MAIN MENU 1) Informations 2) Logging 3) Serial 4) Settings 5) Probes Calibration 6) Language ▲▼ select <ENTER> confirm If you do not press any key within 2 minutes, the instrument goes back to the main display. Use the arrows ▲▼... - Page 16 To change the ID, press ENTER. Use the ◄► arrows to select the item, and edit it with the ▲▼ arrows. Proceed with the other items, and finally confirm with ENTER. By selecting Info Sensors, the following information on the sensors will be displayed: INFO SENSORS Type= CO2-CO Fw.V0R0 Cal = 2010/02/10...
-
Page 17: Logging Menu
4.2 L OGGING Enter the main menu by pressing MENU; • Use the arrows ▲▼ to select Logging; • Press ENTER: The parameter setting submenu for the logging sessions (to be captured) will be displayed. LOGGING MENU 1) Log frequency 2) Auto switch off 3) Start/Stop Log 4) Start Log Erase... -
Page 18: Autopoweroff- Autopoweroff Mode
4.2.2 AutoPowerOff– AutoPowerOff Mode The Auto switch off item controls the instrument’s automatic turning off during logging, between the capture of a sample and the next one. When the interval is lower than 5 minutes, the instrument will always remain on. With intervals greater than or equal to 5 minutes, it is possible to turn off the instrument between loggings: it will turn on one minute before sampling and will turn off immediately afterwards, thus increasing the battery life. -
Page 19: Start/Stop Log - Automatic Start
4.2.3 Start/Stop Log – Automatic Start The logging start and end can be programmed by entering the date and time. Set the logging start date and time using the arrows. Confirm the logging start date and time using ENTER. Then you are asked to set the data to end the recording. Set the logging end date and time using the arrows. - Page 20 8. Once both values have been set, a summary will be displayed showing the start and end time of the LOG session. LOGGING MENU SETTED LOG START Date 2010/02/10 10:29:00 END Date 2010/02/10 10:39:00 <ESC> exit/cancel <ENTER> confirm 9. Press ENTER to confirm or ESC to exit without enabling the automatic start: In both cases, you will return to the LOGGING menu.
-
Page 21: Cancel Auto-Start
4.2.4 Cancel Auto-Start Once the LOG session start and end times are set, you can inhibit the session automatic start by using Start Log Erase. Once you have accessed the LOGGING submenu: 1. Use the arrows ▲▼ to select Start Log Erase 2. -
Page 22: Log File Manager
4.2.5 Log File Manager This item allows managing the logs captured: The instrument allows displaying of the captured data files and erasing the entire memory (File Log Erase). The instrument can store up to 64 LOG sessions, progressively numbered from 00 to 63: The session list is arranged on 4 lines and 4 columns. - Page 23 See File Log: Selecting this item you can view the logging sessions in the instrument: LOG FILE 00– 01– 02– 03 04– 05– 06– 07 08– 09– 10– 11 12– 13– 14– 15 START Date: 2010/02/10 08:50:40 Record: 000039 ▲▼◄► select <MEM>...
-
Page 24: Serial Menu (Serial Communication )
Log lasting (time set for recording) It represents the recording duration: After this set time, the recording is ended. The recording can be stopped earlier by pressing MEM. To disable this function, set the time to 0:00:00. In this case the recording ends by pressing MEM or when the memory is full. -
Page 25: Print Interval
4.3.1 Print Interval To set the Print Interval, proceed as follows: 1. Use the arrows ▲▼ to select the item; 2. Press ENTER: You will get the following message: COMMUNICATION MENU SERIAL PRINT INTERVAL h:mm:ss (1h max) 0:00:00 ▼▲ set <ESC>... -
Page 26: Contrast
4.4.1 Contrast This item of the Settings menu allows to increase or decrease the display contrast. To access the Contrast submenu, proceed as follows: 1. Use the arrows ▲▼ to select Contrast; 2. Press ENTER 3. You will get the following message CONTRAST LCD Contrast set: ▼▲... -
Page 27: Probes Calibration
4.5 P ROBES ALIBRATION The instruments and sensors are calibrated in the factory; no calibration is usually required by the user. However, you can perform a new calibration. You can perform the calibration of the CO (Carbon Monoxide) and CO (Carbon Dioxide) sensors. - Page 28 PROBE CALIBRATION CALIBRATION CO 1) Offset only calib 2) 2 Pts Calibration 3) Restore Fact cal ▼▲ select <ESC> exit/cancel <ENTER> confirm The CO sensor can be calibrated: • In 1 point: only the sensor offset is corrected, the point can be any value between 0 and 950 ppm.
- Page 29 8. If the nitrogen bottle was used, close the bottle valve, remove the tube from the HD21AB17.9 accessory and remove the accessory from the instrument. Calibrazione in 2 punti: 1. Place the instrument in an environment with known CO concentration between 0 and 950 ppm (for ex.
- Page 30 14. Adjust the value by using the arrows ▼▲. 15. Press ENTER on the instrument and wait the time necessary for calibration without changing the working conditions. 16. When the “CALIBRATION GOOD” indication appears, press ESC to return to the calibration menu.
-
Page 31: Co Calibration
4.5.2 CO Calibration You can calibrate the zero of the CO sensor in clean air (the CO concentration is lower than 0.1 ppm outdoor) or using nitrogen bottles (code MINICAN.12A). Use the arrows ▲▼ to select the 2) Calibration CO item: PROBES CALIBRATION 1) Calibration CO 2) Calibration CO... - Page 32 CO zero calibration with nitrogen bottle (code MINICAN.12A): Using a screwdriver, open the back small door of the instrument. Connect the tube from the MINICAN.12A bottle with the rubber cap on the CO sensor head. Back door CO sensor Use the arrows ▲▼ to select the 2) Calibration CO item: PROBES CALIBRATION 1) Calibration CO 2) Calibration CO...
- Page 33 Confirm with ENTER. The following screen will appear: PROBES CALIBRATION CO CALIBRATION CAL ZERO Cal zero 0 ppm <ESC> exit/cancel <ENTER> confirm • Wait about 15 minutes before continuing. • Supply the gas adjusting the bottle flow meter to get a constant flow from 0.1 to 0.2 l/min. •...
- Page 34 3. Select 2) Set sensitivity and confirm with ENTER. The following screen will appear: PROBES CALIBRATION CALIBRATION CO SENSITIVITY SET Sens 50 nA/ppm 0 ppm ▼▲ set <ESC> exit/cancel <ENTER> confirm 4. Use the arrows ▼▲ to change the CO sensor sensitivity value, and confirm using ENTER.
-
Page 35: Rh Calibration (Hd21Abe17 Only)
4.5.3 RH calibration (HD21ABE17 only) This procedure applies to HD21ABE17 instrument. Before starting the calibration operation, you should check if you need a new calibration using the saturated solutions at 75.4%RH and 33%RH: You should proceed with the calibration, only if you find an error in one of the two above calibration points. - Page 36 V. The measuring chamber must be closed, otherwise it will not reach a balance. Screw the probe all the way in the container thread. VI. The tuning or calibration sequence of Delta Ohm instruments is as follows: • First solution: 75% RH.
-
Page 37: Language
Relative Humidity Balance values of some saturated salt solutions from 0°C to 100°C Temp. °C Lithium chloride Magnesium chloride Sodium chloride 11.23 ± 0.54 33.66 ± 0.33 75.51 ± 0.34 11.26 ± 0.47 33.60 ± 0.28 75.65 ± 0.27 11.29 ± 0.41 33.47 ±... -
Page 38: Connection To A Pc
5. CONNECTION TO A PC HD21ABE and HD21ABE17 are fitted with an USB 2.0 interface. Optionally, you can receive on request the serial connection cable CP23 with mini-USB connector on instrument’s side and USB 2.0 connector on computer’s side. The instruments are supplied with the DeltaLog10 software (from version 0.1.5.3) running in a Windows®... -
Page 39: Storing And Transferring Data To Apc
Command Response Description & Stop the data download & Erase stored data & Immediate printing of data & Stop printing data Start logging data & & Stop logging data & Auto-power-off function = ENABLE Auto-power-off function = DISABLE & & Setting SELF off &... -
Page 40: Print Function
• Some keys are disabled during logging. The following keys are enabled: MEM, MENU, ENTER and ESC. • Pressing the MEM and MENU keys has no effect on the logged data if these keys are pressed after starting the recording, otherwise the following is valid. 5.1.3 Print function Press ENTER to send the measured data directly to the USB port, in real time. -
Page 41: Instrument Signals And Faults
6. INSTRUMENT SIGNALS AND FAULTS The following table lists all error indications and information displayed by the instrument and supplied to the user in different operating situations: Display indication Explanation This appears if the sensor relevant to the indicated physical quantity is - - - - not present or is faulty. -
Page 42: Battery Symbol - Mains Power Supply
7. B – M ATTERY SYMBOL AINS POWER SUPPLY The meter is provided with a pack of 4 x 1.2V-2200mA/h Ni-MH rechargeable batteries, placed in the battery compartment. The battery symbol on the display constantly shows the battery charge status. To the extent that batteries have discharged, the symbol "empties". -
Page 43: Notes For The Batteries Use
Replace the batteries package when the autonomy is reduced at some hours. • Use only Delta Ohm batteries package code BAT-40 and recharge it using SWD10 battery charger or one that complies with the specifications indicated in the technical data. -
Page 44: Instrument Storage
8. INSTRUMENT STORAGE Instrument storage conditions: • Temperature: -25…+65°C. • Humidity: less than 90% RH without condensation. • During storage avoid locations where: • humidity is high; • the instrument may be exposed to direct sunlight; • the instrument may be exposed to a source of high temperature; •... -
Page 45: Technical Characteristics
9. TECHNICAL CHARACTERISTICS Instrument Dimensions (Length x Width x Height) 210x90x40 mm (HD21ABE) 300x90x40 mm (HD21ABE17 with probe) Weight 470 g (batteries included) Materials ABS, rubber Display Backlit, Dot Matrix 160x160 dots, visible area 52x42 mm Operating conditions Operating temperature -5 …... -
Page 46: Technical Data Of The Sensors
9.1 T ECHNICAL DATA OF THE SENSORS Carbon Dioxide Sensor NDIR Dual Wavelength Measurement range 0 … 5000ppm Sensor working range -5 … 50°C Accuracy ±50ppm+3% of measure Resolution 1ppm Temperature dependence 0.1%f.s./°C Response time (T < 120 sec (wind speed = 2m/sec) Long-term stability 5% of measure/5 years CO Carbon Monoxide... -
Page 47: Ordering Codes
20µm protection in PTFE for Ø14mm probes, thread M12x1. 20µm protection grid in stainless steel and Pocan for Ø14mm probes, thread M12x1. DELTA OHM metrology laboratories LAT N° 124 are accredited by ACCREDIA for Temperature, Humidity, Pressure, Photometry / Radiometry, Acoustics and Air Velocity. - Page 48 NOTES...
- Page 49 NOTES...
- Page 50 NOTES...
- Page 51 Dichiarazione di conformità UE EU declaration of conformity Prodotto: Indoor Air Quality Monitor HD21ABE – HD21ABE17 Product: Indoor Air Quality Monitor HD21ABE – HD21ABE17 Accessori: Alimentatore stabilizzato SWD10 Accessories: SWD10 stabilized power supply Fabbricante: Manufacturer: Delta Ohm S.r.l. a socio unico via G.
- Page 52 All DELTA OHM instruments are subject to accurate testing, and are guaranteed for 24 months from the date of purchase. DELTA OHM will repair or replace free of charge the parts that, within the warranty period, shall be deemed non efficient according to its own judgement. Complete replacement is excluded and no damage claims are accepted.
Need help?
Do you have a question about the HD21ABE and is the answer not in the manual?
Questions and answers