Advertisement
Quick Links
PCW-1218A-EU(12010)
Installation Manual
LUMEN AVANT
Observe Safety Precautions for Safety!
These safety precautions are essential for safe installation and use of the product.
Please read the precautions thoroughly before installing the product.
Do not allow any anyone except an
authorized service technician to disassemble,
repair or modify this product.
* Electric shock, fire, or injuries may result.
Do not pour water or cleanser onto the body
or the power plug.
* Electric shock or fire may result.
Do not install the product in locations subject
to high humidity, such as a bathroom.
* Electric shock or fire may result.
Do not remove or insert the power plug with
wet hands.
* Electric shock may result.
Do not connect the product to any water
source other than tap water.
* The inside of the product may be corroded,
causing an electric shock, fire or skin inflammation.
Do not use any loose outlet or an ungrounded
outlet.
* Electric shock or fire may result.
Follow the instructions below when performing wiring and installing the outlet. Consign wiring work to an electrician.
● Use an outlet with both a grounding terminal and grounding electrode, and suitable for 220–240 VAC with a maximum
rating of 600W. (For a toilet bowl with heater, 34W is added to the maximum rating.)
If the outlet is not equipped with a grounding electrode or grounding terminal, replace it with the required one. In addition,
when using the toilet bowl with a heater or using this product with other electrical appliances, prepare the required number of
outlets.
Be sure to connect the grounding lead of the shower toilet to the grounding terminal.
● Install the outlet in a position as high above the floor as allowed by the length of the cords to avoid exposure to splashing
water. The length of the power cord and grounding lead is 1.0 m.
* Do not insert the power plug into the outlet until installation is completed. Failure to observe this may cause malfunction of the product.
Be sure to connect the water supply parts to the household water supply line.
Using intermediate, industrial or well water will affect the durability of electrical and mechanical parts, resulting in accidents.
● The minimum operation water pressure is 16 L per minute, and at least 0.1 MPa (1.0 kgf/cm
maximum water pressure is 0.75 MPa (7.6 kgf/cm
When using other appliances simultaneously, water pressure of at least 0.1 MPa (1.0 kgf/cm
water pressure is less than this value, the ideal washing performance may not be obtained.
Use the special device (CWA-44) to measure the water pressure.
● The above water pressure cannot be obtained if the pipes are 10A or less. Use pipes of 15A (13 mm) or more.
Checking Parts
Top cover
*
Attached to the body
Installation manual
Instruction manual and
other documents
Representing product No.
811341000
811341092
WARNING
Install the product correctly according to the
Installation Manual.
DO NOT
* Electric shock, fire, or injuries may result.
DISASSEMBLE
* Water may leak, resulting in water flooding over the floor.
Connect the grounding lead to the grounding terminal.
* Not connecting this or inappropriate connection
may cause electric shock or fire.
DO NOT WET
* If the outlet is not equipped with a grounding terminal,
consult an electrician.
Firmly insert the power plug into the outlet.
DO NOT USE
* Electric shock or fire may result.
NEAR WATER
Do not nick, damage, carve, bend unduly, pull,
twist or bind the power cord, place any heavy
NO WET HANDS
object on it, or pinch the power cord between
any objects.
* The power cord may be damaged, causing electric shock or fire.
PROHIBITED
● Do not use the product with any power
supply other than 220–240 VAC.
● Do not plug any other appliances into the
same power outlet.
PROHIBITED
* Fire may result.
Checking Power Supply
Water Supply
Water Pressure
2
).
(check inside the package)
Body
Decorative
Decorative
panel (right)
panel (left)
Screws
Bolts
Washer
Anchor Nuts
Thank you for purchasing this product.
CAUTION
Explanation of Hazard Symbols
WARNING
Indicates a potentially
hazardous situation which,
if not avoided, could result
in death or serious injury.
OBSERVE
GROUND
OBSERVE
PROHIBITED
PROHIBITED
Mount the toilet bowl before mounting the body.
Never place the body on the floor.
Firmly secure the water supply pipe to prevent any looseness.
* Abnormal noise or water leakage may result.
The space required for installing the toilet is as shown in the figure below.
* Secure at least 70 mm space on both the left and right of the
) when flowing. The
2
2
) is required. If the minimum
Bracket
* The bracket is attached to
the rear of the remote control.
Slide it off to remove it.
Remote control
Batteries
(2 pcs.)
Wood screws
Water shut off valve
Plastic anchors
● Carefully read this Installation Manual to install
the product correctly.
● Be sure to test operation after installation has
been completed.
● Be sure to pass this Installation Manual,
User 's Manual and Warranty Certificate to
customers. When passing these to customers,
explain the operation method.
CAUTION
Indicates a potentially hazardous
situation which, if not avoided,
may result in minor or moderate
injury or damage to other property.
CAUTION
Be sure to adjust the water shutoff valve and
check for water leakage after installation.
* Water may leak, resulting in water flooding over
the floor.
Flush any foreign matter and rust in the pipes
completely before connecting the product.
* Damage inside the product may cause water
leakage, resulting in water flooding over the floor.
If freezing weather is anticipated before
handing the product to the customer, drain
water and leave it.
* Damage from freezing may cause water leakage,
resulting in water flooding over the floor.
● When removing the strainers, be sure to
close the water shutoff valve.
● When attaching the strainers, tighten these
completely so that there is no clearance.
* Water may leak, resulting in water flooding over the floor.
The new water supply hose supplied with
this product are to be used and old hose-sets
should not be used.
Before Mounting Body
Do Not Place Body on Floor!
Secure Water Supply Pipe!
Minimum Installation Clearance
product when viewed from the front.
1190 or more
400 or more
70 or more
790
70 or more
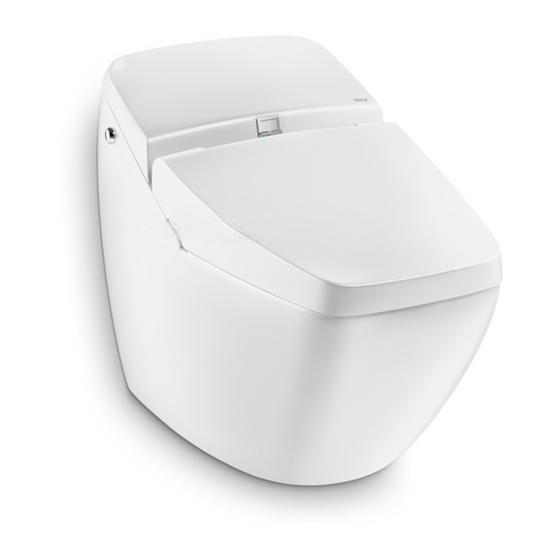
Names of Parts
Toilet lid
Top cover
Body
Power plug
(with ground
fault protector)
Grounding lead
Water supply hose
Open/close handle
OBSERVE
OBSERVE
OBSERVE
OBSERVE
OBSERVE
(mm)
Seat sensor
Nozzle (for posterior)
Nozzle (for bidet)
Toilet seat
Toilet bowl
Advertisement

Related Manuals for Roca LUMEN AVANT 811341000


Summary of Contents for Roca LUMEN AVANT 811341000
- Page 1 PCW-1218A-EU(12010) Thank you for purchasing this product. ● Carefully read this Installation Manual to install Installation Manual the product correctly. LUMEN AVANT ● Be sure to test operation after installation has been completed. CAUTION Representing product No. ● Be sure to pass this Installation Manual, 811341000 User ’s Manual and Warranty Certificate to 811341092...
- Page 2 Installation Procedure Mounting Toilet Bowl Mount the toilet bowl as described in the Installation Manual (PAW-1109-W) included in the product package. Preparing to Connect Water Note 1 Supply Hose to Water Valve Attaching Anchor Nuts Be sure to perform depressurizing before Attach the Anchor Nuts to the toilet bowl.
- Page 3 Connecting Power Supply See Reference 2 Reference 2 Connect the power supply to 1. Attach the top cover. 4. Check that power is supplied. confirm the position of the body. Check that the power lamp on the body is lit. Do not secure the body yet.
- Page 4 Test Operation (Follow the steps below to conduct test operation when installation is completed.) Checking posterior washing and bidet washing operation Seat sensor 1. Check the posterior washing operation. (1) Check that the seat sensor is covered with paper. (2) Press the [SHOWER] button. As the nozzle begins spraying, cover the tip of the nozzle with your hand to prevent water from splashing.
Need help?
Do you have a question about the LUMEN AVANT 811341000 and is the answer not in the manual?
Questions and answers