Table of Contents
Advertisement
Quick Links
www.insigniashowers.com
Last Modified: 16/03/2022
INSTALLATION MANUAL
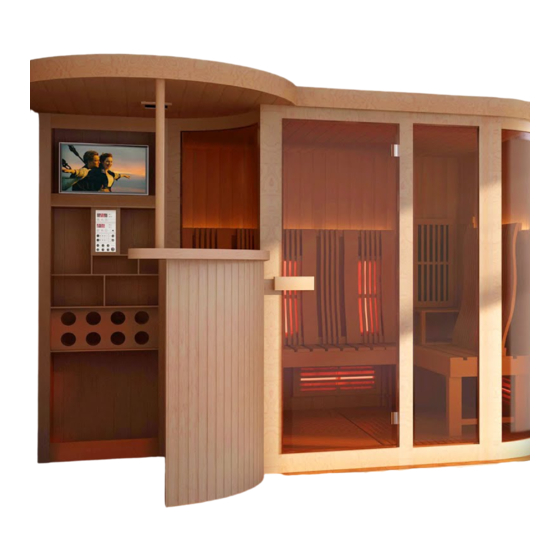
KY3000
Sauna Series
30 Day Technical Support:
Call 01908 317512 and request technical support for aiding your
installation.
Replacements Parts:
Inside of your warranty period visit:
https://www.insigniashowers.com, click support and make a
warranty claim.
Spares/Replacements Parts:
Outside of your warranty period visit
https://www.insigniashowers.com/replacement-parts.html
ATTENTION INSTALLERS:
These instructions must be
left with the customer
CHECK ALL CONTENTS BEFORE BUILD COMMENCES. NO RETURNS CAN BE MADE
ONCE THE BUILD HAS STARTED AS IT IS DEEMED ACCEPTANCE OF PRODUCT!
Advertisement
Table of Contents

Related Manuals for Insignia KY3000 Series


Summary of Contents for Insignia KY3000 Series
- Page 1 www.insigniashowers.com Last Modified: 16/03/2022 INSTALLATION MANUAL KY3000 Sauna Series 30 Day Technical Support: Call 01908 317512 and request technical support for aiding your installation. Replacements Parts: Inside of your warranty period visit: https://www.insigniashowers.com, click support and make a warranty claim. Spares/Replacements Parts: Outside of your warranty period visit https://www.insigniashowers.com/replacement-parts.html...
-
Page 2: Table Of Contents
www.insigniashowers.com Last Modified: 16/03/2022 Contents Thank you for your purchase Electrics Install Electrical & Tool requirements Roof Topper Install Door Handle Install Box contents Roof Connection Control Panel Instructions Back Panel Connection Sauna Room Safety Guide Side Panel Install WEEE Compliance Statement Bar Install Curved Front Fixed Panel Install Door Frame Install... -
Page 3: Thank You For Your Purchase
Last Modified: 16/03/2022 Thank you for your recent purchase of an Insignia Sauna. Please read this booklet with great care to ensure you get the best out of your build and have a Sauna that will last for many years to come! Like everything, in order to obtain a first class product that will serve you well for many years, the effort and correctness put into the assembly will reflect in the quality of your finish. -
Page 4: Electrical & Tool Requirements
www.insigniashowers.com Last Modified: 16/03/2022 Electrical Requirements Sauna Model No KY3000 Tools Required Voltage Rating 220-240AC You will require: Frequency Rating 50Hz • • Scissors Philips Screwdriver Power Rating 6097 Watts • • Knife Electric Drill Amperage 25.404 amps • • Spirit Level Safety Gloves •... -
Page 5: Box Contents
Door Handle Heater Guard Screw Pack VERY IMPORTANT Have you got everything? If not please contact the Insignia directly on 01908 317 512. Remember NEVER book your tradesman until everything has arrived, been checked and is present. No replacement/missing parts can be obtained free of charge during or after the build. -
Page 6: Roof Connection
www.insigniashowers.com Last Modified: 16/03/2022 Step 1 — Connecting the Roof 5 x 60mm Screws Locate the roof pieces and position together and secure by screwing together using ST60 Screws. - Page 7 www.insigniashowers.com Last Modified: 16/03/2022 Step 1 — Connecting the Roof continued 5 x 60mm Screws Locate the roof pieces and position together and secure by screwing together using ST60 Screws.
- Page 8 www.insigniashowers.com Last Modified: 16/03/2022 Step 1 — Connecting the Roof continued 5 x 60mm Screws Locate the roof pieces and position together and secure by screwing together using ST60 Screws...
-
Page 9: Back Panel Connection
www.insigniashowers.com Last Modified: 16/03/2022 Step 2 — Left side panel and back panel connection Locate the three back panel pieces, two top bar 12 x 60mm Screws connectors and two bottom bar connectors. The top bar connectors have grooves cut out for the wires. -
Page 10: Side Panel Install
www.insigniashowers.com Last Modified: 16/03/2022 Step 3 — Back panel to side panel connection Locate the screw fixings and screw them into the side panel. Lift the side panel and locate the screw fixing and recessed bracket together and push the panel down to lock it into position. -
Page 11: Bar Install
www.insigniashowers.com Last Modified: 16/03/2022 Step 4 — Bar Panel Install Locate the screw fixings and screw them into the side panel. Lift the bar panel and locate the screw fixing and recessed bracket together and push the panel down to lock it into position. -
Page 12: Curved Front Fixed Panel Install
www.insigniashowers.com Last Modified: 16/03/2022 Step 5 — Front curved panel install Locate the screw fixings and screw them into the right side panel and the bar panel. Lift the curved fixed glass panels and locate the screw fixing and recessed bracket together and push the panel down to lock it into position. -
Page 13: Door Frame Install
www.insigniashowers.com Last Modified: 16/03/2022 Step 6 — Door Install Locate the screw fixings and screw them into both curved fixed glass panels. Lift the door and locate the screw fixing and recessed bracket together on both sides and push the door down to lock it into position. -
Page 14: Floor Positioning
www.insigniashowers.com Last Modified: 16/03/2022 Step 7 — Floor positioning Locate the three floor pieces and position into the sauna. -
Page 15: Lower Heater Guard Install
www.insigniashowers.com Last Modified: 16/03/2022 Step 7 — Lower heater guard install 16 x 35mm Screws Locate the four lower heater covers and screw them in position using ST35 Screws. -
Page 16: Upper Heater Guard Install
www.insigniashowers.com Last Modified: 16/03/2022 Step 8 — Upper heater guard install 20 x 35mm Screws Locate the five upper heater covers and screw them in position using ST35 Screws. Note: The heater panels are different sizes: • Left side panel = 940mm •... -
Page 17: Bench Framework Install
www.insigniashowers.com Last Modified: 16/03/2022 Step 9 — Bench framework install 20 x 35mm Screws Locate the bench legs and support framework and place into position. The unique bench leg sits centrally on the back panel bench framework. The bench legs have cut-outs for the bench support to fit around. -
Page 18: Bench Seat Install
www.insigniashowers.com Last Modified: 16/03/2022 Step 10 — Bench Top install Locate the bench tops and place into position. -
Page 19: Bar Front Install
www.insigniashowers.com Last Modified: 16/03/2022 Step 11 — Bar Install Locate the screw fixings and screw them into the door frame. Lift the bar front, locate the screw fixing and recessed bracket together on the door panel and the bar sides and push the door down to lock it into position. - Page 20 www.insigniashowers.com Last Modified: 16/03/2022 Step 12 — Bar Topper and Support Install Locate the cylindrical upright and place on top Place the Bar Topper on the Bar body and locate the ‘L’ of the bar in the groove shaped support brackets and screw to the underside of that is recessed.
-
Page 21: Roof Install
www.insigniashowers.com Last Modified: 16/03/2022 Step 13 — Install the Roof 20 x 60mm Screws Lift the roof and place on top. Due to the size we recommend a minimum of 3 person lift. The front of the roof is designed to overhang the sauna slightly, so the spotlights sit on the outside of the sauna. -
Page 22: Electrics Install
www.insigniashowers.com Last Modified: 16/03/2022 Step 14 — Installing the Electrics Locate all wires from the roof and connect. Retrieve all wires from the side panels and feed up through the holes in the roof and connect. -
Page 23: Roof Topper Install
www.insigniashowers.com Last Modified: 16/03/2022 Step 15 — Install the Roof cover Locate the roof topper sections and place into position. The holes cut out are designed to fit over the top of the speakers and fans located throughout the roof. -
Page 24: Door Handle Install
www.insigniashowers.com Last Modified: 16/03/2022 Step 16 — Installing the door handle Locate the door handle and separate. Place around the door and reconnect, with the larger handle positioned outside the sauna. -
Page 25: Control Panel Instructions
www.insigniashowers.com Last Modified: 16/03/2022 Control Panel Instructions KY1500 (KY0721 BT Panel) Button 1/2 (Sauna Heaters) Press to activate Sauna heaters. Pressing once will put the heaters on at 100%. Twice = 90%. Three times = 80%. Four times = 70% and five times = Off. Button 3(Lights) Press to cycle through the coloured lights. -
Page 26: Sauna Room Safety Guide
www.insigniashowers.com Last Modified: 16/03/2022 Sauna Usage & Safety Guide Never leave children unattended in the Sauna. Regulate the temperature of sauna before session - Pre-heat time 15-30 minutes (from room temperature 20c) Never touch the heater panels whilst in operation, possible burning may occur. Recommended time of use 15-20 minutes per session Stay hydrated during each Sauna session. -
Page 27: Weee Compliance Statement
(EEE) have to fulfil certain obligations. Under the WEEE directive Insignia is considered the producer of certain products we supply and in line with the demands of the legislation we are pleased to offer the op- portunity to return these products to us for treatment and recycling. - Page 28 www.insigniashowers.com Last Modified: 16/03/2022...
Need help?
Do you have a question about the KY3000 Series and is the answer not in the manual?
Questions and answers