Advertisement
Quick Links
Advertisement

Subscribe to Our Youtube Channel
Related Manuals for Progressive DRIFT PRO


Summary of Contents for Progressive DRIFT PRO
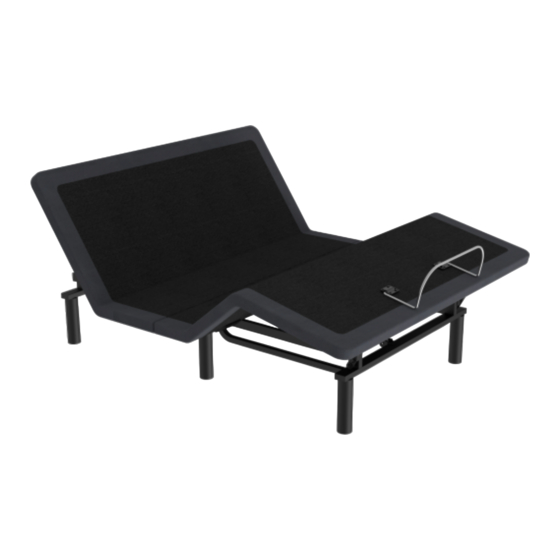
- Page 1 DRIFT User Manual Scan for more information V 1.3...
-
Page 2: Table Of Contents
Table of Contents Safety Precautions ................3 Specifications .................. 4 Dimensional Drawing ............... 5 Parts List ..................6 Assembly & Installation ..............7 Control Guide ................16 Troubleshooting ................19 Have any queries? Our expert engineers are here to help! sales@progressivebed.com progressivebed.com 1-800-828-9381... -
Page 3: Safety Precautions
Exceeding this rating will shorten the life expectancy of the adjustable bed and will void the warranty. Not for Hospital Use This Progressive Bed product is designed for household use only. It is not designed for hospital use and is not designed to meet hospital standards. -
Page 4: Specifications
Specifications Adjustments Head (max 60°), Leg (max 40°) Underbed Lighting Massage Back & leg USB Port Remote Wireless - 13 buttons Remote One-touch Positions 2 x Programmable Positions, Zero Gravity, Anti-snore, Flat Remote Button Illumination Blue (remains on for 10 seconds after any button press) Zero Clearance Bed Base Adjustable Legs No legs/3”... -
Page 5: Dimensional Drawing
Dimensional Drawing All dimensions are in inches. King/Split King is comprised of 2 x Twin XL frames, side-by-side. Top View Side View End View P a g e | 5... -
Page 6: Parts List
Parts List Important: The diagrams illustrated are for instructional reference only and may vary from the actual product. Please contact us if you have any missing or damaged components. Parts List 2 x 9v Batteries 3 x AAA (not Batteries included) (included) Mattress Retainer... -
Page 7: Assembly & Installation
Assembly & Installation & Installation Two people are required to install the adjustable bed. Please contact our customer service team for missing or damaged components as well as installation and troubleshooting. Step 1: Prepare for Assembly Before discarding the packing materials, ensure that all the parts required are included by reviewing the Parts List. Lay the adjustable bed, bottom-side up, on a clean and smooth surface. - Page 8 Step 3 (optional): Install the Headboard Brackets (sold separately) NOTE: Some adjustable bed configurations may not be compatible with the Headboard Brackets – refer to ‘Step 4: Adjustable Bed Base Options’ for more details. Step 3A: Identify the left and right Headboard Bracket assembly parts Pair the bracket assembly parts according to the diagram.
- Page 9 Step 3C: Install both of the Headboard Bracket assemblies Place the Headboard Bracket assemblies on the head-side of the adjustable bed frame, according to the diagram below. Each bracket has two slots for mounting to the adjustable bed frame that will match with two holes on the adjustable bed frame.
- Page 10 Under-Bed Bed Height Surface Clearance Next Instruction Manual Step (inches) (inches) Floor or bed frame Step 7: Connect the system to a No Leg 2.06 4.76 with solid platform power source Bed Slat Bracket Depends on Depends on Step 6 (optional): Install the Bed Bed frame with slats (sold separately) bed frame...
- Page 11 Step 6B: Install the Frame Brace assemblies on the adjustable bed frame Install the four Frame Brace Assemblies on the locations shown on the diagram below. Repeat Assembly (8 times) Insert through Fixed Seat and Adjustable Bed Frame Hinge Pin Bushing Bushing R-Clip...
- Page 12 Step 6F: Select the Bed Slat Bracket mounting hole on the Frame Brace Each of the Frame Braces has two holes for mounting the Bed Slat Brackets. Select the hole which will allow the Bed Slat Brackets to be positioned in a way that it completely straddles the bed frame slat. This will allow for a later step of adding bolts to either side of the bed frame slat as shown in the diagram.
- Page 13 Step 6H: Secure the Bed Slat Brackets to the bed frame slats Use the Bed Slat Plates to secure each of the four Bed Slat Brackets onto your existing bed frame slats. Select the Bed Slat Plate mounting hole that will allow it to straddle the entire bed frame slat width. Tools Repeat Assembly (4 times) 2x M8x30 Socket...
- Page 14 Step 8: Setup the Wireless Remote Use the 3 x AAA Batteries provided. Please wait 30 seconds after the system is powered on before operating. If the Wireless Remote is not working, refer to the ‘Troubleshooting’ section. Step 9: Install the Mattress Retainer Bar Install the Mattress Retainer Bar in the foot area of the adjustable bed.
- Page 15 1. Connect the Sync Cord to the ‘Sync’ ports of both Control Boxes. 2. Complete the Reset Procedure – refer to the ‘Control Guide’ section. 3. Initial Setup is complete. Switching to a Split King Configuration (individual control) The Sync Cord does not need to be removed. 1.
-
Page 16: Control Guide
Cont Control Guide Reset Procedure Twin XL/Queen Configuration King /Split King Configuration 1. Unplug the system from the power source. 1. Unplug the system (both adjustable beds) from 2. Wait 60 seconds. the power source. 3. Plug back into power source. 2. - Page 17 Wireless Remote Please wait 30 seconds after powering the system on before operation. Remote Button Illumination Any button press will turn on illumination for 10 seconds. Adjustment Buttons Hold the button until the desired position is achieved. Head Up/Down: Raises and lowers the head section of the adjustable bed.
- Page 18 1. Connect the Bluetooth Adapter to the Control Box port labelled ‘APP’. 2. Complete the Reset Procedure – refe r to the ‘Control Guide’ secti on. 3. Install the Progressive Automations Smart Home application on your device through App Store (iOS) or Google Play Store (Android).
-
Page 19: Troubleshooting
Troubleshooting Category Problem Solution Wireless Remote Wireless Remote Wait 30 seconds after powering the unit on. fails to control Pair Wireless Remote – refer to the ‘Control Guide’ secti on. adjustable bed. Wireless Remote Wireless Remote Aim the Wireless Remote underneath the adjustable bed. If this commands cause improves operation –...
Need help?
Do you have a question about the DRIFT PRO and is the answer not in the manual?
Questions and answers