Table of Contents
Advertisement
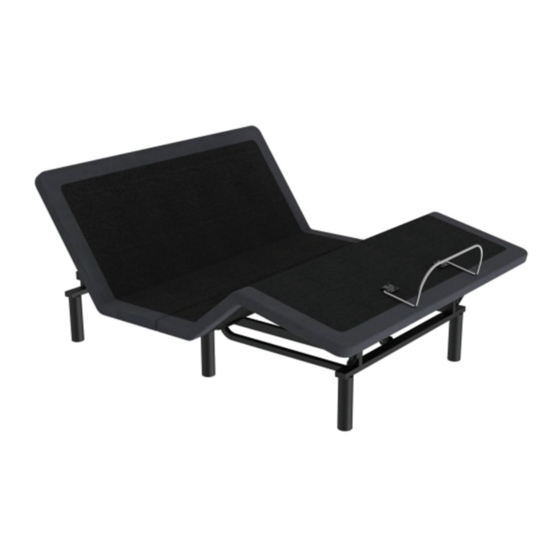
Quick Links
Advertisement
Table of Contents

Subscribe to Our Youtube Channel
Related Manuals for Progressive CLASSIC BED


Summary of Contents for Progressive CLASSIC BED
- Page 1 DRIFT CLASSIC and PRO User Manual Scan for more information V 1.5...
-
Page 2: Table Of Contents
Table of Contents Safety Warnings Specifications Dimensional Drawing Parts List Assembly Controls Guide Drift Classic 9 Button Wireless Remote Drift Pro 13 Button Wireless Remote Troubleshooting Have any queries? Our expert engineers are here to help! sales@progressivebed.com progressivebed.com 1-800-828-9381 P a g e | 2... -
Page 3: Safety Warnings
WARRANTY Opening or tampering with the components and operating outside of the advertised operating weight limits will void the warranty. Please refer to the warranty page on the Progressive Bed website for more information on warranty. CHILDREN AND PETS 1. Close supervision is necessary when the adjustable bed is under operation around children, pets, or those with certain disabilities. - Page 4 14. Do not exceed the maximum weight limit mentioned in product specifications for each model. INDOOR HOUSEHOLD USE ONLY 1. This Progressive Bed product is designed for indoor and household use only. Not for hospital or commercial use and is not designed to meet hospital standards.
-
Page 5: Specifications
Specifications Model Drift Classic Drift Pro Adjustments Head (max 60°), Leg (max 40°) Underbed Lighting Built-In LED Massage Back & Leg Wall Hugger Mechanism USB Port Remote Wireless - 9 Buttons Wireless - 13 Buttons Remote One-Touch Positions 2x Programmable Positions, Zero Gravity, Anti-Snore, Flat Adjustable Leg Options 3”... -
Page 6: Dimensional Drawing
Dimensional Drawing All dimensions are in inches. King and Split King adjustable beds use 2x Twin XL beds, side-by-side. TOP VIEW SIDE VIEW END VIEW P a g e | 6... -
Page 7: Parts List
Parts List Important: The diagrams illustrated are for instructional reference only and may vary from the actual product. Please contact us if you have any missing or damaged components. PARTS LIST 2 x 9v 3 x AAA Batteries Batteries (not (included) included) Mattress Retainer... - Page 8 DRIFT CLASSIC PARTS CONNECTION MAP P a g e | 8...
- Page 9 DRIFT CLASSIC PARTS CONNECTION MAP P a g e | 9...
-
Page 10: Assembly
Assembly Note: Two people are required to assemble the adjustable bed. Please contact our customer service team for missing or damaged components as well as installation and troubleshooting. STEP 1: IDENTIFY BED CONFIGURATION Depending on the desired configuration, please reference the table below for the parts required for each. King and Split King Configuration: Consists of two Twin XL adjustable beds combined. - Page 11 Step B: Identify the Left and Right Headboard Bracket Assembly parts Pair the bracket assembly parts according to the diagram. Left Bracket Assembly Right Bracket Assembly Left Headboard T Bracket Right Headboard T Bracket Bracket Mount Bracket Mount Step C: Assemble both Left and Right Headboard Bracket Assemblies Using the provided Tools, repeat the Bolt Assembly instructions twice per Headboard Bracket as shown below.
- Page 12 Align the two slots on each Headboard Bracket with the two holes on the corners of the bed frame. Use the holes towards the center of the bed to mount the Headboard Bracket assemblies. The other holes, towards the outside edge of the bed are for the Adjustable Legs.
- Page 13 STEP 5: (OPTIONAL) INSTALL BED SLAT BRACKETS PART 1 OF 2 (SOLD SEPARATELY) Before continuing, refer to ‘Step 4:Bed Height Configuration’ located on page 12 to confirm if Bed Slat Brackets are required. Step A: Inspect existing bed frame slats Ensure there are no damaged, deformed, or missing slats as they may cause injury, damage, or excessive noise.
- Page 14 Step D: Flip adjustable bed facing up Important: To ensure safe handling, please lift the adjustable bed directly by the frame. Please exercise all necessary caution to ensure your personal safety and to prevent damage to the adjustable bed. Step E: Position the adjustable bed on the bed frame slats Gently place the adjustable bed on top of your existing bed frame slats.
- Page 15 STEP 9: SETUP CONTROL AND POWER SYSTEM Connect the Control Box Power Cord, Power Supply, and AC Power Cord together before connecting to an appropriate AC Power Source. STEP 10: KING AND SPLIT KING CONFIGURATION SETUP Please refer to this table to determine your desired configuration and proceed with the appropriate instructions. Bluetooth Headboard Wireless...
- Page 16 ii. Triplex Connector: three wires are visible within the transparent connector at the end of the Sync Cord. b. Between the two adjustable bed Control Boxes, identify the Control Box that would likely have better reception to the Wireless Remote and/or Bluetooth paired mobile device. This will be the Primary Control Box. c.
- Page 17 Step E: Attach the T Bracket to the Headboard Use at least two screws to attach the T bracket to a secure part of your existing headboard. Do not tighten as a final adjustment will be required. Repeat for both Headboard Brackets. Step F: Finalize adjustable bed position 1.
- Page 18 Step C: Install Bed Slat Brackets Install a Bed Slat Bracket on each of the four Frame Braces (using the hole selected in the previous step). Tools Repeat assembly four times M8x35 Socket Bed Slat Bracket 6mm Hex Key M8 Washer Head Bolt Insert through Frame Brace...
- Page 19 Tools Repeat assembly four times 2x M8x30 Socket Bed Slat Plate 6mm Hex Key 2x M8 Washer Head Bolt Step E: Finalize Slat Bracket installation Finally, command the bed to move its entire range of motion while checking for obstructions. P a g e | 19...
-
Page 20: Controls Guide
Controls Guide WIRELESS REMOTE PAIRING 1. Unplug the system from the AC power source. 2. Plug the system back into the AC power source. 3. Within 30 seconds of powering the system, press and hold the Head Up button and Leg Up button on the Wireless Remote until you hear a BEEP sound from the Control Box. -
Page 21: Drift Classic 9 Button Wireless Remote
Drift Classic 9 Button Wireless Remote Adjustment Buttons Hold the button to move the adjustable bed to the desired position. • Head Up/Down: Raises and lowers the head section of the adjustable bed. • Leg Up/Down: Raises and lowers the leg section of the adjustable bed. -
Page 22: Drift Pro 13 Button Wireless Remote
Drift Pro 13 Button Wireless Remote Adjustment Buttons Hold the button to move the adjustable bed to the desired position. • Neck Up/Down: Raises and lowers the neck section of the adjustable bed. • Head Up/Down: Raises and lowers the head section of the adjustable bed. -
Page 23: Troubleshooting
Troubleshooting Category Problem Solution King Configuration Unresponsive • Complete the ‘Soft Reset Procedure for King Configuration’ located on adjustable bed. page 20. • Complete the ‘Hard Reset Procedure’ located on page 20. • Complete the ‘Wireless Remote Pairing‘ instruction located on page 20. •...
Need help?
Do you have a question about the CLASSIC BED and is the answer not in the manual?
Questions and answers