
Subscribe to Our Youtube Channel
Related Manuals for Progressive FLT-02


Summary of Contents for Progressive FLT-02
-
Page 1: Table Of Contents
Contents Caution Specifications Dimensional Drawing Components Assembly Reset Procedure Operation Troubleshooting Scan for video assembly! Model: FLT-02 User Guide... -
Page 2: Caution
Caution Warning Ensure no obstacles are in the desk's path. Ensure the tabletop is not touching any walls. Ensure all cords are Pinch Point appropriate length to accommodate the change in height. Keep hands and fingers clear. Keep children away from electric height-adjustable desks, control units, and handsets. There is a risk of injury and electric shock. -
Page 3: Specifications
Specifications Input Voltage 120VAC, 60 Hz Output Voltage 24VDC Stroke (movement) 25.5" Height Range (without tabletop) 23.6” - 49.1” Base Width 39.6" minimum - 74" maximum Minimum Tabletop Size 45" x 25" Weight Capacity (load) 270 lbs (135 lbs per leg) No Load Speed 1.57"/s Full Load Speed... -
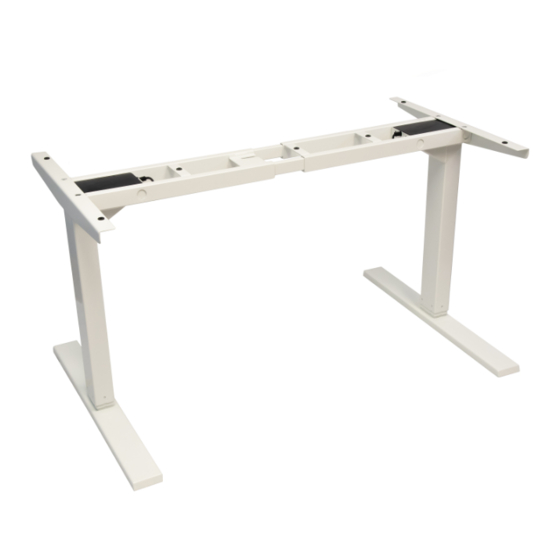
Page 4: Dimensional Drawing
Dimensional Drawing Maximum Width - 72.4" Minimum Width - 43" 0.3" 17.7" 8.2" 10" 10" 22.6" 2" 27.5" *Feet and column style may vary slightly... -
Page 5: Components
Progressive Desk Tabletop Included Hardware M6x13 Machine Screw If you purchased a Progressive Desk tabletop, use the machine screws included in the tabletop packaging (#17) instead of the wood screws (#14). Progressive Desk tabletops will have pre-drilled threaded holes for installation. -
Page 6: Assembly
Assembly STEP 1 Expand frame to separate components Separate control box (7), center rails (5), and frame ends (3,4). STEP 2 Attach legs to frame ends Ensure the frame end (4) is positioned as shown. Use the Allen wrench to partially install each machine screw (12) until all screws are inserted before fully tightening. - Page 7 Assembly STEP 4 Connect both frame ends using the center rails Ensure the gap is facing inward and is closer to the top edge. Insert center rails (5) to join frame ends (3,4) together. Do not insert or tighten machine screws until Step 8. STEP 5 Install foot with pre-installed glides Use Allen wrench to install foot (2) using 4 machine screws (11).
- Page 8 STEP 7 Secure desk frame & remote to tabletop Progressive Desk Tabletop If you have a Progressive Desk tabletop, use the machine screws (18) included in the tabletop packaging. Line up the desk frame with the pre- drilled holes on the underside of the tabletop and insert all machine screw before using the Allen wrench to tighten each machine screw (18).
-
Page 9: Reset Procedure
Reset Procedure WARNING: During the Reset Procedure, the table lift will retract 7mm below the lowest normal operating height. Please ensure that no obstacles impede this motion of travel. 1. Move the desk frame to the lowest position. (If there is "RST" displayed on the remote, continue to step 3). -
Page 10: Troubleshooting
Troubleshooting Troubleshooting Guide Problem Possible Cause Corrective Action Low power mode Press any button on the remote and LED will activate. activated Remote LED is off. Disconnect and reconnect the RJ-45 remote connector. Ensure connection is Connection issue secure and cable is not damaged. Follow "Setting Limit Switches"...
Need help?
Do you have a question about the FLT-02 and is the answer not in the manual?
Questions and answers