Table of Contents
Advertisement
Quick Links
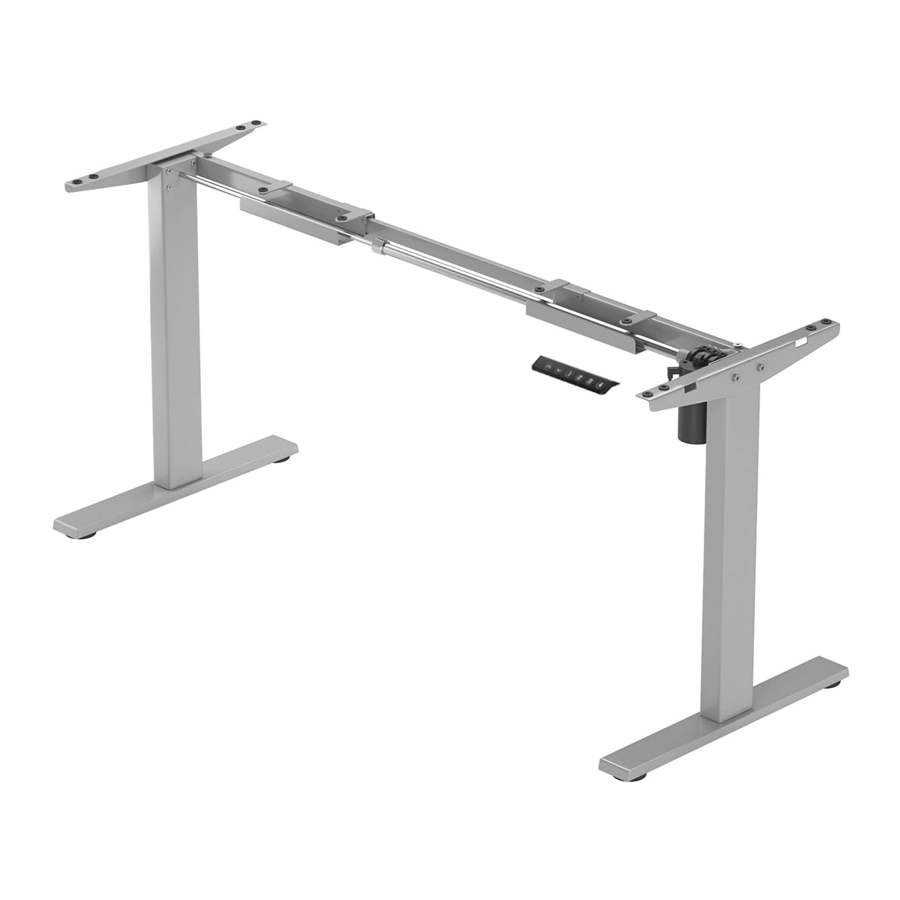
FLT-20
Parts List
Attention: The drawings below are for reference only which may be slightly different from the physical product. Please contact customer service if you
are missing any components.
A
B
C
X1
X4
4x4
5x5
2.5x2.5
M4x6
1
1
2
2
3
Pedestal
Column
4
1
5
1
6
Supporting beam
Transmission rod
7
1
8
2
9
Adapter
Baffle
1
1 0
4
1 1
1 2
Cable tie
Adaptor holder
1 3
1 4
1
16
1 5
Switch cord
Gasket
Have any queries?
Our expert engineers are here to help!
Progressivedesk.com
1-800-828-9414
sales@progressivedesk.com
Technical Data
Number of stages
Number of motors
155 lbs
Rated Load
No Load Speed
1.00"/sec
Input Voltage
100VAC to 240VAC
Lowest Position
Highest Position
Frame Material
L: 39.3" to 62.9"
Recommended
Tabletop Size
W: 19.6" to 31.4"
Duty Cycle
10% (2 minutes on, 18 minutes off)
Operational Temperature
0°C to 40°C
D
E
F
X4
X14
X8
X4
M6x16
ST4.2x19
M6x30
M8x50
4
1
Column
6
2
Supporting plate
10
1
7
2
Power cable
1
13
Remote
1
3
Remote screw
STEP 1
E
x8
A
5x5
2
1
27.9"
47.6"
Steel
STEP 2
F
x4
A
4x4
5x5
Loosen screws on (4) with wrench 4x4(A),
G
X1
then extend supporting beam.
Wrench
STEP 3
C
x4
5
12
A
5x5
3
11
8
9
Install Pedestal (1)
A
E
1
2
Install Pedestal (1) & Columns (2, 3) together. Use 5*5 wrench (A) to tighten the screws (E)
Install Supporting beam (4)
A
Loose
4
Extend
14
Install Supporting plate (6)
6
C
Loose
3
A
3
A
F
2
4
3
Adjust the support beam size(4)
according to table top size.
Install supporting beam on the column (2)
(3), tighten screw (F) with wrench 5x5 (A)
C
Insert gaskets (14) onto supporting beam (4)
and supporting plates (6) locations.
2
Insert M6 (C) to attach supporting plates (6)
to each column (2,3). Do not fully tighten until
attaching desk frame to tabletop (see step 6).
Use 5*5 wrench (A) to tighten screws (C).
Advertisement
Table of Contents

Subscribe to Our Youtube Channel
Related Manuals for Progressive FLT-20


Summary of Contents for Progressive FLT-20
- Page 1 Have any queries? Our expert engineers are here to help! STEP 1 Progressivedesk.com Install Pedestal (1) 1-800-828-9414 FLT-20 sales@progressivedesk.com Technical Data Number of stages Number of motors 155 lbs Rated Load No Load Speed 1.00"/sec Input Voltage 100VAC to 240VAC 27.9"...
- Page 2 Secure supporting beam, install baffle and power adaptor Install the power adapter, tabletop and remote Attach the desk frame to the tabletop with screws (D). If you purchased a Progressive Desk tabletop, use the hardware included with the tabletop and attach to threaded holes. Insert 2.5x2.5...
- Page 3 Operation Instruction How to use Remote Dimensional Drawing Adjust Height : ● 1. Press the "▲" button, the desk rises, press and hold to continue raising the desk height. Press once to rise the height by 0.1cm Key button 2. Press the "▼" button, the desk descends, press and hold to continue to descend. Press once to descend the height by 0.1cm Memory Preset Height: ●...
Need help?
Do you have a question about the FLT-20 and is the answer not in the manual?
Questions and answers