Table of Contents
Advertisement
Quick Links
F&F Filipowski sp. j.
ul. Konstantynowska 79/81 95-200 Pabianice
phone: (+48 42) 215 23 83; 227 09 71 POLAND
https://www.fif.com.pl e-mail: biuro@fif.com.pl
ASTRONOMICAL PROGRAMMABLE
pcz-525.3
CONTROL TIMER
with night break
WARRANTY. The F&F products are cov-
ered by a warranty of the 24 months from
the date of pruchase. Effective only with
proof of purchase.
Contact your dealer or directly with us.
More information how to make a compli-
ant can be found on the website:
www.fif.com.pl/reklamacje
Do not dispose of the device to a garbage bin with other unsorted
waste! In accordance with the Waste Electrical and Electronic Equip-
ment Act any household electro-waste can be turned in free of charge
and in any quantity to a collection point established for this purpose, as
well as to the store in the event of purchasing new equipment (as per
the old for new rule, regardless of brand). Electro-waste thrown in the
garbage bin or abandoned in the bosom of nature pose a threat to the
environment and human health.
1. Purpose
The PCZ-525.3 Plus astronomical clock is designed to switch on and off lighting
or other electrical receivers according to the daily astronomical sunrise or sun-
set times calculated automatically based on the current date and the entered
location of the controller. It is also possible to enter a fixed on/off time and
define a night break during which the lighting will be switched off.
In combination with the external "Plus" probe brightness sensor the clock al-
lows you to adjust the on/off moment according to the actual brightness level.
2. Operating modes
2.1. automatic mode
Automatic operation according to the preset programmed ON and OFF points.
The clock allows for independent setting of switch-on and switch-off points ac-
cording to the following criteria:
ƒ ƒ sunrise or sunset;
ƒ ƒ dawn or dusk (civilian dawn/ dusk);
ƒ ƒ a constant shift in relation to sunrise and sunset (expressed in minutes or the
position of the sun shield relative to the horizon);
ƒ ƒ constant time.
Also, a night break between poFF and poN points can be set in the operating
program during which the lighting will be switched off.
If an external brightness sensor of the "Plus" probe type is connected and acti-
vated, it is possible to specify an additional time interval around the switch-on
points oN (Switch-on Zone) and switch-off points oFF (Switch-off Zone) in which
the clock will analyze the actual brightness level and on this basis decide on an
earlier or later switch-on/off. This makes it possible, for example, to switch the
lighting on and off earlier in case of cloudy days.
Automatic operation is indicated by the clock symbol at the bottom left of the
display.
For correct operation in automatic mode, it is necessary to correctly
set the location, date, and time.
2.2. semi-automatic mode
Semi-automatic operation is the ability to manually switch the contact during
automatic operation. The change will be effective until the next switching re-
sulting from the automatic operation cycle. An example of how semi-automatic
mode works is shown in the diagram below:
Switching between automatic and semi-automatic mode is done by pressing
the external button connected to terminal 4 of the clock or by pressing the "+"
or "–" button located on the facade of the clock. Semi-automatic operation is
indicated by a blinking clock symbol at the bottom left of the display.
2.3. maNual mode
In manual mode, the clock assumes a fixed on/off state set by the user by press-
ing the external button connected to terminal 4 of the clock, or by pressing
the "+" or "–" button located on the facade of the clock. Manual operation is
indicated by the switched off clock symbol.
The status of the relay in manual mode is maintained in the non-vol-
atile memory of the clock. This means that in the event of a power
outage and return, the clock will restore the state of the relay from
before the power outage.
3. Features
ƒ ƒ 1-channel astronomical programmable control timer with night break ;
ƒ ƒ automatic transition between summer (daylight saving time) and standard
time (with the ability to block the function in the event of a change in the
applicable legislation);
ƒ ƒ ability to connect an external brightness sensor to adjust the moment of light-
ing switching on and off;
ƒ ƒ ability to connect an external button for manual control of the operation of
the clock;
ƒ ƒ backlit LCD for clock configuration and time and operating status indication;
ƒ ƒ NFC WIRELESS COMMUNICATION – wirelessly read and write timer configura-
tion from an Android phone equipped with the NFC module;
ƒ ƒ PCZ CONFIGURATOR APP – free application for Android mobile phones and
tablets equipped with the NFC module for wireless communication.
Features:
ƒ » timer configuration in offline mode (without the connection with the timer);
ƒ » coordinates settings by selecting the preset location (code coordinates), a
direct indication of the location on a map on your phone or copying the
current position recorded by the GPS in your phone;
ƒ » read and write the configuration of the controller;
ƒ » quick programming of multiple controllers using a single configuration;
ƒ » read and write the configuration from and to a file;
ƒ » sharing the configuration via e-mail, Bluetooth, network drives...
ƒ » identification of the connected timer and the ability to name individual
devices;
ƒ » automatic backups of the configuration. Along with a unique identifier for
each timer, user can easily restore previous configuration;
ƒ » set the time and date according to the clock in mobile phone.
ƒ ƒ predefined lighting switch-on and off points:
ƒ » sunrise and sunset – the moment when the solar disc crosses the horizon,
ƒ » civilian dawn and dusk – the moment when, according to legal conditions,
the lighting of, for example, streets should be switched off/on;
ƒ ƒ ability to set your own switch-on/off point interpreted as a sunrise/sunset
shift by:
ƒ » preset time (within ± 180 minutes).
ƒ » preset position of the center of the solar disc (within ±15°);
ƒ ƒ ability to set the width of the time zone (in relation to the program switch-
on/off point) in which the moment of switch-on will be determined by the
brightness level measured by the "Plus" probe sensor;
ƒ ƒ location table – the geographical coordinates of more than 1,500 localities
from 51 countries of the world are encoded in the memory of the timer,
allowing you to precisely select the location of the timer and ensure high
accuracy of the position of the sun calculation;
ƒ ƒ a preview of the switch-on and switch-off points and location information – if
the timer operates in automatic mode, then in the date preview mode the
successive presses of the Up/Down buttons will display information about the
current time, the actual switch-on and switch-off times of the relay and about
the set location (geographical coordinates are displayed) and the UTC zone;
ƒ ƒ LCD configuration – ability to set the backlight level (separately for standby
and button-pressed condition) and display contrast;
ƒ ƒ relay state memory – the relay state in manual mode will be stored in the
read-only memory of the relay at the time of a power outage and will be
restored when the power returns;
ƒ ƒ 2032-type replaceable battery – the controller is equipped with control of
the battery status that maintains the timer operation in case of main power
failure. If the battery is low, you will be notified if it needs to be replaced;
ƒ ƒ clock frequency correction – the ability to freely accelerate/slow the clock
operation. For example, if, over time, the controller starts to be 5 seconds late
per month, this deviation can be corrected.
- 1 -
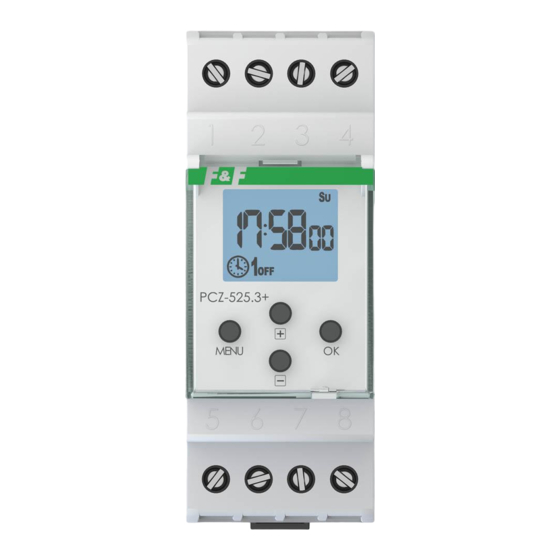
4. Display and control panel description
plus
4.1. days oF the week
mo – Monday; tu – Tuesday; we – Wednesday; th – Thursday; Fr – Friday;
sa – Saturday; su – Sunday.
4.2. operatioN mode iNdicator
maNual mode – no clock icon,
automatic mode – lighted clock icon,
semi-automatic mode – flashing clock icon.
4.3. coNtact positioN iNdicatioN
ƒ ƒ OFF – relay off, closed connection between COM (terminal 1) and NC (ter-
minal 5) contacts,
ƒ ƒ ON – relay on, closed connection between COM (terminal 1) and NC (terminal
6) contacts.
4.4. buttoNs
meNu
ƒ ƒ enter the program menu
ƒ ƒ return to the previous position (back).
ok
ƒ ƒ move to the next setting
ƒ ƒ accept setting
ƒ ƒ preview of the date and the scheduled points of switch on/off and the lo-
cation;
"+" [up]
ƒ ƒ While displaying the home screen:
ƒ » in automatic mode – switching on/off semi-automatic mode and switching
the contact;
ƒ » in manual mode: permanent on and off contact switching.
ƒ ƒ In parameter edit mode:
ƒ » changing the setting state by "+1" in the selected programming position
(holding down the button changes the setting by "+1" continuously in the
loop).
"−" [dowN]
ƒ ƒ While displaying the home screen:
ƒ » in automatic mode – switching on/off semi-automatic mode and switching
the contact;
ƒ » in manual mode: permanent on and off contact switching.
ƒ ƒ In parameter edit mode
ƒ » changing the setting state by "-1" in the selected programming position
(holding down the button changes the setting by "-1" continuously in the
loop).
5. Operation
Connect the power supply. The timer will start its operation from the main
screen displaying the current time and information on the operating mode and
switch-on/off of the output relay.
ƒ ƒ From the home screen, you can monitor and configure the operation of the
device.
ƒ ƒ Pressing the meNu button displays the menu of the controller that allows you
to configure the clock.
ƒ ƒ Pressing the OK button displays the set date. In addition, after pressing the
ok button in automatic mode, by pressing the up or dowN buttons you can
display the subsequent details of the timer: the set date, the location of the
controller (longitude and latitude), the points of lighting switch-on and off.
In the case of operation with an active outdoor light sensor, the
switch-on and switch-off points are approximate and indicate at what
time it will be switched on/off in the case of the currently measured
brightness level.
ƒ ƒ Pressing the up/dowN button: When operating in automatic mode, the timer
switches to the semi-automatic mode and switches the contact to the oppo-
site position. This state will be maintained until the next program switching
point occurs.
ƒ ƒ During manual operation, the relay contact is permanently switched to the
opposite position.
The status of the relay in manual mode is maintained in the non-vol-
atile memory of the clock. This means that in the event of a power
outage and return, the clock will restore the state of the relay from
before the power outage.
The clock can also be controlled via an external momentary button connected
to terminal 4. Short press (<1 s) of the external button has a similar function to
the up/dowN button pressing described above. Long press (>2 s) of the exter-
nal button, when operating in automatic or semi-automatic mode, forces the
clock to return to automatic mode.
In specific cases, additional messages may appear on the screen to
inform about errors or requiring user intervention.
5.1. low battery
The low batt message indicates that the battery backup clock is too low after a
power outage. In this case, battery replacement is recommended.
The user can replace the battery by himself with a new, type 2032 lithium coin
cell battery.
The low battery level is no obstacle during normal clock operation.
However, if the clock is not powered, it may result in loss of date and time
settings.
All settings, except for time and date, are saved in non-volatile mem-
ory and are not lost in the event of a power outage and low battery.
Under proper operating conditions, a new, charged battery is suffi-
cient for approx. 6 years of operation. Low temperatures or long peri-
ods of operation without AC power can shorten this period.
5.2. device error
Internal PCZ timer error indication. The error may be caused by external inter-
ference, configuration error, or it may indicate a controller failure.
- 2 -
If the message Err ... appears, turn off the power supply of the timer, wait about
10 seconds and turn the power on again. If the error is repeated, please contact
the service.
6. Configuration
The operation of the timer can be configured using the timer control panel and
the configuration menu, or via the PCZ Konfigurator app for Android mobile
devices equipped with NFC communication module.
6.1. data
Press MENU. The timer will enter program menu.
Using the +/– buttons select the date setting mode date.
Confirm with ok. Timer will show settings for the next parameters: year, month,
and day. Use the +/– keys to set the parameters; move to the next parameter
with the ok button. Go back to the previous item by pressing meNu.
The day of the week is set automatically based on the year, month
and day you entered.
Press ok to accept date setting. The timer will automatically exit from the date
setting mode and go to the program menu
Choosing a date means that the correct time is also set at the same time: stand-
ard (winter) or summer (daylight saving time).
The automatic time change can be turned off.
More information see section 6.7.1.
6.2. hour
Press meNu. The timer will enter the program menu.
Using the +/– buttons select the mode for time setting hour.
Confirm with ok. Timer will show settings for the next parameters: hour and
minutes. Set the parameters with the +/– buttons. Move to the next parameter
with the ok button. Go back to the previous item by pressing meNu.
Press ok to accept time entry. The timer will automatically exit from the date
setting mode and go to the program menu.
6.3. operatioN modes
Press meNu. The timer will enter program menu.
Using the +/– buttons select the mode for time setting mode.
Select operation mode using the +/– buttons.
auto – automatic mode
haNd – manual mode
Press ok to accept. The timer will automatically exit from the date setting mode
and go to the program menu.
6.4. locatioN
Setting the correct location of the timer is one of the key elements re-
sponsible for the operation of the astronomical clock and the correct
calculation of sunrise and sunset times.
Press meNu. The timer will enter program menu.
Using the +/– buttons select the mode for time setting locate.
ƒ ƒ list – select location from the list of coordinate codes,
ƒ ƒ user – manual setting of the user geographical position and time zone.
Press ok to accept
6.4.1. selectiNg a locatioN From the list
Check the table of coordinate codes located at the diagram of programming.
Find the country and the city closest to your location and the corresponding
code.
The timer will enter country selection menu. Using the +/– buttons select the
country. Accept by pressing OK. The timer will enter the coordinate code selec-
tion. Using the +/– buttons select desired code from the list. Press OK.
The timer will automatically go to the location settings menu.
Pressing the meNu button will move you to a higher level.
After selecting a location from the list of locations, there is no need to
write common geographical ordinates. The full list of locations (writ-
ed in timer memory) you find from the product subpage on www.fif.
com.pl. Scan QR code below.
- 3 -
6.4.2. maNual locatioN settiNg
When you select a manual location setting, prepare the correct set of
coordinates: latitude and longitude and the time zone related to UTC.
6.4.2.1. latitude
When the User option is selected (see 6.4), the timer will move to the latitude
setting, where, using the +/– buttons, you will be able to sequentially set:
ƒ ƒ N – northern hemisphere;
ƒ ƒ S – southern hemisphere;
ƒ ƒ latitude in degrees and minutes of arc.
Switch to editing the next latitude element by pressing the ok button. Return to
the previous position by pressing the meNu button.
Pressing the ok button after setting the minutes moves the program to the
longitude setting.
6.4.2.2. loNgtitude
Ustawienie długości geograficznej wprowadzenia kolejno, za pomocą przy-
cisków +/– parametrów:
ƒ ƒ E – półkula wschodnia;
ƒ ƒ W – półkula zachodnia;
ƒ ƒ długość w stopniach i minutach kątowych.
6.4.2.3. time zoNe
Setting the selected time zone t is done with the +/– buttons. Large digits indi-
cate hours, small digits – minutes. A single push of the button moves the zone
by 30 minutes.
For Poland, set up a time zone +1
Confirm the location setting by pressing the ok button – the timer will automat-
ically go to the locate menu. Pressing meNu will return to longitude editing.
6.5. program oN/oFF poiNts aNd Night break
The PCZ-525.3 Plus timer allows you to define 4 independent switch-on and
switch-off points:
ƒ ƒ ON – controls the moment the light is switched on in the evening;
ƒ ƒ POFF – the beginning of the night break, which is the period in the middle of
the night when the light is to be switched off;
ƒ ƒ PON – the end of the night break, which is the moment from which the light
in the morning is to switch on again;
ƒ ƒ OFF – controls the moment the light is switched off in the morning.
The entered night interruption times are a permanent pair that exe-
cutes switching on and off of the contact. They are treated as single
commands and are executed according to the chronology of the set
time.
Press meNu. The timer will enter program menu.
Using the +/– buttons select the mode for time setting oN.
Use the +/– buttons to select the correct moment of activation:
ƒ ƒ suNset – astronomical sunset
ƒ ƒ tlight – civil twilight
ƒ ƒ time – setting of the "rigid" hour of the switching on that is independentfrom
the sunset
ƒ ƒ user – ustawienia użytkownika.
The switch-on time in the user settings is set as a shift of the switch-on point
in relation to the sunset time. When selecting the user option, first of all, you
should choose whether the switch-on time shift in relation to sunset will be
expressed as time (ti) or as the angular position of the sun disc (°). Confirm the
selected unit by pressing the OK button and then, using the +/– buttons, enter
the numerical shift value (within ±180 minutes for the time shift or ±15° for the
sun angle position shift).
Due to the different length of dawn/dusk depending on the season of
the year and latitude, it is recommended to adjust the correction to
the position of the center of the sun disc (°) to ensure switch-on/off
at a similar brightness level.
Confirm selected setting by pressing the ok button, the timer will then return
to display the oN menu.
When operating with the external light sensor switched on, the oN
switch-on point is approximate, as the actual moment of switch-on
will depend on the set width of the operating zone of the tlight
Brightness Sensor (6.6.3) and will be, depending on the brightness
level (6.6.4 and 6.6.5), between (oN – tlight) and (oN + tlight).
6.5.2. poFF (begiNNiNg oF the Night break)
Press the meNu button. The clock will enter the program menu. Press the +/–
buttons to select the poFF setting.
Confirm your selection by pressing ok. Use the +/– buttons to set the hour first
and then the minute at which the night break should start. Confirm the edited
value by pressing the ok button.
After confirming the minute, the clock will return to display the poFF menu.
Return to the previously edited value by pressing the meNu
button.
Setting the beginning and end of the night break to the same time
blocks the activation of the night break, as shown in the diagram
below:
PPZW – program points of switching on and off
PN – night break
6.5.3. poN (eNd oF the Night break)
Press the meNu button. The clock will enter the program menu. Press the +/–
buttons to select the poN setting.
- 4 -
Advertisement
Table of Contents

Related Manuals for F&F PCZ-525.3 plus


Summary of Contents for F&F PCZ-525.3 plus
- Page 1 4. Display and control panel description If the message Err ... appears, turn off the power supply of the timer, wait about 6.4.2. maNual locatioN settiNg F&F Filipowski sp. j. 10 seconds and turn the power on again. If the error is repeated, please contact ul.
- Page 2 Confirm your selection by pressing ok. Use the +/– buttons to set the hour first 6.6.1. brightNess level readiNg With +/– keys select desired mode:: Using +/– select required parameter: and then the minute at which the night break should end. Confirm the edited A parameter that allows you to read the brightness level measured by the sen- value by pressing the ok button.
- Page 3 X-ON Electronics Largest Supplier of Electrical and Electronic Components Click to view similar products for category: Timers Click to view products by manufacturer: F&F Other Similar products are found below : 79237785 H5AN-4DM DC12-24 H5CN-YAN AC100-240 H5CX-L8S-N AC100-240 H3AM-NSR-B AC100-240 H5AN-4D DC12-24 THR2U-220A THR2U-110A 81506944 88225029 H5S-YB4-X H7AN-2D DC12-24 H5CN-XANS DC12-48 H7AN-W4DM DC12-24 H7AN-4DM DC12-24 H7AN-4D DC12-24 H7AN-RT6M AC100-240 MTR17-BA-U240-116 PM4HSDM-S-AC240VS PM4HSDM-S- AC240VSW PO-405 600DT-CU PM4HF8-M-DC24V 3RP2511-1AW30 1SVR500130R0000 1SVR508020R0000 1SVR508020R1100...
Need help?
Do you have a question about the PCZ-525.3 plus and is the answer not in the manual?
Questions and answers