Juniper Day One+ Hardware Manual
Hide thumbs
Also See for Day One+:
- Manual (12 pages) ,
- Manual (12 pages) ,
- Quick start manual (12 pages)
Advertisement
Quick Links
Day One+
QFX5120-32C
IN THIS GUIDE
Step 1: Begin | 1
Step 2: Up and Running | 7
Step 3: Keep Going | 10
Step 1: Begin
IN THIS SECTION
Meet the QFX5120-32C Ethernet Switch | 2
Install the QFX5120-32C | 2
Power On | 5
In this guide, we provide a simple, three-step path, to quickly get you up and running with your new QFX5120-32C switch.
We've simplified and shortened the installation and configuration steps, and included how-to videos. You'll learn how to
install an AC-powered QFX5120-32 switch in a rack, power it up, and deploy it on your network. There's a separate Day
One+ guide for the QFX5120-48 switch (see
QFX5120-32C, see
QFX5120 Switch Hardware
NOTE:
Are you interested in getting hands-on experience with the topics and operations covered in this guide?
Visit
Juniper Networks Virtual Labs
sandbox in the stand alone category.
QFX5120
on the Day One+ webpage). For details on installing a DC powered
Guide.
and reserve your free sandbox today! You'll find the Junos Day One Experience
Advertisement

Subscribe to Our Youtube Channel
Related Manuals for Juniper Day One+


Summary of Contents for Juniper Day One+
- Page 1 Are you interested in getting hands-on experience with the topics and operations covered in this guide? Visit Juniper Networks Virtual Labs and reserve your free sandbox today! You’ll find the Junos Day One Experience sandbox in the stand alone category.
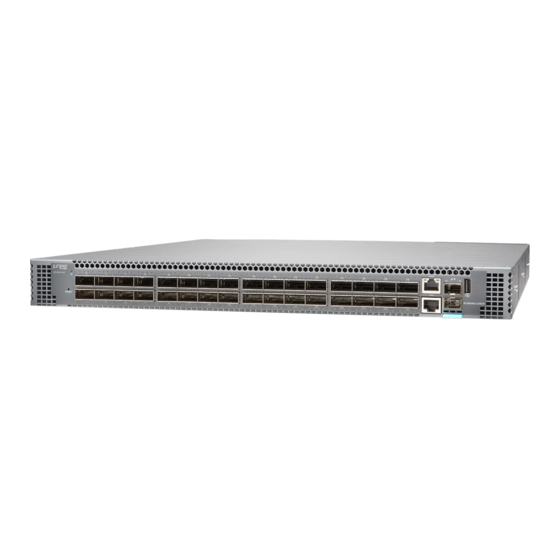
- Page 2 Meet the QFX5120-32C Ethernet Switch ® The Juniper Networks QFX5120-32C is a compact, 1-U fixed configuration switch with 32 100GbE or 40GbE QSFP28 ports, making it ideal for data centers that require top-of-rack and spine-and-leaf deployments. You can also use the QFX5120-32C for high-density server connectivity, with options to channelize the QSFP28 ports.
- Page 3 An RJ-45 to DB-9 serial port adapter A four-post rack mounting kit that contains: Two front mounting brackets Two side mounting rails Twenty flat head M4X8 screws to attach the front mounting brackets and side mounting rails to the switch chassis Two rear mounting (L-shaped) brackets Two pan head M4X8 screws to attach the rear mounting brackets to the side mounting rails What Else Do I Need?
- Page 4 4. Attach the front mounting brackets to the switch. 5. Attach the side mounting rails to the switch. 6. Lift the switch and position it in the rack. Line up the bottom hole in each mounting bracket with a hole in each rack post, making sure the switch is level.
- Page 5 9. Secure the rear mounting brackets to the rack posts using the rack mount screws. Secure the rear mounting brackets to the side mounting rails by using the pan head M4X8 screws. 10. Verify that the mounting brackets on each side of the rack are level. Power On Now that you’ve mounted your switch in the rack, you’re ready to connect it to power.
- Page 6 6. Ensure that the power supplies are fully inserted in the switch. 7. Connect the power cord to the AC power socket on the power supply: a. Push the end of the retainer strip into the hole next to the AC power socket until it snaps into place. b.
-
Page 7: Step 2: Up And Running
Step 2: Up and Running IN THIS SECTION Plug and Play | 7 Customize the Basic Configuration | 7 Now that the QFX5120-32C is powered on, let’s do some initial configuration to get it up and running on the network. It’s simple to configure and manage the QFX5120-32C using the CLI. - Page 8 1. Verify that the your laptop or desktop PC has the following default serial port settings: Baud Rate—9600 Data—8 Flow Control—None Parity—None Stop Bits—1 DCD State—Disregard 2. Connect the console port (labeled CON) on the QFX5120-32C rear panel to a serial port on your laptop or desktop PC using the Ethernet cable and RJ-45 to DB-9 adapter.
- Page 9 Encrypted password: [edit] root# set system root-authentication encrypted-password encrypted-password SSH-ECDSA password: [edit] root# set system root-authentication ssh-ecdsa public-key SSH-ED25519 password: [edit] root# set system root-authentication ssh-ed25519 public-key SSH-RSA password: [edit] root# set system root-authentication ssh-rsa public-key 7. Configure the default gateway. [edit] root# set routing-options static route 0/0 next-hop address 8.
-
Page 10: What's Next
Download, activate, and manage your software licenses to Activate Junos OS Licenses in the Juniper Licensing unlock additional features for your QFX series switch Guide See all documentation available for the QFX5120 See the QFX5120 Documentation in the Juniper Networks TechLibrary... - Page 11 Juniper Portal Juniper Networks, the Juniper Networks logo, Juniper, and Junos are registered trademarks of Juniper Networks, Inc. in the United States and other countries. All other trademarks, service marks, registered marks, or registered service marks are the property of their respective owners. Juniper Networks assumes no responsibility for any inaccuracies in this document. Juniper Networks reserves the right to change, modify, transfer, or otherwise revise this publication without notice.
Need help?
Do you have a question about the Day One+ and is the answer not in the manual?
Questions and answers