Juniper Day One+ Manual
Hide thumbs
Also See for Day One+:
- Hardware manual (11 pages) ,
- Manual (12 pages) ,
- Quick start manual (12 pages)
Advertisement
Quick Links
Day One+
EX4400
IN THIS GUIDE
Step 1: Begin | 1
Step 2: Up and Running | 8
Step 3: Keep Going | 11
Step 1: Begin
IN THIS SECTION
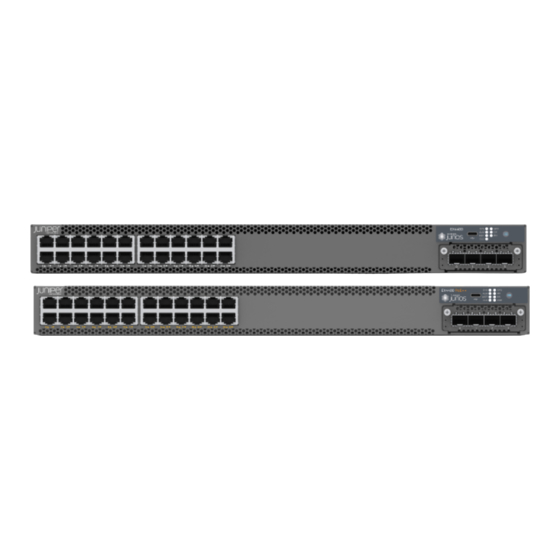
Meet the EX4400 Ethernet Switches | 2
Install the EX4400 | 3
Power On | 5
In this guide, we provide a simple, three-step path, to quickly get you up and running with your new EX4400. We've
simplified and shortened the installation and configuration steps, and included how-to videos. You'll learn how to install
an AC-powered EX4400, power it up, and configure basic settings.
NOTE:
Are you interested in getting hands-on experience with the topics and operations covered in this guide?
Visit
Juniper Networks Virtual Labs
sandbox in the stand alone category. EX switches are not virtualized. In the demonstration, focus on the virtual
QFX device. Both the EX and QFX switches are configured with the same Junos commands.
and reserve your free sandbox today! You'll find the Junos Day One Experience
Advertisement

Summary of Contents for Juniper Day One+
- Page 1 Are you interested in getting hands-on experience with the topics and operations covered in this guide? Visit Juniper Networks Virtual Labs and reserve your free sandbox today! You’ll find the Junos Day One Experience sandbox in the stand alone category. EX switches are not virtualized. In the demonstration, focus on the virtual...
- Page 2 EX4400 Ethernet Switches are our first cloud-ready switches. You can manage EX4400 switches deployed in a cloud network by using Juniper Mist™. EX4400 switches support Virtual Chassis technology, making it easy for you to scale the network without increasing the number of devices to manage. You can also channelize the QSFP28 ports to increase the number of interfaces.
- Page 3 Models Access Ports EX4400-48MP 36 100/1000/2500-Mbps RJ-45 ports on the front panel 12 100/1000/2500/5000/10000-Mbps RJ-45 ports on the front panel 2 100GbE QSFP28 ports on the rear panel EX4400-48F 36 SFP ports and 12 SFP+ ports on the front panel 2 100GbE QSFP28 ports on the rear panel Install the EX4400 IN THIS SECTION...
- Page 4 A serial-to-USB adapter (if your laptop or desktop PC doesn’t have a serial port) Two 10-32 x .25-in. screws with #10 split-lock washers to secure the grounding lug A grounding cable: 14 AWG (1.5 mm²), minimum 90° C wire, or as permitted by the local code, with a Panduit LCD10-10AF-L or equivalent lug attached CAUTION: Ensure that a licensed electrician has attached the appropriate grounding lug to the...
- Page 5 4. Lift the switch and position it in the rack. Position the switch so that the AIR IN labels on the fan modules are facing the cold aisle, or the AIR OUT labels on the fan modules are facing the hot aisle. Line up the bottom hole in each mounting bracket with a hole in each rack post, making sure the switch is level.
- Page 6 3. Place the grounding lug attached to the grounding cable over the protective earthing terminal on the rear panel. 4. Secure the grounding lug to the protective earthing terminal using the 10-32 x .25-in. screws with #10 split-lock washers. 5. Dress the grounding cable. Be sure that the cable doesn’t block access to or touch other device components, and that it doesn’t drape where people could trip over it.
- Page 7 7. On the rear panel, connect the retainer strip and power cord to the AC power socket: a. Push the end of the retainer strip into the hole next to the AC power socket until it snaps into place. Ensure that the loop in the retainer strip points upward.
-
Page 8: Step 2: Up And Running
Step 2: Up and Running IN THIS SECTION Plug and Play | 8 Customize the Basic Configuration | 8 Now that the EX4400 is powered on, let’s do some initial configuration to get it up and running on the network. It’s simple to configure and manage the EX4400 using the CLI. - Page 9 1. Verify that the serial port settings for your laptop or desktop PC are set to the default values: Baud Rate—9600 Data—8 Flow Control—None Parity—None Stop Bits—1 DCD State—Disregard 2. Connect the console port (labeled CON) on the rear panel of the EX4400 switch to a serial port on your laptop or desktop PC using the Ethernet cable and RJ-45 to DB-9 adapter.
- Page 10 root# set routing-options static route 0/0 next-hop address 8. Configure the IP address and prefix length for the management interface on the switch. [edit] root# set interfaces me0 unit 0 family inet address address/prefix-length NOTE: The management port me0 (labeled MGMT) is on the rear panel of the EX4400 switch. The management interface provides a dedicated out-of-band management channel to manage devices on the network.
-
Page 11: What's Next
Guide Find more information about how to install and configure See the EX4400 Switch Hardware Guide the EX4400 See, automate, and protect your network with Juniper Visit the Security Design Center Security Get hands-on experience with the procedures covered in... -
Page 12: General Information
Juniper Portal Juniper Networks, the Juniper Networks logo, Juniper, and Junos are registered trademarks of Juniper Networks, Inc. in the United States and other countries. All other trademarks, service marks, registered marks, or registered service marks are the property of their respective owners. Juniper Networks assumes no responsibility for any inaccuracies in this document. Juniper Networks reserves the right to change, modify, transfer, or otherwise revise this publication without notice.


Need help?
Do you have a question about the Day One+ and is the answer not in the manual?
Questions and answers