Table of Contents
Advertisement
Advertisement
Table of Contents

Related Manuals for Giant Crest 34


Summary of Contents for Giant Crest 34
- Page 1 Model Year: MY20 Model Name: Crest 34 August 2019...
-
Page 2: Table Of Contents
目錄 CONTENTS 保固及售服政策 WARRANTY & AS POLICY ..................3 保養區間 SERVICE INTERVAL ......................3 避震前叉拆解 SUSPENSION FORK DISASSEMBLY................4 上下叉拆解 U ..................4 PPER OWER LEG DISASSEMBLY 氣壓室拆解 A ..................6 IR SPRING SIDE DISASSEMBLY 阻尼側拆解 D ..................... 8 AMPER SIDE DISASSEMBLY 避震前叉組裝... -
Page 3: 保固及售服政策 Warranty & As Policy
保固及售服政策 Warranty & AS Policy Warranty period: 2 years from date of purchase. Warranty cases need to be registered on WPS. GMCs need to reply to warranty cases within 2 days. GMCs will decide whether or not to return defective forks or not. For the first year, defective forks need to be sent back from dealers to GSCs. -
Page 4: 避震前叉拆解 Suspension Fork Disassembly
避震前叉拆解 Suspension Fork Disassembly 工具清單 Tool list 避震器打氣筒 Shock pump w/ air release 膠槌 Plastic mallet 萬用鉗 Universal grip pliers 尖嘴鉗 Needle-nose pliers 游標卡尺 Vernier caliper 一字起子 Flathead screwdriver ... - Page 5 Remove the bolt and separate the connecting rod and lower leg. 取出油泡棉,浸泡至 Mobil SHC 627。 Remove sponges and soak in Mobil SHC 627. Other oils may be used; please check with Giant ASQA for confirmation. Never use alcohol to clean.
-
Page 6: Ir Spring Side Disassembly
氣壓室拆解 Air Spring Side Disassembly 逆時針旋開氣壓室上蓋 Unthread the air spring cap by turning it in a counterclockwise direction. Release air slowly! 緩慢的使用六角扳手或避震器打氣筒洩氣 Gradually release air pressure by using a 2mm hex or a shock pump with an air release button. 使用... - Page 7 使用 24mm 開口扳手拆開氣壓室下方螺絲,取 出活塞。 Unthread the bottom nut of air chamber using a 24mm open wrench turning counterclockwise direction. Remove the piston. 可使用 6mm 六角扳手調整氣室墊塊。 鎖緊扭力:2Nm Adjust air tokens using 6mm hex and a torque value of 2Nm.
-
Page 8: Amper Side Disassembly
阻尼側拆解 Damper Side Disassembly 使用一字起子拆開阻尼側上蓋。 註:小心裡面的鋼珠。 Gently pop the LSC cap off using a flathead screwdriver. Note: When removing cap, be careful not to lose steel ball bearing and spring located underneath. 夾起鋼珠及彈簧。 Carefully remove the the steel ball bearing and spring and set aside in a safe place. 取出... - Page 9 使用 24MM 套筒旋開阻尼室螺母。 Unthread the damper side cap using a 24mm socket and turning in a counterclockwise direction. 取出阻尼棒後, 使用 5 號六角板手及萬用鉗拆開螺絲。 註:請小心夾持阻尼棒並包覆緩衝物以避免造 成損傷。 Remove damper cartridge. Gently hold the damper cartridge and unthread the bolt using a 5 mm hex and universal grip pliers.
-
Page 10: 避震前叉組裝 Suspension Fork Assembly
避震前叉組裝 Suspension Fork Assembly 阻尼側組裝 Damper Side Assembly 使用 5mm 六角板手鎖緊螺母與阻尼棒,扭力 值 7.5Nm。 7.5 Nm Tighten the damper cartridge, nut and bolt to 7.5Nm with 5mm hex. 使用 4mm 六角板手將阻尼棒順時針方向調至 lock 位置,扭力值 1200g-cm,當感覺到阻力時 1200g-cm 即停止,請勿過度旋緊阻尼棒。 Turn the damper to locked position in a clockwise direction using a 4mm hex and a torque value of 1200g-cm. - Page 11 置入 LSC 調整軸,往下壓至正確位置。 Insert the LSC adjustment knob and adjust into into the correct position. 在 Pin 的 180 度地方置入鋼珠及彈簧。 Carefully place the steel ball bearing and spring into the 3 o'clock position, 180 degrees from the silver pin. 阻尼側上蓋上油。 在...
-
Page 12: Ir Spring Side Assembly
氣壓室組裝 Air Spring Side Assembly 活塞及連桿抹上 Slick honey,如下圖,約 3ml。 Apply 3ml of Slick Honey lubricant on the piston and connecting rod, as shown below. 以旋轉的手勢裝入,請參考影片。 Insert and rotate the piston to set. Please reference the Crest service video for complete instructions on this step. 活塞連桿外露長度:... - Page 13 在氣壓室滴入 6c.c Mobil SHC 627。 6c.c Inject 6c.c. of Mobil SHC 627 into air chamber. Other oils may be used; please check with Giant ASQA to confirm compatibility. 清潔螺絲螺牙並上油。 鎖緊氣壓室螺絲至扭力值 24Nm。 Grease 註:請確鎖緊至標準扭力值。 Clean and grease air spring cap threads. Never use alcohol to clean.
-
Page 14: 上下叉組裝 U /L
上下叉組裝 Upper/Lower Leg Assembly 清潔下叉腳內管。 裝回油泡棉。 Sponge 防塵套塗上 Slick honey 約 0.8ml。 上 DU 塗上 Slick honey 約 0.5ml。 Slick Honey Clean the inside of lower leg. Never use alcohol to clean. Re-insert sponge. Apply 0.8ml of Slick Honey on the wiper seal . Apply 0.5ml. - Page 15 打開 Low speed compression。 Open the Low Speed Compression knob. 壓縮上、下叉腳。 Compress upper and lower legs. 鎖緊阻尼側底部螺絲,扭力值 7.5Nm。 Tighten the damper bolt to 7.5Nm. Note: Make sure the bolt is tightened to recommended torque value. 拉長上下叉,氣壓側打氣至 100psi,推出連桿。 註:請確實鎖緊氣壓側螺母至標準扭力值。 Pull out the lower legs from the stanchions. Pump the air chamber to 100 psi to push out the connecting rod.
- Page 16 鎖緊氣壓側底部螺絲,扭力值 7.5Nm。 Tighten the air spring bolts to 7.5Nm. Note: Make sure the bolt is tightened to recommended torque value. 裝上回彈調整鈕 Re-insert the rebound adjustment knob.
-
Page 17: 更換阻尼棒 Damper Cartridge Replacement
更換阻尼棒 Damper Cartridge Replacement 將 LSC 調至 Open 的位置,取下螺絲並將螺絲旋入 2~3 圈,使用膠槌敲打,分離下連桿與 下叉腳 Open the LSC. Remove bolt the damper side bolt. Loosen the bolt two or three turns and use a plastic mallet to gently tap it out. 使用一字起子拆開阻尼側上蓋 Gently pop the LSC cap off using a flathead screwdriver. - Page 18 取出 LSC 調整軸 Remove the LSC adjustment knob. 使用 24MM 套筒旋開阻尼室螺母 Unthread the damper side nut using a 24mm socket and turning in a counterclockwise direction. 取出阻尼棒後,使用 5 號六角板手及萬用鉗 拆開螺絲,分離阻尼棒。 註:請小心夾持阻尼棒並包覆緩衝物以避免造 成損傷。 參考阻尼側組裝章節安裝阻尼。 Remove damper cartridge. Gently hold the damper cartridge and unthread the bolt using a 5 mm hex and universal grip pliers.
- Page 19 確認阻尼棒的功能。 如果阻尼棒沒有 Lockout 的功能,請以此方式排除: 氣壓室洩氣,Lockout 端跟 rebound 端需都維持在全開閥位置,全行程作動 3~5 次 Check damper function. If there is no lockout function: Release air from the air spring chamber. Open the low speed compression and open the rebound damper. Slowly compress cartridge to full travel and then let cartridge restore to original position 3 to 5 times.
-
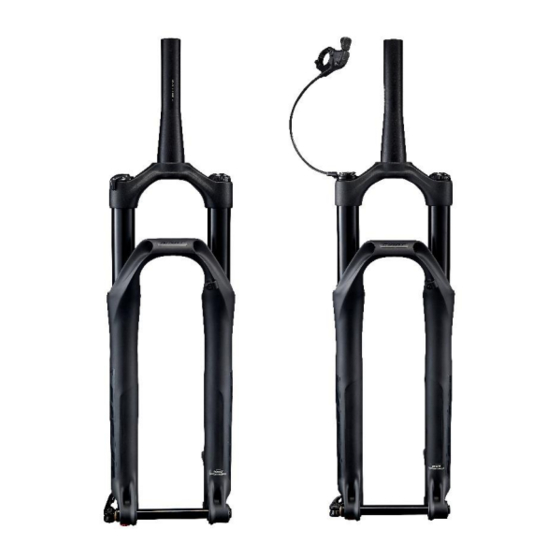
Page 20: 更換線控 Remote Control Replacement
更換線控 Remote Control Replacement 使用 6 號六角板手拆下阻尼側底部螺絲。 Remove bottom damper bolt using a 6 mm hex. 線控於開啟的位置。 將阻尼底部螺絲旋入 2~3 圈,使用膠槌敲打,分離下連桿與下叉腳 Put the remote control in open position. Loosen the bolt two or three turns and use a plastic mallet to gently tap it loose. 使用... - Page 21 使用 2.5mm 六角扳手逆時鐘方向旋開線控線固定螺絲,取下線控線。 Unthread the fixing remote control cable fixing bolt using 2.5 mm hex. Remove the remote control cable. 使用 2.5mm 六角扳手逆時鐘方向旋開上蓋螺 絲,取下上蓋及零件。 Remove the cable cap bolt using a 2.5 mm hex. 使用 2.5mm 六角扳手逆時鐘方向旋開線控線 固定座螺絲, 取下線控線固定座。 Remove the remote control cable setting seat bolt .
- Page 22 固定阻尼棒,使用 10mm 套筒取下螺母螺絲①。 取下阻尼調整軸②。 更換阻尼棒(如果需要)。 Gently grip the damper cartridge. Unthread the bolt using 10mm socket ①. Remove the damper adjustment axle by rotating it in a counter clockwise direction ②. Replace the damper cartridge (if needed). ② ① Assembly process: 1、順時鐘方向旋入阻尼調整軸①至感受到有阻力就停止。...
- Page 23 使用 24mm 套筒組裝阻尼棒,扭力值 24Nm。 Using a 24 mm socket, tighten the damper 24Nm cartridge into the stanchion to 24Nm. Front 0.6Nm 組裝線控線固定座,鎖緊扭力 0.6Nm,線控線 孔位朝前。 Tighten the remote control cable setting seat bolt to 0.6Nm. Make sure it is to the front of the fork.
- Page 24 將上蓋逆時鐘方向轉 140 度,約在 4~5 點鐘的位置,此為線控開啟的位置。 注意:如果關閉的位置在 7 點鐘位置,線控開啟的位置約在 2~3 點鐘位置。 Turn the top cap 140 degrees in a counterclockwise direction to the 4~5 o’clock position. This is the open position. Note: If the lockout position is around 7 o’clock in the previous step, the open position should be around the 2~3 o’clock position.
- Page 25 1、標記螺絲位置①。 2、拿起上蓋,將墊片、塑膠襯套置入,襯套開口的位置需跟標記位置對齊②。 3、將彈簧放入上蓋③。 4、對齊塑膠襯套開口位置裝上蓋④。 1. Mark the bolt location①. 2. Remove the top cap and place the washer and plastic bushing in the nut. The gap of plastic bushing should be aligned with the location mark②. 3. Put the spring in the top cap③. 4.
- Page 26 測試阻尼棒的開啟/關閉功能。 Test the damper cartridge open and lockout functions. Open Lockout Compression Firm 1、線控關閉①。 2、組裝線控線②。 3、將上蓋轉至關閉位置③。 4、鎖緊線控線④。 1. Put the remote control in lock out position①. 2. Insert the remote control cable②. 3. Turn the top cap to the lockout position③. 4.
-
Page 27: 各部件扭力值 Torque Value Information
各部件扭力值 Torque Value Information... -
Page 28: 潤滑標準 Standard Of Lubrication
Standard of lubrication: O-ring, Q-ring, and Sponge: Soak in Mobil SHC 627. Other oils may be used, please check with Giant ASQA for confirmation. DU, Dust seal, and Piston set: Apply Slick Honey. LSC cap, nut of damper top and bottom nut of air chamber: Apply grease... -
Page 29: 下叉腳保養 Lower Leg Maintenance
Remove sponges and soak in Mobil SHC 627. Other oils may be used, please check with Giant ASQA for confirmation. 清潔上下叉管的外觀及下叉管的防塵套、管件內部 Clean the outside of upper and lower leg as well as the wiper seal. Never use alcohol to clean. -
Page 30: 氣壓側及阻尼側保養 Air Spring And Damper Side Maintenance
2. Check the O-ring/X-ring for wear and tear. Soak the O-ring/X-ring in Mobil SHC 627 Other oils may be used, please check with Giant ASQA for confirmation. Replace the O- ring/X-ring if necessary. For reference, consult the O-ring/X-ring indication section. -
Page 31: O-Ring/X-Ring 指南 O-Ring/X-Ring Indication
O-ring/X-ring 指南 O-ring/X-ring Indication Code Type Where for Sag setting inside of lower leg on non-drive side on the bottom bolt of damper side O-ring on the top nut and bottom nut of air chamber inside of air spring cap on the air token and top nut of air chamber on the piston X-ring... -
Page 32: 防塵套更換 Wiper Seal Replacement
防塵套更換 Wiper Seal Replacement 取出油泡棉,浸泡至 Mobil SHC 627。 Remove sponges and soak in Mobil SHC 627. Other oils may be used, please check with Giant ASQA for confirmation 使用開口扳手拆下防塵套,清潔表面。 Remove wiper seal using an open wrench. Clean the inside of lower leg. -
Page 33: 售服清單 After Service Lineup
Low speed Rebound & high/low compression (w/ trail model) Low/high Rebound & high/low compression (w/ trail model) RRL* Low speed Rebound with Remote lockout * The function of MY20 Giant Crest suspension fork Completed fork-GBD lineup (order from GBD): Item number Description 100000001 GIANT CREST 34 RCL 100MM 29"... - Page 34 CREST 34-Boost RRL 29"1.125-1.5"X245.5 AL T100 PM 00D 20G9-XTC ADV 29 3 1111-CREST3-009 C/F:YS727 MATT, W/15X110MM AXLE, W/REMOTE LEVER, W/ GLOSS&MATTE DECAL CREST 34-Boost RCL 29" 1.125-1.5X245.5 AL T100 PM 00D 20G9-Fathom 29 2 1111-CREST3-13 C/F:YS727 MATT,W/15X110MM AXLE, W/GLOSS&MATTE DECAL...
- Page 35 91234CAPVEA1K Air spring cap kit CREST 34 CapValve BK W/4X2 Oring 91234PLUGSA1K Air token (one token w/O-ring) CREST 34 Plugs W/19X2 Oring CREST 34 T120mm Connecting rod Component W/O 91234CC120A1K Piston kit for 120mm travel CREST 34 T100mm Connecting rod Component W/O...
Need help?
Do you have a question about the Crest 34 and is the answer not in the manual?
Questions and answers