Advertisement
Quick Links
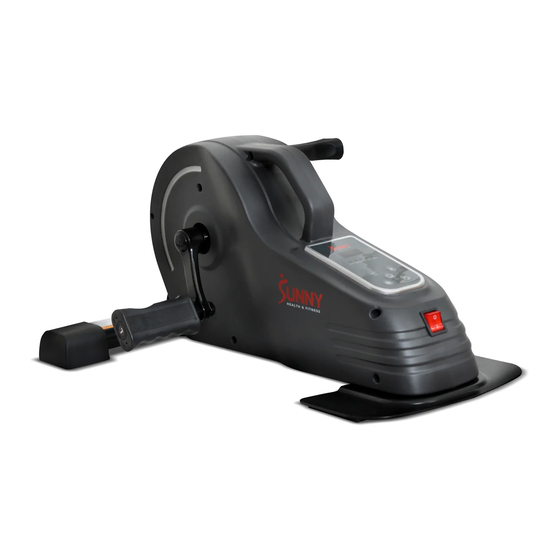
ELECTRIC UNDER DESK CYCLE
SF-B0960
USER MANUAL
DO NOT STAND ON THE UNIT
IMPORTANT! Please retain owner's manual for maintenance and adjustment instructions. Your
satisfaction is very important to us, PLEASE DO NOT RETURN UNTIL YOU HAVE CONTACTED US:
support@sunnyhealthfitness.com or 1- 877 - 90SUNNY (877-907-8669).
Advertisement

Summary of Contents for Sunny Health & Fitness SF-B0960
- Page 1 ELECTRIC UNDER DESK CYCLE SF-B0960 USER MANUAL DO NOT STAND ON THE UNIT IMPORTANT! Please retain owner’s manual for maintenance and adjustment instructions. Your satisfaction is very important to us, PLEASE DO NOT RETURN UNTIL YOU HAVE CONTACTED US:...
- Page 2 IMPORTANT SAFETY INSTRUCTIONS Thank you for purchasing the Electric Under Desk Cycle. Please read the operating instructions carefully before use, especially the safety precautions. When using an electrical appliance, basic precautions should always be followed, including the following: Read all instructions before using this appliance. DANGER –...
- Page 3 21. This appliance is not suitable for therapeutic use. Do not use with other medical electronic equipment, such as pacemakers or EKG machines. 22. Do not use the appliance in wet or dusty environment. Do not use in humid environment, such as bathroom.
- Page 4 EXPLODED DIAGRAM #39 S13-S14-S15 1PC HARDWARE PACKAGE 3 ...
- Page 5 PARTS LIST Description Spec. Description Spec. Main Frame 21L/R Nylon Nut Front Stabilizer Screw ST3.5*15 3L/R Crank Non-Slip Pad Power Cord Screw ST4.2*15 Power Switch Flange Nut Rubber Pad End Cap 7L/R Pedal Spring Washer Φ2.2*Φ3.4*0.8 8L/R Belt Cover 3P Data Line Motor Sensor 10 Console...
- Page 6 ASSEMBLY INSTRUCTIONS We value your experience using Sunny Health and Fitness products. For assistance with parts or troubleshooting, please contact us at support@sunnyhealthfitness.com or 1-877-90SUNNY (877-907- 8669). STEP 1: Attach Rear Fixed Bottom Plate (No. 19) to the Main Frame (No. 1) with 3 Bolts (No. 18).
- Page 7 We value your experience using Sunny Health and Fitness products. For assistance with parts or troubleshooting, please contact us at support@sunnyhealthfitness.com or 1-877-90SUNNY (877-907- 8669). STEP 3: NOTE: The Pedals (No. 7L & No. 7R) are marked “L” and “R” for Left and Right. ...
- Page 8 We value your experience using Sunny Health and Fitness products. For assistance with parts or troubleshooting, please contact us at support@sunnyhealthfitness.com or 1-877-90SUNNY (877-907- 8669). STEP 4: Plug the Power Cord (No. 4) into the Power Switch (No. 5) on the Main Frame (No.
- Page 9 IMPORTANT ELECTRICAL INFORMATION WARNING: This cycle requires a power source of 120V in order to properly operate. For your safety as well as the safety of others, please verify that the power source is correct before powering in the equipment. Any power supply source above or below this level could cause significant damage to the equipment and/or user.
- Page 10 BATTERY INSTALLATION & REPLACEMENT Battery Battery Seat Battery Seat Battery Battery Seat BATTERY INSTALLATION: 1. Press the arrow at squeeze point a of battery seat and buckle point b of battery seat, then pull out battery seat. Take out the 1pc CR2032 3V battery that is included inside the manual bag. 2.
- Page 11 DISPLAY CONSOLE ELECTRICAL INFORMATION Rated Voltage: 120V FUNCTION KEYS Start/Pause Start and pause machine Mode Changes between automatic and manual Direction Changes the direction forward or backward Speed+/- Select key for increasing or decreasing speed (18 speed levels) WARNINGS AND INSTRUCTIONS ...
- Page 12 OPERATING INSTRUCTIONS Power Switch 1. Plug in the power cord. Turn on the power switch. The machine will beep and LED display will show “OFF“. This is standby mode. 2. Press the Start/Pause button on the console or the remote control to start the cycle, it will begin in manual mode.
- Page 13 7. Under the automatic mode, there are P1/P2/P3 modes included. Different modes have different speeds and working directions, see below details. P1 MODE:Based on speed Level 1, the pedals move 13 times forward, 13 times backwards, 13 times forward based, 13 times backwards and so on. P2 MODE The pedals move forward first then the speed will be increasing from Level 1 to Level 9 gradually.
- Page 14 DISPLAY REMOTE CONTROL FUNCTION KEYS Start/Pause Start and pause machine Mode Changes between automatic and manual Direction Changes the direction forward or backward Speed+- Select key for increasing or decreasing speed (18 speed levels) REMOTE CONTROL NOTICE: If the Remote Control (No. 11) does not activate the Electric Under Desk Cycle, or if you have a replacement remote, the Remote Control (No.
- Page 15 Caution: The user is cautioned that changes or modifications not expressly approved by the party responsible for compliance could void the user's authority to operate the equipment. This device complies with Part 15 of the FCC Rules. Operation is subject to the following two conditions: (1) this device may not cause harmful interference, and (2) this device must accept any interference received, including interference that may cause undesired operation.
- Page 16 USER-MAINTENANCE INSTRUCTION Caution:There are no serviceable parts in the appliance, any servicing should be performed by an authorized service person. When the appliance is not in use, disconnect the power supply, storage of the power cord and the total appliance in a dry location where children cannot touch or in play area(s). ...
- Page 17 16 ...


Need help?
Do you have a question about the SF-B0960 and is the answer not in the manual?
Questions and answers