Table of Contents
Advertisement
Quick Links
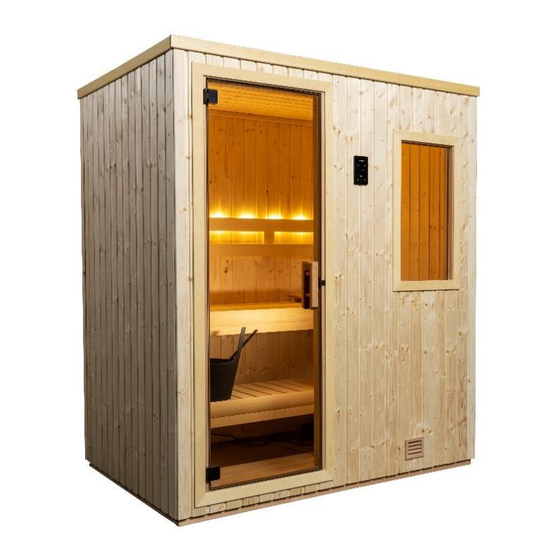
NorthStar Indoor Series Owner's Manual
with SL2 Control and CB 16-1
and Bluetooth Sound Sytem (Optional)
NS 46, NS 56 Room
(4' x 6', 5' x 6')
Precautions Before Use
Read Before Installation
Room Summary
Room Assembly
Electrical Installation
Sound Bar Installation
Interior Installation
Control Operation
Maintenance and Troubleshooting
71-0164
Rev. 01
NS 46, NS 56, NS 57
2
2
3
4
9
13
15
17
19
Page 1
NS 57 Room (5' x 7')
4215-139
09/07/2021
Advertisement
Table of Contents

Related Manuals for Finnleo NorthStar Series


Summary of Contents for Finnleo NorthStar Series
- Page 1 NorthStar Indoor Series Owner’s Manual NS 46, NS 56, NS 57 with SL2 Control and CB 16-1 and Bluetooth Sound Sytem (Optional) NS 57 Room (5’ x 7’) NS 46, NS 56 Room (4’ x 6’, 5’ x 6’) Precautions Before Use Read Before Installation Room Summary Room Assembly...
-
Page 2: Room Assembly
Read all instructions carefully before installation including instructions packaged separately with the sauna heater. Please leave all instructions and warranty with the owner. WARNING: When using electrical sauna heaters and associated sauna products, basic precautions must be followed, including the following: 1. - Page 3 Trim Profiles Hardware Package Window/Door Casing (normally pre-installed) Carriage Bolts, Washers, Inside Cove Molding & Nuts (for saunas with L-benches) 9 x 2 Wood Screw Exterior Fascia Trim 9 x 3 Wood Screw Torx Bit Fascia Trim Ceiling Panel Top Plate Interior Cove Benches Exterior Corner Trim...
- Page 4 INSTALLATION OF SAUNA ROOM 1. Position the base frame (or optional floor panel) in the desired location on a level surface. 2. Fasten the corners of the base frame using one 3” screw at each corner in the predrilled holes. Note: Predrilled holes are purposely made at an angle.
- Page 5 4. Place the front panel of the right wall (panel 2) on the floor and butt it to the front panel. 5. Secure the right wall to the front wall with three 3” Torq screws (provided). Install one screw on the top of the wall, one in the middle, and one on the bottom.
- Page 6 8. Install the next panel in the number series. Secure the side wall to the back wall panel with three 3” Torq screws. Ensure the tongue and groove are tight at the interior corner when screws are installed. 9. Install the second and third panels of the back wall.
- Page 7 12. Install the door panel next to the right front wall panel. Repeat step 7 between wall panels. 13. Install the remaining wall panel to the door panel. Repeat step 7 between wall panels. 14. Secure left front wall panel to the left side wall with three 3” Torq screws. Ensure the tongue and groove are tight at the interior corner when screws are installed.
- Page 8 17. Install corner caps to each corresponding wall panel using Brad nails or finishing nails (not supplied). Note: Some woods will twist, which is normal, so installation can be more difficult. See end of manual for suggestions on how to install a twisted corner cap. 18.
-
Page 9: Electrical / Heater Assembly
25. Install interior cove to front wall so it lays flush to left and right edges of the wall. 26. Install cove to back wall so it lays flush to left and right edges of wall. 27. Install cove to left and right side walls so it lays flush to front cove and back cove. - Page 10 34. Insert the black, white, and green wires into the terminal block as shown. Tighten the screws securely (approximately 18 in/lbs.) Green = ground Black = L1 (hot) White = L2 (hot) 35. Determine power requirements and wire size needed based on the room model. WIRE SIZE Sauna Sauna...
- Page 11 39. Mount the CB Box to the back wall with the four screws provided in the hardware pack inside the CB box. 40. After all connections are complete, place cover on CB Box with the four screws provided. 41. Install plastic wire raceway on right side wall. Peel adhesive strip off the back side of raceway and attach to the wall, flush with the floor and about 12”...
- Page 12 47. Install two of the shorter screws to the control. Place a black plastic wing on the end of each screw. (Longer screws are not used) 48. Mount control on to wall so the wires are inside the wall. Secure control to wall with the previously installed screws and wings.
- Page 13 User and installation manual for SL2 Sound Bar (Optional) This Bluetooth Audio system has been designed exclusively for use with the SL2 and SL2-C sauna control systems. Do not attempt to connect to any other control system. Record the product serial number, found on the back of the sound bar in the space designated on the back of this document and save for future reference.
- Page 14 Using your SL2 Sound Bar • Touch the Bluetooth button on your SL2 or SL2-C control to activate power to the SL2 Sound Bar. o A confirmation tone will be heard on your sound bar speakers when power is applied. Bluetooth Activation Button •...
-
Page 15: Interior Installation
INTERIOR INSTALLATION 58. Install door handle so the handle with the predrilled holes is inside the room. Secure handle with two screws provided within the handle package and cover screw heads with wooden buttons. The NS 46 and NS 56 bench systems have two benches which span from left to right walls. - Page 16 64. Install upper return bench to the notch on the upper main bench and the front wall bench support. Use the 3/8” bit to drill 2 holes where the upper main and upper return benches meet. Bolt the benches together using the carriage bolts provided. Note: When aligning the return bench with the main upper bench, make sure the bench tops are flush with each other.
- Page 17 SL2 (SaunaLogic 2) Control Operation Operating Instructions for Heater Default settings for temperature are preset to 194°F, the bath time is set to 60 minutes and 0-minute delay to start to heat. These settings are adjustable (as described below) from 119°F to 194°F. Length of sauna can be set from 0 to 60 minutes.
-
Page 18: User Maintenance Instructions
AUDIO OPERATION Audio Power On • Press icon to toggle On or Off the Bluetooth System. Note: The control does not have to be active for Sound System to operate. Pairing • Refer to your mobile device to pair to the unit. •... -
Page 19: Troubleshooting
Date of Purchase: _______________________ Place of Purchase: ____________________________ Record Serial Number Here Enjoy Your Sauna! Follow Finnleo (@finnleosauna) on social media. Tag Finnleo & include #MyFinnleo for a chance to be featured on our page. www.finnleo.com 575 East Cokato St., Cokato, MN 55321...
Need help?
Do you have a question about the NorthStar Series and is the answer not in the manual?
Questions and answers