Table of Contents
Advertisement
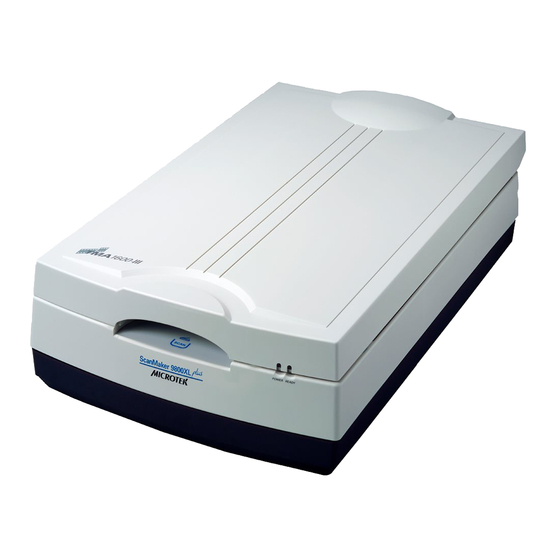
The ScanMaker 9800XL Plus is a tabloid-size scanner with a 12" x 17" scan bed, 1600
x 3200-dpi optical resolution, 3.6 maximum optical density, a Hi-Speed USB interface,
and one Smart-Touch button on the front panel for an easy access to the scan
function. With the use of the TMA 1600-III Transparent Media Adapter (available as
either standard or optional equipment), you can also scan film and transparencies -
including X-rays - up to 12" x 16" in size.
Contents
Getting to Know Your ScanMaker 9800XL Plus ............................................. 1
Features of the ScanMaker 9800XL Plus ........................................................ 2
Taking a Closer Look ........................................................................................ 3
Unlocking the Scanner .................................................................................... 4
How to Use the TMA 1600-III .......................................................................... 5
A. Unpacking TMA 1600-III ...................................................................... 5
B. Installing the TMA 1600-III .................................................................. 6
C. Unlocking the TMA 1600-III ................................................................. 7
Positioning Reflective Originals ...................................................................... 8
Positioning Transparent Film ........................................................................ 10
A. Using the 35mm Slide Template ...................................................... 1 1
B. Using the 35mm Filmstrip Template ................................................ 12
C. Using the 120 Film Template ............................................................. 13
D. Using the 4 " x 5 " Film Template ........................................................ 14
E. Using the Film Alignment Ruler ...................................................... 15
Positioning Multiple Templates ........................................................... 16
Scanning Scenarios ....................................................................................... 17
Copyright © 2012
Microtek International, Inc.
I49-004869 A, April 2012
Getting to Know Your ScanMaker 9800XL Plus
http://www.microtek.com
For PC Users Using ScanWizard Pro .................................................... 18
A. Scanning Photos ...................................................................... 18
B. Scanning Positive Film ............................................................. 21
C. Scanning Negative Film ............................................................ 24
For MAC Users Using ScanPotter ........................................................ 27
A. Scanning Photos ...................................................................... 27
B. Scanning Film ........................................................................... 29
Using the Microtek Scanner ICC Profiler (MSP) .......................................... 31
MSP and IT8 Calibration Data Installation ........................................... 31
Calibration Target ................................................................................... 31
Positioning the Target ........................................................................... 32
A. Positioning the Reflective Target ............................................. 32
B. Positioning the Transparent Target .......................................... 32
Calibration Setup ................................................................................... 33
Calibration and Profiling ....................................................................... 34
Loading a Profile ................................................................................... 35
Specifications / System Requirements ........................................................ 36
FCC Compliance Statement .......................................................................... 37
Advertisement
Table of Contents

Related Manuals for Microtek ScanMaker 9800XL Plus


Summary of Contents for Microtek ScanMaker 9800XL Plus
-
Page 1: Table Of Contents
Getting to Know Your ScanMaker 9800XL Plus The ScanMaker 9800XL Plus is a tabloid-size scanner with a 12" x 17" scan bed, 1600 x 3200-dpi optical resolution, 3.6 maximum optical density, a Hi-Speed USB interface, and one Smart-Touch button on the front panel for an easy access to the scan function. -
Page 2: Features Of The Scanmaker 9800Xl Plus
The ScanMaker 9800XL Plus comes with several important features, including the following: • Large 12" x 17" scan bed: The tabloid-size scan bed of the ScanMaker 9800XL Plus lets you easily scan oversized originals, contact sheets, large pieces of art, mechanical blueprints, and X-rays. -
Page 3: Taking A Closer Look
Scanner lid (or TMA 1600-III) Glass surface Vertical ruler Horizontal ruler READY indicator (Green) (U-shaped ruler) POWER indicator (Orange) Smart-Touch button (Scan) Accessory port (or with TMA 1600-III's connector securely Power switch connected) Hi-Speed USB port (1) Power connector ScanMaker 9800XL Plus User Guide... -
Page 4: Unlocking The Scanner
When the screw has been tightened, this indicates that your scanner is locked. 4. Turn off your scanner. The scanner is now ready for transport. ScanMaker 9800XL Plus User Guide... -
Page 5: How To Use The Tma 1600-Iii
How to Use the TMA 1600-III The Transparent Media Adapter (TMA 1600-III) is specially designed to scan slides, transparencies, and negative film with the ScanMaker 9800XL Plus scanner. The TMA 1600-III is available either as standard equipment or an optional accessory (depending on the scanner configuration that you purchased). -
Page 6: Installing The Tma 1600-Iii
2. Remove the scanner lid, then attach the TMA 1600-III by sliding the posts at the rear of the TMA 1600-III into the holes. Scanner lid TMA 1600-III 3. Plug the connector of the TMA 1600- III into the scanner’s 15-pin accessory port. ScanMaker 9800XL Plus User Guide... -
Page 7: Unlocking The Tma 1600-Iii
3. When the indicators on the front of your TMA 1600-III and scanner stop blinking, turn the locking knob clockwise to the lock position “ ”. 4. Turn off your scanner and disconnect the TMA 1600-III connector from the scanner. The TMA 1600-III is ready for transport. ScanMaker 9800XL Plus User Guide... -
Page 8: Positioning Reflective Originals
Center the original along the U-shaped ruler on the scanner. B. If you purchased your ScanMaker 9800XL Plus with the TMA 1600-III, you will need to use the Black Plate included with your TMA 1600-III package to shield unwanted light. - Page 9 This ensures that the Black Plate is in optimal condition at all times. 2. A protective film covers the Black Plate during shipping and prevents it from being scratched. When peeling the film from the plate, be careful not to tear or bend the Black Plate. ScanMaker 9800XL Plus User Guide...
-
Page 10: Positioning Transparent Film
Use the template that correctly matches the film type to be scanned. The use of the individual film templates and Film Alignment Ruler is explained in the succeeding pages of the manual. 35mm Slide Template 35mm Filmstrip Template 120 Film Template 4" x 5" Film Template Film Alignment Ruler ScanMaker 9800XL Plus User Guide... -
Page 11: Using The 35Mm Slide Template
To scan 35mm slides, use the 35mm Slide Template, which can hold up to 4 mounted 35mm slides at a time. 1. Place the 35mm Slide Template on the scanner glass surface. Make sure to orient the template with the “Microtek” logo facing up. The Grabber is used to remove the Calibration strip... -
Page 12: Using The 35Mm Filmstrip Template
2. Place the 35mm Filmstrip Template containing the loaded filmstrip on the scanner glass surface. Make sure to orient the template with the “Microtek” logo facing up. The Grabber is used to remove the... -
Page 13: Using The 120 Film Template
3. Place the 120 Film Template containing the loaded film on the scanner glass surface. Make sure to orient the template with the “Microtek” logo facing up. Calibration strip The Grabber is used to remove the... -
Page 14: Using The 4" X 5" Film Template
"Microtek" logo facing up 2. Place the 4" x 5" Film Template containing the loaded film on the scanner glass surface. Make sure to orient the template with the “Microtek” logo facing up. The Grabber is used to remove the... -
Page 15: Using The Film Alignment Ruler
U-shaped ruler located at the front of the scanner. During placement of the film, make sure that the calibration strip on the scanner glass surface is kept clear and free of obstruction at all times. ScanMaker 9800XL Plus User Guide... -
Page 16: Positioning Multiple Templates
At least two sets of each template are included in your TMA 1600-III package for multiple placements of the templates on the scanner. The templates can be placed side by side on the scanner glass surface, as shown in the illustration below. ScanMaker 9800XL Plus User Guide... -
Page 17: Scanning Scenarios
35mm filmstrips, 6 x 17 cm (120) panoramic film, and 4" x 5" / 6 x 9 cm film. For Mac Users Using ScanPotter, • Scanning photos: This scenario details the steps for scanning photos. • Scanning film: This scenario details the steps for scanning film. ScanMaker 9800XL Plus User Guide... -
Page 18: For Pc Users Using Scanwizard Pro
OK button to accept the settings. You can always change the settings at a later time. For more information, see the Color Matching Setup section in the ScanWizard Pro Reference Manual in the Microtek Software CD. Pertains to how your monitor displays color,... - Page 19 When you have completed the settings, press the Done/Save button, and the scanner will automatically scan and save your image based on your settings. ScanMaker 9800XL Plus User Guide...
- Page 20 ScanMaker 9800XL Plus User Guide...
-
Page 21: Scanning Positive Film
9. If the colors in your photo are faded and need restoring, check the “Automatic Color Restoration” box in the Settings window. 10. Click the Scan (or “Batch”) button in the Preview window or on the scanner unit to start scanning. ScanMaker 9800XL Plus User Guide... - Page 22 When you have completed the settings, press the Done/Save button, and the scanner will automatically scan and save your image based on your settings. ScanMaker 9800XL Plus User Guide...
- Page 23 For film scanning using own settings. the Film Alignment Ruler, it is normal for a black ruler to appear in the preview window after you perform a preliminary scan of your original. ScanMaker 9800XL Plus User Guide...
-
Page 24: Scanning Negative Film
For more details on how to control settings for negative film scanning, see the section “Negative Scan Settings Window” in the ScanWizard Pro Reference Manual in the Microtek software CD. ScanMaker 9800XL Plus User Guide... - Page 25 When you have completed the settings, press the Done/Save button, and the scanner will automatically scan and save your image based on your settings. ScanMaker 9800XL Plus User Guide...
- Page 26 ScanMaker 9800XL Plus User Guide...
-
Page 27: For Mac Users Using Scanpotter
8. If necessary, click the Image Settings button to switch to a window in which you can select a preset image effect to the image directly or adjust image quality manually by using the additional image correction tools. 9. Click the Scan button to start scanning. ScanMaker 9800XL Plus User Guide... - Page 28 Settings button to switch to a window where contains a composite display of nine-image-effects (Filter column) and additional image correction tools (Additional Adjustment column) for your scanned image. Preview window Scan frame (enclosed by dotted lines) ScanMaker 9800XL Plus User Guide...
-
Page 29: Scanning Film
8. If necessary, click the Image Settings button to switch to a window in which you can select a preset image effect to the image directly or adjust image quality manually by using the additional image correction tools. 9. Click the Scan button to start scanning. ScanMaker 9800XL Plus User Guide... - Page 30 (Additional Adjustment column) for your scanned image. Preview window Multiple scan frames (bordered in dotted lines and tagged with the number (e.g., 1, 2) at the top-left corner of the scan frame) ScanMaker 9800XL Plus User Guide...
-
Page 31: Using The Microtek Scanner Icc Profiler (Msp)
MSP utility will install and function properly. To install MSP, take note of the following: • For PC: Place the Microtek Software CD into a drive, then double click the MSP installer icon. Follow the on-screen instructions to install and you will be prompted to insert the IT8 Calibration Data CD included in your software kit. -
Page 32: Positioning The Target
1. Load the target face down inside the slot of the 120 Film Template. 2. Place the 120 Film Template with the loaded target on the scanner glass surface, and orient the template with the “Microtek” logo facing up. Important: Align the... -
Page 33: Calibration Setup
Calibration Data to update the target profiles in your system. D. When all the settings are done, click the Start (or Start Profiling) button. The calibration window will appear, and an initial preview of the target is performed. ScanMaker 9800XL Plus User Guide... -
Page 34: Calibration And Profiling
L mark (“ ”). Align normal L mark (“ ”). Align the cursor the cursor with the small bottom- with the small upper-right registration right registration mark. mark. ScanMaker 9800XL Plus User Guide... -
Page 35: Loading A Profile
“Positive” or “Positive Film” option for transparencies and slides. 3. From the Settings window, click the Scanner Profile/Input Profile list box, and select the profile you have just created. ScanMaker 9800XL Plus User Guide... -
Page 36: Specifications / System Requirements
• Microsoft Windows XP, Vista or Windows 7 Macintosh • Intel-Based Mac computer with built-in USB port • Mac OS X 10.6 through 10.7 Important Specifications, software bundles, and accessories are subject to change without notice. Not responsible for typographic errors. ScanMaker 9800XL Plus User Guide... -
Page 37: Fcc Compliance Statement
This device complies with Part 15 of the FCC Rules. Operation is subject to the following two conditions: (1) This device may not cause harmful interference, and (2) this device must accept any interference received, including interference that may cause undesired operation. ScanMaker 9800XL Plus User Guide...
Need help?
Do you have a question about the ScanMaker 9800XL Plus and is the answer not in the manual?
Questions and answers