Table of Contents
Advertisement
Quick Links
Advertisement
Table of Contents

Related Manuals for Garmin QUATIX 7 Solar


Summary of Contents for Garmin QUATIX 7 Solar
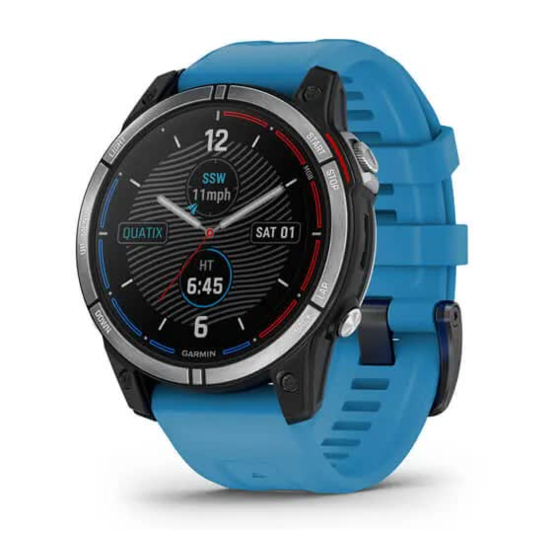
- Page 1 QUATIX 7/7X SOLAR ® Owner’s Manual...
- Page 2 © 2022 Garmin Ltd. or its subsidiaries All rights reserved. Under the copyright laws, this manual may not be copied, in whole or in part, without the written consent of Garmin. Garmin reserves the right to change or improve its products and to make changes in the content of this manual without obligation to notify any person or organization of such changes or improvements. Go to www.garmin.com...
-
Page 3: Table Of Contents
Table of Contents Boat Data..........11 Streaming Boat Data......11 Marking a Waypoint on Your Introduction........1 Chartplotter........11 Getting Started........1 GNT™ 10..........12 Device Overview........1 Streaming GNT 10 Data....12 Enabling and Disabling the Fusion-Link™ App........12 Touchscreen........2 Connecting to a Fusion Stereo.. - Page 4 Appearance........45 Training.......... 36 Watch Face Settings......45 Customizing the Watch Face....46 Workouts..........36 Glances..........47 Following a Workout From Garmin Connect..........36 Viewing the Glance Loop....49 Starting a Workout......37 Customizing the Glance Loop..49 Following a Daily Suggested Body Battery........
- Page 5 Wallet..........64 Map..........76 Paying for a Purchase Using Your Watch..........65 Viewing the Map........76 Adding a Card to Your Garmin Pay Saving or Navigating to a Location on Wallet..........65 the Map..........77 Changing Your Garmin Pay Navigating with the Around Me Passcode........
- Page 6 Navigating to a Destination....94 Applications........... 84 Navigating to a Point of Interest..94 Garmin Connect.........85 Navigating to the Starting Point of a Using the Garmin Connect App..85 Saved Activity........94 Using Garmin Connect on Your Navigating to Your Starting Point Computer........86 During an Activity......
- Page 7 110 Syncing the Time......102 The step counts on my device and my Changing the Screen Settings.... 102 Garmin Connect account don't Customizing Sleep Mode....102 match..........110 Customizing the Hot Keys....103 The floors climbed amount does not Changing the Units of Measure..
-
Page 9: Introduction
(Device Overview, page 2 Follow the on-screen instructions to complete the initial setup. During the initial setup, you can pair your smartphone with your watch to receive notifications, set up your Garmin Pay wallet, and more (Pairing Your Phone, page 82). -
Page 10: Enabling And Disabling The Touchscreen
UP·MENU • Press to scroll through the glance loop and menus. • Hold to view the menu. DOWN • Press to scroll through the glance loop and menus. START·STOP • Press to choose an option in a menu. • Press to view the activity list and start or stop an activity. •... -
Page 11: Starting The Countdown Timer
Starting the Countdown Timer 1 From the watch face, hold MENU. 2 Select Clocks > TIMERS. 3 Select an option: • To set and save a countdown timer for the first time, enter the time, press MENU, and select Save Timer. •... -
Page 12: Using The Stopwatch
Using the Stopwatch 1 From the watch face, hold MENU. 2 Select Clocks > STOPWATCH. 3 Press START to start the timer. 4 Press LAP to restart the lap timer The total stopwatch time continues running. 5 Press STOP to stop both timers. 6 Select an option: •... -
Page 13: Editing An Alternate Time Zone
You can pair with compatible Garmin marine devices using the marine apps preloaded ® on your watch. See the owner's manual for your Garmin marine device for more information about pairing with that device. Marine Maps and Charts Optional premium charts, such as BlueChart ®... -
Page 14: Sailing
Sailing Tack Assist While cruising or racing into the wind, the tack assist feature can help you determine if your boat is being lifted or headed. When you calibrate tack assist, the device captures your boat's port and starboard course over ground (COG) measurements, and uses the COG data to calculate the mean true wind direction and the boat's tack angle... -
Page 15: Entering A Fixed Tack Angle
Entering a Fixed Tack Angle 1 From the watch face, press START. 2 Select Sail Race or Sail. 3 Press UP or DOWN to view the tack assist screen. 4 Hold MENU. 5 Select Tack Angle > Angle. 6 Press UP or DOWN to set the value. Entering a True Wind Direction 1 From the watch face, press START. -
Page 16: Starting A Race
Starting a Race Before you can view the time to burn, you must set the starting line (Setting the Starting Line, page 1 From the watch face, press START. 2 Select Sail Race. 3 Wait while the watch locates satellites. The screen displays the regatta timer and time to burn 4 If necessary, hold MENU, and select an option:... -
Page 17: Tides
Tides Viewing Tide Information WARNING Tide information is for information purposes only. It is your responsibility to heed all posted water-related guidance, to remain aware of your surroundings, and to use safe judgment in, on, and around the water at all times. -
Page 18: Mfd Remote
MFD Remote Pairing With a Chartplotter You can pair your watch with a compatible Garmin chartplotter for quick access to frequently used functions, such as shortcuts and chart zoom. 1 From the watch face, press START. 2 Select MFD Remote. -
Page 19: Autopilot
1 From the watch face, select START > Autopilot > START. 2 Bring your quatix device within 3 m (10 ft.) of the marine device. 3 Set your compatible Garmin autopilot helm control to search for a remote control. See your autopilot helm control owner's manual for more information. -
Page 20: Gnt™ 10
(Connect IQ Features, ™ page 86). For more information about activity tracking and fitness metric accuracy, go to garmin.com/ataccuracy. Starting an Activity When you start an activity, GPS turns on automatically (if required). 1 From the watch face, press START. -
Page 21: Tips For Recording Activities
13). 2 Select a number that corresponds with your perceived effort. NOTE: You can select to skip the self evaluation. 3 Select how you felt during the activity. You can view evaluations in the Garmin Connect app. Activities and Apps... -
Page 22: Running
Running Going for a Track Run Before you go for a track run, make sure you are running on a standard-shape, 400 m track. You can use the track run activity to record your outdoor track data, including distance in meters and lap splits. 1 Stand on the outdoor track. -
Page 23: Calibrating The Treadmill Distance
Calibrating the Treadmill Distance To record more accurate distances for your treadmill runs, you can calibrate the treadmill distance after you run at least 1.5 km (1 mi.) on a treadmill. If you use different treadmills, you can manually calibrate the treadmill distance on each treadmill or after each run. -
Page 24: Stroke Types
Stroke type identification is available only for pool swimming. Your stroke type is identified at the end of a length. Stroke types appear in your swimming history and in your Garmin Connect account. You can also select stroke type as a custom data field (Customizing the Data Screens, page 29). -
Page 25: Training With The Drill Log
Training with the Drill Log The drill log feature is available only for pool swimming. You can use the drill log feature to manually record kick sets, one-arm swimming, or any type of swimming that is not one of the four major strokes. 1 During your pool swim activity, press UP or DOWN to view the drill log screen. -
Page 26: Indoor Activities
Indoor Activities The quatix watch can be used for training indoors, such as running on an indoor track or using a stationary bike or indoor trainer. GPS is turned off for indoor activities (Activities and App Settings, page 30). When running or walking with GPS turned off, speed, distance, and cadence are calculated using the accelerometer in the watch. -
Page 27: Recording A Hiit Activity
Recording a HIIT Activity You can use specialized timers to record a high-intensity interval training (HIIT) activity. 1 Press START. 2 Select HIIT. 3 Select an option: • Select Free to record an open, unstructured HIIT activity. • Select HIIT Timers > AMRAP to record as many rounds as possible during a set time period. •... -
Page 28: Climbing Sports
Climbing Sports Recording an Indoor Climbing Activity You can record routes during an indoor climbing activity. A route is a climbing path along an indoor rock wall. 1 From the watch face, press START. 2 Select Climb Indoor. 3 Select Yes to record route statistics. 4 Select a grading system. -
Page 29: Recording A Bouldering Activity
Recording a Bouldering Activity You can record routes during a bouldering activity. A route is a climbing path along a boulder or small rock formation. 1 From the watch face, press START. 2 Select Bouldering. 3 Select a grading system. NOTE: The next time you start a bouldering activity, the device uses this grading system. -
Page 30: Skiing
Skiing Viewing Your Ski Runs Your device records the details of each downhill skiing or snowboarding run using the auto run feature. This feature is turned on by default for downhill skiing and snowboarding. It automatically records new ski runs based on your movement. -
Page 31: Golfing
Golfing Playing Golf Before you play golf, you should charge the watch (Charging the Watch, page 104). 1 From the watch face, press START. 2 Select Golf. 3 Go outside, and wait while the watch locates satellites. 4 Select a course from the list of available courses. 5 If necessary, set your driver distance. - Page 32 7 Select a tee box. The hole information screen appears. Current hole number Distance to the back of the green Distance to the middle of the green Distance to the front of the green Par for the hole Map of the green Driver distance from the tee box NOTE: Because pin locations change, the watch calculates the distance to the front, middle, and back of the green, but not the actual pin location.
-
Page 33: Golf Menu
Move Flag: Allows you to move the pin location to get a more precise distance measurement (Moving the Flag, page 25). Measure Shot: Shows the distance of your previous shot recorded with the Garmin AutoShot feature (Viewing ™ Measured Shots, page 26). -
Page 34: Viewing Measured Shots
Viewing Measured Shots Before the device can automatically detect and measure shots, you must enable scoring. Your device features automatic shot detection and recording. Each time you take a shot along the fairway, the device records your shot distance so you can view it later. TIP: Automatic shot detection works best when you wear the device on your leading wrist and make good contact with the ball. -
Page 35: About Stableford Scoring
About Stableford Scoring When you select the Stableford scoring method (Activities and App Settings, page 30), points are awarded based on the number of strokes taken relative to par. At the end of a round, the highest score wins. The device awards points as specified by the United States Golf Association. -
Page 36: Big Numbers Mode
Big Numbers Mode You can change the size of the numbers on the hole information screen. Hold MENU, select the activity settings, and select Big Numbers. The distance to the back of the green The distance to the middle of the green or selected pin position The distance to the front of the green The current hole number The par for the current hole... -
Page 37: Adding Or Removing A Favorite Activity
Adding or Removing a Favorite Activity The list of your favorite activities appears when you press START from the watch face, and it provides quick access to the activities you use most frequently. You can add or remove favorite activities at any time. 1 Hold MENU. -
Page 38: Creating A Custom Activity
Creating a Custom Activity 1 From the watch face, press START. 2 Select Add. 3 Select an option: • Select Copy Activity to create your custom activity starting from one of your saved activities. • Select Other to create a new custom activity. 4 If necessary, select an activity type. - Page 39 25 minutes of inactivity. The extended mode can result in shorter battery life between charges. Record Activity: Enables activity FIT file recording for golf activities. FIT files record fitness information that is tailored for Garmin Connect. Recording Interval: Sets the frequency for recording track points during an expedition. By default, GPS track points are recorded once an hour, and they are not recorded after sunset.
- Page 40 Vibration Alerts: Enables alerts that notify you to inhale or exhale during a breathwork activity. Workout Videos: Enables instructive workout animations for a strength, cardio, yoga, or Pilates activity. Animations are available for pre-installed workouts and workouts downloaded from your Garmin Connect account.
-
Page 41: Activity Alerts
Activity Alerts You can set alerts for each activity, which can help you to train toward specific goals, to increase your awareness of your environment, and to navigate to your destination. Some alerts are available only for specific activities. There are three types of alerts: event alerts, range alerts, and recurring alerts. Event alert: An event alert notifies you once. -
Page 42: Activity Map Settings
Activity: Sets an activity for routing. The watch calculates routes optimized for the type of activity you are doing. Popularity Routing: Calculates routes based on the most popular runs and rides from Garmin Connect. Courses: Sets how you navigate courses using the watch. Use the Follow Course option to navigate a course exactly as it appears, without recalculating. -
Page 43: Using Climbpro
Using ClimbPro The ClimbPro feature helps you manage your effort for the upcoming climbs on a course. You can view climb details, including gradient, distance, and elevation gain, before or in real time while following a course. Cycling climb categories, based on length and gradient, are indicated by color. 1 Hold MENU. -
Page 44: Satellite Settings
Your device includes several preloaded workouts for multiple activities. You can create and find more workouts using Garmin Connect, or select a training plan that has built-in workouts and transfer them to your device. You can schedule workouts using Garmin Connect. You can plan workouts in advance and store them on your device. -
Page 45: Starting A Workout
Starting a Workout Your device can guide you through multiple steps in a workout. 1 From the watch face, press START. 2 Select an activity. 3 Hold MENU. 4 Select Training > Workouts. 5 Select a workout. NOTE: Only workouts that are compatible with the selected activity appear in the list. 6 Select View to view a list of workout steps (optional). -
Page 46: Starting An Interval Workout
1 From the watch face, select START > Pool Swim > Options > Training. 2 Select an option: • Select Workouts to do workouts downloaded from Garmin Connect. • Select Training Calendar to do or view your scheduled workouts. 3 Follow the on-screen instructions. -
Page 47: About The Training Calendar
You can also create a pace band for a known course to optimize your pace effort based on elevation changes. You can create a PacePro plan using the Garmin Connect app. You can preview the splits and elevation plot before you run the course. -
Page 48: Creating A Pacepro Plan On Your Watch
Creating a PacePro Plan on Your Watch Before you can create a PacePro plan on your watch, you must create a course (Creating and Following a Course on Your Device, page 96). 1 From the watch face, press START. 2 Select an outdoor running activity. 3 Hold MENU. -
Page 49: Starting A Pacepro Plan
Segments You can send running or cycling segments from your Garmin Connect account to your device. After a segment is saved to your device, you can race a segment, trying to match or exceed your personal record or other participants who have raced the segment. -
Page 50: Strava™ Segments
You can download Strava segments to your quatix device. Follow Strava segments to compare your performance with your past rides, friends, and pros who have ridden the same segment. To sign up for a Strava membership, go to the segments menu in your Garmin Connect account. For more information, go to www.strava.com. -
Page 51: Using Virtual Partner
5 Select an option: • Select From History to select a previously recorded activity from your device. • Select Downloaded to select an activity you downloaded from your Garmin Connect account. 6 Select the activity. The Virtual Partner screen appears indicating your estimated finish time. -
Page 52: History
History History includes time, distance, calories, average pace or speed, lap data, and optional sensor information. NOTE: When the device memory is full, your oldest data is overwritten. Using History History contains previous activities you have saved on your watch. The watch has a history glance for quick access to your activity data (Glances, page 47). -
Page 53: Restoring A Personal Record
Restoring a Personal Record You can set each personal record back to the one previously recorded. 1 From the watch face, hold MENU. 2 Select History > Records. 3 Select a sport. 4 Select a record to restore. 5 Select Previous > Yes. NOTE: This does not delete any saved activities. -
Page 54: Customizing The Watch Face
Customizing the Watch Face Before you can activate a Connect IQ watch face, you must install a watch face from the Connect IQ store (Connect IQ Features, page 86). You can customize the watch face information and appearance, or activate an installed Connect IQ watch face. 1 From the watch face, hold MENU. -
Page 55: Glances
Tracks your floors climbed and progress toward your goal. Displays scheduled workouts when you select a Garmin coach adaptive training plan in Garmin coach your Garmin Connect account. The plan adjusts to your current level of fitness, coaching and schedule preferences, and race date. Golf Displays golf scores and statistics for your last round. - Page 56 Name Description Music controls Provides music player controls for your phone or watch music. Displays a dynamic summary of your activity today. The metrics include timed activities, My day intensity minutes, floors climbed, steps, calories burned, and more. Alerts you to incoming calls, texts, social network updates, and more, based on your Notifications phone notification settings (Enabling Bluetooth Notifications, page...
-
Page 57: Viewing The Glance Loop
51 to 75 is high reserve energy, and 76 to 100 is very high reserve energy. You can sync your watch with your Garmin Connect account to view your most up-to-date Body Battery level, long-term trends, and additional details (Tips for Improved Body Battery Data, page 49). -
Page 58: Performance Measurements
(Viewing Your Predicted Race Times, page 52). HRV stress test: The heart rate variability (HRV) stress test requires a Garmin chest heart rate monitor. The watch records your heart rate variability while standing still for 3 minutes. It provides your overall stress level. -
Page 59: About Vo2 Max. Estimates
On the device, your VO2 max. estimate appears as a number, description, and position on the color gauge. On your Garmin Connect account, you can view additional details about your VO2 max. estimate, such as where it ranks for your age and gender. -
Page 60: Viewing Your Predicted Race Times
The watch analyzes several weeks of your training data to refine the race time estimates. TIP: If you have more than one Garmin device, you can enable the Physio TrueUp feature, which allows your ™... -
Page 61: Performance Condition
Viewing Your Heart Rate Variability and Stress Level This feature requires a Garmin chest heart rate monitor. Before you can view your heart rate variability (HRV) stress level, you must put on a heart rate monitor and pair it with your device... -
Page 62: Getting Your Ftp Estimate
Getting Your FTP Estimate Before you can get your functional threshold power (FTP) estimate, you must pair a chest heart rate monitor and power meter with your watch (Pairing Your Wireless Sensors, page 73), and you must get your VO2 max. estimate (Getting Your VO2 Max. -
Page 63: Lactate Threshold
Performing a Guided Test to Determine Your Lactate Threshold This feature requires a Garmin chest heart rate monitor. Before you can perform the guided test, you must put on a heart rate monitor and pair it with your device (Pairing Your Wireless Sensors, page 73). -
Page 64: Viewing Your Real-Time Stamina
Viewing Your Real-Time Stamina Your watch can provide real-time stamina estimates based on your heart rate data and VO2 max. estimate (About VO2 Max. Estimates, page 51). 1 Hold MENU. 2 Select Activities & Apps. 3 Select a run or bike activity. 4 Select the activity settings. -
Page 65: Training Status
Cycling performance measurements require a heart rate monitor and a power meter. These estimates are provided and supported by Firstbeat Analytics. For more information, go to garmin.com /performance-data/running. NOTE: The estimates may seem inaccurate at first. The watch requires you to complete a few activities to learn about your performance. -
Page 66: Training Status Levels
Training Status Levels Training status shows you how your training affects your fitness level and performance. Your training status is based on changes to your training load and VO2 max. over an extended time period. You can use your training status to help plan future training and continue improving your fitness level. - Page 67 Training Load Focus In order to maximize performance and fitness gains, training should be distributed across three categories: low aerobic, high aerobic, and anaerobic. Training load focus shows you how much of your training is currently in each category and provides training targets. Training load focus requires at least 7 days of training to determine if your training load is low, optimal, or high.
-
Page 68: Recovery Time
Recovery Time You can use your Garmin device with wrist-based heart rate or a compatible chest heart rate monitor to display how much time remains before you are fully recovered and ready for the next hard workout. NOTE: The recovery time recommendation uses your VO2 max. estimate and may seem inaccurate at first. The device requires you to complete a few activities to learn about your performance. -
Page 69: Pausing And Resuming Your Training Status
1 When you want to pause your training status, select an option: • From the training status glance, hold MENU, and select Options > Pause Training Status. • From your Garmin Connect settings, select Performance Stats > Training Status > > Pause Training Status. -
Page 70: Controls
Controls The controls menu lets you quickly access watch features and options. You can add, reorder, and remove the options in the controls menu (Customizing the Controls Menu, page 63). From any screen, hold LIGHT. Icon Name Description Alarm Clock Select to add or edit an alarm (Setting an Alarm, page Altimeter... -
Page 71: Customizing The Controls Menu
Select to sync your watch with the time on your phone or using satellites. Touch Select to enable or disable touchscreen controls. Select to open your Garmin Pay wallet and pay for purchases with your watch Wallet (Garmin Pay, page 64). -
Page 72: Using The Led Flashlight
4 Press LIGHT to adjust the brightness. Garmin Pay The Garmin Pay feature allows you to use your watch to pay for purchases in participating stores using credit or debit cards from a participating financial institution. Setting Up Your Garmin Pay Wallet You can add one or more participating credit or debit cards to your Garmin Pay wallet. -
Page 73: Paying For A Purchase Using Your Watch
• To delete the card, select Changing Your Garmin Pay Passcode You must know your current passcode to change it. If you forget your passcode, you must reset the Garmin Pay feature for your quatix watch, create a new passcode, and reenter your card information. -
Page 74: Wrist Heart Rate
• For more information about accuracy, go to garmin.com/ataccuracy. • For more information about watch wear and care, go to www.garmin.com/fitandcare. Tips for Erratic Heart Rate Data If the heart rate data is erratic or does not appear, you can try these tips. -
Page 75: Wrist Heart Rate Monitor Settings
The watch starts broadcasting your heart rate data. 3 Pair your watch with your compatible device. NOTE: The pairing instructions differ for each Garmin compatible device. See your owner's manual. 4 Press STOP to stop broadcasting your heart rate data. -
Page 76: Pulse Oximeter
On the watch, your pulse oximeter reading appears as an oxygen saturation percentage and color on the graph. On your Garmin Connect account, you can view additional details about your pulse oximeter readings, including trends over multiple days. -
Page 77: Getting Pulse Oximeter Readings
Getting Pulse Oximeter Readings You can manually begin a pulse oximeter reading by viewing the pulse oximeter glance. The glance displays your most recent blood oxygen saturation percentage, a graph of your hourly average readings for the last 24 hours, and a graph of your elevation for the last 24 hours. NOTE: The first time you view the pulse oximeter glance, the watch must acquire satellite signals to determine your elevation. -
Page 78: Compass Settings
Compass Settings Hold MENU, and select Sensors & Accessories > Compass. Calibrate: Allows you to manually calibrate the compass sensor (Calibrating the Compass Manually, page 70). Display: Sets the directional heading on the compass to letters, degrees, or milliradians. North Ref.: Sets the north reference of the compass (Setting the North Reference, page 70). -
Page 79: Calibrating The Barometric Altimeter
Calibrating the Barometric Altimeter Your watch was already calibrated at the factory, and the watch uses automatic calibration at your GPS starting point by default. You can manually calibrate the barometric altimeter if you know the correct elevation. 1 Hold MENU. 2 Select Sensors &... -
Page 80: Wireless Sensors
(Customizing the Data Screens, page 29). If your watch was packaged with a sensor, they are already paired. For information about specific Garmin sensor compatibility, purchasing, or to view the owner's manual, go to buy.garmin.com for that sensor. Sensor Type... -
Page 81: Pairing Your Wireless Sensors
The first time you connect a wireless sensor to your watch using ANT+ or Bluetooth technology, you must pair the watch and sensor. If the sensor has both ANT+ and Bluetooth technology, Garmin recommends that you pair using ANT+ technology. After they are paired, the watch connects to the sensor automatically when you start an activity and the sensor is active and within range. -
Page 82: Training With Running Dynamics
NOTE: Ground contact time and balance appears only while running. It is not calculated while walking. inReach Remote The inReach remote function allows you to control your inReach device using your quatix device. Go to buy.garmin.com to purchase a compatible inReach device. Using the inReach Remote... -
Page 83: Controlling A Virb Action Camera
Controlling a VIRB Action Camera Before you can use the VIRB remote function, you must enable the remote setting on your VIRB camera. See the VIRB Series Owner's Manual for more information. 1 Turn on your VIRB camera. 2 Pair your VIRB camera with your quatix watch (Pairing Your Wireless Sensors, page 73). -
Page 84: Xero Laser Location Settings
Share Mode: Allows you to share laser location information publicly or broadcast it privately. Your device can display several types of Garmin map data, including topographical contours, nearby points of interest, ski resort maps, and golf courses. You can use the Map Manager to download additional maps or manage map storage. -
Page 85: Saving Or Navigating To A Location On The Map
Saving or Navigating to a Location on the Map You can select any location on the map. You can save the location or start navigating to it. 1 From the map, select an option: • To use the touchscreen, tap the map, tap and drag to position the crosshairs, and press UP or DOWN to zoom in or out. -
Page 86: Map Settings
Map Settings You can customize how the map appears in the map app and data screens. NOTE: If necessary, you can customize the map settings for specific activities instead of using the system settings (Activity Map Settings, page 34). Hold MENU, and select Map. Map Manager: Shows the downloaded map versions and allows you to download additional maps (Managing Maps, page... -
Page 87: Marine Map Settings
Connecting to a Third-Party Provider Before you can download music or other audio files to your compatible watch from a supported third-party provider, you must connect to the provider using the Garmin Connect app. 1 From the Garmin Connect app, select 2 Select Garmin Devices, and select your watch. -
Page 88: Downloading Audio Content From A Third-Party Provider
Downloading Personal Audio Content Before you can send your personal music to your device, you must install the Garmin Express application on your computer (www.garmin.com/express). You can load your personal audio files, such as .mp3 and .m4a files, to a quatix device from your computer. For more information, go to garmin.com/musicfiles. -
Page 89: Music Playback Controls
Music Playback Controls NOTE: Music playback controls may look different, depending on the selected music source. Select to view more music playback controls. Select to browse the audio files and playlists for the selected source. Select to adjust the volume. Select to play and pause the current audio file. -
Page 90: Phone Connectivity Features
• If you previously skipped the pairing process, hold MENU, and select Connectivity > Pair Phone. 3 Select an option to add your watch to your account: • If this is the first time you are pairing a device with the Garmin Connect app, follow the on-screen instructions. -
Page 91: Receiving An Incoming Phone Call
® ® • If you are using an Android phone, from the Garmin Connect app, select Settings > Notifications. Turning Off the Bluetooth Phone Connection You can turn off the Bluetooth phone connection from the controls menu. -
Page 92: Playing Audio Prompts During An Activity
The next time your device has a Wi‑Fi connection, the files are wirelessly sent to your device. Connecting to a Wi‑Fi Network You must connect your watch to the Garmin Connect app on your phone or to the Garmin Express application on your computer before you can connect to a Wi‑Fi network. -
Page 93: Garmin Connect
Garmin Connect You can connect with your friends on Garmin Connect. Garmin Connect gives you the tools to track, analyze, share, and encourage each other. Record the events of your active lifestyle including runs, walks, rides, swims, hikes, triathlons, and more. To sign up for a free account, you can download the app from the app store on your phone (garmin.com/connectapp), or go to connect.garmin.com. -
Page 94: Using Garmin Connect On Your Computer
Garmin Express application to upload your activity data to your Garmin Connect account and to send data, such as workouts or training plans, from the Garmin Connect website to your watch. You can also add music to your watch (Downloading Personal Audio Content, page 80). -
Page 95: Downloading Connect Iq Features Using Your Computer
™ You can use the Garmin Pilot app to create flight plans and send them to your quatix watch. The Garmin Pilot app is available for some mobile devices. See the app store for your mobile device for availability and compatibility information. -
Page 96: Fitness Goals
• Run often with the wrist or chest heart rate monitor. • Try a few heart rate training plans, available from your Garmin Connect account. • View your heart rate trends and time in zones using your Garmin Connect account. User Profile... -
Page 97: Heart Rate Zone Calculations
If you know your functional threshold power (FTP) value, you can enter it and allow the software to calculate your power zones automatically. You can manually adjust your zones on the device or using your Garmin Connect account. 1 Hold MENU. -
Page 98: Safety And Tracking Features
3 Follow the on-screen instructions. Adding Contacts You can add up to 50 contacts to the Garmin Connect app. Contact emails can be used with the LiveTrack feature. Three of these contacts can be used as emergency contacts (Adding Emergency Contacts, page 90). -
Page 99: Turning Incident Detection On And Off
NOTE: Incident detection is available only for certain outdoor activities. When an incident is detected by your quatix watch and your phone is connected, the Garmin Connect app can send an automated text message and email with your name and GPS location to your emergency contacts. You have 15 seconds to cancel the message. -
Page 100: Tips For Grouptrack Sessions
Your device creates a daily step goal automatically, based on your previous activity levels. As you move during the day, the device shows your progress toward your daily goal. If you choose not to use the auto goal feature, you can set a personalized step goal on your Garmin Connect account. -
Page 101: Intensity Minutes
While you are sleeping, the watch automatically detects your sleep and monitors your movement during your normal sleep hours. You can set your normal sleep hours in the user settings on your Garmin Connect account. Sleep statistics include total hours of sleep, sleep stages, sleep movement, and sleep score. You can view your sleep statistics on your Garmin Connect account. -
Page 102: Navigating To A Destination
Navigating to a Destination You can use your device to navigate to a destination or follow a course. 1 From the watch face, press START. 2 Select an activity. 3 Hold MENU. 4 Select Navigation. 5 Select a category. 6 Respond to the on-screen prompts to choose a destination. 7 Select Go To. -
Page 103: Navigating To Your Starting Point During An Activity
Navigating to Your Starting Point During an Activity You can navigate back to the starting point of your current activity in a straight line or along the path you traveled. This feature is available only for activities that use GPS. 1 During an activity, press STOP. -
Page 104: Marking And Starting Navigation To A Man Overboard Location
2 Select Stop Navigation. Courses You can send a course from your Garmin Connect account to your device. After it is saved to your device, you can navigate the course on your device. You can follow a saved course simply because it is a good route. For example, you can save and follow a bike friendly commute to work. -
Page 105: Creating A Round-Trip Course
• To view a list of ascents in the course, select View Climbs. Creating a Course on Garmin Connect Before you can create a course on the Garmin Connect app, you must have a Garmin Connect account (Garmin Connect, page 85). -
Page 106: Viewing Or Editing Course Details
Viewing or Editing Course Details You can view or edit course details before you navigate a course. 1 From the watch face, press START. 2 Select an activity. 3 Hold MENU. 4 Select Navigation > Courses. 5 Press START to select a course. 6 Select an option: •... -
Page 107: Setting Up A Heading Bug
Setting Up a Heading Bug You can set up a heading indicator to display on your data pages while navigating. The indicator points to your target heading. 1 Hold MENU. 2 Select Navigation > Heading Bug. Setting Navigation Alerts You can set alerts to help you navigate to your destination. 1 Hold MENU. -
Page 108: Changing The Power Mode
Changing the Power Mode You can change the power mode to extend battery life during an activity. 1 During an activity, hold MENU. 2 Select Power Mode. 3 Select an option. The watch displays the hours of battery life available with the selected power mode. Customizing Power Modes Your device comes preloaded with several power modes, allowing you to quickly adjust system settings, activity settings, and GPS settings to extend battery life during an activity. -
Page 109: System Settings
The Every Second recording option provides more detailed activity recordings, but may not record entire activities that last for longer periods of time. USB Mode: Sets the watch to use MTP (media transfer protocol) or Garmin mode when connected to a computer. -
Page 110: Setting Time Alerts
Syncing the Time Each time you turn on the device and acquire satellites or open the Garmin Connect app on your paired phone, the device automatically detects your time zones and the current time of day. You can also manually sync the time when you change time zones, and to update for daylight saving time. -
Page 111: Customizing The Hot Keys
4 Select a unit of measure. Syncing Activities and Performance Measurements You can sync activities and performance measurements from other Garmin devices to your quatix watch using your Garmin Connect account. This allows your watch to more accurately reflect your training status and fitness. -
Page 112: Device Information
Device Information Charging the Watch WARNING This device contains a lithium-ion battery. See the Important Safety and Product Information guide in the product box for product warnings and other important information. NOTICE To prevent corrosion, thoroughly clean and dry the contacts and the surrounding area before charging or connecting to a computer. -
Page 113: Specifications
Up to 40 days typical use Up to 139 days with solar The device withstands pressure equivalent to a depth of 100 m. For more information, go to www.garmin.com/waterrating. All-day wear with 3 hr./day outside in 50,000 lux conditions With use in 50,000 lux conditions... -
Page 114: Device Care
Corrosion can prevent charging and data transfer. 1 Wipe the watch using a cloth dampened with a mild detergent solution. 2 Wipe it dry. After cleaning, allow the watch to dry completely. TIP: For more information, go to www.garmin.com/fitandcare. Changing the QuickFit Bands ®... -
Page 115: Data Management
4 Press the Delete key on your keyboard. NOTE: Mac operating systems provide limited support for MTP file transfer mode. You must open the Garmin drive on a Windows operating system. You should use the Garmin Express application to remove music files from your device. -
Page 116: My Phone Will Not Connect To The Watch
• Remove your watch from the Garmin Connect app and the Bluetooth settings on your phone to retry the pairing process. • If you bought a new phone, remove your watch from the Garmin Connect app on the phone you intend to stop using. -
Page 117: Resetting All Default Settings
Delete Data and Reset Settings. NOTE: If you have set up a Garmin Pay wallet, this option deletes the wallet from your device. If you have music stored on your device, this option deletes your stored music. -
Page 118: Improving Gps Satellite Reception
◦ Sync your watch to the Garmin Connect app using your Bluetooth enabled phone. ◦ Connect your watch to your Garmin account using a Wi‑Fi wireless network. While connected to your Garmin account, the watch downloads several days of satellite data, allowing it to quickly locate satellite signals. -
Page 119: Appendix
NOTE: Not all data fields are available for all activity types. Some data fields require ANT+ or Bluetooth accessories to display data. Some data fields appear in more than one category on the watch. TIP: You can also customize the data fields from the watch settings in the Garmin Connect app. Cadence Fields... - Page 120 Distance Fields Name Description Distance The distance traveled for the current track or activity. Interval Distance The distance traveled for the current interval. Lap Distance The distance traveled for the current lap. Last Lap Distance The distance traveled for the last completed lap. Nautical Distance The distance traveled in nautical meters or nautical feet.
- Page 121 Gears Name Description Di2 Battery The remaining battery power of a Di2 sensor. Front The front bike gear from a gear position sensor. Gear Battery The battery status of a gear position sensor. Gear Combo The current gear combination from a gear position sensor. Gears The front and rear bike gears from a gear position sensor.
- Page 122 Heart Rate Fields Name Description The percentage of heart rate reserve (maximum heart rate minus resting heart % Heart Rate Reserve rate). Aerobic Training Effect The impact of the current activity on your aerobic fitness level. Anaerobic Training Effect The impact of the current activity on your anaerobic fitness level. Average % Heart Rate The average percentage of heart rate reserve (maximum heart rate minus Reserve...
- Page 123 Muscle Oxygen Fields Name Description Muscle O2 Saturation % The estimated muscle oxygen saturation percentage for the current activity. Total Hemoglobin The estimated total hemoglobin concentration in the muscle. Navigation Fields Name Description The direction from your current location to a destination. You must be navigating for this Bearing data to appear.
- Page 124 Name Description Vertical Speed to The rate of ascent or descent to a predetermined altitude. You must be navigating for Target this data to appear. Other Fields Name Description Active Calories The calories burned during the activity. Ambient Pressure The uncalibrated environmental pressure. Barometric Pressure The current calibrated environmental pressure.
- Page 125 Name Description Total Calories The amount of total calories burned for the day. Pace Fields Name Description 500m Pace The current rowing pace per 500 meters. Average 500m Pace The average rowing pace per 500 meters for the current activity. Average Pace The average pace for the current activity.
- Page 126 Power Fields Name Description % Functional Threshold The current power output as a percentage of functional threshold power. Power 3s Balance The 3-second moving average of the left/right power balance. 3s Power The 3-second moving average of power output. 10s Balance The 10-second moving average of the left/right power balance.
- Page 127 Name Description Maximum Lap Power The top power output for the current lap. Maximum Power The top power output for the current activity. Normalized Power The Normalized Power for the current activity. The measurement of how evenly a rider is applying force to the pedals Pedal Smoothness throughout each pedal stroke.
- Page 128 Run Dynamics Name Description Average GCT Balance The average ground contact time balance for the current session. Average Ground Contact The average amount of ground contact time for the current activity. Time Average Stride Length The average stride length for the current session. Average Vertical Oscilla...
- Page 129 Speed Fields Name Description Average Moving Speed The average speed when moving for the current activity. The average speed for the current activity, including both moving and stopped Average Overall Speed speeds. Average Speed The average speed for the current activity. The average speed of travel in knots for the current activity, regardless of the course Avg.
- Page 130 Stroke Fields Name Description Average Distance Per Stroke Swimming. The average distance traveled per stroke during the current activity. Paddle sports. The average distance traveled per stroke during the current Average Distance Per Stroke activity. Paddle sports. The average number of strokes per minute (spm) during the Average Stroke Rate current activity.
- Page 131 Name Description Strokes Paddle sports. The total number of strokes for the current activity. Swolf Fields Name Description The average swolf score for the current activity. Your swolf score is the sum of the time for Average Swolf one length plus the number of strokes for that length (Swim Terminology, page 15).
-
Page 132: Color Gauges And Running Dynamics Data
Elite runners tend to have quick and balanced strides. You can watch the color gauge or data field during your run or view the summary on your Garmin Connect account after your run. As with the other running dynamics data, ground contact time balance is a quantitative measurement to help you learn about your running form. -
Page 133: Vertical Oscillation And Vertical Ratio Data
Vertical Oscillation and Vertical Ratio Data The data ranges for vertical oscillation and vertical ratio are slightly different depending on the sensor and whether it is positioned at the chest (HRM-Pro, HRM-Run , or HRM-Tri accessories) or at the waist (Running ™... -
Page 134: Ftp Ratings
FTP Ratings These tables include classifications for functional threshold power (FTP) estimates by gender. Males Watts per Kilogram (W/kg) Superior 5.05 and greater Excellent From 3.93 to 5.04 Good From 2.79 to 3.92 Fair From 2.23 to 2.78 Untrained Less than 2.23 Females Watts per Kilogram (W/kg) Superior... -
Page 135: Wheel Size And Circumference
Wheel Size and Circumference Your speed sensor automatically detects your wheel size. If necessary, you can manually enter your wheel circumference in the speed sensor settings. The tire size is marked on both sides of the tire. This is not a comprehensive list. You can also measure the circumference of your wheel or use one of the calculators available on the internet. - Page 136 Tire Size Wheel Circumference (mm) 27 × 1-1/4 2161 27 × 1-3/8 2169 29 x 2.1 2288 29 x 2.2 2298 29 x 2.3 2326 650 x 20C 1938 650 x 23C 1944 650 × 35A 2090 650 × 38B 2105 650 ×...
-
Page 137: Symbol Definitions
Symbol Definitions These symbols may appear on the device or accessory labels. Alternating current. The device is suitable for alternating current. Direct current. The device is suitable for direct current only. Fuse. Indicates a fuse specification or location. WEEE disposal and recycling symbol. The WEEE symbol is attached to the product in compliance with the EU directive 2012/19/EU on Waste Electrical and Electronic Equipment (WEEE). - Page 138 April 2022 GUID-6D76A13F-2195-4287-9B0C-2124AECF9717 v1...
Need help?
Do you have a question about the QUATIX 7 Solar and is the answer not in the manual?
Questions and answers