Table of Contents
Advertisement
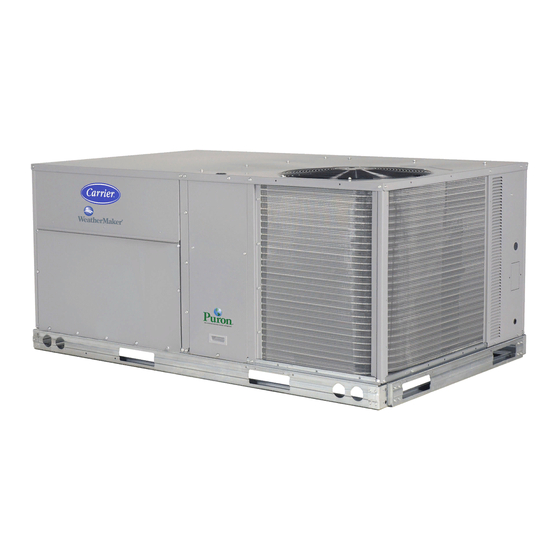
48TCA04---A12
Nominal 3 to 10 Tons
With Puron® (R---410A) Refrigerant
Service and Maintenance Instructions
TABLE OF CONTENTS
. . . . . . . . . . . . . . . . . . . . . . . . . . . . . . . . . . . .
. . . . . . . . . . . . . . . . . . . . . . . . .
. . . . . . . . . . . . . . . . . . . . . . . . .
. . . . . . . . . . . . . . . . . . . . . . . . . . . . . .
. . . . . . . . . . . . . . . . . . . . . . . .
. . . . . . . . . . . . . . . . . . . . . . . . . . . . . . . .
. . . . . . . . . . . . . . . . . . . .
. . . . . . . . . . .
. . . . . . . . . . . . . .
. . . . . . . . . . . . . .
. . . . . . . . . . . . . . . . .
. . . . . . . . . . . . . . . . . . . .
. . . . . . . . . . . . . . . . . . . . . . .
. . . . . . . . . . . . . . . . . . . . . .
. . . . . . . . . . . . . . . . . . .
. . . . . . . . . . . . . . . . . .
. . . . . . . . . . . . . . . . . . . . . .
. . . . . . . .
. . . . . . . . . . . . . . . .
. . . . . . . . . . . . . . . . . . . . .
. . . . . . . . . . . . . . . . .
. . . . . . . . . . . . . . . .
. . . . . . . . . . .
. . . . . . . . . . . . .
. . . . . . . .
. . . . . . . . . . . . . . . . .
SAFETY CONSIDERATIONS
1
Installation and servicing of air-conditioning equipment
can be hazardous due to system pressure and electrical
2
components. Only trained and qualified service personnel
4
should
install,
5
equipment. Untrained personnel can perform the basic
maintenance functions of replacing filters. Trained service
8
personnel should perform all other operations.
9
When working on air-conditioning equipment, observe
14
precautions in the literature, tags and labels attached to
15
the unit, and other safety precautions that may apply.
22
Follow all safety codes. Wear safety glasses and work
gloves. Use quenching cloth for unbrazing operations.
22
Have fire extinguishers available for all brazing
34
operations.
42
Follow all safety codes. Wear safety glasses and work
55
gloves. Use quenching cloth for brazing operations. Have
63
fire extinguisher available. Read these instructions
thoroughly and follow all warnings or cautions attached to
66
the unit. Consult local building codes and National
66
Electrical Code (NEC) for special requirements.
68
Recognize safety information. This is the safety- - alert
68
symbol
. When you see this symbol on the unit and in
71
instructions or manuals, be alert to the potential for
personal injury.
81
.
82
Understand the signal words DANGER, WARNING, and
CAUTION. These words are used with the safety- - alert
83
symbol. DANGER identifies the most serious hazards
87
which will result in severe personal injury or death.
99
WARNING signifies a hazard which could result in
personal injury or death. CAUTION is used to identify
104
unsafe practices which may result in minor personal
injury or product and property damage. NOTE is used to
105
highlight suggestions which will result in enhanced
107
installation, reliability, or operation.
repair,
or
service
air-conditioning
Advertisement
Table of Contents

Related Manuals for Carrier 48TCA04---A12


Summary of Contents for Carrier 48TCA04---A12
-
Page 1: Table Of Contents
48TCA04---A12 Nominal 3 to 10 Tons With Puron® (R---410A) Refrigerant Service and Maintenance Instructions TABLE OF CONTENTS SAFETY CONSIDERATIONS ....UNIT ARRANGEMENT AND ACCESS... -
Page 2: Unit Arrangement And Access
WARNING FIRE, EXPLOSION HAZARD Failure to follow this warning could result in personal injury, death and/or property damage. Refer to the User’s Information Manual provided with this unit for more details. Do not store or use gasoline or other flammable vapors and liquids in the vicinity of this or any other appliance. -
Page 3: Seasonal Maintenance
Quarterly Inspection (and 30 days after initial start) S Return air filter replacement S Outdoor hood inlet filters cleaned S Belt tension checked S Belt condition checked S Pulley alignment checked S Fan shaft bearing locking collar tightness checked S Condenser coil cleanliness checked S Condensate drain checked Seasonal Maintenance These items should be checked at the beginning of each... -
Page 4: Supply Fan (Blower) Section
Fig. 4 - - Screens Installed on Outdoor- - Air Hood (Sizes 7- - 1/2 to 12- - 1/2 Tons Shown) To remove the screen, loosen the screws in the top retainer and slip the retainer up until the filter can be removed. Re- - install by placing the frame in its track, rotating the retainer back down and tighten all screws. -
Page 5: Cooling
To change fan speed: 1. Shut off unit power supply. 2. Loosen belt by loosening fan motor mounting nuts. (See Fig. 5.) 3. Loosen movable pulley flange setscrew. (See Fig. 6.) 4. Screw movable flange toward fixed flange to increase speed and away from fixed flange to decrease speed. - Page 6 This cleaner available from Carrier Components Division as part number P902- - 0301 for a one gallon container, and part number P902- - 0305 for a 5 gallon container. It is recommended that all coils,...
- Page 7 6. Use a water hose or other suitable equipment to flush down between the 2 coil sections to remove dirt and debris. Clean the outer surfaces with a stiff brush in the normal manner. 7. Secure inner and outer coil rows together with a field- - supplied fastener.
-
Page 8: Refrigerant Charge
This surface provides a metal to metal seal when torqued into the seat. Appropriate handling is required to not scratch or dent the surface. Fig. 11 - - CoreMax Access Port Assembly Refer Carrier GTAC2- - 5 Charging, CORE DEPRESSOR PER ARI 720 +.01/-.035 1/2"... -
Page 9: Cooling Charging Charts
NOMINAL TONS SIZE DESIGNATION REFERENCE COOLING CHARGING CHARTS EXAMPLE: Model 48TC*A04 Outdoor Temperature Suction Pressure Suction Temperature should be Fig. 12 - - Cooling Charging Charts ....85_F (29_C) . - Page 10 COOLING CHARGING CHARTS (cont.) C08204 C08228 Fig. 12 (cont.) - - Cooling Charging Charts...
- Page 11 COOLING CHARGING CHARTS (cont.) C08229 C08437 Fig. 12 (cont.) - - Cooling Charging Charts...
- Page 12 COOLING CHARGING CHARTS (cont.) C08438 C08439 Fig. 12 (cont.) - - Cooling Charging Charts...
- Page 13 PROBLEM CAUSE Power failure. Fuse blown or circuit breaker tripped. Defective thermostat, contactor, transformer, Compressor and Condenser or control relay. Fan Will Not Start. Insufficient line voltage. Incorrect or faulty wiring. Thermostat setting too high. Faulty wiring or loose connections in compressor circuit.
-
Page 14: Convenience Outlets
Compressor Lubrication The compressor is charged with the correct amount of oil at the factory. CAUTION UNIT DAMAGE HAZARD Failure to follow this caution may result in damage to components. The compressor is in a PuronR refrigerant system and uses a polyolester (POE) oil. This oil is extremely hygroscopic, meaning it absorbs water readily. -
Page 15: Smoke Detectors
breaker requirements and disconnect switch size and location. Route 125- - v power supply conductors into the bottom of the utility box containing the duplex receptacle. Unit- - powered type: A unit- - mounted transformer is factory- - installed to stepdown the main power supply voltage to the unit to 115- - v at the duplex receptacle. -
Page 16: Smoke Detector Locations
Duct smoke sensor controller Conduit nuts (supplied by installer) Conduit support plate Terminal block cover Controller housing and electronics Conduit couplings (supplied by installer) Fastener (2X) Alarm Fig. 16 - - Controller Assembly Sensor The sensor (see Fig. 17) includes a plastic housing, a printed circuit board, a clear plastic cover, a sampling tube inlet and an exhaust tube. -
Page 17: Completing Installation Of Return Air Smoke Sensor
Return Air without Economizer — The sampling tube is located across the return air opening on the unit basepan. See Fig. 19. The holes in the sampling tube face downward, into the return air stream. The sampling tube is connected via tubing to the return air sensor that is mounted on a bracket high on the partition between return filter and controller location. - Page 18 Fig. 23 - - Typical Smoke Detector System Wiring Highlight C: 24- - v power signal via ORN lead is removed at Smoke Detector input on LCTB; all unit operations cease immediately. PremierLink and RTU- - MP Controls: Unit operating functions (fan, cooling and heating) are terminated as described above.
- Page 19 CAUTION OPERATIONAL TEST HAZARD Failure to follow this caution may result in personnel and authority concern. This test places the duct detector into the alarm state. Disconnect all auxiliary equipment from the controller before performing the test. If the duct detector is connected to a fire alarm system, notify the proper authorities before performing the test.
- Page 20 SD- - TRK4 Remote Alarm Test Procedure 1. Turn the key switch to the RESET/TEST position for seven seconds. 2. Verify that the test/reset station’s Alarm LED turns 3. Reset the sensor by turning the key switch to the RESET/TEST position for two seconds. 4.
- Page 21 LED on both the sensor and the controller are on and all other LEDs are off. Alarm State The smoke detector enters the alarm state when the amount of smoke particulate in the sensor’s sensing chamber exceeds the alarm threshold value. (See Table 3.) Upon entering the alarm state: S The sensor’s Alarm LED and the controller’s Alarm LED turn on.
-
Page 22: Protective Devices
Controller’s Power LED is Off 1. Make sure the circuit supplying power to the control- ler is operational. If not, make sure JP2 and JP3 are set correctly on the controller before applying power. 2. Verify that power is applied to the controller’s supply input terminals. - Page 23 Limit Switch and Shield Fig. 28 - - Limit Switch Location Fuel Types and Pressures Natural Gas — The 48TC unit is factory- - equipped for use with Natural Gas fuel at elevation under 2000 ft (610 m). See section Orifice Replacement for information in modifying this unit for installation at elevations above 2000 ft (610 m).
- Page 24 This switch also prevents operation when the propane tank level is low which can result in gas with a high concentration of impurities, additives, and residues that have settled to the bottom of the tank. Operation under these conditions can cause harm to the heat exchanger system.
-
Page 25: Burners And Igniters
Burners and Igniters CAUTION EQUIPMENT DAMAGE HAZARD Failure to follow this caution may result in equipment damage. When working on gas train, do not hit or plug orifice spuds. Main Burners To access burners, remove burner access panel and slide out burner partition. -
Page 26: Burner Ignition
1. Remove manifold pressure tap plug from manifold and connect pressure gauge or manometer. (See Fig. 33.) 2. Turn on electrical supply. 3. Turn on unit main gas valve. 4. Set room thermostat to call for heat. If unit has two- - stage gas valve, verify high- - stage heat operation be- fore attempting to adjust manifold pressure. -
Page 27: Orifice Replacement
This unit uses orifice type LH32RFnnn (where nnn indicates orifice reference size). When replacing unit orifices, order the necessary parts via Carrier RCD. See Table 10 for available orifice sizes. See Table 11 and Table 12 for orifice sizes for Natural Gas and LP fuel usage at various elevations above sea level. - Page 28 2 Stage Single Stage C08210 Fig. 37 - - Gas Valves Red LED-Status C08452 Fig. 38 - - Integrated Gas Control (IGC) Board...
- Page 29 Table 9 – IGC Connections SENSOR LOCATION control box gas section gas section LCTB gas section fan section — gas section control box gas section Table 10 – Orifice Sizes CARRIER PART NUMBER LH32RF129 LH32RF125 LH32RF120 LH32RF116 LH32RF113 LH32RF111 LH32RF110 LH32RF105 LH32RF104 LH32RF102 LH32RF103...
- Page 30 Table 11 – Altitude Compensation* (A04- - A07) 72,000 BTUH Nominal ELEVATION ft (m) Orifice Size Orifice Size 0 --- 2000 (610) 2000 (610) 3000 (914) 4000 (1219) 5000 (1524) 6000 (1829) 7000 (2134) 8000 (2438) 9000 (2743) †40 10000 (3048) †41 11000 (3353) †42...
- Page 31 Table 12 – Altitude Compensation* (A04- - A06) - - Low NO ELEVATION ft (m) NG Orifice Size 0 --- 2000 (610) 2000 (610) 3000 (914) 4000 (1219) 5000 (1524) 6000 (1829) 7000 (2134) 8000 (2438) 9000 (2743) 10000 (3048) 11000 (3353) 12000 (3658) 13000 (3962)
- Page 32 PROBLEM CAUSE Misaligned spark electrodes. No gas at main burners. Water in gas line. Burners Will Not Ignite. No power to furnace. No 24 v power supply to control circuit. Miswired or loose connections. Burned ---out heat anticipator in thermostat. Broken thermostat wires.
- Page 33 ACTION TAKEN BY FLASH DESCRIPTION CODE Normal Operation Hardware Failure No gas heating. Gas valve and igniter Off. Limit Switch Fault Flashes Indoor fan and inducer Indoor fan and inducer Flame Sense Fault Flashes Four Consecutive Limit No gas heating. Flashes Switch Fault Ignition Fault...
-
Page 34: Premierlinkt Control
PremierLink configuration, operating sequences and troubleshooting information. Have a copy of this manual available at unit start- - up. The PremierLink controller requires the use of a Carrier electronic thermostat or a CCN connection for time broadcast to initiate its internal timeclock. This is necessary for broadcast of time of day functions (occupied/unoccupied). - Page 36 Sensors 42,315 factory- - shipped configured for Space Sensor Mode. A 32,651 Carrier T- - 55 or T- - 56 space sensor must be used. T- - 55 25,395 space temperature sensor provides a signal of space 19,903 temperature to the PremierLink control T- - 56 provides...
- Page 37 OAQ ---SEN/RH ---SEN CCN Gnd (WHT) AUX OUT(Power Exhaust) LEGEND: --- Space Temperature Sensor --- Space Temperature Sensor --- Carrier Comfort Network (communication bus) CMPSAFE --- Compressor Safety FILTER --- Dirty Filter Switch Table 16 – PremierLink Sensor Usage RETURN AIR...
- Page 38 TB1 TERMINAL IAQ ---COM/OAQ ---COM/RH ---COM LEGEND: Carrier Comfort Network (communication bus) Thermostat Fan Indoor Air Quality (CO Outdoor Air Quality (CO Return Air Temperature Connect T- - 56 - - See Fig. 45 for T- - 56 internal connections. Install a jumper between SEN and SET terminals as illustrated.
- Page 39 PremierLink Configuration screen for Operating Mode. Default setting is Sensor Mode (value 1). Change the value to 0 to reconfigure the controller for Thermostat Mode. When the PremierLink is configured for Thermostat Mode, these functions are not available: Fire Shutdown (FSD), Remote Occupied (RMTOCC), Compressor Safety (CMPSAFE), Supply Fan Status (SFS), and Filter Pressure Switch (FILTER).
- Page 40 requirements and terminal locations. See Fig. 50 for typical CO sensor wiring schematic. H G 24 VAC 24 VDC 8 7 6 5 4 3 2 1 Fig. 50 - - Indoor/Outdoor Air Quality (CO (33ZCSENCO2) - - Typical Wiring Diagram To accurately monitor the quality of the air in the conditioned air space, locate the sensor near a return- - air grille (if present) so it senses the concentration of CO...
- Page 41 unit shutdown through its NC contact set connected to the unit’s LCTB input. The FSD function is initiated via the smoke detector’s Alarm NO contact set. The PremierLink communicates the smoke detector’s tripped status to the CCN building control. See Fig. 23 for unit smoke detector wiring.
-
Page 42: Rtu- - Mp Control System
4000 ft, with no more than 60 total devices on any 1000- - ft section. Optically isolated RS- - 485 repeaters are required every 1000 ft. NOTE: Carrier device default is 9600 band. COMMUNICATION BUS WIRE SPECIFICATIONS — The CCN Communication Bus wiring is field- - supplied and field- - installed. - Page 43 C07129 Fig. 59 - - RTU- - MP Multi- - Protocol Control Board...
- Page 45 Have a copy of these manuals available at unit start- - up. The RTU- - MP controller requires the use of a Carrier space sensor. A standard thermostat cannot be used with the RTU- - MP system.
- Page 46 Phoenix connectors and then reconnect the connectors to the board. Space Temperature (SPT) Sensors A field- - supplied Carrier space temperature sensor is required with the RTU- - MP to monitor space temperature. There are 3 sensors available for this application:...
- Page 47 return air sensor is wired to the enthalpy controller (HH57AC077). See Fig. 49. To wire the return air enthalpy sensor, perform the following: 1. Use a 2- - conductor, 18 or 20 AWG, twisted pair cable to connect the return air enthalpy sensor to the enthal- py controller.
- Page 48 Alarm state is reset when the smoke detector alarm condition is cleared and reset at the smoke detector in the unit. Connecting Discrete Inputs Filter Status The filter status accessory is a field- - installed accessory. This accessory detects plugged filters. When installing this accessory, the unit must be configured for filter status by setting MENU Config...
- Page 49 BACnet over BACnet- - only controllers. This is the default Carrier communications protocol. Each RTU- - MP module acts as an MS/TP Master. The speed of an MS/TP network can range from 9600 to 76.8K baud. Physical Addresses can be set from 01 to 99.
- Page 50 The LEDs on the RTU- - MP show the status of certain functions Status is... If this LED is on... Power The RTU MP has power The RTU MP is receiving data from the network segment The RTU MP is transmitting data over the network segment The digital output is active The Run and Error LEDs indicate control module and network status If Run LED shows...
- Page 51 BACnet POINT NAME OBJECT NAME Safety Chain Alarm safety_chain Fire Shutdown Alarm fire_alarm Space Temp Sensor spt_alarm Failure SAT Sensor Alarm sat_alarm High Space Temp Alarm spt_hi Low Space Temp Alarm spt_lo High Supply Air Temp sat_hi Low Supply Air Temp sat_lo Supply Fan Failed to sf_fail...
- Page 52 Alarms Alarms can be checked through the network and/or the local access. All the alarms are listed in Table 23 with name, object name, action taken by control, reset method, and probable cause. There are help screens for each alarm on the local access display and listed in Form 48- - 50H- - T- - 2T, Appendix A: Help Screens.
- Page 53 S Max Masters: Defines the highest MS/TP Master MAC address on this MS/TP network. For example, if there are 3 master nodes on an MS/TP network, and their MAC addresses are 1, 8, and 16, then Max Masters would be set to 16 (since this is the highest MS/TP MAC address on the network).
- Page 54 When troubleshooting, you may need to know a control module’s manufacture date Obtain the manufacture date from Notes a... Module status report (modstat) To obtain a modstat with BACview 1. Press Function (FN) key and hold. 2. Then press period (.) 3.
-
Page 55: Economi$Er Systems
7. Verify proper wiring between the BAS and the con- troller. 8. Verify that the BAS is reading or writing to the proper Modbus register numbers on the controller. Download the latest points list for the controller to verify. 9. Verify that the BAS is sending his requests to the proper slave address of our controller. - Page 56 LEGEND DCV— Demand Controlled Ventilation IAQ — Indoor Air Quality LA — Low Ambient Lockout Device OAT — Outdoor-Air Temperature POT — Potentiometer RAT — Return-Air Temperature 500 OHM RESISTOR NOTE 1 NOTE 3 50HJ540573 ACTUATOR ASSEMBLY DIRECT DRIVE ACTUATOR NOTES: 1.
- Page 57 A functional view of the EconoMi$er is shown in Fig. 74. Typical settings, sensor ranges, and jumper positions are also shown. An EconoMi$er IV simulator program is available from Carrier to help with EconoMi$er IV training and troubleshooting. Compressor Stage...
- Page 58 Supply Air Temperature (SAT) Sensor The supply air temperature sensor is a 3 K thermistor located at the inlet of the indoor fan. (See Fig. 75.) This sensor is factory installed. The operating range of temperature measurement is 0° to 158_F (- - 18_ to 70_C). See Table 15 for sensor temperature/resistance values.
- Page 59 provided in the EconoMi$er IV wiring harness. (See Fig. 70.) ECONOMI$ERIV Fig. 79 - - Return Air Temperature or Enthalpy Sensor Mounting Location CONTROL CONTROL POINT CURVE APPROX. deg. F (deg. C) AT 50% RH 73 (23) 70 (21) 67 (19) 63 (17) In this mode of operation, the outdoor-air temperature is compared to the return-air temperature and the lower...
- Page 60 Open Free Cool Fig. 81 - - EconoMi$er IV Control Differential Enthalpy Control For differential enthalpy control, the EconoMi$er IV controller uses two enthalpy sensors (HH57AC078 and CRENTDIF004A00), one in the outside air and one in the return air duct. The EconoMi$er IV controller compares the outdoor air enthalpy to the return air enthalpy to determine EconoMi$er IV use.
- Page 61 To determine the minimum position setting, perform the following procedure: 1. Calculate the appropriate mixed air temperature using the following formula: ) + (TR = Outdoor-Air Temperature OA = Percent of Outdoor Air = Return-Air Temperature RA = Percent of Return Air = Mixed-Air Temperature As an example, if local codes require 10% outdoor during...
- Page 62 (See Table 28.) Use setting 1 or 2 for Carrier equipment. (See Table 28.) 1. Press Clear and Mode buttons. Hold at least 5 seconds until the sensor enters the Edit mode.
-
Page 63: Wiring Diagrams
Single Enthalpy To check single enthalpy: 1. Make sure EconoMi$er IV preparation procedure has been performed. 2. Set the enthalpy potentiometer to A (fully CCW). The Free Cool LED should be lit. 3. Set the enthalpy potentiometer to D (fully CW). The Free Cool LED should turn off. - Page 64 C08308 Fig. 83 - - 48TC Typical Unit Wiring Diagram - - Power (A06, 208/230- - 3- - 60)
-
Page 66: Pre- -Start- - Up
PRE- -START- - UP WARNING PERSONAL INJURY HAZARD Failure to follow this warning could result in personal injury or death. 1. Follow recognized safety practices and wear pro- tective goggles when checking or servicing refri- gerant system. 2. Do not operate compressor or provide any electric power to unit unless compressor terminal cover is in place and secured. -
Page 67: Main Burners
direction. To determine whether or not compressor is rotating in the proper direction: 1. Connect service gauges to suction and discharge pres- sure fittings. 2. Energize the compressor. 3. The suction pressure should drop and the discharge pressure should rise, as is normal on any start- - up. If the suction pressure does not drop and the discharge pressure does not rise to normal levels: 4. -
Page 68: Start- - Up, Premierlinkt Control
- up and setpoints from a zone sensor or terminal control module. During start- - up, the Carrier software can also be used to verify communication with PremierLink controller. NOTE: All set- - up and setpoint configurations are factory set and field- - adjustable. - Page 69 normally to maintain proper unit operation. All normal cooling alarms and alerts are functional. NOTE: Circuit A is always operated with Circuit B due to outdoor fan control on Circuit A. Always test Circuit A first, and leave it on to test other Circuits. The Heating submenu is used to change output status for the individual heat stages, gas or electric.
- Page 70 Inputs NOTE: For installation of inputs and field installed accessories, refer to the appropriate sections. Input 3 This input is a discrete input and can be configured to be one of five different inputs: No Function, Compressor Safety, Fan Status, Filter Status, or Remote Occupancy. This input can also be configured to be either Normally Open (N/O) or Normally Closed (N/C).
-
Page 71: Operating Sequences
Economizer Economizer Exists This point tells the controller if there is an economizer installed on the unit. Factory Default = NO if no economizer YES if there is an economizer installed Economizer Minimum Position This defines the lowest economizer position when the indoor fan is running and the building is occupied. -
Page 72: Heating With Economi$Er
During free cooling operation, a supply air temperature (SAT) above 50_F will cause the dampers to modulate between Minimum Position setpoint and 100% open. With SAT from 50_F to 45_F, the dampers will maintain at the Minimum Position setting. With SAT below 45_F, the outside air dampers will be closed. - Page 73 When Y2 is energized, the economizer will be modulated to control to a lower supply air setpoint SASP= SATLO2 + 3_F If the SAT > SASP + 5_F it will close the economizer to minimum position for 3 minutes, reset the integrator for the economizer, then start modulating the economizer to maintain the SASP after the stage two has been on for 90 seconds.
- Page 74 S If the PremierLink controller is in the occupied mode and ASHRAE 90.1 Supply Fan is configured for Yes when Linkage is active and the Linkage Coordinator device is sending an occupied mode flag S When Temperature Compensated Start is active S When Free Cool is active S When Pre- - Occupancy Purge is active S Whenever there is a demand for cooling or heating in the...
- Page 75 When in the occupied mode and the indoor relative humidity is greater then the Occupied High Humidity setpoint, then the H3_EX_RV output point will be energized. When in the unoccupied mode and indoor relative humidity is greater then the Unoccupied High Humidity setpoint, then the H3_EX_RV output point and supply fan output will be energized.
- Page 76 The maximum number of stages available is dependent on the type of heat and the number of stages programmed in the CONFIG and SERVICE configuration tables. Staging will occur as follows for gas electric units, Carrier heat pumps with a defrost board, or cooling units with electric heat: For Heating PID STAGES = 2 HEAT STAGES = 1 (50% capacity) - - energize HS1.
- Page 77 S Next Occupied Time is valid S Time is within 2 hours of next Occupied period S Time is within Purge Duration (user- - defined 5 to 60 minutes in the CONFIG configuration table) S OAT Reading is available If all of the above conditions are met, the economizer damper IQMP is temporarily overridden by the pre- - occupancy damper position PURGEMP will be set to one of the following conditions...
- Page 78 For more information on how the PremierLink controller is used in conjunction with the Carrier 3V control system, contact your CCN controls representative. IMPORTANT: The PremierLink controller should not be used as a linked air source in a ComfortIDt VAV system.
- Page 79 control to the occupied heating or cooling setpoints. Scheduling functions are located under occupancy determination and the schedule menu accessed by the Menu softkey (see Appendix - - for menu structure). Your local time and date should be set for these functions to operate properly.
- Page 80 the T56 slider offset). S Space Temperature reading is available. S If it is unoccupied and the SPT > (unoccupied cool setpoint plus the T56 slider offset). The indoor fan will be turned on by the staging algorithm. S If economizer is available and active and economizer open >...
-
Page 81: Fastener Torque Values
If the calculated IAQ minimum position is greater than the IAQ maximum damper position configuration then it will be clamped to the configured value. Demand Limit If the RTU- - MP receives a level 1 (one degree offset), 2 (two degree offset), or a 3 (4 degree offset) to the BACnet demand limit variable, the controller will expand the Supply fan motor mounting Supply fan motor adjustment plate... -
Page 82: Appendix I. Model Number Significance
APPENDIX I. MODEL NUMBER SIGNIFICANCE Model Number Nomenclature 4 8 T C D A 0 4 A 1 A 5 -- 0 A 0 A 0 ____ ____ Unit Heat Type 48 = Gas heat pkg rooftop Tier / Model TC = Entry tier (with Puron refrigerant) Heat Size D = Low heat... -
Page 83: Appendix Ii. Physical Data
Physical Data (Cooling) Refrigeration System # Circuits / # Comp. / Type Puron (R--- 410a) charge A/B (lbs) Oil A/B (oz) Metering Device High--- press. Trip / Reset (psig) Low--- press. Trip / Reset (psig) Evap. Coil Material Coil type Rows / FPI Total Face Area (ft Condensate Drain Conn. - Page 84 APPENDIX II. PHYSICAL DATA (cont.) Physical Data (Cooling) Refrigeration System # Circuits / # Comp. / Type Puron (R--- 410a) charge A/B (lbs) Metering Device High--- press. Trip / Reset (psig) Low--- press. Trip / Reset (psig) Evap. Coil Total Face Area (ft Condensate Drain Conn.
- Page 85 APPENDIX II. PHYSICAL DATA (cont.) Physical Data (Heating) Gas Connection # of Gas Valves Connection size Nat. gas supply line press (in. w.g.)/(PSIG) LP supply line press (in. w.g.)/(PSIG) Heat Anticipator Setting (Amps) 1st stage 2nd stage Natural Gas Heat # of stages / # of burners (total) Rollout switch opens / Closes Temperature rise...
- Page 86 APPENDIX II. PHYSICAL DATA (cont.) Physical Data (Heating) Gas Connection # of Gas Valves Nat. gas supply line press (in. w.g.)/(PSIG) LP supply line press (in. w.g.)/(PSIG) Heat Anticipator Setting (Amps) 1st stage 2nd stage Natural Gas Heat Connection size # of stages / # of burners (total) Rollout switch opens / Closes Temperature rise (min/max)
-
Page 87: Appendix Iii. Fan Performance
4. The Fan Performance tables offer motor/drive recommendations. In cases when two motor/drive combinations would work, Carrier recommended the lower horsepower option. 5. For information on the electrical properties of Carrier’s motors, please see the Electrical information section of this book. - Page 88 APPENDIX III. FAN PERFORMANCE (cont.) 48TC**04 1 Phase 3 Ton Horizontal Supply Field---Supplied Drive 0.14 0.16 1050 0.18 1125 0.21 1200 0.23 1275 0.27 1350 0.30 1425 0.34 1500 0.38 Medium Static Option 1019 0.64 1084 1036 0.69 1101 1050 1053 0.74 1118...
- Page 89 APPENDIX III. FAN PERFORMANCE (cont.) 48TC**04 3 Phase 3 Ton Horizontal Supply Field---Supplied Drive 0.14 0.16 1050 0.18 1125 0.21 1200 0.23 1275 0.27 1350 0.30 1425 0.34 1500 0.38 Medium Static Option 1019 0.64 1084 1036 0.69 1101 1050 1053 0.74 1118...
- Page 90 APPENDIX III. FAN PERFORMANCE (cont.) 48TC**05 1 Phase 4 Ton Horizontal Supply Standard Static Option 1200 0.23 1300 0.28 1400 0.33 1500 0.38 1600 0.45 1700 0.52 1800 0.59 1900 0.68 2000 0.77 1006 Medium Static Option 1200 1089 0.84 1153 1300 1113...
- Page 91 APPENDIX III. FAN PERFORMANCE (cont.) 48TC**05 3 Phase 4 Ton Horizontal Supply Standard Static Option 1200 0.23 1300 0.28 1400 0.33 1500 0.38 1600 0.45 1700 0.52 1800 0.59 1900 0.68 2000 0.77 1006 Medium Static Option 1200 1089 0.84 1153 1300 1113...
- Page 92 APPENDIX III. FAN PERFORMANCE (cont.) 48TC**06 1 Phase 5 Ton Horizontal Supply 1500 0.39 1625 0.48 1750 0.59 1875 0.70 1038 2000 1001 0.84 1085 2125 1053 0.99 1133 2250 1106 1.16 1182 2375 1159 1.34 1231 2500 1500 1247 0.98 1320 1625...
- Page 93 APPENDIX III. FAN PERFORMANCE (cont.) 48TC**06 3 Phase 5 Ton Horizontal Supply 1500 0.39 1625 0.48 1750 0.59 1875 0.70 1038 2000 1001 0.84 1085 2125 1053 0.99 1133 2250 1106 1.16 1182 2375 1159 1.34 1231 2500 1212 1.55 1281 1500 1247...
- Page 94 APPENDIX III. FAN PERFORMANCE (cont.) 48TC**07 3 Phase 6 Ton Horizontal Supply Field---Supplied Drive 1800 0.64 1010 1950 0.78 1065 2100 1032 0.95 1120 2250 1093 1.14 1177 2400 1155 1.36 1234 2550 1217 1.60 1293 2700 1280 1.87 1352 2850 1343 2.17...
- Page 95 APPENDIX III. FAN PERFORMANCE (cont.) 48TC**08 3 PHASE 7.5 TON HORIZONTAL SUPPLY 2250 0.52 2438 0.62 2625 0.74 2813 0.88 3000 1.03 3188 1.21 3375 1.40 3563 1.61 3750 1.85 Medium Static Option 2250 1.81 2438 1.96 2625 2.12 2813 2.31 3000 2.51...
- Page 96 48TC**09 3 PHASE 8.5 TON HORIZONTAL SUPPLY Field---Supplied Drive 2550 0.48 2763 0.58 2975 0.70 3188 0.84 3400 1.00 3613 1.17 3825 1.37 4038 1.59 4250 1.83 Medium Static Option 2550 1.21 2763 1.36 2975 1.52 3188 1.70 3400 1.90 3613 2.13 3825...
- Page 97 48TC**12 3 PHASE 10 TON HORIZONTAL SUPPLY Field---Supplied Drive 3000 0.70 3250 0.85 3500 1.03 3750 1.23 4000 1.45 4250 1.71 4500 1.99 4750 2.31 5000 2.66 3000 1.70 3250 1.93 3500 2.18 3750 2.46 4000 1011 2.76 4250 1037 3.09 4500 1064...
-
Page 98: Pulley Adjustment
APPENDIX III. FAN PERFORMANCE (cont.) Pulley Adjustment MOTOR/DRIVE UNIT COMBO Standard Static Medium Static 1175 High Static Standard Static Medium Static 1175 High Static 1466 Standard Static Medium Static 1175 High Static Standard Static Medium Static 1175 High Static 1466 Standard Static 1175 Medium Static... -
Page 99: Appendix Iv. Electrical Data
APPENDIX IV. ELECTRICAL DATA 48TC**04 3 TONS VOLTAGE COMP (ea) V ---Ph---Hz RANGE 208--- 1--- 60 16.6 230--- 1--- 60 16.6 208--- 3--- 60 10.4 230--- 3--- 60 10.4 460--- 3--- 60 575--- 3--- 60 48TC**05 4 TONS VOLTAGE COMP (ea) V ---Ph---Hz RANGE 208--- 1--- 60... - Page 100 APPENDIX IV. ELECTRICAL DATA (cont.) 48TC**06 5 TONS VOLTAGE COMP (ea) V ---Ph---Hz RANGE 208--- 1--- 60 26.2 230--- 1--- 60 26.2 208--- 3--- 60 15.6 230--- 3--- 60 15.6 460--- 3--- 60 575--- 3--- 60 48TC**07 6 TONS VOLTAGE COMP (ea) V ---Ph---Hz RANGE...
- Page 101 APPENDIX IV. ELECTRICAL DATA (cont.) 48TC**08 7.5 TONS COMP (ea) VOLTAGE RANGE V ---Ph---Hz 208--- 3--- 60 25.0 230--- 3--- 60 25.0 460--- 3--- 60 12.2 575--- 3--- 60 48TC**09 8.5 TONS VOLTAGE COMP (ea) RANGE V ---Ph---Hz 208--- 3--- 60 29.5 230--- 3--- 60 29.5...
- Page 102 APPENDIX IV. ELECTRICAL DATA (cont.) MCA/MOCP DETERMINATION NO C.O. OR UNPWRD C.O. COMBUSTION NOM. FAN MOTOR V ---Ph---Hz TYPE 208/230--- 1--- 60 0.48 208/230--- 3--- 60 0.48 HIGH 460--- 3--- 60 0.25 HIGH 575--- 3--- 60 0.24 HIGH 208/230--- 1--- 60 0.48 208/230--- 3--- 60 0.48...
- Page 103 APPENDIX IV. ELECTRICAL DATA (cont.) MCA/MOCP DETERMINATION NO C.O. OR UNPWRD C.O. COMBUSTION NOM. FAN MOTOR V ---Ph---Hz TYPE 208/230--- 3--- 60 0.48 HIGH 460--- 3--- 60 0.25 HIGH 575--- 3--- 60 0.24 HIGH 208/230--- 3--- 60 0.48 HIGH 460--- 3--- 60 0.25 HIGH 575--- 3--- 60...
-
Page 104: Appendix V. Wiring Diagram List
APPENDIX V. WIRING DIAGRAM LIST Wiring Diagrams SIZE VOLTAGE 208/230---1---60 208/230---3---60 460---3---60 575---3---60 208/230---1---60 208/230---3---60 460---3---60 575---3---60 208/230---1---60 208/230---3---60 460---3---60 575---3---60 208/230---3---60 460---3---60 575---3---60 208/230---3---60 460---3---60 575---3---60 208/230---3---60 460---3---60 575---3---60 208/230---3---60 460---3---60 575---3---60 PremierLink* RTU ---MP* NOTE: Component arrangement on Control; Legend on Power Schematic * PremierLink and RTU--- MP control labels overlay a portion of the base unit control label. -
Page 105: Appendix Vi. Motormaster Sensor Locations
APPENDIX VI. MOTORMASTER SENSOR LOCATIONS Fig. 85 - - 48TC*A04 Outdoor Circuiting Fig. 86 - - 48TC*A05/06 Outdoor Circuiting C08259 Fig. 87 - - 48TC*A07 Outdoor Circuiting C08260 Fig. 88 - - 48TC*A08 Outdoor Circuiting C08261 C08262... - Page 106 C08263 Fig. 89 - - 48TC*A09/12 Outdoor Circuiting Catalog No: 48TC ---2SM Copyright 2008 Carrier Corp. S 7310 W. Morris St. S Indianapolis, IN 46231 Printed in U.S.A. Edition Date: 08/08 Manufacturer reserves the right to change, at any time, specifications and designs without notice and without obligations.
-
Page 107: Unit Start-Up Checklist
VERIFY THAT 3- -PHASE SCROLL COMPRESSOR IS ROTATING IN CORRECT DIRECTION Copyright 2008 Carrier Corp. S 7310 W. Morris St. S Indianapolis, IN 46231 Manufacturer reserves the right to change, at any time, specifications and designs without notice and without obligations.
Need help?
Do you have a question about the 48TCA04---A12 and is the answer not in the manual?
Questions and answers