Table of Contents
Advertisement
Quick Links
Advertisement
Table of Contents

Related Manuals for NANLITE Forza 720B


Summary of Contents for NANLITE Forza 720B
- Page 1 Forza 720B USER MANUAL Guangdong NanGuang Photo&Video Systems Co., Ltd...
-
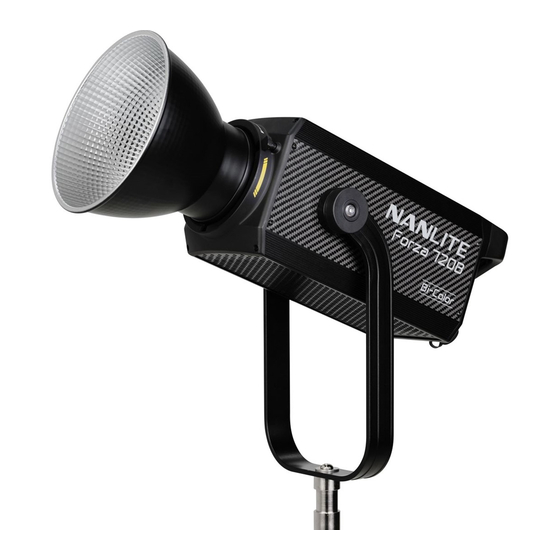
Page 2: Product Diagram
Forza 720B LED Bi-color Spot Light Product Diagram Technical Data Rated power: 800W Input voltage/current: DC48V/16.67A Max AC100-240V 50/60Hz Color Temperature: 2700K-6500K CRI: average 96 TLCI: average 97... -
Page 3: Product Details
Product Details 3. Umbrella Hole 1. Fixture Body Handle 4. Reflector 5. Adjustable Handle 2. Fixture Body Input Socket 6. Yoke 7. Lock Catch... - Page 4 8. Control Unit 10. AC Power Input Socket Output Socket 11. Power Switch 9. DMX OUT 12. DMX IN 13. USB Port 16. Control Unit 14. Control Panel Handle 17. Quick Release Plate 15. Battery Holder 15. Battery Holder...
-
Page 5: Detailed Description
Detailed Description 1. Fixture body handle: Be convenient for users to lift the lamp head and adjust the diection of the light. 2. Fixture body input socket: For connecting the lamp head with control unit. 3. Umbrella hole: For installing/removing an umbrella. 4. - Page 6 Usage 1. Connection Between the Light Fixture, Control Unit and the Power Outlet.
- Page 7 Note: ① When connecting the power supply, please make sure the power, voltage and frequency are consistent with the control unit. ② Make sure to use the provided power cable and DC connecting cable. The connection between the DC plug and the fixture body input socket should be connected as following.
- Page 8 2. Connection Between the Light Fixture and Control Unit with Battery Battery Note: 1. When powered by two 14.8V batteries, the maximum output is 40%. 2. When powered by two 26V batteries, the maximum output is 65%. 3. Do not use the 14.8V and 26V batteries at the same time, or use only one battery of either kind to power the fixture.
- Page 9 3. Quick Release Clamp Installation 1. Loosen the adjustable handle to open the clamp. 2. Mount the quick release clamp on the light stand, then rotate the adjustable handle to tighten the clamp. 3. Align the quick release plate on the control unit 4.
- Page 10 4. Reflector Installation 1. Align the reflector with the mount and rotate 2. Press the lock catch and rotate the reflector according to the lock catch sign to secure it according to the sign to release it from the fixture. into the fixture.
-
Page 11: Remote Control
Remote Control Forza 720B supports 2.4G remote control, DMX/RDM control, and includes a built-in bluetooth module as well. · ▲Address code need to be pre-set for 2.4G remote control, DMX/RDM control solutions. 1. ADDRESS/DMX, including ADDRESS, DMX MODE and DMX DIMMING CURVE settings. - Page 12 MENU MENU CH: 512 CH: 512 OUTPUT MODE ADDRESS ADDRESS/DMX DMX MODE RESET BLUETOOTH DMX DIMMING CURVE WIRELESS PROTOCOL FAN CONTROL ROTATE SCREEN PRESS “MENU” TO RETURN Rotate ''Right knob'' to ADDRESS/DMX. Press ''Right knob'' to enter the corresponding sencondary menu. MENU MENU CH: 512...
-
Page 13: Dmx Mode
2. DMX MODE MENU MENU CH: 512 CH: 512 ADDRESS CCT 8bit DMX MODE CCT 16bit DMX DIMMING CURVE ULTIMATE DMX 8bit PRESS “MENU” TO RETURN PRESS “MENU” TO RETURN Rotate ''Right knob'' to DMX MODE. Press ''Right knob'' to enter the corresponding third menu. MENU MENU CH: 512... - Page 14 3. DMX DIMMING CURVE MENU MENU CH: 512 CH: 512 ADDRESS LINEAR DMX MODE EXPONET DMX DIMMING CURVE LOGARITHM S CURVE PRESS “MENU” TO RETURN PRESS “MENU” TO RETURN Rotate "Right knob'' to DMX DIMMING CURVE. Press ''Right knob'' to enter the corresponding third menu. MENU MENU CH: 512...
- Page 15 2. DMX Remote Control ① Connect the fixture to the DMX/RDM consoles via DMX cable as shown below: DMX IN DMX OUT 1 GND GND 1 2 DATA- DATA- 2 3 DATA+ DATA+ 3 The connection between light fixtures, or light fixture and DMX/RDM console, must use five core shielded cable. ·...
- Page 16 Address Setting of the Light Fixtutre. ④ Refer to the DMX reference guide and control the light via DMX/RDM console. (For detailed operation please refer to the DMX/RDM console operation manual.) Note: DMX reference guide "Forza_720B_DMX_REFERENCE_GUIDE_EN" is downloadable from www.nanlite.com.
- Page 17 3. 2.4G Remote Control Set the address of the 2.4G remote controller to be consistent with the light fixture, enabling the fixture to be · remotely controlled by 2.4G remote controller or by APP via the transmitter box. ① Note: 2.4G remote controller and transmitter box are sold separately.
- Page 18 Operating Instructions 1. Be sure that the power switch of the control unit is in the "off ". Now it is safe to connect the control unit and power the unit on, the screen will display "NANLITE". Powered by Mode...
- Page 19 2.CCT button: press the CCT button to enter the CCT mode. CCT MODE CH: 512 100.0% 5600K EFFECT MENU LOCK ① Brightness setting, rotate "Left knob" clockwise to increase the brightness while counterclockwise to reduce the brightness, the screen will show the percentage of brightness, DIM range: 0.0-100.0%. CCT MODE CCT MODE CH: 512...
- Page 20 ② CCT setting, rotate "Right knob" clockwise to increase the CCT while counterclockwise to reduce the CCT, the CCT is shown on the screen, CCT range: 2700K-6500K. CCT MODE CCT MODE CH: 512 CH: 512 2700K 100.0% 2700K 100.0% 6500K 6500K Note: Press the "Right knob"...
- Page 21 Forza 720B has built-in effects including CCT LOOP, INT LOOP, FLASH, PULSE, STORM AUTO, · STORM MANUAL, TV, PAPARAZZl, CANDLE/FIRE, BAD BULB, FIREWORK, EXPLOSION AUTO, EXPLOSION MANUAL and WELDING. EFFECT MODE EFFECT MODE CH: 512 CH: 512 CCT LOOP EFFECT:...
- Page 22 EFFECT MODE EFFECT MODE CH: 512 CH: 512 EFFECT: CCT LOOP EFFECT: CCT LOOP DIM: 0.0% DIM: 0.1% CCT: 2700K - 6500K CCT: 2700K - 6500K SPEED: 8s SPEED: 8s Rotate "Left knob" to set the corresponding parameters. ① Note: All the effects are set in same method.
-
Page 23: Max Output
① OUTPUT MODE MENU MENU CH: 512 CH: 512 OUTPUT MODE MAX OUTPUT ADDRESS/DMX CONSTANT OUTPUT RESET BLUETOOTH WIRELESS PROTOCOL FAN CONTROL ROTATE SCREEN PRESS “MENU” TO RETURN Rotate "Right knob" to "OUTPUT MODE", press "Right knob" to enter the corresponding secondary menu. MENU MENU CH: 512... -
Page 24: Wireless Protocol
② ADDRESS/DMX For more operation details please refer to P10. ③ RESET BLUETOOTH MENU MENU CH: 512 CH: 512 OUTPUT MODE ADDRESS/DMX RESET BLUETOOTH RESET BLUETOOTH BACK RESET WIRELESS PROTOCOL FAN CONTROL ROTATE SCREEN PRESS “MENU” TO RETURN Rotate ''Right knob'' to RESET BLUETOOTH. Press ''Right knob'' to enter the corresponding third menu. MENU MENU CH: 512... -
Page 25: Fan Control
⑤ FAN CONTROL MENU MENU CH: 512 CH: 512 OUTPUT MODE ADDRESS/DMX RESET BLUETOOTH WIRELESS PROTOCOL FAN CONTROL ROTATE SCREEN PRESS “MENU” TO RETURN Rotate "Right knob" to FAN CONTROL. Press "Right knob" to enter the corresponding secondary menu. MENU MENU CH: 512 CH: 512... -
Page 26: Rotate Screen
⑥ ROTATE SCREEN MENU MENU CH: 512 CH: 512 OUTPUT MODE ADDRESS/DMX DO YOU WANT ROTATE RESET BLUETOOTH SCREEN WIRELESS PROTOCOL FAN CONTROL ROTATE SCREEN Rotate "Right knob" to ROTATE SCREEN. Press "Right knob" to enter the corresponding secondary menu. MENU CH: 512 DO YOU WANT ROTATE... -
Page 27: Screen Brightness
⑦ SCREEN BRIGHTNESS MENU MENU CH: 512 CH: 512 ADDRESS/DMX RESET BLUETOOTH SCREEN BRIGHTNESS WIRELESS PROTOCOL FAN CONTROL ROTATE SCREEN SCREEN BRIGHTNESS PRESS “MENU” TO RETURN Rotate ''Right knob'' to SCREEN BRIGHTNESS. Press ''Right knob'' to enter the corresponding secondary menu. MENU MENU CH: 512... -
Page 28: Button Backlight
⑧ BUTTON BACKLIGHT MENU MENU CH: 512 CH: 512 RESET BLUETOOTH WIRELESS PROTOCOL FAN CONTROL ROTATE SCREEN SCREEN BRIGHTNESS BUTTON BACKLIGHT PRESS “MENU” TO RETURN Rotate ''Right knob'' to BUTTON BACKLIGHT. Press ''Right knob'' to enter the corresponding secondary menu. MENU MENU CH: 512... - Page 29 ⑨ LANGUAGE MENU MENU CH: 512 CH: 512 WIRELESS PROTOCOL ENGLISH FAN CONTROL 简体中文 ROTATE SCREEN SCREEN BRIGHTNESS BUTTON BACKLIGHT LANGUAGE FULL PRESS “MENU” TO RETURN Rotate ''Right knob'' to LANGUAGE. Press ''Right knob'' to enter the corresponding secondary menu. MENU MENU CH: 512...
-
Page 30: Firmware Update
⑩ FIRMWARE UPDATE Download the firmware files of light fixture and control unit, and put into the root directory of the USB drive(ensure · the firmware versions match), and connect the USB drive to the USB port. MENU MENU CH: 512 CH: 512 FAN CONTROL ROTATE SCREEN... - Page 31 To upgrade, please switch off the SCREEN BRIGHTNESS light, plug in USB drive that has BUTTON BACKLIGHT new firmware, and restart the light. LANGUAGE www.nanlite.com VERSION PRESS “MENU” TO RETURN Rotate "Right knob" to VERSION, and press "Right knob" to check the current version.
- Page 32 5. LOCK button: Press and hold the "LOCK" button to lock all functions. Operation buttons or adjustment knobs can not change the current function. Press and hold the LOCK button again to release the Lock status. CCT MODE CCT MODE CH: 512 CH: 512 100.0%...
-
Page 33: Safety Precautions
Safety Precautions 1. Please open the package to check for possible damage caused in transit, please do not use if damage is found and contact place of purchase or manufacturer. 2. Do not use a power cord with damaged insulation, do not unplug too hard or drag the power cord directly. 3. - Page 34 General Fault Detection and Diagnosis Diagnosis Fault Detection 1. Please check whether the power supply, cable and outlet are properly connected and that the cable is not faulty or loose. The light won't boot up properly 2. Please check whether the voltage value is within the specified parameters.
- Page 35 Guangdong NanGuang Photo&Video Systems Co., Ltd Guangdong NanGuang Photo&Video Systems Co., Ltd This manual and all stats within it were produced under controlled conditions, and are accurate at time of print. Any future changes to design/technical data can be found at www.nanlite.com.
- Page 36 Version: V3 2022-04-01 +86-754-85751187 +86-754-85300887 service@nanlite.com Zhanglin,324,Dongli Chenghai Shantou Guangdong China www.nanlite.com...
Need help?
Do you have a question about the Forza 720B and is the answer not in the manual?
Questions and answers