
Related Manuals for NANLITE PavoSlim 120B


Summary of Contents for NANLITE PavoSlim 120B
- Page 1 PavoSlim 120B LED Bi-color Panel Light USER MANUAL Guangdong NanGuang Photo&Video Systems Co., Ltd.
- Page 2 With slim and lightweight fixture body of 2×1”size, PavoSlim 120B is suitable for most scenes, particularly the small space, run & gun situations, providing a great help on film and television production, photography and content creation lighting setup.
-
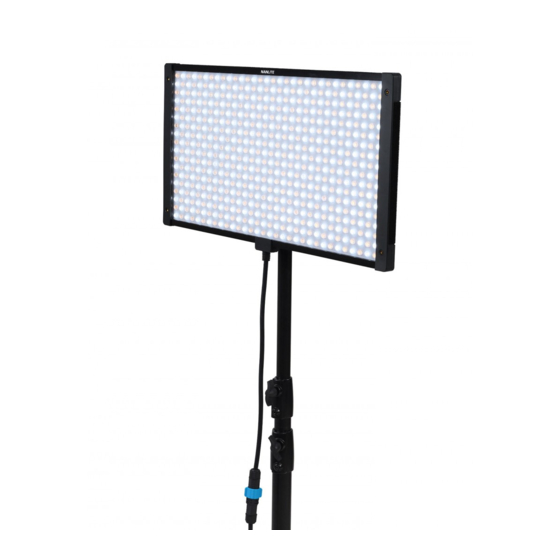
Page 3: Product Diagram
PavoSlim 120B LED Bi-color Panel Light Product Diagram Technical Data Rated Power: 150W Input: DC 24V DC (Battery) 14.4-26V AC100-240V 50/60Hz Color Temperature: 2700K-6500K CRI: Average 95 TLCI: Average 97 WWW.NANLITE.COM... -
Page 4: Product Details
Product Details 2. Quick Release Plate 1. Battery Holder 6. Universal Holder 7. DC Output Socket 3. USB Port 8. DC Input Socket 4. Display 9. AC Power Screen Input Socket 5. Control 10. Power Switch Panel 11. DMX In/Out WWW.NANLITE.COM... -
Page 5: Detailed Description
9. AC Power Input Socket: To connect the AC power cable to power the control unit. 10. Power Switch: To turn on/off the fixture. 11. DMX In/Out: Connect to DMX adapter cable for DMX signal input and output. (Note: DMX adapter cable is sold separately). WWW.NANLITE.COM... - Page 6 Includes PavoSlim 120B x 1 Control Unit x 1 DC Connection Cable x 1 AC Power Cable x 1 Universal Holder x 1 Softbox x 1 Diffuser x 2 Eggcrate x 1 Carrying Bag x 1 User Manual x 1...
- Page 7 1.1. When connecting the power supply, please make sure the power voltage is consistent with that indicated on the control unit. 1.2. Make sure to use the included AC power cable and control unit. The connection between the DC output socket and the DC connection cable from the fixture body should be done as shown above. WWW.NANLITE.COM...
- Page 8 2.1 Please do not exert too much force when mounting the battery, to avoid damage and deformation of the battery holder. 2.2 Please press the battery lock catch when removing the battery, to avoid damage of the battery holder. 2.3 V-mount battery holder is for mounting 14.4-14.8V or 26V V-mount batteries. WWW.NANLITE.COM...
- Page 9 Align the quick release plate on the control unit Press the lock catch on the clamp to remove the with the quick release mount on the clamp to control unit from the light stand. mount the control unit on to the clamp. WWW.NANLITE.COM...
- Page 10 4. Installation of Softbox and Diffuser 4.1. Unfold the softbox, wrap the softbox around the fixture body and stick at the interface. WWW.NANLITE.COM...
- Page 11 4.2 Attach the hook and loop fasteners on the back of softbox to the back of the fixture. WWW.NANLITE.COM...
- Page 12 4.3 Attach the diffuser to the black hook and loop fasteners on the inside of the softbox. Note: There are included two diffusers: lite diffuser and standard diffuser. WWW.NANLITE.COM...
- Page 13 4.4 Attach the eggcrate to the hook and loop fasteners on the inside of the softbox. WWW.NANLITE.COM...
- Page 14 5. Installation and Detachment of Universal Holder 5.1 Align to the icons that on the back of fixture. WWW.NANLITE.COM...
- Page 15 Follow the direction shown as the picture to install the universal holder. WWW.NANLITE.COM...
- Page 16 5.2 Pull up the knob of the universal holder, and slide the universal holder in the direction shown as picture above to remove it from the fixture. WWW.NANLITE.COM...
-
Page 17: Remote Control
Remote Control ·PavoSlim 120B supports DMX/RDM and 2.4G remote control, and it also has built-in Bluetooth module. The address needs to be set before operating the remote control via DMX/RDM and 2.4G. ▲ 1. ADDRESS/DMX Seting, including ADDRESS, DMX MODE, DMX REDUCED CHANNELS, DMX DIMMING CURVE and DMX SMOOTHING. - Page 18 CH: 512 CH: 512 ADDRESS DMX MODE ADDRESS DMX REDUCED CHANNELS DMX DIMMING CURVE DMX SMOOTHING PRESS “MENU” TO RETURN PRESS “MENU” TO RETURN Rotate the right knob to ADDRESS, and press the right knob to enter the tertiary menu. WWW.NANLITE.COM...
-
Page 19: Dmx Mode
Rotate the right knob to select needed address, and press the right knob to set. Note: PavoSlim 120B has 10 channels, for multiple lights remote control via DMX/RDM, the address of the first light fixture should be set to 001, the second one to 011, the third one to 021, and so on. - Page 20 CH: 512 ADDRESS DMX MODE DMX REDUCED CHANNELS DMX DIMMING CURVE DMX SMOOTHING PRESS “MENU” TO RETURN PRESS “MENU” TO RETURN Rotate the right knob to DMX REDUCED CHANNELS, and press the right knob to enter the tertiary menu. WWW.NANLITE.COM...
- Page 21 DMX REDUCED CHANNELS LOGARITHM DMX DIMMING CURVE S CURVE DMX SMOOTHING GAMMA 2.2 PRESS “MENU” TO RETURN PRESS “MENU” TO RETURN Rotate the right knob to DMX DIMMING CURVE, and press the right knob to enter the tertiary menu. WWW.NANLITE.COM...
- Page 22 MENU CH: 512 ADDRESS DMX MODE DMX REDUCED CHANNELS DMX DIMMING CURVE DMX SMOOTHING PRESS “MENU” TO RETURN PRESS “MENU” TO RETURN Rotate the right knob to DMX SMOOTHING, and press the right knob to enter the tertiary menu. WWW.NANLITE.COM...
- Page 23 ·5-pin shielded cable with a diameter not less than 0.3mm must be used for connection between light fixture and DMX/RDM console, or between light fixture and light fixture. XLR plug/socket and the cable should be connected as shown above. ·Pin1, Pin2, Pin3 for connecting DMX signal. Pin4, Pin5 have no connection. WWW.NANLITE.COM...
- Page 24 This prevents interference caused by DMX signals in the transmitting process. DMX Terminator Connection Connect a 120Ω(OHM) resistor across Pin 2 and Pin 3 in an XLR plug and insert into the DMX 120Ω OUT socket on the last unit. PIN 2 PIN 3 WWW.NANLITE.COM...
- Page 25 2.4 Refer to the DMX reference guide and control the fixture via DMX/RDM console. (For detailed operation please refer to the DMX/RDM console operation manual.) 2.5 The latest technical data can be download from www.nanlite.com. 3. RDM Control 3.1 Connect the light fixture to the console with RDM function by using a connection cable, the connecting method is the same as that of DMX/RDM console.
-
Page 26: Wireless Control
4. WIRELESS CONTROL 4.1 Bluetooth Setting PavoSlim 120B has built-in Bluetooth function for connection via Bluetooth. MENU MENU CH: 512 CH: 512 OUTPUT MODE BLUETOOTH SETTINGS ADDRESS/DMX 2.4G SETTINGS WIRELESS CONTROL ALL WIRELESS ON/OFF ROTATE SCREEN SCREEN BRIGHTNESS PRESS “MENU” TO RETURN Rotate the right knob to WIRELESS CONTROL, and press the right knob to enter the secondary menu. -
Page 27: Bluetooth On/Off
MENU CH: 512 CH: 512 PRESS “MENU” TO RETURN PRESS “MENU” TO RETURN Rotate the right knob to select ON or OFF, and press the right knob to set. The RESET BLUETOOTH is available when the Bluetooth is on. WWW.NANLITE.COM... - Page 28 Rotate the right knob to RESET BLUETOOTH, and press the right knob to enter the next menu. MENU MENU CH: 512 CH: 512 RESET BLUETOOTH BACK RESET PRESS “MENU” TO RETURN PRESS “MENU” TO RETURN Rotate the right knob to RESET, and press the right knob to set. WWW.NANLITE.COM...
- Page 29 4.2 2.4G Setting PavoSlim 120B can be remotely controlled by 2.4G remote controller or by Nanlink App via the WS-TB-1 transmitter box. Note: ①2.4G remote controller and WS-TB-1 transmitter box are sold separately. ②PavoSlim 120B supports the 2.4G wireless protocol V1.0 and V2.0. The fixture should be set in V2.0 while using WS-RC-C2 remote controller, set in V1.0 while using other remote controllers.
- Page 30 2.4G ON/OFF WIRELESS PROTOCOL 2.4G WIRELESS PROTOCOL WIRELESS DMX V1.0 V2.0 WIRELESS DMX UNIVERSE PRESS “MENU” TO RETURN PRESS “MENU” TO RETURN Rotate the right knob to WIRELESS PROTOCOL, and press the right knob to enter the next menu. WWW.NANLITE.COM...
- Page 31 MENU CH: 512 CH: 512 2.4G ON/OFF WIRELESS PROTOCOL WIRELESS DMX WIRELESS DMX UNIVERSE PRESS “MENU” TO RETURN PRESS “MENU” TO RETURN Rotate the right knob to WIRELESS DMX, and press the right knob to enter the next menu. WWW.NANLITE.COM...
- Page 32 CH: 512 2.4G ON/OFF WIRELESS PROTOCOL WIRELESS DMX UNIVERSE WIRELESS DMX WIRELESS DMX UNIVERSE PRESS “MENU” TO RETURN PRESS “MENU” TO RETURN Rotate the right knob to WIRELESS DMX UNIVERSE, and press the right knob to enter the next menu. WWW.NANLITE.COM...
- Page 33 CH: 512 BLUETOOTH SETTINGS OUTPUT MODE ADDRESS/DMX 2.4G SETTINGS WIRELESS CONTROL ALL WIRELESS ON/OFF ROTATE SCREEN SCREEN BRIGHTNESS PRESS “MENU” TO RETURN Rotate the right knob to WIRELESS CONTROL, and press the right knob to enter the secondary menu. WWW.NANLITE.COM...
- Page 34 CH: 512 CH: 512 DO YOU WANT TO TURN ON OR OFF ALL WIRELESS FUNCTIONS? PRESS “MENU” TO RETURN PRESS “MENU” TO RETURN Rotate the right knob to select ON or OFF, and press the right knob to set. WWW.NANLITE.COM...
- Page 35 Operating Instructions 1. Make sure the control unit is off, connect with the fixture, and connect to mains electricity via the power cable or mount the battery, and turn on the power switch, the screen will display "NANLITE". CCT MODE...
- Page 36 MODE MENU Press the MODE button to switch to CCT mode. ①DIM Setting: Rotate the left knob clockwise to increase the brightness, rotate anticlockwise to decrease, the percentage will be shown on the screen, DIM range: 0% - 100%. WWW.NANLITE.COM...
- Page 37 2700K 100% 6500K Note: In other modes, the CCT range is the same as that in CCT MODE. Presss the right knob to promptly switch among: 2700K, 3200K, 4300K, 5600K and 6500K, which can be selected in a loop. WWW.NANLITE.COM...
- Page 38 2.2 EFFECT Mode PavoSlim 120B has built-in effects including CCT LOOP, INT LOOP, FLASH, PULSE, STORM AUTO, STORM MANUAL, TV, PAPARAZZI, CANDLE/FIRE, BAD BULB, FIREWORK, EXPLOSION AUTO, EXPLOSION MANUAL and WELDING. EFFECT MODE CH: 512 EFFECT: CCT LOOP DIM: 0%...
- Page 39 Rotate the right knob to select DIM, CCT or SPEED. EFFECT MODE EFFECT MODE CH: 512 CH: 512 EFFECT: CCT LOOP EFFECT: CCT LOOP DIM: DIM: CCT: 3200K-5600K CCT: 3200K-5600K SPEED: 8S SPEED: 8S Rotate the left knob to set the corresponding parameters. WWW.NANLITE.COM...
- Page 40 Rotate the right knob to select DIM, CCT or SPEED. EFFECT MODE EFFECT MODE CH: 512 CH: 512 EFFECT: INT LOOP EFFECT: INT LOOP DIM: 0%-100% DIM: 1%-100% CCT: 3200K-5600K CCT: 3200K-5600K SPEED: 8S SPEED: 8S Rotate the left knob to set the corresponding parameters. WWW.NANLITE.COM...
- Page 41 Rotate the right knob to select DIM, CCT, INTERVALS or FLASH RATIO. EFFECT MODE EFFECT MODE CH: 512 CH: 512 EFFECT: FLASH EFFECT: FLASH DIM: DIM: CCT: 5600K CCT: 5600K INTERVALS: 1.0S INTERVALS: 1.0S FLASH RATIO: 50% FLASH RATIO: 50% Rotate the left knob to set the corresponding parameters. WWW.NANLITE.COM...
- Page 42 Rotate the right knob to select DIM, CCT or PULSES/MIN. EFFECT MODE EFFECT MODE CH: 512 CH: 512 EFFECT: PULSE EFFECT: PULSE DIM: DIM: CCT: 5600K CCT: 5600K PULSES/MIN: 40 PULSES/MIN: 40 Rotate the left knob to set the corresponding parameters. WWW.NANLITE.COM...
- Page 43 Rotate the right knob to select DIM, CCT or INTERVAL RANGE. EFFECT MODE EFFECT MODE CH: 512 CH: 512 EFFECT: STORM AUTO EFFECT: STORM AUTO DIM: DIM: CCT: 5600K CCT: 5600K INTVL RANGE: 2S-6S INTVL RANGE: 2S-6S Rotate the left knob to set the corresponding parameters. WWW.NANLITE.COM...
- Page 44 EFFECT MODE EFFECT MODE CH: 512 CH: 512 EFFECT: STORM MANUAL EFFECT: STORM MANUAL DIM: DIM: CCT: 5600K CCT: 5600K PRESS RIGHT KNOB TO TRIGGER PRESS RIGHT KNOB TO TRIGGER Rotate the left knob to set the corresponding parameters. WWW.NANLITE.COM...
- Page 45 EFFECT MODE CH: 512 CH: 512 EFFECT: EFFECT: TV DIM: 0%-100% DIM: 0%-100% CCT: 5600K CCT: 5600K CCT SHIFT: 600K CCT SHIFT: 600K SPEED: 50 SPEED: 50 Rotate the right knob to select DIM, CCT, CCT SHIFT or SPEED. WWW.NANLITE.COM...
- Page 46 Rotate the right knob to select DIM, CCT or SPEED (range:1-100), and rotate the left knob to set the corresponding parameters. EFFECT MODE EFFECT MODE CH: 512 CH: 512 EFFECT: PAPARAZZI EFFECT: PAPARAZZI DIM: 0% DIM: CCT: 5600K CCT: 5600K SPEED: 50 SPEED: 50 Rotate the right knob to select DIM, CCT or SPEED. WWW.NANLITE.COM...
- Page 47 EFFECT MODE CH: 512 CH: 512 EFFECT: CANDLE/FIRE EFFECT: CANDLE/FIRE DIM: 0%-100% DIM: 0%-100% CCT: 5600K CCT: 5600K CCT SHIFT: 600K CCT SHIFT: 600K SPEED: 50 SPEED: 50 Rotate the right knob to select DIM, CCT, CCT SHIFT or SPEED. WWW.NANLITE.COM...
- Page 48 EFFECT MODE EFFECT MODE CH: 512 CH: 512 EFFECT: BAD BULB EFFECT: BAD BULB DIM: 0% DIM: CCT: 5600K CCT: 5600K INTENSITY: 50 INTENSITY: 50 SPEED: 50 SPEED: 50 Rotate the right knob to select DIM, CCT, INTENSITY or SPEED. WWW.NANLITE.COM...
- Page 49 EFFECT MODE EFFECT MODE CH: 512 CH: 512 EFFECT: FIREWORK EFFECT: FIREWORK DIM: 0% DIM: CCT: 5600K CCT: 5600K SPEED: 50 SPEED: 50 DECAY: 50 DECAY: 50 Rotate the right knob to select DIM, CCT, SPEED or DECAY. WWW.NANLITE.COM...
- Page 50 EFFECT MODE EFFECT MODE CH: 512 CH: 512 EFFECT: EXPLOSION AUTO EFFECT: EXPLOSION AUTO DIM: 0% DIM: CCT: 5600K CCT: 5600K SPEED: 50 SPEED: 50 DECAY: 50 DECAY: 50 Rotate the right knob to select DIM, CCT, SPEED or DECAY. WWW.NANLITE.COM...
- Page 51 CH: 512 EFFECT: EFFECT: EXPLOSION MANUAL EXPLOSION MANUAL DIM: 0% DIM: CCT: 5600K CCT: 5600K SPEED: 50 SPEED: 50 PRESS RIGHT KNOB TO TRIGGER PRESS RIGHT KNOB TO TRIGGER Rotate the right knob to select DIM, CCT or DECAY. WWW.NANLITE.COM...
- Page 52 PRESS RIGHT KNOB TO TRIGGER Rotate the left knob to set the corresponding parameters. EFFECT MODE CH: 512 EFFECT: EXPLOSION MANUAL DIM: CCT: 5600K SPEED: 50 PRESS RIGHT KNOB TO TRIGGER Press the right knob to trigger the explosion effect. WWW.NANLITE.COM...
- Page 53 SPEED: 50 PAUSE: OFF PAUSE: OFF Rotate the left knob to set the corresponding parameters. Lighting effects and additional functionality will be probably updated with the later firmware version. Detailed information is subject to the instruction of firmware function. WWW.NANLITE.COM...
- Page 54 Press the MENU button to return to the previous menu. MENU CH: 512 OUTPUT MODE ADDRESS/DMX WIRELESS CONTROL ROTATE SCREEN Left Knob Right Knob SCREEN BRIGHTNESS MODE MENU WWW.NANLITE.COM...
- Page 55 PRESS “MENU” TO RETURN Rotate the right knob to select MAX OUTPUT or CONSTANT OUTPUT, and press the right knob to set. 3.2 ADDRESS/DMX For detailed operations please refer to P16. 3.3 WIRELESS CONTROL For detailed operations please refer to P25. WWW.NANLITE.COM...
-
Page 56: Rotate Screen
Rotate the right knob to ROTATE SCREEN, and press the right knob to enter the secondary menu. MENU MENU CH: 512 CH: 512 DO YOU WANT ROTATE SCREEN? PRESS “MENU” TO RETURN PRESS “MENU” TO RETURN Rotate the right knob to select YES or NO, and press the right knob to set. WWW.NANLITE.COM... -
Page 57: Screen Brightness
Rotate the right knob to SCREEN BRIGHTNESS, and press the right knob to enter the secondary menu. MENU CH: 512 MENU CH: 512 SCREEN BRIGHTNESS PRESS “MENU” TO RETURN PRESS “MENU” TO RETURN Rotate the right knob to select the screen brightness, and press the right knob to set. WWW.NANLITE.COM... -
Page 58: Button Backlight
Rotate the right knob to BUTTON BACKLIGHT, and press the right knob to enter the secondary menu. MENU MENU CH: 512 CH: 512 PRESS “MENU” TO RETURN PRESS “MENU” TO RETURN Rotate the right knob to select ON or OFF, and press the right knob to set. WWW.NANLITE.COM... - Page 59 Rotate the right knob to the LANGUAGE, and press the right knob to enter the secondary menu. MENU 菜单 CH: 512 通道:512 ENGLISH 简体中文 PRESS “MENU” TO RETURN 按“MENU”键返回 Rotate the right knob to ENGLISH or 简体中文 , and press the right knob to set. WWW.NANLITE.COM...
-
Page 60: Firmware Update
USB drive, or whether the USB drive format is FAT, FAT32 or exFAT. ④ If all the above steps are done and the firmware files still cannot be found, please format the USB drive again. ⑤ If the fixture still cannot identify the USB drive, please replace the USB drive. WWW.NANLITE.COM... - Page 61 After firmware file is found, enter the firmware update interface, rotate the right knob to select UPDATE, and press the right knob to make update. After update, the light fixture will automatically restart. MENU CH: 512 FIRMWARE UPDATED PRESS “MENU” TO RETURN WWW.NANLITE.COM...
-
Page 62: Reset All Settings
CH: 512 Reset all settings of this light? This will take up to about 1 minute. PRESS “MENU” TO RETURN PRESS “MENU” TO RETURN Rotate the right knob to select YES or NO, and press the right knob to set. WWW.NANLITE.COM... - Page 63 RESET ALL SETTINGS in the menu. VERSION www.nanlite.com PRESS “MENU” TO RETURN Rotate the right knob to VERSION, and press the right knob to check the current version. 4. When the fixture is not in use, please turn off the power switch.
- Page 64 The fixture can be operated manually, 2. Please check whether the DMX cable is connected correctly and but DMX control is not working. without damage. If the fault is not resolved after troubleshooting, please contact with the place of purchase. WWW.NANLITE.COM...
- Page 65 Certification Made in China WWW.NANLITE.COM...
- Page 66 Nanlite Website Nanlink App This manual has been compiled according to the rigorous testing for Nanlite products. Product designs are subject to change without prior notice. The latest version of the manual for this product is downloadable at www.nanlite.com. WWW.NANLITE.COM...
- Page 67 WWW.NANLITE.COM 0754-85751187 info@nanlite.com 0754-85300887 Dongli Section, Highway 324, Chenghai, Shantou City, Guangdong Province, China...
Need help?
Do you have a question about the PavoSlim 120B and is the answer not in the manual?
Questions and answers