
Related Manuals for KTM 690 DUKE EU Packaging 4 2008


Summary of Contents for KTM 690 DUKE EU Packaging 4 2008
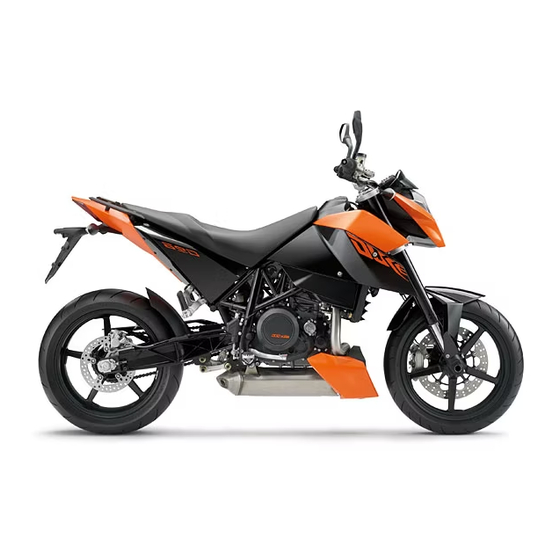
- Page 1 SETUP INSTRUCTIONS 2008 Packaging 4 690 DUKE EU 690 DUKE AUS/UK 690 DUKE JP 690 DUKE USA ART. NO. 3211338en...
- Page 3 KTM accepts no liability for delivery options, deviations from illustrations and descriptions, as well as misprints and other errors.
-
Page 4: Means Of Representation
MEANS OF REPRESENTATION 1 M EANS OF REPRESENTATION Symbols used The symbols used are explained in the following. Indicates an expected reaction (e.g. of a work step or a function). Indicates an unexpected reaction (e.g. of a work step or a function). Identifies a page reference (more information is provided on the specified page). - Page 5 SET‑UP 2 S ET‑UP Unpacking and setting up the vehicle – Remove the box and the plastic packaging. Info To avoid damaging the motorcycle when mounting the handlebar, do not remove the plastic on the fuel tank until after all of the work has been com- pleted.
- Page 6 700211-01 – Fit the front spoiler. ( S. 8) – Fill up with fuel. ( S. 8) – Print out the current PDI form found on KTM DEALER.NET and perform the delivery inspection. – Set kilometers or miles. ( S. 7)
-
Page 7: Mounting The Seat
WORK 3 W ORK Removing the seat – Insert the ignition key in the seat lock and turn it 45° counterclockwise. – Lift up the seat at the rear, pull it back and remove from above. 700131-01 Mounting the seat –... -
Page 8: Recharging The Battery
WORK – Carefully move the fuel tank forwards and lower it. – Mount and tighten screw with bearing sleeve and rubber bushing . Check fuel tank for tight fitting. Guideline Screw, fuel tank bracket 15 Nm (11.1 lbf ft) – Check the routing of the fuel hoses. -
Page 9: Setting The Clock
WORK – Connect the battery charger to the battery. Switch on the battery charger. Battery charger (58429074000) You can also use the battery charger to test rest potential and start potential of the battery, and to test the generator. With this device, you cannot overcharge the bat- tery. - Page 10 WORK Fitting front spoiler – Position the front spoiler side parts to the center part and latch in. – Fit the rubber grommets 300028-01 – Position the front spoiler to the retaining bracket . Fit screws with bushes, but ...
- Page 11 WORK – Switch off engine. – Open the filler cap. – Fill the fuel tank with fuel up to measurement Guideline Measurement of 50 mm (1.97 in) Fuel tank content 13.5 l Super unleaded (ROZ 95 / RON 95 / (3.57 US gal) PON 91) ( S.
-
Page 12: Technical Data - Chassis Tightening Torques
TECHNICAL DATA - CHASSIS TIGHTENING TORQUES 4 T ECHNICAL DATA - CHASSIS TIGHTENING TORQUES – Screw, combination instrument 1 Nm (0.7 lbf ft) – Screw, combination instrument holder 1 Nm (0.7 lbf ft) ® Screw, side stand switch 2 Nm (1.5 lbf ft) Loctite 243™ – Remaining screws, chassis 4 Nm (3 lbf ft) –... - Page 13 TECHNICAL DATA - CHASSIS TIGHTENING TORQUES – Screw, fuel tank bracket 15 Nm (11.1 lbf ft) Screw, manifold on main silencer 25 Nm (18.4 lbf ft) Copper paste – Screw, handlebar clamp 20 Nm (14.8 lbf ft) ® Screw, upper subframe 35 Nm (25.8 lbf ft) Loctite 243™ ® Screw, side stand bracket 25 Nm (18.4 lbf ft) Loctite 243™...
- Page 14 SUBSTANCES 5 S UBSTANCES Super unleaded (ROZ 95 / RON 95 / PON 91) according to – DIN EN 228 (ROZ 95 / RON 95 / PON 91)
- Page 15 *3211338en* 3211338en KTM-Sportmotorcycle AG 5230 Mattighofen/Austria http://www.ktm.com...
Need help?
Do you have a question about the 690 DUKE EU Packaging 4 2008 and is the answer not in the manual?
Questions and answers