Advertisement
Quick Links
Advertisement

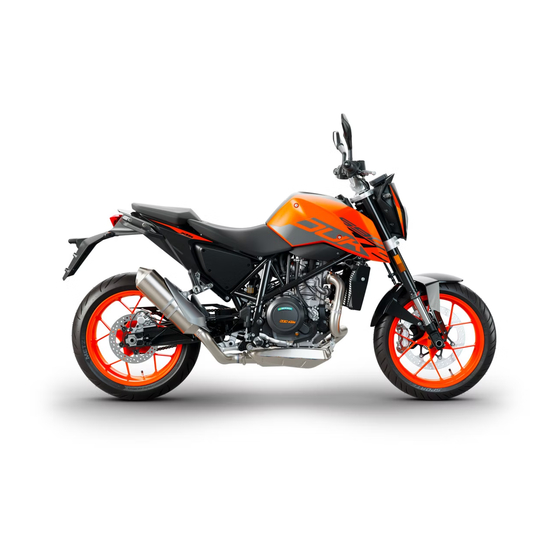
Summary of Contents for KTM 690 Duke 2018
- Page 1 SETUP INSTRUCTIONS 2018 690 Duke Art. no. 3213788en...
- Page 3 KTM accepts no liability for delivery options, deviations from figures and descriptions, misprints, and other errors. The models portrayed partly contain special equipment that does not belong to the regular scope of supply.
-
Page 4: Means Of Representation
1 MEANS OF REPRESENTATION Symbols used The meaning of specific symbols is described below. Indicates an expected reaction (e.g. of a work step or a function). Indicates an unexpected reaction (e.g. of a work step or a function). Indicates a page reference (more information is provided on the specified page). Indicates information with more details or tips. - Page 5 SETUP 2 Unpacking and setting up the vehicle – Remove the box and the plastic packaging. Info To avoid damaging the motorcycle while mounting the handlebar, leave the film on the fuel tank until all of the work on the motorcycle has been finished. –...
- Page 6 2 SETUP Guideline Screw, handlebar 20 Nm (14.8 lbf ft) clamp Info The markings on the handlebar should be at the center of the handlebar clamps. Keep the gap widths equal when tightening. – Mount and tighten the right handlebar weight. –...
- Page 7 8) – Refuel. ( p. 10) – Check the headlight setting. ( p. 12) – Prepare the vehicle according to the specifications in the KTM Dealer.net for handover to the customer. – Set the kilometers or miles. ( p. 10)
- Page 8 3 WORK Removing the passenger seat – Insert the ignition key in seat lock and turn it clockwise. – Raise the rear of the passenger seat, push it towards the rear, and remove it upward. – Remove the ignition key from the seat lock. V00043-10 Mounting the passenger seat –...
- Page 9 WORK 3 Info Even when there is no load on the battery, it discharges steadily. The charging level and the method of charging are very important for the service life of the battery. Rapid recharging with a high charging current shortens the service life of the battery. If the charging current, charging voltage, and charging time are exceeded, the battery will be destroyed.
- Page 10 3 WORK Installing the battery Main work – Position the battery in the battery holder. Battery (HTZ12A-BS) The battery terminals face opposite the direction of travel. – Reconnect rubber band – Connect both positive cables to the battery. Guideline Screw, battery termi- 2 Nm (1.5 lbf ft) –...
- Page 11 WORK 3 Connecting the negative cable of the battery Main work – Connect negative cable . Tighten the screw. Guideline Screw, battery termi- 2 Nm (1.5 lbf ft) V00580-10 Finishing work – Mount the passenger seat. ( p. 6) – Set the time and date.
- Page 12 3 WORK Setting the kilometers or miles Info If the unit is changed, the value is retained and converted accordingly. Make the setting according to the country. Condition The motorcycle is stationary. – Press the UP or DOWN button until the "Settings" menu appears on the display.
- Page 13 WORK 3 – Switch off the engine. – Open the filler cap. ( p. 11) – Fill the fuel tank with fuel up to the lower edge of the filler neck. Total fuel tank 14 l Super unleaded capacity, approx. (3.7 US gal) (ROZ 95/RON 95/PON 91)
-
Page 14: Checking The Headlight Setting
3 WORK 3.11 Closing the filler cap – Fold down the filler cap. – Turn the ignition key 90° clockwise. – Push down the filler cap and turn the ignition key counter- clockwise until the lock closes. Warning Fire hazard Fuel is highly flammable, toxic and a health hazard. - Page 15 WORK 3 3.13 Adjusting the headlight range Preparatory work – Check the headlight setting. ( p. 12) Main work – Adjust the beam distance of the headlight by turning screw Guideline For a motorcycle with rider, and with luggage and a passen- ger if applicable, the light/dark boundary must be exactly on the lower mark (applied in: Checking the headlight setting).
-
Page 16: Technical Data
4 TECHNICAL DATA Chassis tightening torques Screw, headlight EJOT 2 Nm (1.5 lbf ft) Screw, side stand switch 2 Nm (1.5 lbf ft) Loctite ® 243™ Remaining nuts, chassis 4 Nm (3 lbf ft) Remaining screws, chassis 5 Nm (3.7 lbf ft) Retaining clamp, brake line 3 Nm (2.2 lbf ft) SAS valve screw on frame... - Page 17 TECHNICAL DATA 4 Screw, magnetic holder on side 5 Nm (3.7 lbf ft) Loctite ® 243™ stand Screw, seat lock 10 Nm (7.4 lbf ft) Loctite ® 222™ Screw, tail light cover 8 Nm (5.9 lbf ft) Screw, voltage regulator 8 Nm (5.9 lbf ft) Screw, wheel speed sensor 6 Nm (4.4 lbf ft)
- Page 18 4 TECHNICAL DATA Screw, side stand 35 Nm (25.8 lbf ft) Loctite ® 243™ Screw, subframe 45 Nm (33.2 lbf ft) Loctite ® 243™ Banjo bolt, brake line M10x1 25 Nm (18.4 lbf ft) Screw, bottom shock absorber M10x1.25 50 Nm (36.9 lbf ft) Loctite ®...
- Page 19 SUBSTANCES 5 Super unleaded (ROZ 95/RON 95/PON 91) Standard/classification – DIN EN 228 (ROZ 95/RON 95/PON 91) Guideline – Only use unleaded super fuel that matches or is equivalent to the specified fuel grade. – Fuel with an ethanol content of up to 10 % (E10 fuel) is safe to use. Info Do not use fuel containing methanol (e.
- Page 20 *3213788en* 3213788en 08/2017 KTM Sportmotorcycle GmbH 5230 Mattighofen/Austria Photo: Mitterbauer/KTM http://www.ktm.com...


Need help?
Do you have a question about the 690 Duke 2018 and is the answer not in the manual?
Questions and answers