Table of Contents
Advertisement
Advertisement
Table of Contents

Subscribe to Our Youtube Channel
Related Manuals for Zimmer Cryo 7


Summary of Contents for Zimmer Cryo 7
- Page 1 Instructions for Use Cryo 7...
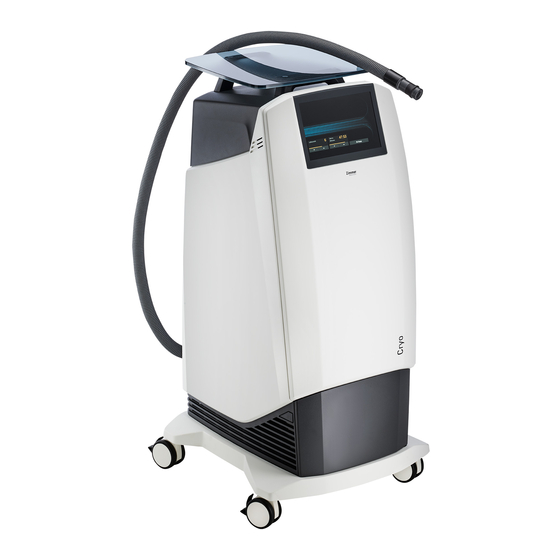
- Page 2 Figures Front of the device / Detailed description – defrost container Fig. 1 Cryo 7 Display Shelf plate Ventilation slits Maintenance door of the defrost container Fig. 2 Detailed description – defrost container Button to open the maintenance door of the defrost container...
- Page 3 Figures Rear of the device Fig. 3 RS232 connection port for data communication with medical technology devices Connection port for USB Handle Air filter Ventilation slits Base Castors with locking device Locking lever Connection for power cable Mains switch Air outlet with magnetic connection and treatment tube connection Connection port for spring arm...
- Page 4 Figures Rear of the device / Detailed description Fig. 4 Detailed description Air outlet with magnetic connection / Connection port for spring arm / Locking lever Air outlet with magnetic connection and treatment tube connection Connection port for spring arm Locking lever “The angle of the lever can be adjusted by pulling the locking lever and simultaneously twisting the device connection.
- Page 5 Figures Accessories Fig. 5 Accessories Cryo 7 Therapy Hose 2.5m Cryo 7 Therapy Hose Spring Arm Cryo 7 Air Filter...
- Page 6 Screens / Display Fig. 6 Display views Status bar Buttons on the screen Buttons in the navigation menu Buttons / displays in the status bar Fill level of defrost container; when defrost container is full, the icon switches to “Empty defrost container” (see Fig. 7 (I)) Fig.
- Page 7 Explanation of symbols Symbol Description The CE mark symbolises the conformity of the product with the applicable requirements which the European Community imposes on the manufacturer. Medical device This symbol indicates “Danger” with regard to possible risks to people. This symbol indicates “Caution” with regard to possible material damage. Follow instructions for use.
- Page 8 Explanation of symbols Symbol Description On (power supply) Disposal of electrical and electronic devices as well as used disposable and rechargeable batteries. Products which are marked with the adjacent symbol may not be discarded with household waste. Do not stack Protect from moisture Transport upright Fragile...
-
Page 9: Table Of Contents
Explanation of symbols Page Intended use 1.1 Indications / Contraindications 1.2 Side effects / Residual risks Application information and warnings Cryo 7 performance features System set-up Software Operation instructions 6.1 Configuration 6.2 Performing the treatment 6.3 Displays and buttons – start screen... - Page 10 If the instructions for use have become illegible, damaged, or are not accessible for the user for other reasons, a replacement is to be requested from the manufacturer for the safe use of Cryo 7 and made available to the user.
-
Page 11: Intended Use
Intended use 1.1 Indications / Contraindications • Acute and chronic painful conditions of the musculoskeletal system Indications ▪ Rheumatic diseases ▪ Tendinopathies ▪ Acute inflammation ▪ Pain in the lower back • Procedure-related pain ▪ Knee, hip, spinal and shoulder surgery •... -
Page 12: Side Effects / Residual Risks
Intended use 1.2 Side effects / Residual risks Side effects Temporary cold-related skin damage can occur, especially in sensitive patients. Cold air therapy devices are intended to cool the surface of the patient’s skin Intended purpose locally and contactlessly. The area of application encompasses physical therapy in pain and inflammatory processes of the musculoskeletal system as well as aesthetic medicine as a supportive cooling procedure in combination with cosmetic treatments such as laser therapy or injections for pain reduction. -
Page 13: Application Information And Warnings
Application information and warnings The air stream should be directed evenly over the area to be treated. Avoid static or excessively intensive cooling as this can lead to cold burns and hypothermia. Children’s body parts which are not being treated should be covered and kept warm. - Page 14 To avoid the risk of electric shock, the mains plug must be disconnected from the power supply before performing cleaning or maintenance work. Check Cryo 7 before use. If it has any damage, the device should not be used and the customer service needs to be contacted.
- Page 15 Objects must be placed in the centre of the shelf plate. Observe the maximum load! Do not place any liquids on the shelf plate. Pushing Cryo 7 at the sides labelled with corresponding warnings is not permitted. Do not lean on the device.
-
Page 16: Cryo 7 Performance Features
Cryo 7 performance features What is new? The use of the latest technology to provide cold air. Space-saving thanks to a slim housing type in a new design. Ergonomic operation. High-resolution display with touch operation. All keys, menus and sub-menus, as well as buttons can be activated directly on the touch screen with finger pressure. -
Page 17: System Set-Up
After transport/assembly or repair, Cryo 7 must be placed in and kept in an upright position for at least 30 minutes before being switched on. If Cryo 7 is switched on before the 30 minutes have elapsed, the compressor can become damaged. - Page 18 Set-up There is a handle (11) on the back of Cryo 7. You can use this handle to push Cryo 7 and move it to its destination. Assembly of the Mount the treatment tube with the magnetic components at the air outlet treatment tube (note the orientation relative to the indentation) at the rear of the device (19).
- Page 19 System set-up Start-up Switch on the device using the power switch (18). After it is switched on, Cryo 7 performs a one-time initial set-up. You are guided through a brief menu with the following questions: 1. Language selection 2. Temperature display selection 3.
-
Page 20: Software
IT safety measures Cryo 7 is controlled via special device software. and information The Cryo 7 device software is protected by special software protection measures against copying. Only USB sticks may be inserted in the USB port. It is prohibited to draw operating voltage for small devices or connect devices with an external power supply. -
Page 21: Operation Instructions
Operation instructions 6.1 Configuration Note Device-specific parameters and default settings are pre-set in the factory and can be changed only by factory support. Basic user settings, such as fan levels and therapy time, are not affected by this. User parameters in the configuration can be changed and individually stored at any time. - Page 22 Standby operation If therapy is not performed for a longer period of time, the cooling switches off depending on the setting in the configuration menu (2-6 hours) and Cryo 7 goes into “standby” energy-saving mode. The Cryo 7 cooling phase restarts by touching anywhere on the touch screen.
-
Page 23: Performing The Treatment
Operation instructions 6.2 Performing the treatment Cryo 7 performs a “precooling” cooling phase after it has been switched on. If Switch device on the cooling phase is completed, Cryo 7 automatically switches to the therapy screen. Patient preparation For standard procedures in your medical practice, we additionally recommend that the patient remove metal objects in the therapy area, if possible. -
Page 24: Displays And Buttons - Start Screen
Operation instructions 6.3 Displays and buttons – start screen Description of the display elements and buttons (1) Arrow buttons By tapping the arrow button, the fan level and therapy time values decrease or increase in single increments. If the arrow buttons are held down, the values are continuously increased or decreased. - Page 25 Operation instructions 6.3 Displays and buttons – start screen Favourites The entries changed and saved in the start screen are filed in Favourites through the save procedure. Favourites list In the Favourites list, these can be: 1. called up for use. To do this, the desired entry is selected directly in the corresponding line.
-
Page 26: Technical Information
Technical information Mains voltage 220 V- 240 V / 50-60 Hz Power consumption max. 5 A Protection class IP protection class IP20 Dimensions H 1060 mm x W 500 mm x D 560 mm Weight 60 kg (without accessories) Temperature: 10 to 35°C Environmental conditions Air humidity: 20-80% relative air humidity without condensation... -
Page 27: Cleaning / Disinfection
If the icon to change the air filter appears in the status bar, the air filter along with the frame must be changed. The Cryo 7 air filter cannot and should not be cleaned. Notes Use the device only in a properly hygienic environment. -
Page 28: Ce Mark
EC directive on medical devices 93/42/EEC and meets the essential requirements of appendix I of this directive. The device is classified in class IIa according to appendix IX of the directive. Manufacturer Zimmer MedizinSysteme GmbH Junkersstraße 9 89231 Neu-Ulm Germany... -
Page 29: Scope Of Delivery And Accessories
* Individual power cable available. Please get in touch with your contact partner. Subject to changes Note: The device may be operated only with original parts from Zimmer MedizinSysteme GmbH. Otherwise the function and safety of the patient, user and third parties cannot be guaranteed. Orders Contact your responsible contact person on site. -
Page 30: Device Combinations
In the case of a combination, observe the instructions for use of the combined device. If Cryo 7 is connected to an IT network (for example, to an aesthetic medical laser), previously unidentified risks to patients, operators, or third parties may arise. - Page 31 Safety / Maintenance / Service 12.1 Safety Safety and Cryo 7 was developed and manufactured in compliance with the safety maintenance regulations of IEC 60601-1. Zimmer MedizinSysteme GmbH is responsible for the safety and reliability of the device only if 1.
- Page 32 If the defrost container has reached a certain fill level, an acoustic signal sounds. In addition, the “Defrost container fill level” icon in the status bar switches to the “Empty defrost container” icon. Maximum capacity Cryo 7 also displays a message in the therapy screen to empty the defrost reached container. Emptying To remove the defrost container, open the maintenance door.
- Page 33 Activating the “Software versions” button displays a list of the software Software versions versions and serial numbers. Operating hours This display gives an overview of various operating hours, such as availability if service is needed and the Cryo 7 configuration (derma or PT). Page 23...
- Page 34 We recommend keeping a replacement air filter on hand in your medical practice (see air filter information in this chapter). Note Cryo 7 may not be operated without the Cryo 7 original air filter. Only the original air filter from Zimmer MedizinSysteme GmbH may be used! Replacing the air The air filter is located at the rear of Cryo 7.
- Page 35 Safety / Maintenance / Service 12.2 Service Export log Cryo 7 provides data for error analysis. These data can be saved on a USB stick. Creating the export Insert the USB stick in the port provided on the back of Cryo 7 (10).
- Page 36 • Wait until the device is ready for use. • This is the case when the device switches to the start screen. • Start Cryo 7 using the start button. Select the various fan levels one after the other and check the strength of the air stream and the cold air output.
- Page 37 Legal notice Cryo 7 is not listed in annex 1 of the MPBetreibV (German Medical Devices Operation Ordinance). The device is not listed in annex 2 of the MPBetreibV (German Medical Devices Operation Ordinance). In Germany, the German Social Accident Insurance (DGUV) (Regulation 3 –...
- Page 38 Reduced cold air Reduced cold air output / reduction in cold air output output / reduction in Icing of Cryo 7 may be the cause of a significant reduction in cold air output cold air output and a weak air stream.
- Page 39 Contact your distributor if necessary. Germany Cryo 7 must not be disposed of in household waste under any circumstances. Packaging materials must be kept out of the reach of children since there is a risk of suffocation! Page 29...
- Page 40 The tested frequencies are listed in Table 4. Cryo 7 does not contain any components which can age during the life of the device and which can lead to worsening of the electromagnetic compatibility.
- Page 41 Guidelines and manufacturer’s declaration – Electromagnetic emissions The Cryo 7 device is intended to be used in the electromagnetic environment as indicated below. The customer or user of the Cryo 7 device must ensure that it is used in such an environment.
- Page 42 Manufacturer’s EMC declaration Single phase: at 0° Single phase: at 0° When the user of the Cryo 7 Voltage interruptions 0% UT; 250/300 cycles 0% UT; 250/300 cycles device needs further operation according to IEC 61000-4-11 even in the case of interruptions...
- Page 43 Guidelines and manufacturer’s declaration – Electromagnetic immunity The Cryo 7 device is intended to be used in the electromagnetic environment as indicated below. The customer or user of the Cryo 7 device must ensure that it is used in such an environment.
- Page 44 Manufacturer’s EMC declaration Table 4 Electromagnetic immunity to HF radio equipment Test Maximum Test level Band Distance frequency Service Modulation energy immunity (MHz) (MHz) (V/m) 380 – 390 TETRA 400 Pulse modulation 18 Hz 430 – 470 GMRS 460, FRS 460 ±...
- Page 45 Cryo 7 Instructions for Use Zimmer MedizinSysteme GmbH Junkersstraße 9 89231 Neu-Ulm, Germany Tel. +49 7 31. 97 61-291 Fax +49 7 31. 97 61-299 export@zimmer.de www.zimmer.de...
Need help?
Do you have a question about the Cryo 7 and is the answer not in the manual?
Questions and answers