
Related Manuals for Electrolux TE1220E


Summary of Contents for Electrolux TE1220E
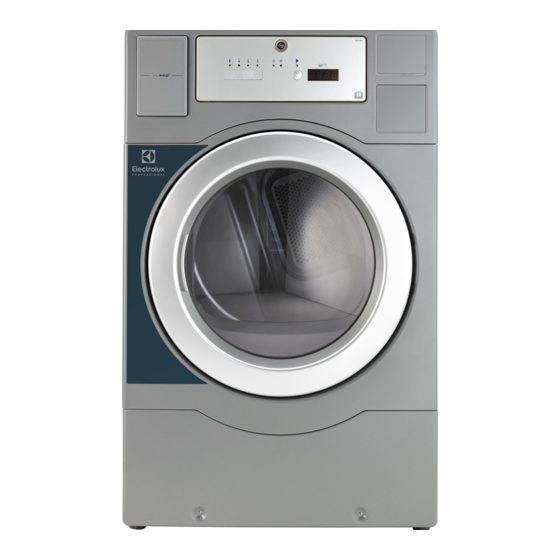
- Page 1 Installation manual Tumble dryer TE1220E, TE1220G 0180500987B/EN Original instructions 2022.01.04...
-
Page 3: Table Of Contents
Contents Contents 1 Safety Precautions ..........................5 Gas heated tumble dryer: ......................7 General safety information......................7 Commercial use only........................7 Copyright ..........................7 Symbols............................8 2 Warranty terms and exclusions......................9 3 Technical data...........................10 Drawing ..........................10 Technical data ......................... 11 Connections ..........................11 4 Setup ...............................12 Unpacking ..........................12 Recycling instruction for packaging ...................13 Siting ............................14... -
Page 5: Safety Precautions
Installation manual 1 Safety Precautions • Servicing shall be carried out only by authorized personnel. • Only authorized spare parts, accessories and consumables shall be used. • The machine is not to be used if industrial chemicals have been used for cleaning. •... - Page 6 Installation manual • If it is unavoidable that fabrics that contain vegetable or cooking oil or have been conta- minated by hair care products be placed in a tumble dryer they should first be washed in hot water with extra detergent – this will reduce, but not eliminate, the hazard. •...
-
Page 7: Gas Heated Tumble Dryer
The machine/machines covered by this manual is/are made for commercial and industrial use only. 1.4 Copyright This manual is intended solely for consultation by the operator and can only be given to third parties with the permis- sion of Electrolux Professional company. -
Page 8: Symbols
Installation manual 1.5 Symbols Caution Caution, hot surface Caution, high voltage Read the instructions before using the machine... -
Page 9: Warranty Terms And Exclusions
Warranty will be applicable where the customer has used only genuine spare parts and has performed maintenance in accordance with Electrolux Professional user and maintenance documentation made available in paper or elec- tronic format. Electrolux Professional strongly recommends using Electrolux Professional approved cleaning, rinse and descaling agents to obtain optimal results and maintain product efficiency over time. -
Page 10: Technical Data
Installation manual 3 Technical data 3.1 Drawing fig.W01608 Operating panel Door opening, ⌀ 570 mm Electrical connection Exhaust connection 1098... -
Page 11: Technical Data
Installation manual 3.2 Technical data Net Weight(electric heating) Net Weight(Gas heating) Drum volume litres Drum diameter Drum depth Drum speed, medium load Rated capacity, filling factor 1:18 (Max. load) Heating: Electricity(230V) 4.84 Nominal Heat Input (Gas dryer) Maximum air flow m3/h Maximum static back pressure A-weighted emission sound pressure level at working stations... -
Page 12: Setup
Installation manual 4 Setup 4.1 Unpacking Note! Two persons are recommended for the unpacking. The machine is delivered fixed onto the transport pallet with packing strap. Remove packing strap from the machine then remove the transport pallet. Remove all the packing from the machine. Note! When moving the machine, handle it with care. -
Page 13: Recycling Instruction For Packaging
Installation manual 4.2 Recycling instruction for packaging fig.X02415 Fig. Description Code Type Cardboard packaging PAP 20 Paper Packaging box sticker PAP 22 Paper Bar code sticker PAP 22 Paper Wrapping film HDPE 2 Plastics Front corner protection PS 6 Plastics Back corner protection PS 6 Plastics... -
Page 14: Siting
Installation manual 4.3 Siting The machine should be positioned so that there is plenty of room for working, both for the user and service personnel. The following clearances are recommended: • The requirement to allow the door to open completely is 36 inches (91 cm). •... -
Page 15: Mechanical Installation
Installation manual 4.4 Mechanical installation Level the machine with the feet of the machine. The maximum height adjustment of the feet is 15 mm. It is important to lock the feet with nuts (A). For the gas dryer, the four feet should be locked with the expansion bolts and foot press plates in the accessory bag to prevent straining of the gas supply when the appliance is moved, at least the two diagonal feet should be fixed. -
Page 16: Reversing The Door
Installation manual 5 Reversing the door Disconnect the power to the machine. Demount the hinge and remove the door. fig.W01611 Demount the screws on the door module except for (A) and (B). Rotate back door plate parts (C) and the middle frame (D) by 180 degrees. - Page 17 Installation manual Demount the two magnets (A) and the protective cover (B) and move them to the opposite side. fig.W01613 Remount the two magnets (A) and the protective cover (B). Remount the door on the opposite side and fasten the hinges. fig.W01614 Connect the power to the machine.
-
Page 18: Evacuation System
Installation manual 6 Evacuation system 6.1 Air principle The fan creates low pressure in the machine, drawing air into the drum via the heating unit. The heated air passes through the garments and the drum holes. The air then flows out through a lint filter positioned below the drum. Then the air is evacuated through the fan and exhaust system. -
Page 19: Fresh Air
Installation manual 6.2 Fresh air For maximum efficiency and the shortest possible drying time, it is important to ensure that fresh air is able to enter the room from the outside in the same volume as that blown out of the room. To avoid draught in the room it is important to place the air inlet behind the machine. -
Page 20: Shared Exhaust Duct
Installation manual 6.4 Shared exhaust duct It is recommended that each machine is connected to a separate exhaust duct and fully inserts into the exhaust duct. When several machines shall use the same exhaust duct , the exhaust duct must increase after each machine. fig.W01618 Number of machines... -
Page 21: Outside Ductwork Protection
Installation manual Note! 1. The flue outlet of gas dryer shall be female and shall allow connection to a flue duct whose diameter com- plies with the standards in force in the country where the appliance is to be installed. 2. -
Page 22: Electrical Connection
Installation manual 7 Electrical connection 7.1 Electrical installation The electrical installation may only be carried out by qualified personnel. It is important to know that the machines are designed to provide a high level of personal safety, which is why items of external equipment such as earth leakage circuit breakers are not necessary. -
Page 23: Single-Phase Connection
Installation manual 7.2 Single-phase connection For electric heated dryer, demount the cover panel from the supply unit. Connect the earth and other wires as shown. ELECTRICAL CONNECTION (Electric heated) Grounding Wire Power Cord Power Cord Ground Screw (Green) Terminal Block Screw Outlet Receptacle –... -
Page 24: Install The Electronic Coin Meter (Coin Operated Models)
Installation manual 7.4 Install the Electronic Coin Meter (Coin Operated Models) 1. Unlock control panel with the provided key. 2. Loosen four screws in the control panel. 3. Extract the four terminals of the display PCB, and remove the main control panel, then demount the control panel seat. - Page 25 Installation manual 6. Mount the control panel seat carefully, don’t damage the coinmeter. 7. Reinstall the control panel seat by using the four screws. fig.W01622 the crossbeam plastic clip total four screws the four terminals of the display PCB (Electric heated) main control panel Connect the four terminals of the display PCB, the above figure shows the connection of four terminals of electric heating dryer, but for the gas heated dryer, the four terminals are directly connected to the display board.
-
Page 26: Gas Connection
Installation manual 8 Gas connection 8.1 Fasten the label Before installing the machine fasten the label the “user instructions” on the inside of the door in a suitable place and at the front panel. The label must have the correct country code, choose the correct label from the gas kit. User Instructions Read the technical instructions before installing the appliance. -
Page 27: Connect The Dryer To The Gas Supply
Installation manual 8.3 Connect the dryer to the gas supply 1. Remove the cap from the end of the gas inlet. 2. Install a female 3/8” NPT adampter at the end of the dryer gas inlet, the male size of the adampter is R1/2”. 3. -
Page 28: Table Of Pressure
Installation manual 8.5 Table of pressure The data label shows the injector size and the injector pressure and the countries that use this gas quality: (Pressure: 1mmH O=10Pa=0.1mbar) Liquiedpetrole- Gas category Inlet pressure Injector pres- Injector size (⌀ Reference gas Label code May be avail- um gases... - Page 29 Installation manual 1. Unplug dryer or disconnect power. 2. Turn off gas supply using the shut-off valve that supplies the dryer. 3. Remove the lower panel. fig.W01625 The Lower Panel Shut off the gas pipe valve. Use a wrench to lossen the hexagon nut union counterclockwise. fig.W01626 gas pipe valve union...
- Page 30 Installation manual Remove the two screws with cross screwdriver. fig.W01627 the two screws...
- Page 31 Installation manual Disconnect ignitor wires from harness and then take out the gas valve. Remove the burner injector from the valve and replace it with the injector inside the accessory bag. Torque the new injector to 30 in-lbs (3.4 N·m). Use the injector (diameter 1.21mm) for both Butane gas and Propane gas Grab the dimples (not the cap) with the lips of needle nosed pliers to twist the cover until the marking LPG point toward the base point.
- Page 32 Installation manual 14. Sign and date one of the STICKER B (Conversion Record) and apply it on the right side panel adjacent to the gas valve. 15. Reinstall the lower panel. fig.W01630 Apply STICKER B Here Leak Check 1. Turn on gas supply. 2.
- Page 33 Installation manual Pressure Test 1. Loosen the pressure measuring screw in the test nipple. 2. Connect the airtight hose to the pressure test nipple. (Airtight hose will attach between the pressure test nipple and manometer). 3. Connect opposite end of hose to manometer. 4.
-
Page 34: Data Label
Gas Type: G31 Injector: Ø1.21mm Nominal Heat Input: 5.7kW(Hi) For safety reasons use only genuine spare parts Electrolux Professional S.p.A. Ser.No. 9031000130 Viale Treviso, 15 - 33170 Pordenone STICKER D AT, BE, CY, CZ, DE, DK, EE, FR, GB, HR, HU, IT, LT, NL, NO,... -
Page 35: Coin Meter Operation
Installation manual 9 Coin meter operation In coin operated machines prices for programs and other operational parameters must be programmed during ma- chine setup. Prices can be programmed as Euros or as the number of coins or tokens required to start and to add additional dry- ing time. -
Page 36: Free Dry / Opl Mode
Installation manual 9.2 Free Dry / OPL Mode When the Amount To Start (ATS) register for a program is set to 0.00 (00 in “token mode”), the program operates in “Time per push mode” (this is free dry mode). In this mode, each time a program button is pressed, the remaining time is incremented. -
Page 37: Promotion Via The Real Time Clock (Rtc)
When the external signal is activated, the DRYER will apply Promotion set in register 081, to increase the drying time as explained elsewhere in this manual. Please contact Electrolux Professional local contact’s Technical Support team if you have any questions or need as- sistance with price programming or implementing promotion events. -
Page 38: Function Check
Installation manual 10 Function check May only be carried out by qualified personnel. A function check must be made when the installation is finished and before the machine can be ready to be used. Whenever a repair has been made, a function check must be performed before the machine can be used again. Check the automatic stop of the machine •... -
Page 39: Disposal Information
Installation manual 12 Disposal information 12.1 Disposal of appliance at end of life Before disposing of the machine, make sure to carefully check its physical condition, and in particular any parts of the structure that can give or break during scrapping. The machine’s parts must be disposed of in a differentiated way, according to their different characteristics (e.g. - Page 40 Electrolux Professional AB 341 80 Ljungby, Sweden www.electroluxprofessional.com...
Need help?
Do you have a question about the TE1220E and is the answer not in the manual?
Questions and answers