Table of Contents
Advertisement
Advertisement
Table of Contents

Related Manuals for Huato S1500 Series


Summary of Contents for Huato S1500 Series
- Page 1 User’s Guide S1500 Portable Paperless Data Logger Operational Instructions...
- Page 2 Any part of this instruction, including words, pictures and graphics, belongs to Shenzhen HUATO Electric Co., Ltd. or its subsidiary (hereinafter referred to as "the company" or "HUATO"). Without written permission, no unit or individual is allowed to extract, copy, trans- late or modify all or part of the instructions in any way.
- Page 3 Introduction Serial number Version number Document number Revision date Attentions 1) The waterproof grade of the product is IP34. If there is moisture on the shell, do not connect the logger with USB in order to prevent from short circuit. Short circuit may cause damage to the instrument.
-
Page 4: Table Of Contents
Table of Contents S1500 Series Table of Contents Section 1 Product Introductions................1 Introductions.....................1 Appearance....................1 Features....................1 1.4 Models.....................2 1.5 Device Overview..................2 1.6 Buttons and Ports..................3 1.7 Operational Steps..................4 1.8 Technical Specifications................5 1.8.1 General Specifications................5 1.8.2 Input Specifications................6 Section 2 Attentions....................7 Section 3 Wiring Instructions..................8 3.1 Connection mode..................8... -
Page 5: Section 1 Product Introductions
Section 1 Product Introductions 1.1 Introductions The S1500 series product is a portable paperless data logger. With 8/12/16 channel universal input and thermocouple input function, it can detect thermocouple, RTD, NTC, DC current, DC voltage, frequency, pulse count and other signals at the same time, and the collected data can be vividly displayed through various forms such as digital interface, bar graph interface, real-time curve, etc. -
Page 6: Models
S1500 Series 1.4 Models Function description Models S1508U 8 Channels thermocouple inputs S1512U 12 Channels thermocouple inputs S1516U 16 Channels thermocouple inputs S1508T 8 Channels thermocouple inputs S1512T 12 Channels thermocouple inputs S1516T 16 Channels thermocouple inputs 1.5 Device Overview Handheld Mode Note:Don’t block the cold junction compensation holes, which may affect the... -
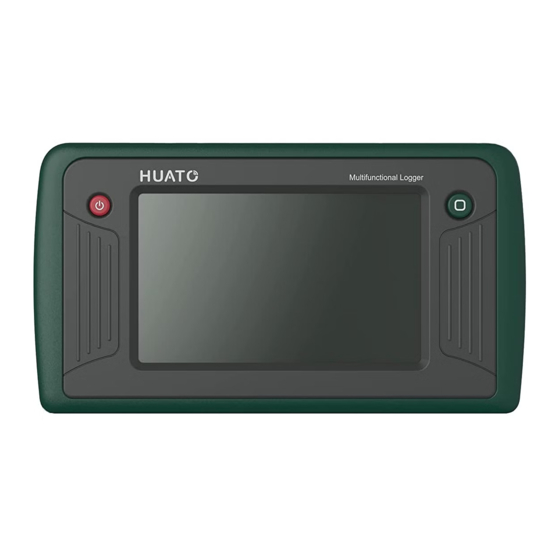
Page 7: Buttons And Ports
S1500 Series Tabletop Kickstand Use the supporting plate on the back to make the device stand on the desktop Mounting Hole Mounting Hole Alarm Output Port RJ45 Port 1.6 Buttons and Ports Home Power On/Of SD Card Type-C USB Card... -
Page 8: Operational Steps
S1500 Series Button/Ports Details 1、To power on and power off the device, hold down the Power button Powerbutton for a few seconds. HOME button 1、Press this key to return to the main interface 1、It can charge the internal rechargeable lithium battery. -
Page 9: Technical Specifications
S1500 Series 1.8 Technical Specifications 1.8.1 Technical Specifications Main parameters Dimensions 189.3*103.5*36.5mm(With ProtectionWith protective sleeve) Display 5 inch capacitive touch screen, resolution 800 * 480 Number of channels 8-channel/12-channel/16-channel universal input Storage capacity A single record file can record up to 100,000 records, and the total... - Page 10 S1500 Series 1.8.2.Input Signal Thermocouple input (cold jucntion compensation-cjc excluded), accuracy (cold jucntion compensation-cjc excluded), CJC error: ± 1.5 ℃ Maximum allowable Type Measuring range(℃) Resolution(℃) error(℃) 0.01 ±1.0 Two-wiresystem -200-850℃ -200-850℃ 0.01 ±0.5 Three-wiresystem -200-850℃ 0.01 ±0.1 Four-wiresystem Thermocouple input (excluding cold junction error), accuracy does not include cold junction compensation error, cold junction compensation error: ±1.5℃...
-
Page 11: Section 2 Attentions
S1500 Series DC current / voltage input 精度 Type Resolution Max permissible errors(%FS) (1-5)V 0.001V (0-10)V ±0.1% (0-5)V 0.001mV (0-100)mV (4-20)mA ±0.1% (0-20)mA 0.001mA (0-10)mA Frequency and Pulse input Type Measuring range Max permissible errors Frequency 0~99KHz ±2Hz Pulse/Count 0-4,000,000,000 Pulses Section 2. -
Page 12: Connection Mode
S1500 Series Section 3 Thermocouple input port 3.1 Connection Mode The following picture shows the input port of the thermocouple,wiring method is shown in the interface diagram RTD input(Two-wiresystem) RTD input(Three-wiresystem) RTD input(Four-wiresystem) Thermocouple input DC voltage input DC current input... -
Page 13: Section 4 Interface And Function Description
S1500 Series Section 4 Interface and function description 4.1 Menu Bar (1) Device Name: User defined, 24 characters, LOGGER by default. (2) Recording status indicator Standby: gray; Recording / auto stop: green flashing; Delay recording: yellow flashing. (3)Alarm prompt: This icon appears when there is alarm information; when the device is normal or enters the alarm interface. -
Page 14: Digital Display
S1500 Series 4.2 Main interface The main interface displays 8 function icons: digital display, bar chart screen, real-time curve, historical curve, start / stop recording, data storage, channel setting and system setting. 4.3 Digital Display Click digital display in the main interface to enter the digital display interface. The digital display interface has three arrangement modes: 2 * 4 (4 rows and 2 col- umns), 3 * 4 (4 rows and 3 columns) and 4 * 4 (4 rows and 4 columns). - Page 15 S1500 Series Digital display 4.4 Bar Chart Screen Click the bar graph screen in the main interface to enter the bar graph display interface. The bar graph display interface has two arrangement modes: 1 * 8 and 1 * 6. The arrangement mode is automatically switched according to the number of channels of the equipment.
-
Page 16: Real Time Curve
S1500 Series 4.5 Real Time Curve As shown in the figure below, from left to right at the top of the interface are: unit selection, channel selection, start / pause icon. The bottom is the channel number and the latest real-time value. The color of the channel number is the same as that of the corresponding channel curve, and the bottom channel unit is corresponding to the left and right ordinates. -
Page 17: Historical Curve
S1500 Series 4.6 Historical Curve As shown in the figure below, from left to right at the top of the interface are: record file selec- tion, unit selection, channel selection; channel number and maximum / minimum value are displayed at the bottom (click the channel box to switch the maximum and minimum values), the digits’... -
Page 18: Start / Stop Recording
S1500 Series 4.7 Start / stop recording Start recording stop recording (1) Record file name: customizable, up to 24 bytes. The default is Log1, log2 . (2) Record interval: customizable, the shortest is 1 second, the longest is 86400 seconds (24h), only integer can be input. -
Page 19: Data Storage
S1500 Series 4.8 Data Storage 4.8.1 Record documents Click the box in front of the file to check the corresponding file. Click the top box to check all the files on the current page.Record the corresponding information at the bottom of the file interface... -
Page 20: Channel Settings
S1500 Series 4.9 Channel Setting The numbers on the left side of the channel setting ports are CH1 ~ CH16, Channel disabled / channel not configured: Ring gray; Channel configured successfully: Ring Blue; Currently selected channel: Green filling. The icon on the top of the interface is signal type, which indicates from left to right: Disabled (the channel is not used), RTD (PT100), TC (thermocouple), DC voltage, DC current, thermistor, pulse (only used on channel 1). -
Page 21: Alarm Settings
S1500 Series 4.9.2 Alarm setting Click the alarm to enter the alarm interface, and click the alarm on / off button (green means open, gray means close). If the alarm is opened, the alarm value and return value can be set. Click apply to set successfully. -
Page 22: Calibration Settings
S1500 Series 4.9.3 Calibration setting Slope: the slope value can be input. Intercept: intercept value can be entered. Algorithm: click the icon to enter the calibration algorithm wizard interface. In the algorithm wizard interface, you only need to input the measured values and standard values of the low calibration point and the high calibration point to calculate the calibration slope and intercept. -
Page 23: System Settings
S1500 Series 4.10 System Settings On the left side of the system setting interface are four functional options: system information, system display, sampling storage and network setting. 4.10.1 system information and program upgrade (1) Serial number (2) Hardware version number (3) software version number;... -
Page 24: Systems Display
S1500 Series 4.10.2 system display (1) Click time format to set 12 hours / 24 hours mode. (2)Click time setting, click up and down arrow to set year, month, day, hour, minute, morning and after- noon. (3) Click the left and right arrows on the backlight display to adjust the information screen time (1min, 10min, 30min, no time out). -
Page 25: Web Settings
S1500 Series Normal mode: ①Enter the IP address, subnet mask, and gateway information. ②Click the SSID name box, slide the progress bar on the right side up and down to view and select the corresponding WIFI name (if The corresponding WIFI name is not found, click Enter, manually enter the WIFI name, and then enter the security key, Click Update and then click Connect), click Apply, and then enter the security key. - Page 26 S1500 Series Section 5 Daily maintenance When there is any foreign matter on the display screen, use a soft cloth to wipe the foreign matter away gently. When there is residual foreign matter on the protective sleeve, use soft cloth and soft deter- gent to remove the foreign matter.
- Page 27 HUATO Electric CO.,Ltd Email: sales@huato.com Email: sales@huato.com Address: 3rd floor, building 2, No.1 Factory building, Taohuayuan science and Technology Innovation Park, Bao'an, Shenzhen Post code: 518102 Official website: www.huato.cn Service hotline: 0755-29977605 / 29748810 / 29977005 / 23081319 / 23081316...
Need help?
Do you have a question about the S1500 Series and is the answer not in the manual?
Questions and answers
We have been facing issues with the S1516T model as the device automatically stops logging after 30-40 seconds without turning it off manually. Kindly help resolve this issue.
The Huato S1500 Series S1516T model may be automatically stopping logging after 30–40 seconds due to the "Auto stop" feature being turned on. If auto stop is enabled, the device will stop recording after the set time. Check the auto stop settings and ensure it is either turned off or set to a longer duration.
This answer is automatically generated