
Related Manuals for Huato S500 Series


Summary of Contents for Huato S500 Series
- Page 1 User’s Guide Talk to our sales and shop online at www.huato.cn E-mail: sales@huato.com S500 S500 Series Temperature & Humidity Data Logger...
- Page 2 Engineering Service: 0755-29977605 Fax: +86-755-29748856 E-mail: sales@huato.com For Other Locations Visit www.huato.cn The information contained in this document is believed to be correct, but HUATO accepts no liability for any errors it contains, and reserves the right to alter specifications without notice.
-
Page 3: Table Of Contents
Table of Contents Table of Contents Section ..........................Page Section 1 Introduction ..................1.1 Features ....................1.2 Applications ..................1.3 Data Logger Model ................1.4 S500-EX/TH/ET/DT- USB DataLogger Appearance ......1.5 S500-EX/TH/ET/DT-RS485Data Logger Appearance ......1.6 LCD Temperature and Humidity Data Logger Screen ......1.7 Button function instructions .............. -
Page 4: Section 1 Introduction
Introduction Section 1 Introduction 1.1 Features • High-end integrated temperature & humidity sensors with original calibration. • Built-in storage, up to 43,000 groups of temperature & humidity data. • High accuracy in measuring temperature & humidity. • Temperature, humidity and time are displayed simultaneously. Easy to operate with buttons. •... -
Page 5: S500-Ex/Th/Et/Dt- Usb Datalogger Appearance
Introduction 1.4 S500-EX/TH/ET/DT- USB Data Logger Appearance S500 Intelligent Data Logger II 记录 储存 Temperature&Humidity MENU ① LCD Screen ② ON/OFF Button ③ Backlight Button ④ Max or Min value and normal state switch button ⑤ Log ON/OFF ⑥ Hanging hole ⑦ Stand ⑧ S/N ⑨ Reset ⑩ USB DC 12V... -
Page 6: S500-Ex/Th/Et/Dt-Rs485Data Logger Appearance
Introduction 1.5 S500-EX/TH/ET/DT-RS485Data Logger Appearance S500 Intelligent Data Logger II 记录 储存 Temperature&Humidity MENU ① LCD Screen ② ON/OFF Button ③ Backlight Button ④ Max or Min value and normal state switch button ⑤ Log ON/OFF ⑥ Hanging hole ⑦ Stand ⑧ S/N ⑨ Reset ⑩ USB DC 12V... -
Page 7: Lcd Temperature And Humidity Data Logger Screen
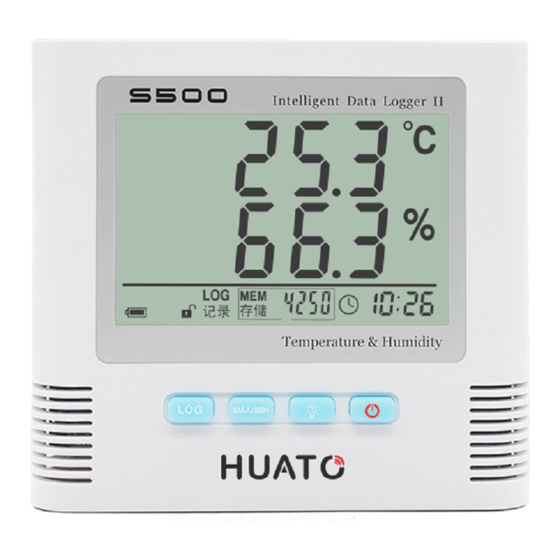
Introduction 1.6 LCD Temperature and Humidity Data Logger Screen 储存 Icon Explanation Backlight light Alarm indicator. When the real-time value of temperature & humidity exceeds the set upper and lower threshold, an alarm symbol will be displayed Temperature display Humidity display Battery level indicator. -
Page 8: Button Function Instructions
Installation and Instruction 1.7 Button function instructions LOG button, turn logging ON/OFF (1) In the non-logging mode (standby), press to enter the logging mode, LOG indicator and the number of current records will be displayed on the LCD. (2) In the logging mode, press this button to exit the logging mode, LOG indicator and the number of current records will disappear. -
Page 9: Usb Install Driver & Software
Installation and Instruction 2.1.2 Click Installation Icon After the installation is complete, connect the instrument to the computer through the attached data cable to check whether the new port number can be found. The steps to check the new port number are as follows: 2.1.3 Right-click the [My Computer] icon-[Manage (G)]-[Device Manager]-as shown below: Device... -
Page 10: Use Of Logpro Software
Installation and Instruction 2.1.4 Next, double-click [Port (COM and LPT)] to check the port number like CH340 or CH341 as shown in the figure below: Port number Note: If the port number cannot be found in the above operation, please shut down the computer and restart to try it again. - Page 11 Installation and Instruction (3) Configuration buttons: Click the button in the menu bar, click the button in the setting dialog to read the attributes from the instrument, and then perform configuration of the instrument. Click the button to synchronize with the instrument, the setting parameters will take effect, otherwise the setting parameters will be ineffective.
- Page 12 Installation and Instruction Name User defined The instrument's unique serial number, cannot be changed Sampling interval Sampling interval, range 1-240s Log interval 2-86400s, which needs to be greater than the sampling interval Set the upper and lower alarm thresholds of the sensor. If the function is turned on, alarms will be triggered when data exceeds Alarm upper &...
-
Page 13: Section 3 S500-Ex/Th/Et/Dt-Rs485 Software Installation
Installation and Instruction 6) The recorded data can be exported to EXCEL file, click and choose location to save. It can also be exported as file or picture in format for further processing. (7) Click the button to delete all data records in the logger. (8) Click and use Logpro software to print out the analysis chart directly. - Page 14 Installation and Instruction (3) Check the USB port of the computer Port number (4) Select the correct port accordingly for RS485 data reception (5) Set the instrument name and fill in the instrument serial number and instrument type settings 1. Select any of the instruments in the upper left corner, after displaying the data, enter required instrument name and serial number.
- Page 15 Installation and Instruction Port number 3.Click [Properties] to pop up a dialog, as shown in the figure below. 4.Click [Get Properties], and then click [Sync Properties] after getting the data 5.After completing the above operations, the temperature and humidity data will be uploaded.
-
Page 16: Check The Save File In File List
Installation and Instruction 3.2 View uploaded data. (Note: ToClient8 can only be used when ToMonitor is turned on, otherwise connection will fail.) Click ToClient8 (1) Run ToClient8 the Huato software file folder as shown below:... - Page 17 Installation and Instruction (2) Login and connect (3) Click record query to pop up the following dialog. Select the instrument to be queried and click [Start Query]...
- Page 18 Installation and Instruction (4) The following dialog pops up to view the corresponding data. (5) Click the [View Data] icon to pop up the following dialog to view the real-time data...
-
Page 19: Section 4 Attention
Installation and Instruction 4.1Notes • The waterproof index of this logger is IP34. If there is moisture on the case, do NOT perform USB connection operation to prevent the electronic circuit from being short-circuited with water, which may damage the instrument. •...
Need help?
Do you have a question about the S500 Series and is the answer not in the manual?
Questions and answers