
Related Manuals for Durafly PRIME TUNDRA


Summary of Contents for Durafly PRIME TUNDRA
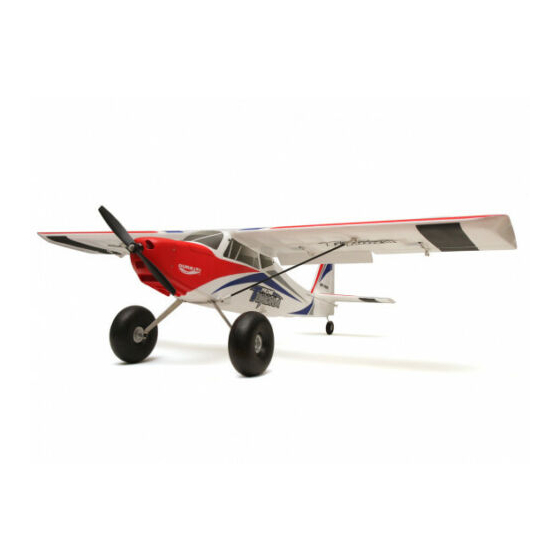
- Page 1 INSTRUCTION MANUAL DURAFLY PRIME TUNDRA 1200MM READY TO FLY VERSION Please read this manual carefully before operating this plane.
- Page 2 WARNING Read this instruction manual fully so as to become completely familiar with the features of the product before operating. Failure to operate this product correctly could result in damage to the product, personal property and cause serious injury. This is a sophisticated hobby product and is NOT a toy. It must always be operated with caution, common sense and some basic mechanical ability.
-
Page 3: Specifications
ORX gyro, motor, ESC, and 6 digital servos, all these items are preinstalled at the factory. So if you are looking at starting RC model flying then look no further than the Prime Tundra, it is the perfect choice. But also, the Prime Tundra is a fantastic sports aerobatic/ STOL plane with a flight envelope that will appeal to the most discerning pilot. - Page 4 CONTENTS: 1. Fuselage 9. Tailwheel 2. Wing 10. Turnigy T-6A Transmitter 3. Horizontal Stabilizer 11. Foam Support for Optional Candy Dropper 4. Wing protectors 12. Cabin Window Sticker 5. 10x6 Propeller 13. Wing Bands, "R" Clips and Bind Plug 6. U/C and Wheels 14.
- Page 5 DURAFLY PRIME TUNDRA 1200MM READY TO FLY VERSION ASSEMBLY: Step 1: U/C Assembly and Fitting. 1.Identify the parts shown above for the U/C 2.Use a box spanner or similar to undo the lock assembly. nuts on the axle. 3.Slide a wheel on to one of the axles, ensure 4.Re-fit the lock nut using your spanner.
- Page 6 7.Identify the pack of four 3x10mm machine 8.Using the 3x10mm screws, attach the U/C screws. assembly to the bottom of the fuselage. Please note the direction of the cut out in the center. Step 2: Attachment of the Horizontal Stabilizer and Tailwheel.
-
Page 7: Step 3: Wing Strut Assembly
DURAFLY PRIME TUNDRA 1200MM READY TO FLY VERSION 5.Using two of the 2.3x8mm self tapping 6.Using the third 2.3x8mm self tapping screw, screws, secure the two stabilizer halves to secure the joint between the two elevator the rear of the fuselage. - Page 8 4. Ensure that you attach the wing struts so that 3. Next stage is to attach the wing struts to the the large dished end faces the underneath of fuselage using the two M2x10mm screws and the wing. lock nuts. 5.
-
Page 9: Step 4: Wing Assembly
DURAFLY PRIME TUNDRA 1200MM READY TO FLY VERSION Step 4: Wing Assembly. 1. For this step you need the wing and the two 2. If you have elected to use the band-on method, then use a good quality glue such as plastic wing protectors. - Page 10 M2.5x16mm machine screws. Note: The basic construction of the Prime Tundra is complete, the next step is setting up the radio and then fitting the propeller. To proceed to the next step you will need to remove the wings. Also for the next steps the propeller must NOT be installed on the motor.
- Page 11 DURAFLY PRIME TUNDRA 1200MM READY TO FLY VERSION Auxiliary Switches on the top of the Transmitter. 1.Remove the battery box cover on the rear of the transmitter and install 8 x "AA" batteries.
- Page 12 3, the light will stay on, meaning the will need the receiver binding plug which is gyro is in training mode. supplied with the Prime Tundra. At this point, Note: If you do have problems binding or arming flick the motor arming switch to armed and...
- Page 13 DURAFLY PRIME TUNDRA 1200MM READY TO FLY VERSION 6.The wing can now be re-attached to the fuselage using either the bands or the bolts. Before you actually fit the wing back on you need to connect the two "Y" leads that are connected to the wing servos.
- Page 14 Elevator Rudder 9.Your Prime Tundra has been set up at the factory, and all control surfaces should be at neutral. With the system switched on and the gyro initialized the control surfaces should all be in their neutral position. Ensure when you do this that the gyro is off, and all the trimmers are also in their neutral position.
- Page 15 DURAFLY PRIME TUNDRA 1200MM READY TO FLY VERSION 14.Now we need to check that the controls are working in the correct direction, see below. Roll Left: Move the aileron stick to the left, the left aileron should go up. Roll Right: Move the aileron stick to the right, the right aileron should go up.
- Page 16 15.Once again, the control throws were all set at the factory and should be as follows. The lower figure is with the D/R (Dual Rates) switch on the top right of the transmitter pointing towards the rear of the transmitter. With the switch the other way you will get full servo throw and this should achieve the higher measurement.
- Page 17 DURAFLY PRIME TUNDRA 1200MM READY TO FLY VERSION 6. Checking the gyro settings. 1. You now need to check that the gyro is functioning correctly. 2. Move the gyro switch down into the "Training Mode", this is the switch in the fully down position.
- Page 18 Note: Now the propeller has been fitted, please be extremely careful when switching the model on, ensure that the transmitter is set correctly before switching on and connecting the battery. Your Prime Tundra is now ready for checking the CG and its first flight.
- Page 19 Step 8: Battery Installation and Setting CG. 1. The recommended center of gravity (CG) for the Prime Tundra should be approximately 55-60mm from the leading edge of the wing. This should be easily achieved if you use a 1300~1400mAh 3S LiPo battery weighing between 110~125g.
- Page 20 9: Flying the Prime Tundra. Once all the above has been done, you should be ready to fly the Prime Tundra for the first time, then we highly recommend that you enlist the help of an experienced RC pilot by joining a local model flying club.
- Page 21 DURAFLY PRIME TUNDRA 1200MM READY TO FLY VERSION 6. When you have completed a satisfactory range test, return to the model and the flying area. Face the model into the wind and stand a few paces behind it, do a final control check. Disarm the motor, ensure the gyro switch is in training mode, and the rate switch is in low rates, you may also need to hold in some up elevator if the grass is a bit long.
- Page 22 Please remember, if when you are flying and you get into a muddle, the gyro is there to help you. If this happens, just let go of the control sticks, reduce the throttle, and let the model sort itself out. Once the model is flying straight and level again, ease the throttle back to around 50% and carefully bring it back to the flying area if it has drifted away.
-
Page 23: Points To Remember
12. Once the model has stopped, disarm the motor straight away with the switch and go and retrieve it. Remember then to disconnect the battery first, before switching off the transmitter. Well done, that is your first flight of the Prime Tundra complete. Points to remember. - Page 24 Using Flaps. When you feel you are ready, the time will come when you want to use the flaps. Using flaps is great fun and a big feature of the Tundra series of models. Flaps help shorten the take-off and landing, enable the model to fly slower, and will help you make steeper approaches to land.
- Page 25 Do this 2 or 3 times until you feel really comfortable using full flaps on the approach. Now start your circuit at the normal height and go for a full flap landing, the Prime Tundra really does this well, especially with the gyro in training mode. As mentioned before, the approach will be steeper, a bit slower, and the landing run very much shorter.
- Page 26 Apply full power and, at point A in the picture above, pull back on the elevator stick to start a climb - not too much, be gentle but precise. Keep the power on, your Prime Tundra will go into a vertical climb. Let it keep going until it starts to roll over onto its back, point B in the picture.
-
Page 27: Gyro Off Mode
Once you are proficient in flying with the gyro off, there are quite a few more maneuvers the Prime Tundra can perform, but we will not go into those in this manual. There is plenty of good videos and illustrations on the internet for the more advanced aerobatics, but as mentioned at the very start of this manual, we would much prefer you learn, and be taught more advanced maneuvers by an experienced club pilot in a club environment. - Page 28 Fitting the Optional Candy Dropper. A.Position the foam support over the mounting B.Feed the Y lead for the Candy Dropper holes on the underside of the fuselage. through the center hole and connect to a spare channel in your Rx. C.Secure the Candy Dropper using the D.The finished Candy Dropper installation.
- Page 29 3.Slot the float cross braces into the inside 4.With the floats assembly on a flat surface, holes of the float front and rear mounting lower the Prime Tundra onto the floats. points. 5.Push the float support legs into the outer 6.Use the supplied M2 x 8mm screws to retain...
- Page 30 7.Although not always required, a water rudder does help with steering in less than calm water conditions. Simply remove the tail wheel and replace with the supplied water rudder. Both tail wheel and water rudder mount in exactly the same way.
-
Page 31: Recommended Accessories
Due to the water rudder taxiing the Prime Tundra is very easy. Place the model in the water and check the controls and ensure they are functioning and operating in the correct direction. Once satisfied all the controls are working as they should, apply some up elevator and then a small amount of power to get the Prime Tundra moving across the water. -
Page 33: Spare Parts
DURAFLY PRIME TUNDRA 1200MM READY TO FLY VERSION Spare Parts. -
Page 34: Optional Accessories
Optional Accessories. -
Page 35: Troubleshooting
DURAFLY PRIME TUNDRA 1200MM READY TO FLY VERSION Trouble Shooting: Problem Cause Solution Charge the batteries. Batteries not fully Install a charged battery. charged. Check connection Transmitter battery low. between the ESC and motor. Replace motor. Motor not connected. Motor does not Consult adio manual and The motor is damaged. - Page 36 Information: Notes:...
- Page 37 APEX CE SPECIALISTS LIMITED UK REP M1 4HT, UK APEX CE SPECIALISTS LIMITED...
Need help?
Do you have a question about the PRIME TUNDRA and is the answer not in the manual?
Questions and answers