Festo YXCL Operating Instructions Manual
Linear gantry
Hide thumbs
Also See for YXCL:
- Description (120 pages) ,
- Description, mechanical installation (92 pages)
Table of Contents
Advertisement
Quick Links
Advertisement
Table of Contents

Related Manuals for Festo YXCL


Summary of Contents for Festo YXCL
- Page 1 YXCL Linear gantry Operating instruc- tions 8087850 2021-07b [8087852]...
- Page 2 Translation of the original instructions...
-
Page 3: Table Of Contents
Operation..............50 Festo — YXCL — 2021-07b... - Page 4 Technical data..............54 Festo — YXCL — 2021-07b...
-
Page 5: Applicable Documents
These documents form part of the product documentation and can be downloaded as follows. 1. Read the order ID/product key from the product labelling. 2. Download the documents from the Festo Support Portal by entering the order ID/Product Key è www.festo.com/sp. -
Page 6: Intended Use
The qualified personnel have skills and experience in dealing with electropneumatic (open-loop) control technology. Additional information – Contact the regional Festo contact if you have technical problems è www.festo.com. – Accessories and spare parts è www.festo.com/catalogue. Festo — YXCL — 2021-07b... -
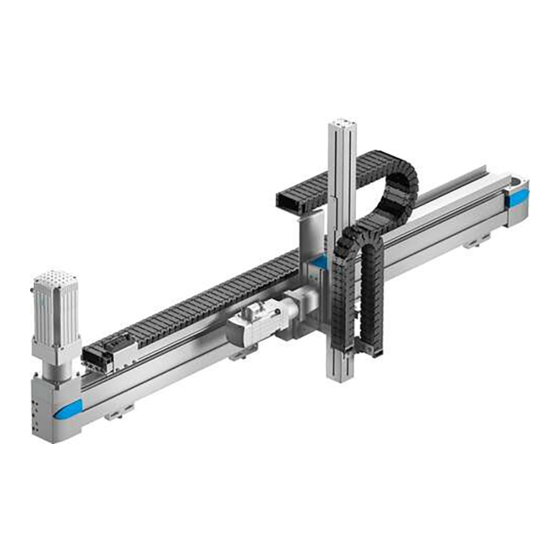
Page 7: Product Overview
– The Y-module moves the Z-module along the Y-axis. – The Z-module moves customer-mounted attachments along the Z-axis. Fig. 1: Product version with EGC axis, example Y-module EHMY-LP-EGC Adapter, attachment components Mounting component for adjusting kit Z-module Festo — YXCL — 2021-07b... - Page 8 Product overview Fig. 2: Product version with ELGC axis, example Y-module EHMY-LP-ELGC Adapter, attachment components Mounting component for adjusting kit Z-module Festo — YXCL — 2021-07b...
-
Page 9: Modules Of The Product
– Energy chain (optional for product version with ELGC axes) – Multi-pin plug for sensors (optional) Product version with EGC axis Fig. 3: Y-module EHMY-LP-EGC, motor position left, example Energy chain Slide with Y-Z adapter plate Y-axis Motor (optional) Mounting component for adjusting kit Festo — YXCL — 2021-07b... - Page 10 Product overview Product version with ELGC axis Fig. 4: Y-module EHMY-LP-ELGC, motor position left axial, example Energy chain (optional) Slide with Y-Z adapter plate Mounting component for adjusting kit Motor (optional) Y-axis Festo — YXCL — 2021-07b...
-
Page 11: Z-Module
Z-axis Energy chain (configuration-dependent) Motor (optional) Fig. 5: Z-module, example The product has one of the following Z-modules, depending on the configuration. Product version with EGC axis Z-Y adapter plate Z-axis Fig. 6: Z-module DHMZ-DGSL Festo — YXCL — 2021-07b... - Page 12 Product overview Z-Y adapter plate Z-axis Fig. 7: Z-module EHMZ-EGSL Z-Y adapter plate Z-axis Fig. 8: Z-module EHMZ-EGC Z-Y adapter plate Z-axis Fig. 9: Z-module EHMZ-DGEA, motor position left Festo — YXCL — 2021-07b...
- Page 13 Fig. 10: Z-module EHMZ-DGEA, motor position right Product version with ELGC axis Drill holes for mounting on the Y-module Z-axis Fig. 11: Z-module DHMZ-DGST Profile mounting Z-axis Multi-pin plug (optional) Fig. 12: Z-module EHMZ-EGSC, axial motor position, example Festo — YXCL — 2021-07b...
-
Page 14: Delivery Status
– For delivery status "completely mounted": Lift the product only by the Y-axis or the mounting components of the Y-axis. – Use suitable aids to lift and set down the product, e.g. crane. Festo — YXCL — 2021-07b... -
Page 15: Remove Transportation Locks From The Transportation Protection
• Secure unsecured moving parts with transportation locks. Fig. 14: Identification of the transportation lock for moving parts • Do not remove the marked transportation locks for the moving parts until the product has been mounted. Festo — YXCL — 2021-07b... -
Page 16: Transport Kit
3. Tighten the nuts of the lifting eye bolts. Tightening torque: M8 = 12 Nm, M12 = 24 Nm Lift product with mounted transport kit (product version with EGC axis) Requirement: the transportation locks for mounting on the transportation protection are removed. Fig. 16: Lift product with transport kit, here EGC-50 Festo — YXCL — 2021-07b... - Page 17 – Apply load to lifting eye bolts evenly at an angle of £ 45°. – Do not apply lateral stress to the lifting eye bolts. – Attach the lifting belts as vertically as possible: – Take adequate safety precautions. – Adjust the lifting speed. Festo — YXCL — 2021-07b...
-
Page 18: Removing Transportation Locks From The Moving Parts
Remove all marked transportation locks from the moving parts. Locking module on the Z-module The fuse module depends on the configuration. – The Z-module with a Festo motor has a brake function: The moving parts do not have a locking module. – For the Z-module without Festo motor: –... - Page 19 Z-axis 1. After assembly and before the product is energised: Support the Z-axis from below. 2. Remove the locking module. 3. Move the Bring Z-axis slowly into the lower end position. 4. Mount the motor. Festo — YXCL — 2021-07b...
-
Page 20: Assembly
3351 … 3900 3701 … 4350 3741 … 4370 8 – 3901 … 4450 4351 … 4500 4371 … 4500 9 – 4451 … 4500 – – Tab. 3: EHMY-LP-EGC-… -KF: number of required mounting components Festo — YXCL — 2021-07b... - Page 21 4151 … 4500 Tab. 4: EHMY-LP-EGC-… -HD: number of required mounting components EHMY-LP-ELGC- Number Mounting attachments [mm] £ 600 Stroke Hy in Y-direction 800 … 1200 ³ 1500 Tab. 5: EHMY-LP-ELGC: number of required mounting components Festo — YXCL — 2021-07b...
-
Page 22: Preparing Mounting Surface For The Adjusting Kit
[mm] [mm] ³ 9 ³ 9 ³ 13 Thread depth [mm] 1) Hy = stroke in Y-direction è Technical data 2) n = number of mounting components Tab. 7: Dimensions for adjusting kit for EHMY-LP-EGC-...-HD Festo — YXCL — 2021-07b... -
Page 23: Application Of Adjusting Kit
Mount and align the product according to the delivery status: • For delivery status "partially mounted": è 6.5 Product assembly with “partially mounted” delivery status. • For delivery status "completely mounted": è 6.6 Product assembly with delivery status "com- pletely assembled". Festo — YXCL — 2021-07b... - Page 24 Washer (2x) for adjusting part Screw M8 (2x) for adjusting part Fig. 24: Not in scope of delivery Select the screw aD for mounting the adjustment part suitable for the installation situation. Strength class at least 8.8 Festo — YXCL — 2021-07b...
- Page 25 • Mount the Y-module to a machine frame accordingly. 1. Loosen the countersunk screws on the support profile of the energy chain. Do not unscrew the screws. Festo — YXCL — 2021-07b...
- Page 26 2. Loosen the screws on the profile mountings of the adjusting kits. Do not unscrew the screws. 3. Position the mounting flange on the mounting surface. 4. Place the washers under the screws. 5. Lightly secure the mounting flange to the mounting surface with the screws. Festo — YXCL — 2021-07b...
- Page 27 EHMY-LP-EGC-...-HD Screw size M5 x 16 M8 x 20 Tightening torque [Nm] EHMY-LP-ELGC- Screw size M5 x 16 Tightening torque [Nm] 7. Press the bolt from below into the intended hole in the mounting flange. Festo — YXCL — 2021-07b...
- Page 28 10. Screw the nut aA onto the screw 8. 11. Fasten the adjusting part to the mounting surface with suitable washers aC and screws aD. 12. Align the Y-module horizontally by screwing the screw on the adjusting part in or out. Festo — YXCL — 2021-07b...
- Page 29 M4 x 16 M6 x 20 M8 x 30 Tightening torque [Nm] EHMY-LP-EGC-...-HD Screw size M6 x 20 M8 x 30 Tightening torque [Nm] EHMY-LP-ELGC- Screw size M5 x 16 M6 x 20 Tightening torque [Nm] Festo — YXCL — 2021-07b...
- Page 30 M5 x 8 M5 x 12 M5 x 12 Tightening torque [Nm] EHMY-LP-EGC-...-HD Screw size M5 x 10 M5 x 10 M5 x 10 Tightening torque [Nm] EHMY-LP-ELGC- Screw size M5 x 10 Tightening torque [Nm] Festo — YXCL — 2021-07b...
-
Page 31: Product Assembly With "Partially Mounted" Delivery Status
Fig. 26: Product version with EGC axis, example Y-module EHMY-LP-EGC Adapter, attachment components Mounting component for adjusting kit Z-module Fig. 27: Product version with ELGC axis, example Y-module EHMY-LP-ELGC Adapter, attachment components Mounting component for adjusting kit Z-module Festo — YXCL — 2021-07b... -
Page 32: Mounting Y-Module
Motor (optional) Fig. 28: Y-module EHMY-LP-EGC, motor position left, example Energy chain (optional) Mounting component for adjusting kit Y-axis Slide with Y-Z adapter plate Motor (optional) Fig. 29: Y-module EHMY-LP-ELGC, motor position left axial, example Festo — YXCL — 2021-07b... - Page 33 1. Place the Y-module slowly and carefully on the prepared mounting surface. 2. Align the Y-module horizontally and fasten it è 6.4 Application of adjusting kit. Next step: • Mount the Z-module according to the product version. Festo — YXCL — 2021-07b...
-
Page 34: Mounting Z-Module
– Z-module EHMZ-EGC or EMHZ-DGEA: the Z-axis is secured with the locking module. Z-axis Z-Y adapter plate Fig. 31: Z-module DHMZ-DGSL Z-axis Z-Y adapter plate Fig. 32: Z-module EHMZ-EGSL Z-axis Z-Y adapter plate Fig. 33: Z-module EHMZ-EGC Festo — YXCL — 2021-07b... - Page 35 Assembly Z-axis Z-Y adapter plate Fig. 34: Z-module EHMZ-DGEA, motor position left Z-axis Z-Y adapter plate Fig. 35: Z-module EHMZ-DGEA, motor position right Cylindrical pin Screw Fig. 36: Enclosed components, example Festo — YXCL — 2021-07b...
- Page 36 Fig. 38: Identification of the transportation lock for moving parts • On the product, remove all marked transportation locks from the moving parts. • Z-module EHMZ-EGC or EMHZ-DGEA: remove the locking module è 5.4 Removing transportation locks from the moving parts. Festo — YXCL — 2021-07b...
- Page 37 M5 x 30 M6 x 45 Tightening torque [Nm] Removing transportation locks Fig. 40: Identification of the transportation lock for moving parts • On the product, remove all marked transportation locks from the moving parts. Festo — YXCL — 2021-07b...
- Page 38 [Nm] 5.0 + 20 % 8.0 + 20 % Removing transportation locks Fig. 42: Identification of the transportation lock for moving parts • On the product, remove all marked transportation locks from the moving parts. Festo — YXCL — 2021-07b...
-
Page 39: Product Assembly With Delivery Status "Completely Assembled
– Product version with EGC axis: the transportation kit for lifting the product is mounted. – The moving parts are secured with the transportation locks. Fig. 43: Product version with EGC axis, example Y-module EHMY-LP-EGC Adapter, attachment components Mounting component for adjusting kit Z-module Festo — YXCL — 2021-07b... - Page 40 Assembly Fig. 44: Product version with ELGC axis, example Y-module EHMY-LP-ELGC Adapter, attachment components Mounting component for adjusting kit Z-module Festo — YXCL — 2021-07b...
-
Page 41: Attachment Component
1. Mount the attachment component provided by the customer to the adapter attachment compo- nents of the Z-module. Note the interface è CAD model of the product. 2. Earth the attachment component at the specified earthing points è 7.2.4 Earthing. Festo — YXCL — 2021-07b... -
Page 42: Installation
-2 M1 Encoder cable (B1) -1 B1 -2 B1 Multi-pin plug 1 (X1) -1 X1 -2 X1 Multi-pin plug 2, – -2 X2 optional (X2) Tab. 10: System of cable identification (product version with EGC axis) Festo — YXCL — 2021-07b... -
Page 43: Chamber Allocation For Energy Chain
Tab. 14: DHMZ-DGST: tubing size/minimum bending radius (product version with ELGC axis) 7.2.2 Chamber allocation for energy chain The energy chains are subdivided into chambers by separators. The chambers are shown schematically from the point of view of the open end of the energy chain. Festo — YXCL — 2021-07b... - Page 44 Motor cables or tubing Motor cables or tubing Encoder cables, earthing cable or plug socket with cable Plug sockets with cables or customer-specific Customer-specific Customer-specific Tab. 17: Chamber allocation energy chain Y-module EHMY -...- EGC (except EHMY-LP-EGC-50/125) Festo — YXCL — 2021-07b...
- Page 45 Encoder cables, plug sockets with cable Motor cables, earthing cable Tab. 19: Chamber allocation energy chain Z-module EHMZ-EGC Energy chain chambers Allocation Customer-specific Customer-specific Plug sockets with cable Earthing cable Tab. 20: Chamber allocation energy chain Z-module EHMZ-DGEA, EHMZ-EGSL Festo — YXCL — 2021-07b...
-
Page 46: Installing Cables And Tubing
1. Move the energy chain through the entire stroke. Ä The energy chain must be able to move without hindrance. 2. In case of blockage: check and correct the installation of the cables and tubing. Festo — YXCL — 2021-07b... -
Page 47: Earthing
3. Earth the attachment component mounted by the customer. Earthing points The following illustration shows an example of the positions of the earthing points. The positions of the earthing points may vary depending on the configuration. Fig. 46: Earthing points, example Festo — YXCL — 2021-07b... - Page 48 Earthing point Washer Serrated washer 1. Position serrated washer. 2. Place the cable lugs of the earthing cables between the serrated washer and the washer. 3. Tighten the nut or screw. Tightening torque: 3.5 Nm Festo — YXCL — 2021-07b...
-
Page 49: Commissioning
• Before energising the product: check that the transportation locks of the moving parts are removed. Commissioning may only be performed by qualified specialised personnel who are familiar with: – Festo Configuration Tools (FCT)/Festo Automation Suite (FAS) – Installation and operation of handling systems Note the following during commissioning: –... -
Page 50: Perform Initial Commissioning With Test Run
Before disconnecting electrical connections: comply with the waiting time specified for the integrated electrical components è Observe the documentation of the electrical compo- nents. 2. Switch off compressed air supply. 3. Compressed air can be stored in the pneumatic Z-module: exhaust the Z-module. Festo — YXCL — 2021-07b... -
Page 51: Cleaning
The product is initially lubricated in the delivery status. NOTICE Trouble-free operation and a long service life require regular relubrication. • Lubricate the axes at the specified lubrication interval. • Observe the specifications for relubrication. • Use appropriate grease gun. Accessories è www.festo.com/catalogue. Specifications Lubrication interval [km] 2500 Lubricating grease See documentation for the axes è... -
Page 52: Fault Clearance
Check signal of the motor con- bled. troller. For motor with brake: brake is Release brake. active. Motor turns in the wrong direc- Wiring fault Check wiring. tion or vibrates. Incorrect controller settings Change controller parameters. Tab. 22: Fault clearance Festo — YXCL — 2021-07b... -
Page 53: Disassembly
Before disconnecting electrical connections: comply with the waiting time specified for the integrated electrical components è Observe the documentation of the electrical compo- nents. 3. Switch off compressed air supply. 4. Compressed air can be stored in the pneumatic Z-module: exhaust the Z-module. Festo — YXCL — 2021-07b... -
Page 54: Technical Data
Screws, centring pins Ball bearing Toothed belt pulleys, flanged High-alloy steel wheels Multi-pin retaining bracket Moment compensator Energy chains Plastic Buffer Cover caps Toothed belt Polychloroprene with glass cord and nylon coating Tab. 23: Technical data Festo — YXCL — 2021-07b... - Page 56 Copyright: Festo SE & Co. KG 73734 Esslingen Ruiter Straße 82 Deutschland Phone: +49 711 347-0 Internet: © 2021 all rights reserved to Festo SE & Co. KG www.festo.com...
Need help?
Do you have a question about the YXCL and is the answer not in the manual?
Questions and answers