
Related Manuals for Sizewise Stratus Series


Summary of Contents for Sizewise Stratus Series
- Page 1 User Manual Sizewise™ Stratus Series Mattress Systems #8109 Rev . 2.0 03.04.2021 User Manual...
-
Page 2: Table Of Contents
Unpacking/Parts Breakdown ........................8 Unpacking Instructions (no tools required) ....................8 Operating Instructions ..........................10 Modes of Operation ..........................10 SW™ Stratus Series 3.1 ......................... 11 SW™ Stratus Series 5.1 ......................... 13 SW™ Stratus Series 7.1 ......................... 16 Patient Care Functions ..........................20 Placing the Patient on the Mattress Surface ................... -
Page 3: Definition Of Symbols
Definition of Symbols Manual Definitions Throughout this manual different type fonts and icons are used to aid user readability and understanding of the content. Below are some examples. Standard Text Used for regular information. Bold Face Text Emphasizes a word or phrase. NOTE SETS APART... - Page 4 This symbol signifies that the device is properly protected from electrical shock. This symbol marks the location of the leakage test point screw. This symbol marks the location and specification of the fuse. Replace fuse as marked Power Cord Label The hazards and warnings are indicated on the shipping container by this label.
-
Page 5: General Warnings And Precautions
General Warnings and Precautions WARNINGS WARNING: DO NOT use this device if the power cord is cut, frayed or loosely connected to the device. WARNING: (110V unit) Electrically Powered Mechanism. Electrical Hazard may occur if device is plugged into inadequate electrical outlet. To avoid electrical shock hazard, make sure unit is plugged into a grounded A/C 110V outlet. -
Page 6: Device Information
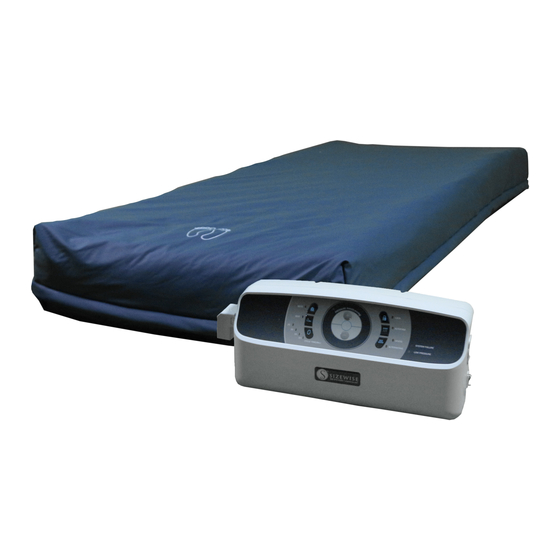
The SW™ (Sizewise) Stratus Series Clinically Effective Mattress System consists of a specialized air inflatable bladder (air mattress) and an electrically powered Blower / Control Unit. The Stratus series is a high quality and affordable air support surface suitable for medium and high risk pressure ulcer treatment. -
Page 7: Specifications
Specifications Control Unit/Pump Mode of Use……………………………………….………………….…. For Indoor Use Only Duty Cycle....……………………………………………………………..Continuous Controller Dimensions…………...… (LxWxH) 15.35”(39 cm) x 7.08”(18 cm) x 4.72”(12cm) Controller Weight 3.1……………………..……….………….…………………6.8 lbs (3.1 kg) Controller Weight 5.1……..…………………………………………………..…7.3 lbs (3.3 kg) ... - Page 8 Safety Standards With respect to electrical shock, fire and mechanical hazards in accordance with ANSI/AAMI ES60601-1 and CAN/CSA C22.2 No. 60601-1 EMC Standards………………………………………………….…...………CISPR 11 Class B (EMC was evaluated according to IEC / EN 60601-1-2:2007)
-
Page 9: Unpacking And Set-Up Instructions
Unpacking and Set-Up Instructions Unpacking/Parts Breakdown The SW™ (Sizewise) Stratus Series Clinically Effective Mattress System consists of a control unit (pump), power cord, a mattress and a waterproof, vapor permeable, easy-to-clean cover. Parts: Pump / Control Unit Mattress ... - Page 10 (Nylon/PVC or Nylon/Pu) and constructions depending on the system model. Please refer to the Specifications section for details. Please consult your Sizewise Representative for more information of the mattress specifications. 1.) Place the mattress flatly on the bed frame. The inflation tube should be towards the foot end so that it can be connected to the inflation nozzles on the pump.
-
Page 11: Operating Instructions
Operating Instructions 1. Remove standard mattress from the frame. 2. Replace standard mattress with the SW™ Stratus Series Mattress. (Be sure air tubing is at the foot end of the frame.) 3. Strap air support mattress to the bed frame on all four sides. -
Page 12: Sw™ Stratus Series 3.1
SW™ Stratus Series 3.1 1.) Turn the Power on. The indicator (green) of the power switch will light up, and the pump starts to pump air into the mattress. When the NORMAL PRESSURE indicator (green) lights up, the pressure in the mattress has reached the pre-defined level, and the patient can then be placed on the mattress. - Page 13 SW Stratus Series 3.1 The functions of the Support Surface pumps are described below by model. Please refer to the figures of each type. (1) POWER switch (2) PRESSURE-ADJUST Knob (3) NORMAL PRESSURE indicator (4) LOW PRESSURE indicator POWER switch (1) ■...
-
Page 14: Sw™ Stratus Series 5.1
SW™ Stratus Series 5.1 1.) Turn the power ON. A BEEP sound will begin the operation. The indicator (green) of the power switch will light up, and the pump starts to pump air into the mattress. The LOW PRESSURE indicator (red) will flicker as the inflation of the mattress begins. - Page 15 “BEEP” alarm tone. In all these cases, pressing the MUTE key will silence the alarm, but the LED indicator will continue flickering. Repressing the MUTE key will reactivate the audible alarm. SW™ Stratus Series 5.1 (1) POWER switch (2) MUTE key...
- Page 16 ■ AUTOFIRM key (4) Press the AUTOFIRM key to set AUTOFIRM mode to quickly inflate the air mattress to the maximum pressure which facilitates nursing and caring. The AUTOFIRM indicator (amber) lights up when the system is in AUTOFIRM mode. The system will automatically return to the previous mode 30 minutes after the AUTOFIRM mode is in operation.
-
Page 17: Sw™ Stratus Series 7.1
SW™ Stratus Series 7.1 1.) Turn the power on. A BEEP sound will begin the operation. The indicator (green) of the power switch will light up, and the pump starts to pump air into the mattress. The LOW PRESSURE indicator (red) will flicker as the inflation of the mattress begins. - Page 18 the pump will automatically start to inflate the mattress. The inflation will stop when the set pressure level is reached. NOTE: If the pressure is consistently low, the audible will beep and its indicator will light up to attract attention. If there should be obvious leakage, for example caused by loose connection of tubes, the audio/visual alarm will be activated.
- Page 19 SW™ Series Stratus 7.1 POWER switch MUTE key PANEL LOCK key AUTOFIRM key LOW AIR LOSS key STATIC/ALTERNATE key CYCLE TIME key PRESSURE SELECTION keys SEAT indicator (10) POWER FAILURE indicator (11) SYSTEM FAILURE indicator (12) LOW PRESSURE indicator POWER switch (1) The POWER switch is at the lower right side of the pump.
- Page 20 PRESSURE SELECTION keys (8) The PRESSURE SELECTION keys can be used to decide the pressure in the inflated cells in the mattress. 8 pressure levels are indicated by the number of indicators (green) light up. SEAT indicator (9) This indicator (yellow) light when the SEAT(Auto-Seat function) is action. POWER FAILURE indicator (10) This indicator (red) flickers when the power input is fail.
-
Page 21: Patient Care Functions
Patient Care Functions Placing the Patient on the Mattress Surface Place the patient on the mattress surface from a bed or stretcher with a transfer device. In order to ensure proper immersion and envelopment of the patient, the user should 1. -
Page 22: Bedpan Placement & Removal
Bedpan Placement & Removal Position the patient’s hips over the center of the mattress. Using Static Mode, lower the pressure setting with the Firm/Soft button. Turn the patient into the side-lying position and place the bedpan. The pressure in the center section of the mattress will lower to make inserting the bedpan easier. The firmness setting may be adjusted to increase the firmness of the center section after the pan is placed in position. -
Page 23: Mattress Cleaning Instructions
Mattress Cleaning Instructions WARNING and CAUTION: It is recommended that gloves and protective clothing be worn at all times during cleaning and disinfecting. DO NOT autoclave. NOTE: Improper cleaning, rinsing or the incorrect use of cleaning agents can lead to premature fabric discoloration and breakdown of the fabric’s fluid-resistance, stain-resistance and fabric strength. -
Page 24: Laundry Instructions
3. Change wipes often to ensure that surfaces remain wet with disinfectant for the manufacturer’s required contact time. Used wipes are to be discarded in the trash. 4. Remove disposable gloves and discard in the trash; perform hand hygiene using soap and warm water, or hand sanitizer, and then remove eye protection. - Page 25 Air Therapy Internal Mattress Components 1. Prepare the disinfectant according to the manufacturer’s recommendations. 2. Prepare a separate bucket of warm, fresh water to be used for rinsing the equipment after cleaning/disinfecting procedures are completed as instructed. 3. Allow the air cells to remain wet with disinfectant solution for the manufacturer’s recommended contact time.
-
Page 26: Cleaning Instructions: Control Unit/Pump
Control Unit Cleaning Instructions: NOTE: Hand clean only. DO NOT place in sterilization room or chamber. 1. Personal Protective Equipment should be used as directed by the Material Safety Data Sheet for the disinfectant. 2. Prepare the disinfectant according to the manufacturer’s recommendations. 3. -
Page 27: Maintenance
Check the items on this chart at the indicated intervals. If any of the items are loose, worn, bent or distorted immediately have them checked and/or repaired by an authorized Sizewise technician. Frequent maintenance and servicing will improve performance and extend product life. -
Page 28: Storage And Disposal
Plug in the pump and check the airflow from the hose connection port. The airflow should alternate between ports every half-cycle time. Check the air hoses to see if there are kinks or breaks. For replacement, please contact your Sizewise representative. -
Page 29: Hepa Filter
HEPA Filter HEPA: (High Efficiency Particulate Air) filter. NOTE: HEPA filters aid in contamination control for facilities. HEPA filters do not filter out gases and odor molecules such as chemical vapors and cigarette smoke. NOTE: HEPA filter must be used in conjunction with the manufacturer supplied filter. DO NOT attempt to install HEPA filter without the original equipment filter. - Page 30 HEPA Filter Maintenance NOTE: DO NOT MODIFY HEPA filter for installation. Order filter from Sizewise to receive filter with correct dimensions. NOTE: DO NOT attempt to clean HEPA filters, as they are to be removed and replaced only. − HEPA filters must be replaced monthly.
-
Page 31: Safety Tips
Safety Tips Important Safety Instructions Unpacking and Set-Up Instructions Keep out of direct sunlight. DO NOT expose to temperatures greater than 35°C (95°F) or below -18°C (0°F). DO NOT expose the Control Unit/Pump to humidity greater than 95%. ... -
Page 32: Seven Zones Of Bed Rail Entrapment
If the patient would have any clinical conditions that could result in risk of falling or improperly lying in bed, the bed should be left at its lowest setting and in flat position when not attended. Sizewise recommends the use of bed rails if they are available. There are seven zones of bed rail entrapment. -
Page 33: Troubleshooting
Turn on the power switch again. If the power indicator is on and the pump doesn’t work, contact your Sizewise Representative. If the power indicator is OFF, there may be a faulty outlet. Try to connect the power cord to another outlet. -
Page 34: Frequently Ordered Parts
Frequently Ordered Parts The following is a list of parts that are frequently ordered for self-replacement and repairs. To aid in ordering parts, please use the provided product numbers given below for each part. The replacement of some parts not listed here may require sending in the unit to the manufacturer for repairs. Hook/s Hook Seat/s... - Page 35 Fuse/s and Fuse Holder 3.1, 5.1, 7.1 Overlays...
- Page 36 Stratus 7.1 Connector Port Stratus 3.1 & 5.1 Connector Port...
-
Page 37: Parts List
35x80 Non Slip Top Cover………………………………………………………………………..27300073 35x80 Non Slip Base………………………………………………………………………………27300074 35x80 Base Standard …………………………………………………………………………….. 27300075 35x80 Top Cover Standard………………………………………………………………………..27300076 42x80 Top Cover………………………………………………………………………………….27300077 42x80 Non Slip Base………………………………………………………………………………27300078 42x80 Top Cover PVC…………………………………………………………………………….27300079 42x80 Base PVC Mesh……………………………………………………………………………27300080 For additional part information please contact your Sizewise Representative @ 1-800-814-9389... -
Page 38: Warranty Information
Sizewise’s sole liability shall be discharged by replacing or repairing, at Sizewise’s option, any product or its part or parts which are determined by Sizewise to be defective under normal and proper use during the warranty period. Customer shall notify Sizewise immediately upon the discovery of any alleged defect by contacting Sizewise Parts and Service at 1-800-814-9389. - Page 39 Sizewise, (2) if the weight capacity on any such product is exceeded, (3) use of cleaning methods or chemicals outside the recommended cleaning guidelines, (4) removal of the serial number from the product.
-
Page 40: User Assistance Information
User Assistance Information For questions or assistance with this product, contact Sizewise at: Sizewise 8601 Monrovia Street Lenexa, KS. 66215 Phone: 1-800-814-9389... - Page 41 Phone: 1-800-814-9389 sizewise.net Sizewise and Sizewise Rentals are trademarks of Sizewise Rentals, L.L.C. All specifications, equipment and prices are subject to change without notice. Photos and drawings are representative of the products and may vary s lightly from actual production models.
Need help?
Do you have a question about the Stratus Series and is the answer not in the manual?
Questions and answers