Daktronics FUELIGHT FL-3000 Series Installation & Operation Manual
Petroleum price display & cash/ credit display
Hide thumbs
Also See for FUELIGHT FL-3000 Series:
- Installation & operation manual (55 pages) ,
- Installation quick manual (4 pages)
Table of Contents
Advertisement
Quick Links
Advertisement
Table of Contents
Troubleshooting

Related Manuals for Daktronics FUELIGHT FL-3000 Series


Summary of Contents for Daktronics FUELIGHT FL-3000 Series
- Page 1 FUELIGHT FL-3000 & FL-4500 SERIES PETROLEUM PRICE DISPLAY & CASH/CREDIT DISPLAY INSTALLATION & OPERATION MANUAL P1611, P1805 DD2238839 Rev 30 24 February 2022 201 Daktronics Drive Brookings, SD 57006-5128 www.daktronics.com/support 800.325.8766...
- Page 2 Daktronics trademarks are property of Daktronics, Inc. All other trademarks are property of their respective companies.
-
Page 3: Table Of Contents
Table of Contents Introduction �����������������������������������������1 Client Radio Installation �����������������������17 Outdoor J-box Installation �������������������17 Limitation of Liability ........1 FLD3-2000 Connection ......18 Display Overview ........1 Indoor J-box Installation ����������������������18 Safety Precautions ........2 Outdoor J-box Installation �������������������19 Retrofit Kit Parts ..........2 Mechanical Installation ���������������������3 Limitation of Liability ........19 FLXR3 Server Radio Kit ......20 Sign Structure Design .........3... - Page 4 Driver Diagnostic LEDs ��������������������������42 Display Troubleshooting ......43 Multi-Pylon Troubleshooting Steps ..44 10 Replacement Parts ���������������������������45 Digit Segment Layout ���������������������������45 11 Daktronics Exchange and Repair & Return Programs ��������������������������������46 Exchange Program .........46 Repair & Return Program ......47 Shipping Address ����������������������������������47 Daktronics Warranty and Limitation of Liability ............47...
-
Page 5: Introduction
Petroleum Price Display retrofit kits. Please read and understand all steps in this manual before beginning the installation process. Complete the steps in this manual in order. Contact Daktronics Technical Support with any questions before or during the installation process. -
Page 6: Safety Precautions
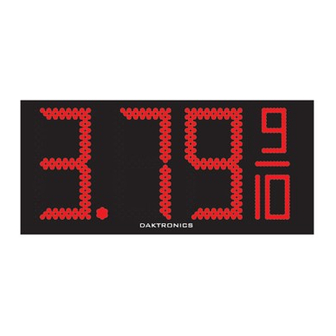
Fuelight ™ cabinets, specially developed for outdoor use, are constructed of daktronics Figure 2: FL-4500 Fuelight Petroleum Price Display heavy-gauge aluminum. Digit faceplates are black and are set directly into the surface of the display. -
Page 7: Mechanical Installation
The customer must also ensure the installation meets local standards. • Daktronics is not responsible for installations, the mounting structure or its structural integrity, or for the quality of the mounting hardware used to attach the displays to the support structure. Structure and attachment must conform to all applicable local and national building codes. - Page 8 4� Hand lift displays into the sign structure. Figure 4 shows a display being inserted into a sign structure. Note: Daktronics assumes no liability for display damage or injury resulting from incorrect setup or incorrect lifting methods. 5� Drill through the front flanges of the cabinet to attach the display to the structure using appropriate hardware for site conditions.
-
Page 9: Electrical Installation
• Consider implementing a separate circuit for the display using an isolation transformer or dedicated transformer. • Daktronics assumes no liability for any issues caused by line voltage fluctuations or other improper power conditions. Important Notes: • Only qualified individuals should perform power and signal routing to the display and termination at the display. -
Page 10: Main Disconnect
Main Disconnect Daktronics requires installation of a power disconnect switch with the display so all ungrounded conductors can be disconnected near the point of power connection. Locate the disconnecting means either in a direct line of sight from the display or so it can be locked in the open position. - Page 11 Display 1 Power In From Power Box At Display Base Power Out Use Grounding Stud From Display 1 Daisy Chained To Display 2 Display 2 Power Out Use Grounding From Display 1 Stud Daisy Chained To Display 2 Display 3 Power Use Grounding Stud...
-
Page 12: Display Interconnections
Display Interconnections DS1 (J16) COMM LINE PORT POWER IN STATUS LINE 24 DC Line-To-Line Cable Installation DS2 (J10)* LINE TO CASH/ LINE CREDIT COMM PORT DS3 (J9)* LED Driver DS4 HEARTBEAT 1 SEC. BLINK = OK DIGIT 4 The display driver, shown in Figure 9, switches POWER digits on and off. - Page 13 2� Place the drain wire of the line-to-line cable on the upper-left stud that holds the driver in place. Refer to Figure 11. 3� Place the 6-32 nut on the stud and tighten it with a 5/16" nut driver. Refer to Figure 12. 4�...
-
Page 14: Cash/Credit Display Installation
Cash/Credit Display Installation Cash/Credit displays are drop-in displays designed for installation with Fuelight price displays. Green or red LEDs are used in Cash/ Credit displays to illuminate text. ™ Figure 14: Cash/Credit Model Label An FLR3-100/400 key fob remote or a DM-100 handheld controller are used to control Cash/Credit displays. -
Page 15: Display Identification
Display Identification Top Left Top Right Identify 2H x 2W cash/credit modules by their position when viewed from the front. Refer to Figure 20. Figure 21 shows the identification used for an alternate size 1H x 2W Bottom Right Bottom Left display. -
Page 16: Grounding
Grounding Cash/Credit displays do not require a local earth ground electrode� Power Installation Install Daktronics Cash/Credit displays using a two-wire plus ground circuit. The ground from the circuit must be connected to the grounding stud within each Cash/Credit display. Do not connect... -
Page 17: Control Options Setup
Control Options Setup Refer to the quick guides provided with display communications for more information on signal installation. Quick Guide Document Number LINE FLR3-100 Installation Quick Guide DD2291475 FLR3-400 Installation Quick Guide DD2239290 FLR3-1500 Installation Quick Guide DD2552313 FLD3-2000 Installation Quick Guide DD2291480 LL-2855 REV00 Find communication installation videos at... -
Page 18: Set Security Dip Switches
9� Connect the receiver cable from receiver to the driver. Refer to Figure 30. Receiver Driver Antenna Cable Digit Cabinet Figure 30: Final Receiver Assembly 10� Neatly secure any excess cable with cable ties. 11� Close and secure the digit face. Set Security DIP Switches The FLR3-100 key fob has a series of DIP switches on the back to give it a unique address setting. -
Page 19: Enter Test Mode
Temperature over 85°C – report this error message to Daktronics Customer Service All other error codes relate to the display driver. Contact Daktronics for more information or to order a new driver. After the self-test, each display is programmed with a default price that corresponds to the line number for which it is addressed. -
Page 20: Server Radio Installation
• Radios must have direct line of sight between them. • Mount radios away from range-reducing elements (walls, vegetation, etc.) and metal objects. • For best results, mount radios at equal elevation. 2� Set the same channel inside both radios. Server Radio Installation 1�... -
Page 21: Client Radio Installation
Client Radio Installation 1� Turn off power to the display Client Radio during the installation of the Inside radio. Display 2� Mount the client radio at or Cabinet within 25' (7.6 m) of the display. POWER 3� Connect signal cables as 24 DC follows. -
Page 22: Fld3-2000 Connection
FLD3-2000 Connection The FLD3-2000 kit connects directly to a J-box at the base of the display or at an indoor location and has a maximum range of 2000' (610 m). The console’s liquid crystal display (LCD) guides the user through the operation of the system. -
Page 23: Outdoor J-Box Installation
Outdoor J-box Installation 1� Choose a location on the support pole so the J-box is easily accessible for plugging in the handheld controller. 2� Orient the box so the quick-connect cable runs out the bottom of the box. 3� Permanently fasten the J-box vertically once it has been proven effective in the location. -
Page 24: Flxr3 Server Radio Kit
FLXR3 Server Radio Kit FLXR3 server radio components are shown in Figure 39. The letter for each component is noted in steps that follow. Letter Component Type Letter Component Type Pole-Mount Hardware Antenna Adapter Wall Pack Transformer High Gain Antenna Antenna Extension Cable - 50' Server to DM-100 Interconnect Cable - 10' DIN Rail Mount/Track... -
Page 25: Client Radio Installation
Figure 46, that is elevated farther off the ground, has improved line of sight to the server radio antenna, and within 10' (3 m) of the client radio. Daktronics provides a 10' (3 m) antenna extension cable to allow for optimal antenna placement. -
Page 26: Flxr3 Client Radio Set Up
FLXR3 Client Radio Set Up By default, each client defaults to SU #1 and Network #1. Configure each client radio in sequence by completing the following steps: 1� Change the client radio number by pressing the reset button, shown in Figure 47, for five seconds to enter configuration mode. -
Page 27: Server Radio Set Up
Radio ID Client Radio Number IP Address Following successful boot up, the client radios show signal strength. Note: Signal strength will not show until the server radio is setup with client ID and sequence. Server Radio Set Up To configure the server radio through a web interface, attach an Ethernet cable from the radio to a computer and follow these steps: Figure 53: Bars Show Signal... -
Page 28: Quality Of Service
3� Enter radio ID numbers. 4� Enter the Network Number. 5� Set TX Power to 27dBm. Capture this Warning: Applying power to information after more the radio without an attached than 10 antenna may cause damage! manual price updates 6� Click Apply. Note: If communication issues arise, record the Radio RSSI, Radio Total... -
Page 29: Rssi Values
On initial setup, it may take a few reset cycles for all the radios to find each other, and the Quality of Service number may take a few minutes to reach 100 percent. Handheld Controller Insert and Code The handheld controller uses a keypad insert to program price information for Daktronics LED Fuelight Displays. ™ UPDATE DISPLAY The controller’s insert, illustrated in Figure 58, is used to... -
Page 30: Flr3-100/400 Key Fob
FLR3-100/400 Key Fob Map Line Numbers Each display must be set to the correct line number to show the correct price when pressing the LINE buttons on the key fob. To map the line number for each display, follow these steps: 1�... -
Page 31: Edit Prices
Edit Prices 1� Press and hold any single plus (+) or minus (–) button for ~5 seconds to enter the price edit mode. The decimal will begin to blink. 2� Press the (+) or (–) button on any LINE number to increase or decrease the price of that product. -
Page 32: Select Active Price States
Price State Number State 1 State 2 State 3 1, 3 2, 3 1, 2, 3 Standard content shown. Custom content is available and will vary from what appears above. When in configuration mode, numbers that represent selected active price states are display. -
Page 33: Edit Cash/Credit Display Hold Time
Edit Cash/Credit Display Hold Time 1� Press and hold the LINE 3 minus (–) and LINE 4 plus (+) buttons, as shown in Figure 64, for ~5 seconds until the hold time is shown on the display. Note: The default hold time is 3 seconds and is shown as 30 on the display. -
Page 34: Fuelight Systems
Option 2: Single Branch Circuit for All Fuelight Systems Use this option when a single branch circuit is wired to all pylons and Fuelight systems. All Fuelight systems turn off and on simultaneously requiring access to the inside of the host display of each Fuelight system to sync to its dedicated key fob. -
Page 35: Flr3-1500 And Fld3-2000 Handheld
FLR3-1500 and FLD3-2000 Handheld Controller After completing power and signal installation, set up the handheld controller. Set Gas Price Function To operate petroleum price displays, the handheld controller must first be programmed to the GAS PRICE function. Use the SET FUNCTION key on startup. The following tables list start-up procedures for both gas price and rate (used for international displays). -
Page 36: Network And Display Discovery
Network and Display Discovery The controller automatically begins detecting networks. Each client radio is referred to as a network. LCD Screen Action/Information Shown Only shown when FLR3-1500 communication is used. RADIOS DETECTED... Shown when either FLR3-1500 or FLD3-2000 communication is used. INITIALIZING DISPLAYS... -
Page 37: Set Petroleum Prices
Set Petroleum Prices The LCD on the handheld controller defaults to showing the current display settings on power up. The following text is shown on the LCD. LCD Screen Action/Information Shown The LCD toggles between active price states, if more than “1” is LINE PRICE1 selected. -
Page 38: Configuration
Configuration 1� Press the MENU key. 2� Press the Down Arrow key to reach Display Menu, and then press ENTER. 3� Press the Down Arrow key to reach Configuration. LCD Screen Action/Information Shown Press ENTER to begin editing line information. CONFIGURATION LINE MAPPING } Note: The line in Edit mode flashes and shows its line information... -
Page 39: Modem
Modem 1� Press the MENU key. 2� Press the Down Arrow key to reach Display Menu, and then press ENTER. 3� Press the Down Arrow key to reach Modem. LCD Screen Action/Information Shown Press ENTER to adjust cellular modem support. MODEM ENT TO SELECT Use the Up and Down Arrow keys to select whether to enable or... -
Page 40: Active Prices
Active Prices 1� Press the Down Arrow key until 12 appears, press ENTER. 2� State 1 and 2 are active for CASH and CREDIT discount pricing. Set Hold Time 1� Default hold time is 3.0 seconds. 2� To change the hold time, enter between 2.0 and 9.9 seconds. Example: Enter 65 for a hold time of 6.5 seconds Update the Display On the DM-100 keypad, press UPDATE DISPLAY to set all updates and configuration... -
Page 41: Diagnostics Menu
Diagnostics Menu Press the MENU key followed by ENTER to select the Diagnostics Menu. Display Status LCD Screen Action/Information Shown Press ENTER to get display status. DISPLAY STATUS ENT TO SELECT Press the Down Arrow key to move to another sign and line number. -
Page 42: Test Patterns
Test Patterns 1� Press the MENU key followed by ENTER to select the Diagnostics Menu. 2� Press the Down Arrow key to reach Test Patterns. LCD Screen Action/Information Shown Press ENTER to enter the test patterns menu. Press ENTER to start the CYCLE BITS test pattern. Each digit will turn on its segments one at a time. - Page 43 CURRENT LOOP – Checks for “loopback” jumpers on the left connector between pins 6 & 8 and 5 & 9 (FAIL if jumpers not CURRENT LOOP detected). Press ENTER to exit. DIAGNOSTICS This menu is only used for internal Daktronics testing purposes. POS STATUS FLR3-1500 and FLD3-2000 Handheld Controller...
-
Page 44: About
About 1� Press the MENU key followed by ENTER to select the Diagnostics Menu. 2� Press the Down Arrow key to reach About. LCD Screen Action/Information Shown Press ENTER to view the About menu. ABOUT ENT TO VIEW The DM-100 toggles between Firmware and Function information. Press ENTER at any time to exit the About menu. -
Page 45: Update The Display
The following prompt is shown for both MANUAL and AUTOMATIC dimming selections: LCD Screen Action/Information Shown Press the Up and Down Arrow keys to modify the display’s current intensity. INTENSITY XX}{* Note: The DM-100 must be communicating with the display. ENTER TO SET Press ENTER to accept this intensity. -
Page 46: Maintenance And Troubleshooting
Maintenance and Troubleshooting Important Notes: • Visit Daktronics Support videos at www.youtube.com/daktronicssupport. • Disconnect power before any repair or maintenance work is done on the display. • Qualified service personnel must make any access to internal display electronics. • Disconnect power when the display is not in use. Leaving power on for prolonged periods of time shortens the life of some electronic components. -
Page 47: Display Troubleshooting
Display Troubleshooting This chart lists some symptoms that may be encountered with the displays. For each symptom, possible causes and corrective actions are indicated. This list does not include every possible problem but does represent some of the more common situations that may occur. -
Page 48: Multi-Pylon Troubleshooting Steps
Multi-Pylon Troubleshooting Steps The following steps may correct communication errors. Please perform these steps before calling for service/support: 1� Locate the breaker panel for each pylon. 2� Power down each pylon (in no particular order). 3� Power down control equipment. 4�... -
Page 49: 10 Replacement Parts
Disconnect power when the display is not in use. • The electrician installing the displays must provide some parts required for installation such as screws, wire nuts, electrical tape, etc. Daktronics does not provide these items. Most display components have a white label that lists the 0P-1127-0024 part number in bold as shown in Figure 67. -
Page 50: Return Programs
In most circumstances, the replacement part will be invoiced at the time it is shipped. If the failed part or replacement part is not returned to Daktronics within three weeks of the ship date, Daktronics will assume that the customer is purchasing the replacement part and will send an invoice for the value of the new sale part. -
Page 51: Repair & Return Program
Repair & Return Program For items not subject to exchange, Daktronics offers a Repair & Return Program. To send a part for repair, follow these steps: 1� Call Daktronics Customer Service. United States & Canada: 1-800-DAK-TRON (325-8766) Outside the U.S. & Canada: +1-605-275-1040 2�... - Page 52 This page intentionally left blank.
-
Page 53: A Reference Drawings
(where “#######” is a 7- or 8-digit number shown below). Project-specific documents take precedence over those listed in this section. To obtain copies of drawings specific to your display, contact Daktronics Customer Service: United States & Canada: 1-800-DAK-TRON (325-8766) Outside the U.S. & Canada: +1-605-275-1040... - Page 54 This page intentionally left blank.
-
Page 55: B Daktronics Warranty And Limitation
Daktronics Warranty and Limitation of Liability This section includes the Daktronics Warranty & Limitation of Liability statement (SL-02374). Daktronics Warranty and Limitation of Liability... - Page 56 This page intentionally left blank.
- Page 57 Warranty Coverage. Daktronics warrants to the original end user (the “End User”, which may also be the Purchaser) that the Equipment will be free from Defects (as defined below) in materials and workmanship for a period of one (1) year (the “Warranty Period”). The Warranty Period shall commence on the earlier of: (i) four weeks from the date that the Equipment leaves Daktronics’...
- Page 58 In no event shall Daktronics be liable for loss, damage, or injury of any kind or nature arising out of or in connection with this Warranty in excess of the Purchase Price of the Equipment. The End User’s remedy in any dispute under this Warranty shall be ultimately limited to the Purchase Price of the Equipment to the extent the Purchase Price has been paid.
- Page 59 For End User’s protection, in addition to that afforded by the warranties set forth herein, End User may purchase extended warranty services to cover the Equipment. The Extended Service Agreement, available from Daktronics, provides for electronic parts repair and/or on-site labor for an extended period from the date of expiration of this warranty. Alternatively, an Extended Service Agreement may be purchased in conjunction with this Warranty for extended additional services.
- Page 60 This page intentionally left blank.
Need help?
Do you have a question about the FUELIGHT FL-3000 Series and is the answer not in the manual?
Questions and answers