Subscribe to Our Youtube Channel
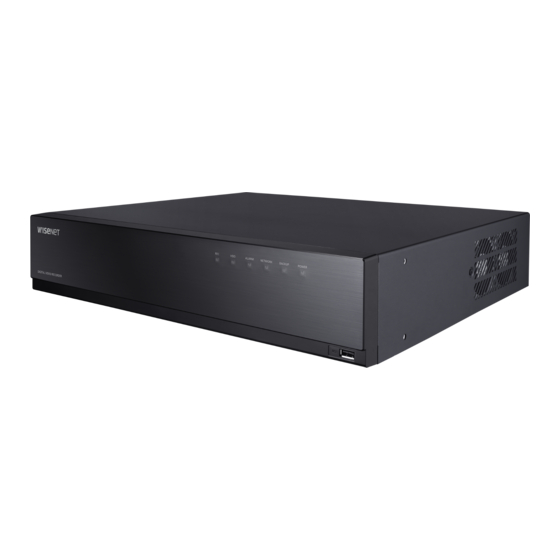
Summary of Contents for Wisenet HRX-1632
- Page 1 DIGITAL VIDEO RECORDER Product Specification Manual HRX-1632/HRX-835/HRX-435/HRX-434...
- Page 2 Digital Video Recorder Product Specification Manual Copyright ©2021 Hanwha Techwin Co., Ltd. All rights reserved. Trademark Each of trademarks herein is registered. The name of this product and other trademarks mentioned in this manual are the registered trademark of their respective company. Restriction Copyright of this document is reserved.
-
Page 3: Important Safety Instructions
overview overview ImPorTanT SafeTY InSTrucTIonS Before STarT Read these operating instructions carefully before using the unit. This manual provides operational information necessary for using the product and contains a description about each Follow all the safety instructions listed below. component part and its function as well as menu or network settings. Keep these operating instructions handy for future reference. - Page 4 Function Products ● Ne pas ingérer la pile, risque de brûlure chimique. HRX-1632, HRX-835, HRX-435, HRX-434 ● Ce produit contient une pile de type bouton/pièce de monnaie. Si la pile de type bouton/pièce de monnaie HRX-1632, HRX-835, HRX-435, HRX-434 est avalée, elle peut causer de graves brûlures internes en seulement 2 heures et peut entraîner la mort.
-
Page 5: Table Of Contents
overview conTenTS overvIeW Important Safety Instructions Before Start Contents Features Package Contents Part Names and Functions (Front) Part Names and Functions (Rear) InSTallaTIon Checking the Installation Environment Rack Installation Power HDD Addition connecTIng WITH oTHer DevIce Connecting to an External Device Connecting the USB Connecting the Alarm Input/Output Connecting the Network... -
Page 6: Features
POWER ● Supports thermal imaging camera/PTZ linked camera DIGITAL VIDEO RECORDER ● Supports a range of 4K camera resolutions (Supports up to 4M for HRX-1632 analog cameras) ● Outputs a 4K high definition image using HDMI (HRX-835/HRX-435/HRX-434) Recorder Mouse Quick Guide ●... -
Page 7: Part Names And Functions (Front)
HrX-435 ParT nameS anD funcTIonS (fronT) HRX-1632/HRX-835 ALARM NETWORK BACKUP POWER DIGITAL VIDEO RECORDER ALARM NETWORK BACKUP POWER DIGITAL VIDEO RECORDER Recorder Mouse Quick Guide HRX-435 Power Cable Power Adapter SATA Cable (2 ea) ALARM NETWORK BACKUP POWER DIGITAL VIDEO RECORDER... -
Page 8: Part Names And Functions (Rear)
AUDIO IN Audio input signal port. POWER Terminal to connect power to. ● ALARM IN : Alarm input ports. HRX-1632 : 1~16 CH HRX-835 : 1~8 CH HRX-835 HRX-435/HRX-434 : 1~4 CH ALARM ● ALARM OUT : Alarm output ports. -
Page 9: Checking The Installation Environment
installation installation Please take note of the followings before using this product. rack InSTallaTIon ● Do not use the product outdoor. Install the Bracket-Rack as shown in the figure, and then fasten the ● Do not spill water or liquid in the connection part of the product. screws on both sides. -
Page 10: Hdd Addition
Please consult your provider for further information on HDD installation since improper installation or settings may To learn how to format, see "Device/Format" in the Wisenet Recorder User Manual. damage the product. ■... - Page 11 installation How to install an HDD in HrX-435 4. Fix the bracket with the HDD to the recorder with screws. 1. Loosen the screws on the left/right sides and back and slide the cover back to remove it. 2. Connect the SATA/power cable of the HDD to the connector on the motherboard.
- Page 12 installation How to install an HDD in HrX-434 1. Loosen the screws on the back and slide the cover back to remove it. 2. Connect the SATA/power cable of the HDD to the connector on the motherboard. 3. Fix the HDD to the bottom of the recorder with screws. 4.
-
Page 13: Connecting To An External Device
To an eXTernal DevIce connecTIng THe alarm InPuT/ouTPuT ■ The following figures are based on Model HRX-1632. The Alarm In/Out port at the back is composed of the following. AC L1 SPOT AC L2 SPOT 30VDC 2A, 125VAC 0.5A MAX... -
Page 14: Connecting The Network
THe neTWork connecting the network camera ■ For more information about network connection, see "Setting the Network" in the Wisenet Recorder User Manual. example) ■ The following figures are based on Model HRX-1632. ex) IP : 192.168.1.100... - Page 15 connecting with other device connecting the rS-485 Device Connect [TX/RX +,-] port on the rear to PTZ camera or system keyboard. SPOT TX + - TX + - RX+- Data + - PTZ Camera System keyboard <RS-422> SPOT TX + - Hanwha Techwin cares for the environment at all product manufacturing stages, and is taking measures to provide customers with more environmentally friendly products.


Need help?
Do you have a question about the HRX-1632 and is the answer not in the manual?
Questions and answers