Table of Contents
Advertisement
Quick Links
Advertisement
Table of Contents

Subscribe to Our Youtube Channel
Related Manuals for Wisenet QRN-410


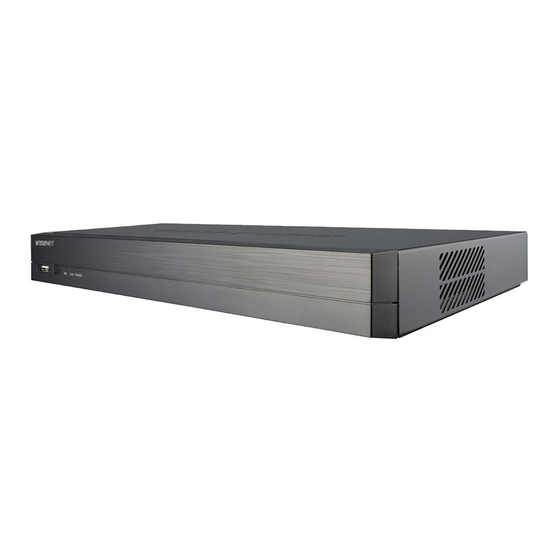
Summary of Contents for Wisenet QRN-410
- Page 1 NETWORK VIDEO RECORDER User Manual QRN-410/810...
- Page 2 Network Video Recorder User Manual Copyright Hanwha Techwin ©2017 Co., Ltd. All rights reserved. Trademark Each of trademarks herein is registered. The name of this product and other trademarks mentioned in this manual are the registered trademark of their respective company. Restriction Copyright of this document is reserved.
-
Page 3: Overview
overview IMPORTANT SAFETY INSTRUCTIONS BEFORE START Read these operating instructions carefully before using the unit. This manual provides operational information necessary for using the product and contains a description about each Follow all the safety instructions listed below. component part and its function as well as menu or network settings. Keep these operating instructions handy for future reference. - Page 4 overview Operating Temperature The guaranteed operating temperature range of this product is 0°C ~ 40°C (32°F ~ 104°F). This product may not work properly if you run right after a long period of storage at a temperature below the guaranteed one. Prior to using a device that has been stored for a long period in low temperatures, allow the product to stand at room temperature for a period.
-
Page 5: Table Of Contents
CONTENTS SEARCH & PLAY Search Playback Important Safety Instructions OVERVIEW Before Start Contents Features STARTING WEB VIEWER What is Web Viewer? Part Names and Functions (Front) Connecting Web Viewer Part Names and Functions (Rear) Remote Control INSTALLATION Checking the installation environment LIVE VIEWER Live Viewer HDD Addition... -
Page 6: Contents
Accessory category and quantity may differ depending on sales region. • User-friendly UI • Supports a range of 4K camera resolutions (4096X2160) QRN-410 • Outputs a 4K high definition image using HDMI • Record and play video • Record and play audio •... -
Page 7: Part Names And Functions (Front)
Functions - ALARM IN : Alarm input ports. (1~4 CH) - ALARM OUT : Alarm output ports. ALARM QRN-410 : 1~2 CH QRN-810 : 1~3 CH AUDIO OUT Audio Signal Output Port (RCA jack). Terminal to connect a separate ground cable. -
Page 8: Remote Control
overview REMOTE CONTROL Using the Numeric buttons 1. Select a number between 1 and 8. 2. Move to the selected channel number. Changing the Remote Control ID POWER Displays the Exit pop up screen. Starts or ends the live recording. Remote control’s ID and NVR’s ID should be matched for proper operation. -
Page 9: Installation
installation Please take note of the followings before using this product. HDD ADDITION • Do not use the product outdoor. Make sure to unplug the power cord from the wall outlet to prevent possible electric shock, injury or product damage. •... - Page 10 installation Installing the HDD 4. Check for any problems in the connection terminal and the wiring in the product, close the cover and fix it with screws. If you are adding a new or previously used HDD to this product in addition to the HDD(s) originally installed, format the new HDD manually in the set before use.
-
Page 11: Connecting With Other Device
connecting with other device CONNECTING TO AN EXTERNAL DEVICE CONNECTING THE ALARM INPUT/OUTPUT The Alarm In/Out port at the back is composed of the following. The following figures are based on Model QRN-810. VGA OUT VGA OUT ALARM OUT ALARM OUT ALARM AUDIO ALARM... -
Page 12: Connecting The Network
connecting with other device CONNECTING THE NETWORK Connecting to Internet through PPPoE For more information about network connection, refer to "Network Configuration". (Page 42) VGA OUT ALARM OUT ALARM AUDIO VIEWER DC 12V 1 2 3 4 HDMI Network connection via Ethernet (10/100/1000BaseT) VGA OUT ALARM OUT PPPoE MODEM... -
Page 13: Live
live If the LAN cable is not connected to the port, the setting button will not be activated for use. Check the LAN cable GETTING STARTED connection. The built-in DHCP Server in NVR will turn on automatically at stage 3. At this stage, using the existing DHCP server in the Starting the system same network may cause a problem, as two DHCP servers would be simultaneously operating. -
Page 14: Live Screen Configuration
live Shutting Down the System LIVE SCREEN CONFIGURATION Icons on the Live Screen 1. Press the [POWER] button for your remote controller or select <Shutdown> in the live screen menu. You can check the status or operation of the NVR with the icons on the live screen. 2. - Page 15 Error Information Name Description • If the built-in HDD is not connected, the “NO HDD” icon ( ) will be displayed in the top left corner. In this It is displayed when the max permitted amount of data for each channel is exceeded. case, make sure you contact the service center for assistance as this may cause a failure of recording, playback or backup.
- Page 16 live Split Mode Menu Menu Description In Live split mode, right-click to display this context menu as shown. Menu Enter the main menu. Refer to the menu settings. (Page 24) The context sensitive menu in split mode differs, depending on the login/logout status. Quick Setup The “Camera Register”...
-
Page 17: Live Screen Mode
The Launcher menu can be accessed only by using the mouse. Method for displaying screen mode QRN-410 only supports full screen, 2/3/4-split screen, and automatic switchover screen. If you want to change the split mode, select a screen mode suggested in the launcher menu or right click with the mouse button and select a split mode in the screen mode menu. - Page 18 live Switching the split mode Manual Switching Press the left/right button on the front panel or the remote control, or click the arrow <◄/►> key to move to You can also play 8 Live channels in the sequence of: Single, 4-split mode. the next split mode.
-
Page 19: Zoom
Record Status Switching to Single Mode If you select <Record> under the <Status> menu on the live screen, you can check a channel's video type, When in split mode, select and double-click a desired channel to switch to its Single mode. recording type, number of input/recording frames, allowed/input/recording data volume. -
Page 20: Layout
live LAYOUT AUDIO ON/OFF In the live screen, you can set the layout for each channel. You can turn the sound on/off corresponding to the channel in Live mode. Setting Up the Live Layout AUDIO ON/OFF in Single mode This section outlines how to select a series of channels based on their purpose/accessibility and monitor them In the screen, click on the audio icon ( ) or in the remote control, press the [AUDIO] button to turn it on/off. -
Page 21: Capture
Ex : If you set <Event Display> to 5 seconds, and the second event occurs in CH 2 within the set time after the first event MAINTAIN THE SCREEN RATIO occurred in CH 1. The screen ratio for a live video can be changed. Event occurrence 4 seconds 9 seconds... -
Page 22: Display Text
live DISPLAY TEXT Using the PTZ camera You can use a single PTZ camera to perform the Pan, Tilt and Zoom operations to monitor multiple places, and configure the custom settings of the presets in a desired mode. Change text output The NVR can display text on a live screen when a text device is set. -
Page 23: Backup
Preset BACKUP Preset is a specific position remembered by the PTZ camera. You can use the Preset function to define up to You can check the backup device and set the backup schedule by channel or by time. 255 presets for a single PTZ camera. 1. -
Page 24: Menu Setup
menu setup You can setup the system, devices, and options for recording, event and network. • Holiday : A user can select specific dates as holidays according to their own preferences. Holidays are applied in the <Recording Schedule> or <Alarm Schedule> setting too. SYSTEM SETUP You can setup Date/Time/Language, User, System Properties and Log. - Page 25 User User setting You can create a group or set permissions for each group. You can set permissions of each user over the NVR's specific function and settings. You can add a user and edit the registered user information. Setting the Administrator [MENU] [ENTER] ▼...
- Page 26 menu setup If you want to register a user Setting Permissions You can set restricted access for all general users. Items with restrictions will require logging in for use. [MENU] [ENTER] ▼ <Menu> [ENTER] <System> ►▼ <User> [ENTER] ▼► <Permission Setup> [ENTER] ▲▼◄►...
- Page 27 If the user has restricted access System Management If a new group is restricted to access the entire menus, the users belonging to the group can access only the You can check the system version, update to a newer version, as well as data backup and initialization. basic menus and can change only their respective password.
- Page 28 menu setup 4. When the recognized device appears, select <Upgrade>. • Load Factory Default : Restore the factory default settings of NVR. Uncheck the checkbox of an item(s) that you want to reset. Then, only the other items than the selected one If you connect a device in the upgrade menu window, you can press the <...
-
Page 29: Setting The Device
Checking the event log SETTING THE DEVICE You can search recorded events including alarms, camera events and video loss. You can configure settings related to camera, storage media, monitor and text. It also shows the log and its timestamp. Camera [MENU] [ENTER] ▼... - Page 30 menu setup To auto-search for and register a network camera To manually search for and register a network camera 1. In the <Cam Registration> field, click on the <Auto> button. 1. In the <Cam Registration> menu, click on the <Manual> button. 2.
- Page 31 - Wisenet DDNS : This is available only if the camera is registered with the Wisenet DDNS(ddns. • Connection has failed due to incorrect HTTP port information. : This message appears if the HTTP port hanwhasecurity.com) server.
- Page 32 menu setup ONVIF Setup Relay You can set details of the relay. In the bottom of the camera addition screen, click on the <ONVIF Setup> button to set additional settings for • Digital Output : You can select a digital output channel. cameras with the ONVIF protocol.
- Page 33 If you change the settings of a specific profile for each model, the effective range of the baud rate may be changed accordingly. Special Ex) if you set the baud rate of the first profile to 30fps, the send rate of the second profile will be changed to 15fps. DIS (shaking compensation), use of Defog levels can be set.
- Page 34 menu setup Setting Camera Password Live Setting You can change the passwords of all registered cameras at once. You can change the live transfer settings of the network camera. [MENU] [ENTER] ▼ <Menu> [ENTER] ▼ <Device> ► <Camera> [ENTER] ▼► [MENU] [ENTER] ▼...
- Page 35 Channel Setting Storage Device You can configure the video settings for each channel. You can check information on storage devices. [MENU] [ENTER] ▼ <Menu> [ENTER] ▼ <Device> ► <Camera> [ENTER] ▼► Device/Format <Channel Setup> [ENTER] ▲▼◄► [ENTER] You can check storage devices and their capacity, usage as well as status. HDD, USB (memory or HDD) can be connected as a storage device.
- Page 36 menu setup • Temperature : You can check the temperature of the HDD mounted in the NVR. HDD Alarm Setting • Time : Displays the use time of an HDD. For HDD malfunctions, you can set the inspection alarm output terminal, the replacement alarm output terminal •...
- Page 37 Remote Devices Monitor You can adjust the ID for a remote control to be used in connection with NVR. You can set the information displayed on the monitor as well as the output system. [MENU] [ENTER] ▼ <Menu> [ENTER] ▼ <Device>...
-
Page 38: Setting The Recording
menu setup Text Event Settings You can set up event keywords. Device and events can be set up. [MENU] [ENTER] ▼ <Menu> [ENTER] ▼ <Device> ►▼ <Text> [ENTER] ▼ ► Device Settings <Event> [ENTER] ▲▼◄► [ENTER] Relevant values of a device connected to NVR can be set. [MENU] [ENTER] ▼... - Page 39 • Event : When an event occurs, you can set which point you will start or stop recording. Record setting by the color - Pre : When an event occurs, recording will be started regardless of the time set. Color Function Description If you set it to five seconds, recording will start at five seconds before an event occurs.
-
Page 40: Setting The Event
menu setup Record Option SETTING THE EVENT When the HDD capacity is full, you can set whether to stop recording or start overwriting. You can make the setup for record in case of sensor detection, camera event or video loss detection. [MENU] [ENTER] ▼... - Page 41 Camera Event Video Loss Detection You can set the activation of events (motion detection, video analysis, audio event) sent from the camera, alarm You can set the camera so that the camera can trigger the alarm if it is disconnected or the video is lost due to output method and alarm time.
-
Page 42: Network Configuration
menu setup Alarm Out Schedule NETWORK CONFIGURATION You can set the conditions and operating hours for scheduled alarms. It provides networked monitoring of Live screen from a remote place, and supports mail forwarding function with events. You can configure the network environment which enables such functions. [MENU] [ENTER] ▼... - Page 43 Connecting and Setting the Network • Setting the DHCP IP Address of the Broadband Router 1. To access the Broadband Router's configurations, open a web browser on the local PC that is connected Networking may differ from the connection method, check your environment before setting the connection to the Broadband Router and enter the router's address (ex : http://192.168.1.1).
- Page 44 menu setup DDNS DDNS Setting DDNS is a short form of Dynamic Domain Naming System. If a remote user accesses the network, you can set whether or not to use DDNS and the site to be connected. DNS (Domain Name System) is a service that routes a domain name consisting of user friendly characters (ex : www.google.com) to an IP address consisting of numbers (64.233.189.104).
- Page 45 802.1x You can select a security connection system or install public certificates. When connecting to a network, you can select whether to use the 802.1x protocol and install a corresponding certificate. [MENU] [ENTER] ▼ <Menu> [ENTER] ▼ <Network> ►▼ <SSL> [ENTER] 802.1x is a certificate system for the server and the client.
- Page 46 menu setup Live Streaming Setting • Server Address : Enter the SMTP server address to connect to. • Port : Sets the communication port. You can set the video profile transmitted to the network. • Use Authentication : Check this if the SMTP server uses user authentication. The account input box will be activated.
- Page 47 • Enable SNMP v3 : SNMP version 3 is used. Recipient Setting - Password : Set the initial user password for SNMP version 3. You can create a group and add users to it or you can delete users and change a group. •...
- Page 48 1. When <Enable P2P> is checked, the connection test runs to check if it can be remotely connected from the current NVR. 2. When the connection is successful, search for WiseNet Mobile from the smart phone, and then install and run it.
-
Page 49: Search & Play
search & play 3. The record data on the specific date will be listed. SEARCH The display bar is different according to the data type. So check the data type for the color in the left pane. You can perform the search for recorded data by the time or by the search criteria such as an event. If DST (Daylight Saving Time) is configured, overlapping multiple recordings may be produced for a certain moment of time. - Page 50 search & play Smart Search Text Search You can select a specific area of the image as an area of interest or exclusion using a virtual line to perform a You can search data that was entered into POS systems connected to NVR. search of events that have occurred in a specific time period.
- Page 51 Backup Search ARB Search Searches for backup data in the connected backup device. Only data in the format of NVR is included in the search. 1. Select <ARB Search> from the <Search> menu. 1. Select <Backup Search> in the <Search> menu. 2.
-
Page 52: Playback
search & play PLAYBACK Using the Playback Button Play You can play data stored in the HDD and backup a desired portion of the data. Name Description Play Timeline Indicates the current playback point, and can be used to move. Skip Backward Moves backward by unit time. -
Page 53: Starting Web Viewer
starting web viewer WHAT IS WEB VIEWER? CONNECTING WEB VIEWER WebViewer is a software program with which the operator can access a remote NVR (Network Video Recorder) for 1. Open your web browser and type the IP address or URL of NVR into the URL address box. real-time monitoring, PTZ control (if configured) or search. - Page 54 starting web viewer If you want to access the web viewer with multiple browsers Live viewer screen layout Set auto execution of plugin (npNVRViewer) in the browser menu that you first access and refresh the screen after activating the plugin or selecting plugin reliability. ...
-
Page 55: Live Viewer
live viewer LIVE VIEWER Menu Description You can check the video from camera registered in the NVR connected from a remote PC. Also, you can adjust the Shows the channel information selected. camera and check the network transfer status. If the user's PC monitor does not support 60Hz at a specific high resolution, or the HDMI Channel information cable does not support HDMI 2.0, 60fps or higher will not be output from the channel Live Viewer Screen... -
Page 56: Live Screen Configuration
live viewer LIVE SCREEN CONFIGURATION To capture a screen 1. Click < > button. System Status When a pop-up window appears, select the saving path for captured image. You can check the status or operation of the NVR with the icons on the live screen. 2. - Page 57 Setting the layout If you want to delete the layout After selecting the layout to delete, click on < >. If you don't add or save it in the layout after registering a camera, the live screen will not be displayed. The selected layout will be deleted.
- Page 58 live viewer Setting screen switching To perform switching Click on the <Sequence> button to activate the switching mode If you don't register the layout, the screen switching function will not operate. and run a sequence. You can view the layouts one by one. Click on the <...
-
Page 59: Controlling A Connected Network Camera
How to query text devices and data CONTROLLING A CONNECTED NETWORK CAMERA Checks the text data transmitted from POS systems that are Controlling PTZ connected to NVR. If the < > button is selected, you can turn on/off the If PTZ camera is connected, the < >... - Page 60 live viewer To set a preset Item Description 1. Click < > button to display "Preset" window. Swing Moves between the preset start point and end point. 2. Click on < > to select the preset order. Group Moves in the path specified by combining the preset. 3.
-
Page 61: Search Viewer
search viewer SEARCH VIEWER Item Description You can search and play the video record saved in NVR by accessing NVR remotely. Sound Sets the sound connected to each channel to either ON/OFF. Search Viewer Screen Capture Saves current video for selected channel in the designated path. Print Prints current video image for selected channel through the assigned printer. - Page 62 search viewer Color indications depending on current recording status To back up the search results You can back up the search results in the list. Displays the corresponding color according to the recorded data type. 1. Click the [ ] button. 2.
- Page 63 Text Search Names and Functions of Play Buttons You can search data that was entered into POS systems connected to NVR. If you want to search by a text 1. Select a date and time to search. 2. Set event keywords and search conditions. - Search Condition : Enter a text to search.
-
Page 64: Setup Viewer
setup viewer SETUP VIEWER System You can configure the various settings of the NVR system. You can configure the NVR settings remotely on the network. To configure the NVR settings, click <Setup>. Date/Time/Language Settings Screen For more information, refer to "Date/Time/Language" in the "System" menu. (Page 24) Date/Time Set the date and time. - Page 65 User System Management For more information, refer to "User" in the "System Setup" menu. (Page 25) For more information, refer to "System Management" in the "System" menu. (Page 27) Administrator System Information You can change the admin ID or the password. You can see information of the current system.
- Page 66 setup viewer Event log Camera Setup The event log lists recorded events, such as sensor events, You can change the settings of a connected network camera. camera events, or video losses. When you click the [Camera website] button, a new camera web browser window is opened.
- Page 67 Channel Setup Monitor You can configure the video settings for each channel. Monitor You can configure the monitoring screen settings and set the output system. If the video is not played properly, refer to the troubleshooting section later in this manual. (Page 79) The Monitor Setup settings control the monitor connected to the NVR.
- Page 68 setup viewer Record Camera You can set the recording profile for a network camera. For more information, refer to "Setting the Recording". (Page 38) Recording Schedule If you set a recording schedule for a specific date and time, the recording will start at that specific time. Record Option You can set the Disk End Mode.
- Page 69 Event Alarm Out Schedule You can schedule the alarm output according to the day of the For more information, refer to "Setting the Event". (Page 40) week and the time. The default setting is Event Sync, which activates the alarm only Sensor Detection if an event occurs.
- Page 70 setup viewer DDNS 802.1x When connecting to a network, you can select whether to use Network the 802.1x protocol and install corresponding certificate. You can check the DDNS settings. Live Streaming IP Filtering You can set the video profile transmitted to the network. You can prepare the list of IP address to allow or block accesses to a specific IP address.
- Page 71 Event DHCP Server You can set the event interval and specify which events the server sends mails for. Network You can set the internal DHCP server and assign an IP address to the network camera. Recipient You can set groups and recipients to receive emails. Check IP You can check the IP and MAC currently used through the DHCP server, and the connected network port.
- Page 72 setup viewer Using the setting icons • : You can check the recording status and the status of camera connected. - Live : Select <Live> to check the status of camera connected to each channel and the transmission information. • : If the button is selected, you can turn on/off the function - Recording : Select <Record>...
-
Page 73: Backup Viewer
backup viewer SEC BACKUP VIEWER You can play a file that is backed up in the format of SEC. Backup in SEC format produces backup data file, library file and self-executable viewer file. NVR_CAM 01 2016-01-01 16:17:49 If you run the backup file viewer, the backup data file will be played. VIDEO:H264(2048x1536)/AUDIO:NONE Recommended System Requirements PCs with a lower specification than the recommended below may not fully support forward/backward and high-... - Page 74 backup viewer Item Description Saves the current video's image as in an image file. Supports JPEG file format. Screen Printout Prints out the current screen. You should have installed the appropriate printer driver before you can print out the screen. A toggle button.
-
Page 75: Appendix 75 Product Specification
PRODUCT SPECIFICATION Details Item Details QRN-410 QRN-810 Item QRN-410 QRN-810 Date & Time(Calendar)/Event Log list/Text Search(POS, ANPR), ARB Mode Search, Smart search (Virtual Line w/ direction, Enter/Exit) Display Simultaneous playback Max. 4CH (Local, Network) Max. 8CH (Local, Network) Search & Play Inputs Max. - Page 76 Plug-in Webviewer Supported MS Explore 11, Mozilla Firefox 43, Apple Safari 9 * Mac OS X only Audio Out(1EA, RCA, Line) Type SSM, Webviewer, SmartViewer, Wisenet Mobile 1EA (WAN, 1Gbps) Ethernet Viewer Software - WAN : Uplink to CMS CMS Support...
-
Page 77: Product Overview
PRODUCT OVERVIEW Details Item unit : mm (inches) QRN-410 QRN-810 Mechanical Color / Material Black / Metal Dimension (WxHxD) W300 x H47 x D208.7mm (11.81”X1.85”X8.22”) (1U) Weight 1.655Kg (2T HDD) English _77... -
Page 78: Default Setting
appendix DEFAULT SETTING Category Details Factory Default Check Alarm Output Port BEEP To reset the system, move to "System Management > Settings > Load Factory Default" and press the Duration Continuous <Initialization> button. Storage Device HDD Alarm Replace Alarm Output Port BEEP This returns the factory default settings. -
Page 79: Troubleshooting
TROUBLESHOOTING Category Details Factory Default IP Type Static IP Network 192.168.1.200 Problem Action Network Subnet Mask 255.255.255.0 Live video will be slow or cut off. The frame number set for multiple data transmission set in camera or Gateway 192.168.1.1 network environment could differ from the actual rate of transmission. 168.126.63.1 Right click with the mouse button and select <Channel Information>... - Page 80 appendix Problem Action Problem Action No response controlling PTZ in the live viewer. Check the registered Camera if it support PTZ function. I forgot the password. Contact the NVR administrator for help. The camera is not connected or the PC fails to Check if the network cable is connected properly.
- Page 81 Problem Action In the recording setting screen, the permitted level If the input data is greater than the permitted level for each channel, it is for a specific channel is displayed in orange. displayed in orange. Set the permitted data limit to higher than the amount of input data.
-
Page 82: Open Source License Report On The Product
OPEN SOURCE LICENSE REPORT ON THE PRODUCT TERMS AND CONDITIONS FOR COPYING, c) Accompany it with the information you received as to the offer to distribute corresponding source code. (This alternative is allowed only DISTRIBUTION AND MODIFICATION for noncommercial distribution and only if you received the program in object code or executable form with such an offer, in accord with 0. - Page 83 2. Basic permissions. Each version is given a distinguishing version number. If the Program The hypothetical commands `show w' and `show c' should show the Finally, every program is threatened constantly by software patents. specifies a version number of this License which applies to it and "any appropriate parts of the General Public License.
- Page 84 6. conveying non-Source Forms. network may be denied when the modification itself materially and Termination of your rights under this section does not terminate the A patent license is “discriminatory” if it does not include within the scope adversely affects the operation of the network or violates the rules and licenses of parties who have received copies or rights from you under of its coverage, prohibits the exercise of, or is conditioned on the You may convey a covered work in object code form under the terms of...
- Page 85 preamble YOU OR THIRD PARTIES OR A FAILURE OF THE PROGRAM TO Although the Lesser General Public License is Less protective of the distribute the same sections as part of a whole which is a work based OPERATE WITH ANY OTHER PROGRAMS), EVEN IF SUCH HOLDER users' freedom, it does ensure that the user of a program that is linked on the Library, the distribution of the whole must be on the terms of The licenses for most software are designed to take away your freedom...
- Page 86 a) Accompany the work with the complete corresponding machine- distribute the Library at all. For example, if a patent license would not everyone can redistribute and change. You can do so by permitting Modifications. When Covered Code is released as a series of files, a readable source code for the Library including whatever changes permit royalty-free redistribution of the Library by all those who receive redistribution under these terms (or, alternatively, under the terms of the...
- Page 87 Contributor Version; 2) separate from the Contributor Version; 3) for Developer or any Contributor. You must make it absolutely clear than RESPECT, YOU (NOT THE INITIAL DEVELOPER OR ANY OTHER unenforceable, such provision shall be reformed only to the extent infringements caused by: i) third party modifications of Contributor any such warranty, support, indemnity or liability obligation is offered by CONTRIBUTOR) ASSUME THE COST OF ANY NECESSARY...
- Page 88 THIS SOFTWARE IS PROVIDED BY THE AUTHOR "AS IS" AND ANY Copyright (c) 2012, AUTHORS.txt (http://jqueryui.com/about) power, direct or indirect, to cause the direction or management of such Works, in at least one of the following places: within a NOTICE text file EXPRESS OR IMPLIED WARRANTIES, INCLUDING, BUT NOT LIMITED entity, whether by contract or otherwise, or (ii) ownership of fifty percent distributed as part of the Derivative Works;...
- Page 89 the zlib/libpng License Microsoft public License (Ms-pL) 4. patent License. Subject to the terms and conditions of this This License is entered between You, the individual or other entity reading or otherwise making use of the Work licensed pursuant to this License, each Author hereby grants to You a perpetual, worldwide, Copyright (c) 2011 Lee Thomason Copyright (c) 2009 Wong Shao Voon...
- Page 90 the php License, version 3.01 c. Subject to the above terms and conditions, this License is This software is copyright (C) 1991-1998, Thomas G. Lane. All Rights 3. All advertising materials mentioning features or use of this software perpetual (for the duration of the applicable copyright in the Work). Reserved except as specified below.
- Page 91 ntp License indemnity 27. [30]Louis A. Mamakos <louie@ni.umd.edu> MD5-based 23. mailto:phk@FreeBSD.ORG authentication 24. http://www4.informatik.uni-erlangen.de/˜kardel You agree to indemnify and hold harmless the authors of the Software This file is automatically generated from html/copyright.htm 28. [31]Lars H. Mathiesen <thorinn@diku.dk> adaptation of foundation 25.
- Page 92 Brian Gladman Alternate License Copyright (c) 2003, 2010 Brian Gladman, Worcester, UK. All rights reserved. LicenSe terMS The free distribution and use of this software in both source and binary form is allowed (with or without changes) provided that: 1. distributions of this source code include the above copyright notice, this list of conditions and the following disclaimer;...
- Page 93 Head Offi ce 6, Pangyo-ro 319 beon-gil, Bundang-gu, Seongnam-si, Gyeonggi-do, 463-400 Rep. of KOREA Tel : +82.70.7147.8753 Fax : +82.31.8018.3740 www.hanwha-security.com Hanwha Techwin America 500 Frank W. Burr Blvd. Suite 43 Teaneck, NJ 07666 Toll Free +1.877.213.1222 Direct +1.201.325.6920 Fax +1.201.373.0124 www.hanwha-security.com Hanwha Techwin Europe Heriot House, Heriot Road, Chertsey, Surrey, KT16 9DT, United Kingdom...
Need help?
Do you have a question about the QRN-410 and is the answer not in the manual?
Questions and answers