Table of Contents

Subscribe to Our Youtube Channel
Related Manuals for Lumens CL511


Summary of Contents for Lumens CL511
- Page 1 CL511 Ceiling Camera (Document Camera) User Manual - English [Important] To download the latest version of Quick Start Guide, multilingual user manual, software, or driver, etc., please visit Lumens https://www.MyLumens.com/support...
-
Page 2: Table Of Contents
Table of Contents Chapter 1 Package Contents ..............3 Chapter 2 Function Introduction .............. 4 2.1 Product appearance ....................4 2.2 Description of LED indicator .................. 5 Chapter 3 Instruction for installation ............6 3.1 Size ..........................6 3.2 Relative position of the presenter and document ........... 7 3.3 Preparation before installation................ - Page 3 6.16 I would like to save preset number..............17 6.17 I want to use the preset number ..............17 Chapter 7 Network Function Settings Description ........ 18 7.1 System Requirements ................... 18 7.2 Connecting Camera to Internet ................18 7.3 Using the Browser to View the Images ............
-
Page 4: Chapter 1 Package Contents
Chapter 1 Package Contents CL511 Quick Start Guide Remote Control Power Adapter Power Connector IR extension cord (Appearance may vary depending on country/region) Hanging parts USB cable VGA cable U-hanger x 1/mounting screw x 2... -
Page 5: Chapter 2 Function Introduction
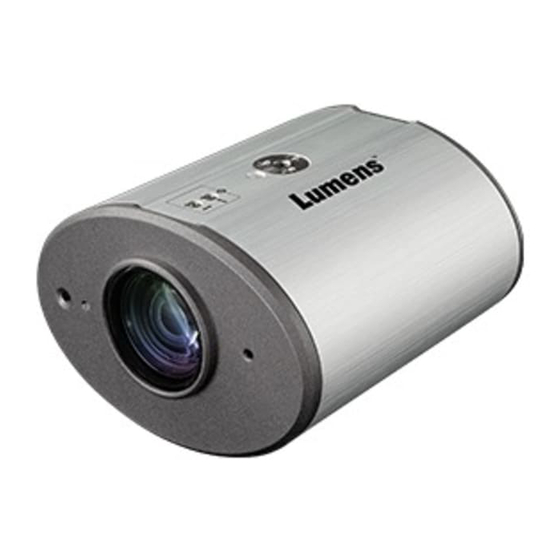
Chapter 2 Function Introduction 2.1 Product appearance 2.1.1 Front View ➎ ➏ ➐ ➊ ➋ ➌ ➍ Item Function Descriptions Camera Lens 30x HD camera lens IR reception IR receiver Display the status of the camera, please refer to 2.2 Description of LED LED Indicator indicator Laser Marker LED... -
Page 6: Description Of Led Indicator
➊ ➋ ➌ ➍ ➎ ➏ ➐ 2.1.2 Back View ➑ ➒ ➓ ⓫ ⓬ Item Function Descriptions DC 12 V power connector AC power supply connecting port Network cable connection port supports routers or hubs of PoE+ Network connection port (IEEE 802.3at) with power supply Kensington lock hole Safety lock slot... -
Page 7: Chapter 3 Instruction For Installation
Chapter 3 Instruction for installation 3.1 Size 3.1.1 CL511 Size Length x Width x Height: 126 x 142 x 86 mm Weight : 0.85 Kg (without mental plates) 3.1.1.1 Size of CL511 together with U-hanger... -
Page 8: Relative Position Of The Presenter And Document
3.1.1.2 Size of U-hanger <Remark> Please prepare the screw hanger in compliance with the size of the hole used for securing the U-hanger. (Please use UL safety approved hanger for the screw hanger.) 3.2 Relative position of the presenter and document ... -
Page 9: Preparation Before Installation
Please check whether accessories in the box are complete or not. Please contact the supplier for any shortage, and make sure to keep the accessories in the box intact. Please choose a proper place for installation of CL511 in advance. Please determine an installation place according to the following requirements a. -
Page 10: System Diagram
3.5 System diagram... -
Page 11: Chapter 4 Start Using
Chapter 4 Start Using 1. Place an object to be displayed under the camera. 2. Press [POWER] on the remote control to power on. 3. Press [AUTO TUNE] button on the remote control to optimize the image. 4. You are ready to teach/present. <Caution>... -
Page 12: Chapter 5 Remote Control And Setting Menu
Chapter 5 Remote Control and Setting Menu 5.1 Functions of remote control The below functions are listed alphabetically. Item Description Power on and off Move up, down, left or right to select the needed ,,, function Automatically adjust the focal length of image Automatically adjust the image to have the best AUTO TUNE brightness and focusing performance... -
Page 13: Setting Menu
5.2 Setting Menu 5.2.1 Main menu Press [MENU] on the remote control to enter the setting menu. Auto Tune Playback Automatically adjust the image to have the best Preview the photos or videos stored in the USB brightness and focusing performance flash drive (priority) or internal memory card. -
Page 14: Setting Menu
5.3 Setting menu 5.3.1 Setting Menu 1st Level 2nd Level Function Descriptions Major Items Minor Items Use left and right arrow keys to select the capture mode Capture Mode (Single Capture/Time Lapse/Record/Off) Use the left and right arrow keys to select the capture time. The setting range is 1 ~ 72 hours Capture Time <Remark>... - Page 15 5.3.2 Mask Mode setting menu Function Items Function Descriptions Live Press [ENTER] to return to live image. Transparency Use the left and right arrow keys to adjust the transparency of the mask. Step Use the left and right arrow keys to select the step of the mask. V Size Use the left and right arrow keys to select the vertical height of the mask.
-
Page 16: Chapter 6 Descriptions Of Major Functions
Chapter 6 Descriptions of Major Functions 6.1 Automatically adjust the image to have the best brightness and focusing performance Press [AUTO TUNE] on the remote control to optimize the brightness and focusing performance. 6.2 Make text clearer and photos more colorful Enter the setting menu, select [Photo/Text] >... -
Page 17: I Would Like To Use The Mask And Spotlight Function
Insert the USB flash drive and a [Copy To USB flash drive] dialog box will appear, and you are asked whether to copy files from CL511 to the USB flash drive. Press [] or [] to select. Copy To USB Disk 6.14 Image comparison (to compare live images with stored image files (PIP)) -
Page 18: I Would Like To Save Preset Number
<Remark> The power on image file must be less than 5 MB and in JPEG format. <Remark> To save the file, please follow the instruction below: File path: \DCIM\100MEDIA, for example: J:\DCIM\100MEDIA File name: four English letters+ four numbers, for example: LUMN0001.JPG 3. -
Page 19: Chapter 7 Network Function Settings Description
Chapter 7 Network Function Settings Description 7.1 System Requirements Version Browser FireFox Chrome Windows Edge FireFox Chrome 10.13 above Safari 7.2 Connecting Camera to Internet Connecting to Internet Two common connection methods are shown below 1. Connecting via switch or router Network cable Network cable Switch or router... -
Page 20: Using The Browser To View The Images
7.3 Using the Browser to View the Images Use a Cat5e cable to connect to the router to view CL511 video and control it through the web browser 1. Confirm the IP address of the camera DHCP is on by default. You can use the remote control to open OSD Menu > Check the IP address on the Network. -
Page 21: Using Rtsp Player To View The Images
7.4 Using RTSP Player to View the Images RTSP connections can be made using free software, e.g.: VLC, QuickTime, PotPlayer, etc. RTSP connection address formats are as follows: rtsp://camera IP:8557/h264 Example: Open the VLC software, select [Media] > [Open Network Streaming], and enter the URL: rtsp://192.168.4.28:8557/h264... -
Page 22: Web Page Function Description
7.5 Web Page Function Description 7.5.1 Login Screen ➊ ➋ ➍ ➌ Item Function Descriptions User Login Account Enter user login account (default: admin) Enter user password (default: 9999) User Password <Remark> For a first-time login, please refer to 7.5.4 System Settings to change the default password Remember user Save user login account and password to the browser. - Page 23 Enlarge Switch the preview window to full screen Preview window Display the screen currently captured by CL511 Zoom Zoom in/out images Brightness Brightness Focus Tune the focus Power Enable/Disable CL511 7.5.3 Live View-2 ➌ ➋ ➊ ➍ ➎ ➏ ➐...
- Page 24 ➊ ➋ Item Function Descriptions Display the current device name of CL511 and web login settings. Click [Edit] to change the device name, the user account, and the password. Device and Account <Remark> The name/account/password is limited to 1 - 16 characters.
- Page 25 Item Function Descriptions Device Current Date and Time Display the current system time Time Zone Set the Time Zone. Select NTP Service/Manually Set Turn on Manually Set and choose to synchronize with the computer or set the date/time manually. Setting Mode Select NTP service to display this item NTP Server URL Connect to a NTP server to correct time...
- Page 26 7.5.7 Maintenance ➊ ➋ ➌ ➍ ➎ Item Function Descriptions Select the firmware file, and click [Upgrade] to update the firmware. <Remark> Update takes about 2 - 3 minutes. Firmware Upgrade <Caution> Please do not operate or turn off the power of the device during the update to avoid firmware update failure.
-
Page 27: Chapter 8 Switch To Different Output Resolutions
Chapter 8 Switch to different output resolutions 8.1 Switch to different output resolutions Unplug and reconnect the power after switching and wait for CL511 to restart before it takes effect. High-speed Note 1 Resolution HDMI 4KIP Note Note 2 mode... -
Page 28: Chapter 9 Troubleshooting
Chapter 9 Troubleshooting This chapter describes problems you may encounter while using CL511. If you have questions, please refer to related chapters and follow all the suggested solutions. If the problem still occurred, please contact your distributor or the service center. -
Page 29: Chapter 10 Safety Instructions
Chapter 10 Safety Instructions Always follow these safety instructions when setting up and using the CU-CAT Video Board: 1 Operation 1.1 Please use the product in the recommended operating environment, away from water or source of heat 1.2 Do not place the product on a tilted or unstable trolley, stand or table. 1.3 Please clean the dust on the power plug prior to usage. -
Page 30: Supplier's Declaration Of Conformity 47 Cfr § 2.1077 Compliance Information
Supplier's Declaration of Conformity 47 CFR § 2.1077 Compliance Information Manufacturer:Lumens Digital Optics Inc. Product Name:CL511 Model Number:Document Camera Responsible Party – U.S. Contact Information Supplier:Lumens Integration, Inc. 4116 Clipper Court, Fremont, CA 94538, United States e-mail :support@mylumens.com FCC Compliance Statement This device complies with Part 15 of the FCC Rules. -
Page 31: Appendix 1
Appendix 1 Power frequency for each country in the world Region or Country Region or Country Region or Country Chinese English Chinese English Chinese English 阿 富 汗 大 陸 China 關 島 Guam Afghanistan 阿 爾 及 利 亞 Algeria 哥... - Page 32 Region or Country Region or Country Region or Country Chinese English Chinese English Chinese English 澳 門 Macao 巴 拿 馬 Panama 中 華 民 國 R.O.C. Taiwan 馬 得 拉 群 島 Madeiral 巴 拉 奎 Paraguay 坦 尚 尼...
-
Page 33: Copyright Information
Lumens is a trademark that is currently being registered by Lumens Digital Optics Inc. Copying, reproducing or transmitting this file is not allowed if a license is not provided by Lumens Digital Optics Inc. unless copying this file is for the purpose of backup after purchasing this product.
Need help?
Do you have a question about the CL511 and is the answer not in the manual?
Questions and answers