
Related Manuals for New Holland Speedrower 200


Summary of Contents for New Holland Speedrower 200
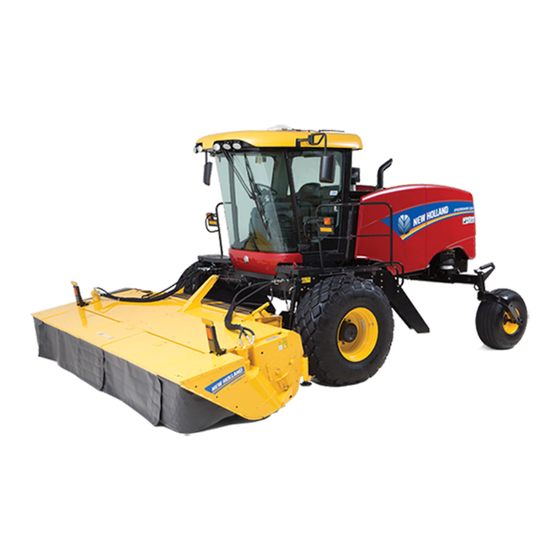
- Page 1 SERVICE MANUAL Speedrower ® Speedrower ® Self-Propelled Windrower Part number 47698329 edition English April 2014...
- Page 2 Link Product / Engine Product Market Product Engine Speedrower® 200 North America F4HE9687 Speedrower® 200 International Region F4HE9687 North America F4HE9687 Speedrower® 240 Speedrower® 240 International Region F4HE9687 47698329 14/04/2014 Find manuals at https://best-manuals.com...
- Page 3 Contents INTRODUCTION Engine..................10 [10.001] Engine and crankcase ............. 10.1 [10.206] Fuel filters .
- Page 4 [35.300] Reservoir, cooler, and filters............35.6 [35.565] Cutter control circuit .
- Page 5 INTRODUCTION 47698329 14/04/2014 Find manuals at https://best-manuals.com...
-
Page 6: Table Of Contents
Contents INTRODUCTION Foreword - Important notice regarding equipment servicing ........3 Foreword - Note to the dealer . -
Page 7: Foreword - Important Notice Regarding Equipment Servicing
Some information could not be updated due to modifications of a technical or commercial type, or changes to the laws and regulations of different countries. In case of questions, refer to your NEW HOLLAND Sales and Service Networks. 47698329 14/04/2014... -
Page 8: Foreword - Note To The Dealer
NEW HOLLAND. The installation and or use of such products could have negative effects upon the design character- istics of your machine and thereby affect its safety. NEW HOLLAND is not liable for any damage caused by the use of "NON-GENUINE" NEW HOLLAND parts and accessories. -
Page 9: Safety Rules
INTRODUCTION Safety rules Speedrower® 200 [YEG6XX001 - ] Speedrower® 240 [YEG6XX001 - ] Personal safety This is the safety alert symbol. It is used to alert you to potential personal injury hazards. Obey all safety messages that follow this symbol to avoid possible death or injury. Throughout this manual you will find the signal words DANGER, WARNING, and CAUTION followed by special in- structions. -
Page 10: Safety Rules (*)
INTRODUCTION Safety rules Speedrower® 200 [YEG6XX001 - ] Speedrower® 200 Speedrower® 240 [YEG6XX001 - ] Speedrower® 240 General safety rules Use caution when operating the machine on slopes. Raised equipment, full tanks and other loads will change the center of gravity of the machine. The machine can tip or roll over when near ditches and embankments or uneven surfaces. - Page 11 INTRODUCTION Always keep windows, mirrors, all lighting, and Slow Moving Vehicle (SMV) emblem clean to provide the best possible visibility while operating the machine. Operate controls only when seated in the operator’s seat, except for those controls expressly intended for use from other locations.
- Page 12 INTRODUCTION Engine, transmission, exhaust components, and hydraulic lines may become hot during operation. Take care when servicing such components. Allow surfaces to cool before handling or disconnecting hot components. Wear protective equipment when appropriate. When welding, follow this instructions in the manual. Always disconnect the battery before welding on the machine. Always wash your hands after handling battery components.
- Page 13 INTRODUCTION Inspect the electrical system for loose connections or frayed insulation. Repair or replace loose or damaged parts. Do not store oily rags or other flammable material on the machine. Do not weld or flame cut any items that contain flammable material. Clean items thoroughly with non-flammable solvents before welding or flame-cutting.
- Page 14 INTRODUCTION Operator presence system Your machine is equipped with an operator presence system to prevent the use of some features while the operator is not in the operator’s seat. The operator presence system should never be disconnected or bypassed. If the system is inoperable, the system must be repaired. Power Take-Off (PTO) PTO-driven machinery can cause death or serious injury.
- Page 15 INTRODUCTION To release the belt, push the red release button (1) on the buckle and pull the tongue from the buckle. 10041220 Air-conditioning system The air-conditioning system is under high pressure. Do not disconnect any lines. The release of high pressure can cause serious injury.
- Page 16 INTRODUCTION Utility safety Make sure the machine has sufficient clearance to pass in all directions. Pay special attention to overhead power lines and hanging obstacles. High voltage lines may require significant clearance for safety. Contact local authorities or utilities to obtain safe clearance distances from high voltage power lines. Retract raised or extended components, if necessary.
- Page 17 INTRODUCTION Do not use the steering wheel or other controls or accessories as handholds when entering or exiting the cab or operator’s platform. Header lift locks Do not work under the machine header unless it is securely blocked and/or the header safety latch is engaged. Header will fall rapidly if hydraulic lift system should fail.
-
Page 18: Safety Rules - Ecology And The Environment
• Do not open the air-conditioning system yourself. It contains gases that should not be released into the atmosphere. Your NEW HOLLAND dealer or air conditioning specialist has a special extractor for this purpose and will have to recharge the system properly. -
Page 19: Personal Safety - Safety Signs
INTRODUCTION Personal safety - Safety signs The following safety signs are placed on your machine as a guide for your safety and for those working with you. Walk around the machine and note the content and location of these safety signs before operating your machine. Keep safety signs clean and legible. - Page 20 INTRODUCTION NHIL13WR00034AA 47698329 14/04/2014...
- Page 21 INTRODUCTION WARNING Check torque of front wheel nuts and rear wheel bolts every 5 hours until no loss of torque is found. Failure to comply could result in death or serious injury. Quantity 1 English 87730677 87730677_A (1) Upper right corner of the cab door. 93100193 WARNING Always fasten seatbelt during operation.
- Page 22 INTRODUCTION WARNING Before starting engine or any function. Warn bystanders. Sound horn 3 times. Failure to comply could result in death or serious injury. Quantity 1 English 86640432 French 86640433 Spanish 86640434 Russian 84378977 Chinese 84012892 86640432 (3) On the right-hand side cab glass, upper right side of glass.
- Page 23 INTRODUCTION WARNING Set machine to clear obstructions and stones. Machine can throw stones and debris toward bystanders. Keep bystanders away while in operation. Keep all shields and covers in place and in good working order. When descending steep grades, place range control in field operating position to prevent loss of control.
- Page 24 INTRODUCTION EMERGENCY EXIT If it becomes impossible to open the cab door, while in the cab, the right cab window can be used as an emergency exit. Remove the hammer from the bracket on the right rear post of the cab. Use the pointed hammer to shatter one of the glass windows.
- Page 25 INTRODUCTION DANGER DO NOT use ether starting fluid with a "THERMOSTART" system. AN EXPLOSION MAY OCCUR. Failure to comply will result in death or serious injury. Quantity 2 English 629086 French 682683 Spanish 86600617 Russian 84379011 Chinese 84203074 629086 (7) On the air intake tube. 76075203 DANGER START ENGINE ONLY FROM OPERATOR'S SEAT.
- Page 26 INTRODUCTION CAUTION DO NOT remove radiator cap. CHECK coolant level in recovery tank. Failure to comply may result in injury. Quantity 2 English 87013363 French 87013364 Spanish 87013365 Russian 84378968 Chinese 47564942 87013363 (9) Rear side of top engine hood. 93100195 WARNING TO PREVENT LOSS OF CONTROL...
- Page 27 INTRODUCTION DANGER / POISON Shield Eyes Explosive Gases NO Sparks NO Flames NO Smoking Sulfuric Acid Flush eyes immediately with water. GET Medical help fast. Failure to comply will result in death or serious injury. KEEP OUT of reach of children. Do not tip. Battery must be secure and level.
- Page 28 INTRODUCTION WARNING Before operating machine, read operator's manual and ALL SAFETY instructions. If manual is missing, contact your dealer or service department. Before starting engine or operation, clear area of bystanders. Disengage drives including PTO. Stop engine, wait for all movement to stop before leaving operator's position.
- Page 29 INTRODUCTION WARNING 1. Operate at low speeds in tight areas or on hillsides. 2. Avoid abrupt changes in direction at high speeds. 3. Keep header as low as possible. 4. Before leaving operator's platform, put controls in neutral, set brake, lower header and stop engine. Failure to comply could result in death or serious injury.
- Page 30 INTRODUCTION WARNING Torque in numbered sequence to 400 N·m (295 ft lb). Go around 3 times. Re-torque at 5 hour intervals until bolts retain torque. Failure to comply could result in death or serious injury. Quantity 2 English: 84240284 French 84240287 Spanish 84240286 Russian 84240288 84240284_A...
- Page 31 INTRODUCTION DANGER CRUSHING HAZARD - HEADER Header will fall rapidly if hydraulic lift system should fall. Rest header on ground or engage header lock handle before working around raised header. Failure to comply will result in death or serious injury. Quantity 2 84554251 84554251_B...
- Page 32 INTRODUCTION WARNING INSTRUCTIONAL SEAT. To be used for training or diagnostic purposes. Extra riders, especially children, are NOT permitted on machine. Buckle up! Failure to comply could result in death or serious injury. Quantity 1 English 86640438 French 86640439 Spanish 86640440 Russian 84379029 Chinese 84282118 86640438...
- Page 33 INTRODUCTION WARNING Keep hands and clothing away from rotating fan and belts. Failure to comply could result in death or serious injury. Quantity 2 English 86501511 French 86509716 Spanish 86601164 Russian 84379019 Chinese 332511A1 86501511 (18) Left-hand side of fan shroud. 93100201 (18) Right-hand side of fan shroud.
- Page 34 INTRODUCTION CAUTION WHEN BACKING UP, HOLD THE STEERING WHEEL AT BACK OF RIM AND MOVE YOUR HAND IN THE DIRECTION YOU WANT TO GO Failure to comply could result in minor or moderate injury. Quantity 1 86555355 86555355 (19) Attached to steering wheel. 93100185 WARNING TO PREVENT LOSS OF CONTROL...
- Page 35 INTRODUCTION WARNING PRESSURIZED FLUID OR GAS Hydraulic accumulator contains gas and oil under pressure. Service or repair must be performed only by trained service technician. Failure to comply could result in death or serious injury. Quantity 1 84005363 84005363_B (21) Under lower windrow hood applied to the accumulator bracket.
- Page 36 INTRODUCTION WARNING TO PREVENT LOSS OF CONTROL DO NOT tow on public roads with this unit. This hitch is for towing "Swath Roller" OFF ROAD. Header MUST BE installed for towing. Maximum weight of "Swath Roller" - 1000 lbs Maximum vertical weight on hitch - 150 lbs Failure to comply could result in death or serious injury.
-
Page 37: Personal Safety - Do Not Operate Tag
DO NOT OPERATE TAG A. (1) Do not operate. B. (2) Do not remove this. C. (3) See other side. D. (4) Signed by. E. (5) Reason The DO NOT OPERATE tag can be obtained from your NEW HOLLAND dealer. 47698329 14/04/2014... -
Page 38: Torque - Minimum Tightening Torques For Normal Assembly
INTRODUCTION Torque - Minimum tightening torques for normal assembly Speedrower® 200 [YEG6XX001 - ] Speedrower® 200 Speedrower® 240 [YEG6XX001 - ] Speedrower® 240 METRIC NON-FLANGED HARDWARE NOM. LOCKNUT LOCKNUT SIZE CL.8 CL.10 CLASS 8.8 BOLT and CLASS 10.9 BOLT and W/CL8.8 W/CL10.9 CLASS 8 NUT... - Page 39 INTRODUCTION METRIC FLANGED HARDWARE NOM. CLASS 8.8 BOLT and CLASS 10.9 BOLT and LOCKNUT LOCKNUT SIZE CLASS 8 NUT CLASS 10 NUT CL.8 CL.10 W/CL8.8 W/CL10.9 BOLT BOLT PLATED PLATED UNPLATED UNPLATED W/ZnCr W/ZnCr 2.4 N·m (21 lb 3.2 N·m (28 lb 3.5 N·m (31 lb 4.6 N·m (41 lb 2.2 N·m (19 lb...
- Page 40 INTRODUCTION INCH NON-FLANGED HARDWARE LOCKNUT LOCKNUT NOMINAL SAE GRADE 5 BOLT SAE GRADE 8 BOLT GrB W/ Gr5 GrC W/ Gr8 SIZE and NUT and NUT BOLT BOLT PLATED PLATED PLATED PLATED W/ZnCr W/ZnCr or PLATED PLATED GOLD GOLD SILVER SILVER 8 N·m (71 lb 11 N·m (97 lb...
- Page 41 INTRODUCTION INCH FLANGED HARDWARE NOM- LOCKNUT LOCKNUT SAE GRADE 5 BOLT and SAE GRADE 8 BOLT and INAL GrF W/ Gr5 GrG W/ Gr8 SIZE BOLT BOLT UNPLATED PLATED UNPLATED PLATED or PLATED W/ZnCr or PLATED W/ZnCr SILVER GOLD SILVER GOLD 12 N·m (106 lb 13 N·m (115 lb...
-
Page 42: Torque - Standard Torque Data For Hydraulics
INTRODUCTION Torque - Standard torque data for hydraulics INSTALLATION OF ADJUSTABLE FITTINGS IN STRAIGHT THREAD O RING BOSSES 1. Lubricate the O-ring by coating it with a light oil or petroleum. Install the O-ring in the groove adjacent to the metal backup washer which is assembled at the extreme end of the groove (4). - Page 43 INTRODUCTION PIPE THREAD FITTING TORQUE PIPE THREAD FITTING Torque (Maximum) Thread Size Before installing and tightening pipe fittings, clean the 1/8-27 13 N·m (10 lb ft) threads with a clean solvent or Loctite cleaner and apply 1/4-18 16 N·m (12 lb ft) sealant L ®...
-
Page 44: Basic Instructions - Shop And Assembly
Only use CNH Original Parts or NEW HOLLAND Original Parts. Only genuine spare parts guarantee the same quality, duration, and safety as original parts, as they are the same parts that are assembled during standard production. Only CNH Original Parts or NEW HOLLAND Original Parts can offer this guarantee. - Page 45 Failure to comply could result in death or serious injury. W0111A The special tools that NEW HOLLAND suggests and illustrate in this manual have been specifically researched and designed for use with NEW HOLLAND machines. The special tools are essential for reliable repair operations. The special tools are accurately built and rigorously tested to offer efficient and long-lasting operation.
-
Page 46: Hydraulic Contamination
INTRODUCTION Hydraulic contamination Contamination in the hydraulic system is a major cause of the malfunction of hydraulic components. Contamination is any foreign material in the hydraulic oil. Contamination can enter the hydraulic system in several ways: • When you drain the oil or disconnect any line •... -
Page 47: Capacities - Capacities
Application Lubricant Lube class Engine crankcase See engine oil viscosity chart CI-4 or CH-4 Engine flywheel gearbox NEW HOLLAND AMBRA HYPOIDE SSL GEAR OIL Hydraulic system NEW HOLLAND AMBRA MULTI G 134™ HYDRAULIC J20A TRANSMISSION OIL Planetary final drives NEW HOLLAND AMBRA HYPOIDE 90 or... -
Page 48: Product Identification - Product Identification Number (Pin)
INTRODUCTION Product identification - Product Identification Number (PIN) Speedrower® 200 [YDG670501 - ] Speedrower® 240 [YDG670501 - ] The windrower identification plate (1) is located on the left side of the frame, next to the platform steps (2). The iden- tification plate includes the model number and the PIN. -
Page 49: Part Identification - Engine Serial Number
INTRODUCTION Part identification - Engine serial number Speedrower® 200 [YDG670501 - ] Speedrower® 240 [YDG670501 - ] The engine specifications are located on the right-hand side of the engine oil pan. NOTE: The identification number of the engine is required when ordering service parts. - Page 50 INTRODUCTION 47698329 14/04/2014...
- Page 51 SERVICE MANUAL Engine Speedrower® 200 Speedrower® 240 47698329 14/04/2014...
- Page 52 Contents Engine - 10 [10.001] Engine and crankcase ............. . . 10.1 [10.206] Fuel filters .
- Page 53 Engine - 10 Engine and crankcase - 001 Speedrower® 200 Speedrower® 240 47698329 14/04/2014 10.1 [10.001] / 1...
- Page 54 Contents Engine - 10 Engine and crankcase - 001 TECHNICAL DATA Engine and crankcase General specification ............... 3 FUNCTIONAL DATA Engine and crankcase Overview .
-
Page 55: General Specification
Engine - Engine and crankcase Engine and crankcase - General specification Model SR200 SR240 Cylinders Aspiration turbocharged w/ charge air cooler turbocharged w/ charge air cooler Bore 104 mm (4.4 in) 104 mm (4.4 in) Stroke 132 mm (5.0 in) 132 mm (5.0 in) Displacement 6.7 L (456 cuin) -
Page 56: Overview
Engine - Engine and crankcase Engine and crankcase - Overview 76075199 The NEF Tier III engine is a 6–cylinder turbocharged and after cooled unit, having a bore of 104 mm (4.4 in) and a stroke of 132 mm (5.0 in) which generates a displacement of 410 in³. The engine uses a electronically controlled hi-pressure injection pump and has been designed to meet current emission regulations and must only be serviced by an authorized service agent. - Page 57 Engine - Engine and crankcase NOTICE: All gaskets, seals, and O-rings must be replaced during reassembly. Where new sealant is to be applied refer to Engine Specifications. 47698329 14/04/2014 10.1 [10.001] / 5...
-
Page 58: Remove
Engine - Engine and crankcase Engine - Remove 1. Remove bolt (2) on starter to disconnect ground cable and the negative battery cable. 2. Remove battery post nut and disconnect positive bat- tery cable (3). 3. Remove protective cap and disconnect all cables from starter solenoid (1). - Page 59 Engine - Engine and crankcase 8. Using a helper, detach four gas springs (1) from engine area side doors by removing four flange nuts and lock washers. 9. Remove side doors by removing one bolt (2) and loos- ening one (3) at each of twelve pivot clips (4). 10.
- Page 60 Engine - Engine and crankcase 14. Loosen spring clamps (1) and remove tubing (2) from intercooler to intake manifold. NHILWR00593AA 15. Loosen clamps (1) and remove 127 mm (5 in) diame- ter outlet tubing (2) from air cleaner to rear bulkhead. 76075200 16.
- Page 61 Engine - Engine and crankcase 19. Remove and cap both heater hoses (1). NHIL13WR00113AA 20. Remove clamps (1) that secure A/C compressor line (2). 21. Remove flange nuts (3) that secure bracket (4). Set bracket and heater hoses aside. 76075210 22.
- Page 62 Engine - Engine and crankcase 24. Remove three bolts (1) that secure A/C compressor. Hang compressor on right side of machine at (2) with hoses connected. NOTICE: Use caution when hanging compressor at (2). Be sure not to damage or bend any of the steel fluid lines. NHILWR00594AA 25.
- Page 63 Engine - Engine and crankcase 29. Remove and cap steel hydraulic lines (1) to the top of transmission. Use a collection pan to catch any excess fluid that may escape. Disconnect breather hose (2). 86070789 30. Remove plug (1) to drain oil from gear box. 31.
-
Page 64: Install
Engine - Engine and crankcase Engine - Install WARNING Heavy parts! Support designated component(s) with adequate lifting equipment. Failure to comply could result in death or serious injury. W1024A 1. Align holes in engine supports and install four 5/8 in. x 3–1/2 in bolts with large washers (1) down through en- gine mounts and install lock nuts. - Page 65 5. Fill front gear case section of flywheel housing by re- moving breather plug (1) with 1.65 l (1.75 US qt) NEW HOLLAND AMBRA HYPOIDE 90 or NEW HOLLAND AMBRA HYPOIDE SSL GEAR OIL. Oil level should be between the two marks on the dipstick (2).
- Page 66 Engine - Engine and crankcase 10. If equipped with optional hydraulic pump (1) install two 3/8 in. x 1–1/2 in. socket head bolts and lock washers (2) that secure pump. 11. Connect wire harness to fuel water switch (3). 86070781 12.
- Page 67 Engine - Engine and crankcase 15. Install flange bolts, flange nuts, and lock washers (1) that secure bracket (2). Secure A/C compressor line (3) with clamps (4). 76075210 16. Connect both heater hoses (1). 76075207 17. Connect ECM harness (1). 18.
- Page 68 Engine - Engine and crankcase 20. Install 127 mm (5 in) diameter outlet tubing (1) from air cleaner to rear bulkhead. Secure with clamps (2) . 76075200 21. Install tubing (1) from intercooler to intake manifold. Tighten spring clamps (2). NHILWR00593AA 22.
- Page 69 Engine - Engine and crankcase 24. Using appropriate lifting equipment, lower hood into place. Install four carriage bolts, lock washers, and flange nuts (1) that secure the front of the hood. 50041836 25. Install four flange bolts (1) that secure the rear of the hood to the radiator support frame.
- Page 70 Engine - Engine and crankcase 29. Connect overflow hose (1) and tighten clamp. 30. Fill radiator with proper coolant. Recommended mix- ture is 50% water with 50% ethylene glycol antifreeze. Replace the 0.88 bar (13 psi) radiator cap (1). 50041838 31.
- Page 71 Engine - Engine and crankcase 35. Install bolt (1) on starter to connect ground cable (2). Attach batteries negative ground cable (3) to engine. 76075206 36. Install two positive battery cables (1) with battery post nut. 76075206 47698329 14/04/2014 10.1 [10.001] / 19...
-
Page 72: Troubleshooting
Engine - Engine and crankcase Engine - Troubleshooting Problem Possible Cause Correction The Engine Does Not Start Battery dead or faulty. Check and recharge battery. Replace bat- tery if necessary.. Connections to battery terminals corroded Clean, examine and tighten the nuts on the or loose. - Page 73 Engine - Engine and crankcase Problem Possible Cause Correction Incorrect calibration of speed regulator. Check and correctly calibrate the regulator. See Bosch dealer. Faulty operation of injectors. Clean and completely overhaul the injec- tors. Impurities or water in the fuel and injection Carefully clean the system and refuel.
- Page 74 Engine - Engine and crankcase Problem Possible Cause Correction Engine oil passing through the intake Recondition the cylinder head. guides valves following wearing of guides or valve stems. Engine too cold (thermostat blocked or in- Replace the thermostat. efficient). 47698329 14/04/2014 10.1 [10.001] / 22...
- Page 75 Index Engine - 10 Engine and crankcase - 001 Engine - Install ..................12 Engine - Remove .
- Page 76 47698329 14/04/2014 10.1 [10.001] / 24...
- Page 77 Engine - 10 Fuel filters - 206 Speedrower® 200 Speedrower® 240 47698329 14/04/2014 10.2 [10.206] / 1...
- Page 78 Contents Engine - 10 Fuel filters - 206 SERVICE Fuel filters Bleed - Filter ................3 47698329 14/04/2014 10.2 [10.206] / 2...
- Page 79 Engine - Fuel filters Fuel filters - Bleed - Filter 1. Open bleed screw (1) on final filter. 76113157 2. Turn on the key-start switch to actuate the electric fuel pump and bleed the filter. When fuel, free of air bubbles is emitted from the bleed screw hole (1) tighten the bleed screw and turn the key-start switch off.
- Page 80 Index Engine - 10 Fuel filters - 206 Fuel filters - Bleed - Filter ................3 47698329 14/04/2014 10.2 [10.206] / 4...
- Page 81 This as a preview PDF file from best-manuals.com Download full PDF manual at best-manuals.com...
Need help?
Do you have a question about the Speedrower 200 and is the answer not in the manual?
Questions and answers
I need a repair manual or the diagram of a 617 disc mower