Viessmann Vitosol-F Installation Instructions Manual
Hide thumbs
Also See for Vitosol-F:
- Installation instructions manual (80 pages) ,
- Installation instructions for contractors (24 pages) ,
- Service instructions manual (24 pages)
Table of Contents
Advertisement
Quick Links
Advertisement
Table of Contents

Related Manuals for Viessmann Vitosol-F


Summary of Contents for Viessmann Vitosol-F
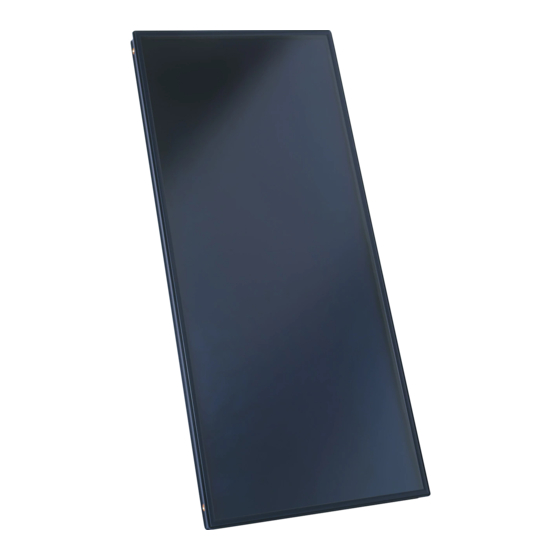
- Page 1 VIESMANN Installation instructions for contractors Vitosol-F/-FM Type SV and SH Flat-plate collector for installation on collector supports and walls Collector supports with variable angle of inclination VITOSOL-F/-FM Dispose after installation. 5698349 GB/en 9/2017...
- Page 2 Safety instructions Please follow these safety instructions closely to prevent accidents and material losses. Safety instructions explained Please note Note This symbol warns against the risk of material Details identified by the word "Note" contain additional losses and environmental pollution. information.
-
Page 3: Table Of Contents
Symbols ....................Intended use ..................Preparing for installation Calculating collector row clearance z ............ Installation sequence Installation on collector supports ............Components, Vitosol-F/-FM, type SH ..........■ Components, Vitosol-F/-FM, type SV ..........■ Fitting collector supports, adjusting angle of inclination .... -
Page 4: Information Disposal Of Packaging
Disposal of packaging Disposal of packaging DE: Use the disposal system organised by Viessmann. Please dispose of packaging waste in line with statu- AT: Use the ARA statutory disposal system (Altstoff tory regulations. Recycling Austria AG, licence number 5766). CH: Packaging waste is disposed of by the HVAC contractor. -
Page 5: Intended Use
Intended use The appliance is only intended to be installed and Any usage beyond this must be approved by the man- operated in sealed unvented systems that comply with ufacturer for the individual case. EN 12828 / DIN 1988, or solar thermal systems that comply with EN 12977, with due attention paid to the Incorrect usage or operation of the appliance (e.g. -
Page 6: Preparing For Installation Calculating Collector Row Clearance Z
Calculating collector row clearance z When installing several collectors one behind the other, maintain clearance z to prevent unwanted shad- ing. α α β Fig. 1 z Collector row clearance Collector angle of inclination α Angle of the sun β Angle of inclination Collector row clearance z in mm α... -
Page 7: Installation Sequence Installation On Collector Supports
Installation on collector supports Components, Vitosol-F/-FM, type SH α= 25° α= 30° α= 50° α= 35° α= 55° α= 40° α= 60° α= 45° α= 65° α= 70° α= 75° α= 80° α α Ø 11 M8x25 Fig. 2 Collector support for angle of inclination 25 to α... -
Page 8: Components, Vitosol-F/-Fm, Type Sv
Installation on collector supports (cont.) Components, Vitosol-F/-FM, type SV Ø 11 α= 60° α= 55° α= 50° α= 45° α= 40 α= 35° α= 30° α= 25° α M8x25 Fig. 4 Collector support Hexagon bolt M 8 x 25 Base rail... -
Page 9: Fitting Collector Supports, Adjusting Angle Of Inclination
Installation on collector supports (cont.) Fitting collector supports, adjusting angle of inclination α Fig. 6 For angles of inclination, see Fig. 2 and 4. Installation on substructure, e.g. steel beams Installation information: Secure joining plate to the retaining plates ■ Observe the maximum load and distance from the between the second and third supports, the fourth ■... - Page 10 Installation on collector supports (cont.) Ø 8,5 qP 8 Fig. 7 Use the base rails as a drilling template. Type mm y 1920...
- Page 11 Installation on collector supports (cont.) Fig. 8 Spacer lip Type plate ■ The side with type plate must be facing out- wards on the first and last collectors. On just one of the collectors, fit the pipework at the side opposite the type plate side. Please note ■...
-
Page 12: Installation On Concrete Slabs, Only For Type Sh
Installation on collector supports (cont.) Installation on concrete slabs, only for type SH Installation information: Screw the joining plate onto the retaining brackets ■ ■ Observe the maximum load and distance from the between the 2nd and 3rd collector support and edge of the roof for the on-site substructure to DIN between the 4th and 5th, etc. - Page 13 Installation on collector supports (cont.) Ø 8,5 Fig. 10 Note The front support rails can be secured in the centre for angles of inclination of 25° and 30°.
- Page 14 Installation on collector supports (cont.) Fig. 11 Spacer lip Type plate ■ The side with type plate must be facing out- wards on the first and last collectors. On just one of the collectors, fit the pipework at the side opposite the type plate side. ■...
-
Page 15: Wall Mounting (Only For Type Sh)
Wall mounting (only for type SH) Components Ø 11 γ γ= 10° γ= 15° γ= 20° γ= 25° γ= 30° γ= 35° γ= 40° γ= 45° M8x25 Fig. 12 Collector support Hexagon nut M 8 Base rail Hexagon bolt M 8 x 25 Adjustable support Retaining bracket Gusset plate with circular hole... -
Page 16: Fitting Collector Supports, Adjusting Angle Of Inclination Γ
Wall mounting (only for type SH) (cont.) Fitting collector supports, adjusting angle of inclination γ Fig. 14 Trim the adjustable support according to the required angle of inclination (see Fig. 12). Installing the collectors Installation information: ■ Gusset plate with circular hole at top ■... - Page 17 Wall mounting (only for type SH) (cont.) qQ 9 Fig. 15 Use the base rails as a drilling template.
- Page 18 Wall mounting (only for type SH) (cont.) Fig. 16 Spacer lip Type plate ■ The side with type plate must be facing out- wards on the first and last collectors. If only 1 collector is used, fit the pipework to the side opposite the side with type plate ■...
-
Page 19: Fitting The Connection Set And Collector Temperature Sensor
Fitting the connection set and collector temperature sensor Components Connection set Fig. 17 Connection pipe (short) Profile clip Connection pipe (long) Support sleeve Plug Special valve grease Locking ring fitting (angled), 22 mm, 90° Sensor well set Fig. 18 Support sleeve Strain relief fitting Locking ring fitting (tee), 22 mm... -
Page 20: Covering The Collector
Fitting the connection set and collector… (cont.) zT K Fig. 19 Flow connection Return connection Covering the collector Commission the solar thermal system as quickly as Note possible once the collectors have been installed. If commissioning takes place at a later date, cover the To reliably prevent steam hammer, the collectors must collector arrays. -
Page 21: Commissioning And Adjustment
The expansion vessel must be approved to DIN there. Metal seal connections, locking ring fittings or 4807. Viessmann plug-in connections with double O-rings The diaphragms and seals of the expansion vessel are the most suitable. and safety valve must be suitable for the heat trans- If other seals such as flat gaskets are used, ade- fer medium. - Page 24 Viessmann Werke GmbH & Co. KG Viessmann Limited D-35107 Allendorf Hortonwood 30, Telford Telephone: +49 6452 70-0 Shropshire, TF1 7YP, GB Fax: +49 6452 70-2780 Telephone: +44 1952 675000 www.viessmann.com Fax: +44 1952 675040 E-mail: info-uk@viessmann.com...
Need help?
Do you have a question about the Vitosol-F and is the answer not in the manual?
Questions and answers