Viessmann VITOSOL-F Installation Instructions Manual
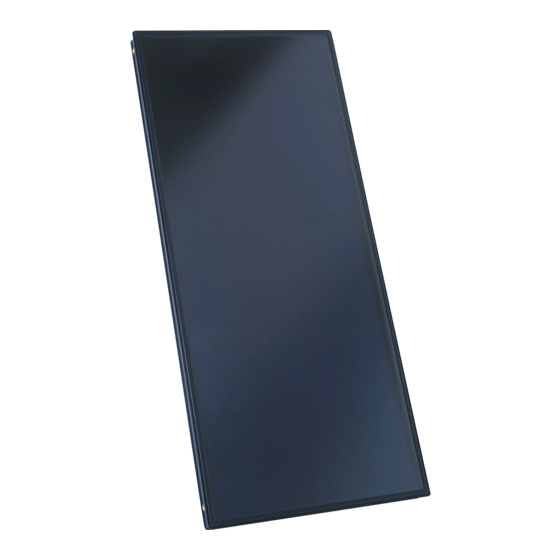
Flat-plate collector for pitched roofs, roof integration
Hide thumbs
Also See for VITOSOL-F:
- Installation instructions manual (32 pages) ,
- Service instructions manual (24 pages) ,
- Installation instructions for contractors (24 pages)

Related Manuals for Viessmann VITOSOL-F


Summary of Contents for Viessmann VITOSOL-F
- Page 1 VIESMANN Installation instructions for contractors Vitosol-F Type SV and SH Flat-plate collector for pitched roofs, roof integration VITOSOL-F Dispose after installation. 5604 068 GB 4/2012...
- Page 2 Safety instructions Please follow these safety instructions closely to prevent accidents and mate- rial losses. Safety instructions explained Working on the system Please note ■ Isolate the system from the power sup- This symbol warns against the ply and check that it is no longer 'live', risk of material losses and envi- e.g.
-
Page 3: Table Of Contents
Index Preparing for installation Installation versions....................Timber packs......................■ Number and length of the timbers in the packs..........Required roof area....................Installation sequence Components — standard version A..............Components — designer version B..............10 Installation overviews, standard version............... 13 Installation overviews, designer version............... 16 Order of installation.................... -
Page 4: Installation Versions
Installation versions Standard version A Pack with side covers (left and right). Designer version B Pack with side covers (left and right) and covers for the top and bottom collector rows. The fixing systems are designed for the roof inclinations and roof covers given in the following table (for versions A and B, see previous diagrams): Collector type Roof inclination... -
Page 5: Timber Packs
Timber packs Conditions for structural verification: ■ Max. snow loads up to 2.55 kN/m ■ Wind speeds up to 150 km/h ■ Max. rafter centres 800 mm. ■ Screws 8 x 120 Assy Plus VG with DIBT approval for threaded width in rafters of 60 mm. -
Page 6: Number And Length Of The Timbers In The Packs
Timber packs (cont.) Number and length of the timbers in the packs Type SV Single row installation (if installing two rows, double the relevant number) No. of collectors Length of timber No. of timbers 40 x 120 mm 1500 mm —... - Page 7 Required roof area (cont.) Standard version A Collector type Collector installation Single row Double row Single row Double row a in mm 2980 5380 1650 2730 b in mm 1650 + 1080 for each addi- 5250 + 2400 for each addi- tional collector tional collector Designer version B...
-
Page 8: Components - Standard Version A
Components — standard version A Side sections, standard 5,5x25... - Page 9 Components — standard version A (cont.) Lead flashing and centre panels Connecting parts, standard 4x30 Tx20 5,5x25 6,3x45...
-
Page 10: Components - Designer Version B
Components — designer version B Side sections, designer 5,5x25 Lead flashing and centre panels... - Page 11 Components — designer version B (cont.) Connecting parts, designer 5,5x25 4x30 Tx20 6,3x45 Designer cover (standard installation kit for first and last collectors) 5x70 Tx25...
- Page 12 Components — designer version B (cont.) Designer cover (extension kit for central collectors) 5x70 Tx25...
-
Page 13: Installation Overviews, Standard Version
Installation overviews, standard version Single row installation 1 40x120 3 40x60 Collector type Roof inclination 15 to 20° 20 to 65° 15 to 20° 20 to 65° Dimensions in Pantiles 2401 2401 1077 1077 Plain tiles — — 2401 — —... - Page 14 Installation overviews, standard version (cont.) Double row installation...
- Page 15 Installation overviews, standard version (cont.) Type SV Roof inclination 15 to 20° 20 to 65° Dimensions in mm Pantiles 2341 4802 2341 4802 Plain tiles — — — 2341 4802 Barrel roof tiles 2341 4802 2341 4802 Type SH Roof inclination 15 to 20°...
-
Page 16: Installation Overviews, Designer Version
Installation overviews, designer version Single row installation 3 40x60 1 40x120 D On-site batten to support the cover panels For roof inclination 20 to 65° Collector type Dimensions in mm Pantiles 2401 1077 Slate 2401 1077 Plain tiles 2401 1077... - Page 17 Installation overviews, designer version (cont.) Double row installation D On-site batten to support the cover panels...
-
Page 18: Order Of Installation
Installation overviews, designer version (cont.) For roof inclination 20 to 65° Collector type Dimensions in mm Pantiles 165 2401 4802 165 1077 2154 Slate 20 2401 4802 20 1077 2154 Plain tiles 150 2401 4802 150 1077 2154 Order of installation 1. -
Page 19: Side Panel With Openings
Observe prior to installation (cont.) Side panel with openings Please note These side panels vary depending on In order that the hydraulic lines the version of hydraulic connections to can be safely routed through the be used (can be left bottom/top, or right roof, ensure bottom/top). -
Page 20: Fitting The Lower Timbers
Fitting the lower timbers ■ Provisionally position the lower tim- Support the dividing point between the bers 40 x 120 mm parallel to the lower batten and the timber. row of tiles (use a mason's line). It is essential to adhere to dimension ■... -
Page 21: Plain Tile Roof Cover
Fitting the lower timbers (cont.) For dimensions, see the table on page 22. E Rafter F Edge of cut Plain tile roof cover Ensure that the tiles butt onto the l.h. and r.h. side panel. E Rafter F Edge of cut... -
Page 22: Marking Right Angles
Fitting the lower timbers (cont.) No. of d in mm e in mm f in mm g in mm collec- Type Type tors ≤300 1303 — 2380 5028 When assem- bling side pan- 3457 7429 For every addi- els with open- 4534 9830 tional collec-... - Page 23 Marking right angles (cont.) 90° Collector type a in mm 1500 b in mm 2598 1212 c in mm 3000 1400...
-
Page 24: Fitting The Upper Timbers And Support Battens
Fitting the upper timbers and support battens Two options: Note 1. Fit the upper timbers (40 x 120 mm) If cantilevers are created, support them following the dimensions in the dia- with an on-site batten G. grams from page 13. 2. - Page 25 Fitting the upper timbers and support battens (cont.) Single row installation Distribute the timbers in such a way that no existing battens need to be removed. ■ Type SH: 2 support battens 3 between the tim- bers 1 ■ Type SV: 4 support battens 3 between the tim- bers 1...
- Page 26 Fitting the upper timbers and support battens (cont.) Double row installation Distribute the timbers in such a way that no existing battens need to be removed.
-
Page 27: Fitting The Drain Panels And Lead Flashing
Fitting the upper timbers and support battens (cont.) ■ Type SH: 2 support battens 3 between the tim- bers 1 ■ Type SV: 4 support battens 3 between the tim- bers 1 Fitting the drain panels and lead flashing Installation information: ■... - Page 28 Fitting the drain panels and lead flashing (cont.) 4x30 Overlap the drain panels and secure flush with the top of the timber. G If this roof batten is not available, fit a batten on site to support the lead flashing and side connection panels that are installed later.
- Page 29 Fitting the drain panels and lead flashing (cont.) Barrel roof tiles 4x30 Start with a long drain panel. Secure the short drain panel to the first and second long drain panels.
- Page 30 Fitting the drain panels and lead flashing (cont.) Information regarding fitting lead Note flashing: The butyl tape is already attached in ■ The roof surface must be dry and free the case of barrel roof tiles. from dust and separating agent. The temperature throughout the work Overlap lead flashings approx.
-
Page 31: Fitting The L.h. Side Connection Panels
Fitting the drain panels and lead flashing (cont.) Fitting the l.h. side connection panels ■ Remove the protective foil from the panels. ■ Never walk on the panels. ■ Depending on the installation version (standard or designer version), the side connection panels 9 and 5 are different (see "Components"... - Page 32 Fitting the l.h. side connection panels (cont.) 5 rP 90° Pos. rP is not fitted until later (see page 70). Standard version A Designer version B Collector Collector type type k in mm 5062 2414 k in mm 5002 2354 l in mm 2661 1337...
-
Page 33: Fitting The L.h. Side Panels
Fitting the l.h. side panels Fitting with the side panel with open- ■ Remove the protective foil from the ing C (see page 19) for the hydraulic panels. connections ■ Never walk on the panels. ■ Depending on the installation version (standard or designer version), the side panels qP and 6 are different (see "Components"... - Page 34 Fitting the l.h. side panels (cont.) 6,3x45...
-
Page 35: Fitting The Centre Panels
Fitting the l.h. side panels (cont.) Only for standard version A: The connecting strip qT is used for sealing. Fitting the centre panels ■ Remove the protective foil from the panels. ■ Never walk on the panels. Only reinforce the panels after they have been secured to the support bat- tens below (see diagrams on pages 25 and 26). -
Page 36: Overview Of Single Row Installation
Fitting the centre panels (cont.) Overview of single row installation ■ Number of centre panels per collector: Note Use assembly gauge wQ to mark the Type SV: 2 Type SH: 4 position of collector retainer eE. ■ Position and secure the centre panels one after the other. -
Page 37: Overview Of Double Row Installation
Fitting the centre panels (cont.) Type SH Overview of double row installation ■ Number of centre panels per collector: Type SV: 2 Type SH: 4 ■ Position the centre panels for the bot- tom row one after another and secure only at the bottom. - Page 38 Fitting the centre panels (cont.) For installation sequence, see from page 39. Type SV...
- Page 39 Fitting the centre panels (cont.) Type SH...
- Page 40 Fitting the centre panels (cont.) 6,3x45 6,3x45 6,3x45...
- Page 41 Fitting the centre panels (cont.) Only perform this step if installing standard version A: wT qE wU...
-
Page 42: Fitting The R.h. Side Panels And Side Connection Panels
Fitting the centre panels (cont.) Fitting the r.h. side panels and side connection panels ■ Remove the protective foil from the panels. ■ Never walk on the panels. - Page 43 Fitting the r.h. side panels and side… (cont.) 6,3x45...
-
Page 44: Installing The Collectors
Installing the collectors Order of installation for collectors The side with the type plate must be on the outside of the outer collectors (observe label). - Page 45 Installing the collectors (cont.) When securing the clamping brackets, ensure that the collector guide sits flush with the collector retainer (see step 9 on page 42). r = 138 mm...
- Page 46 Installing the collectors (cont.) Ensure that the collector guide sits flush with the collector retainer (see step 9 on page 42). A Standard version r = 138 mm B Designer version...
-
Page 47: Inserting The Connection Pipes
Installing the collectors (cont.) Inserting the connection pipes Please note Connection pipes should not show any signs of damage. Lubricate O-ring seals only with the special valve grease provi- ded. -
Page 48: Positioning Further Collectors
Installing the collectors (cont.) Positioning further collectors Determine the distance between the col- lectors with the aid of the repair panel qR. When securing the clamping brackets, ensure that the collector guide sits flush with the collector retainer (see step 9 on page 42). Fitting the spacer panel Only for designer version B. - Page 49 Installing the collectors (cont.) The spacer panel is only required if sev- eral collectors are installed side by side. When securing the spacer panel, ensure that the collector guide sits flush with the collector retainer (see step 9 on page 42).
-
Page 50: Fitting The Connection Set
Fitting the connection set Observe the following when installing the Never fit annealed copper pipes onto the locking ring fitting: locking ring fittings. ■ All pipes must be cut at right angles and deburred. Please note ■ Push the union nut and the locking ring Rigid connection lines between onto the pipe and lightly lubricate the the collector arrays will result in... -
Page 51: Fitting The Connection Set - Standard Version A
Fitting the connection set — standard version A Single row collector installation and side panel with opening (see page 19) top right/left X Return Y Flow Single row collector installation and side panel with opening (see page 19) bot- tom right/left X Return Y Flow... - Page 52 Fitting the connection set — standard version A (cont.) Double row collector installation and side panel with opening (see page 19) top right/left X Return Y Flow...
-
Page 53: Fitting The Connection Set - Designer Version B
Fitting the connection set — standard version A (cont.) Double row collector installation and side panel with opening (see page 19) bottom right/left X Return Y Flow Fitting the connection set — designer version B Use the side panel with openings in con- junction with this version only if the hydraulic lines are to be routed down- wards through the roof. - Page 54 Fitting the connection set — designer version B (cont.) Single row collector installation X Return Y Flow Single row collector installation and side panel with opening (see page 19) bot- tom right/left X Return Y Flow...
- Page 55 Fitting the connection set — designer version B (cont.) Double row collector installation X Return Y Flow...
-
Page 56: Fitting The Collector Temperature Sensor
Fitting the connection set — designer version B (cont.) Double row collector installation and side panel with opening (see page 19) bottom right/left X Return Y Flow Fitting the collector temperature sensor The collector temperature sensor is part of the standard delivery of the solar con- trol unit. - Page 57 Fitting the collector temperature sensor (cont.)
- Page 58 Fitting the collector temperature sensor (cont.)
-
Page 59: Fitting The Covers - Standard Version A
Fitting the collector temperature sensor (cont.) Fitting the covers — standard version A ■ Remove the protective foil from the panels. ■ Never walk on the panels. - Page 60 Fitting the covers — standard version A (cont.) s = 90 mm...
- Page 61 Fitting the covers — standard version A (cont.) Ø 4 Collector type t in mm 2160 u in mm v in mm 2160...
- Page 62 Fitting the covers — standard version A (cont.) Only perform steps 3 and 4 if installing a double row of collectors.
-
Page 63: Fitting The Covers - Designer Version B
Fitting the covers — standard version A (cont.) Affix the diagonal sealing strip to the external edge of the flashing frame array: ■ Butt joints should not be located at cor- ners. ■ The vertical side of the strip should point inwards. - Page 64 Fitting the covers — designer version B (cont.) s = 90 mm...
- Page 65 Fitting the covers — designer version B (cont.) Ø 4 Collector type t in mm 2160 u in mm v in mm 2000...
- Page 66 Fitting the covers — designer version B (cont.) s = 90 mm...
- Page 67 Fitting the covers — designer version B (cont.) Only perform steps 6 and 7 if installing a double row of collectors.
-
Page 68: Positioning And Fitting The Support Wedges
Fitting the covers — designer version B (cont.) K On the vertical sides of the side cov- ers, affix the sealing tape in double thickness. Positioning and fitting the support wedges One collector in one row... - Page 69 Fitting the covers — designer version B (cont.) Several collectors in one row L Existing batten (not for slate roofs)
- Page 70 Fitting the covers — designer version B (cont.) Support wedges rZ and drain panels Collector type must be supported. Where necessary, fit additional battens (on site). a in mm — To check whether the drain panels are b in mm fully supported by the support wedges, c in mm provisionally position the panels first.
- Page 71 Fitting the covers — designer version B (cont.)
- Page 72 Fitting the covers — designer version B (cont.) Ø 4...
- Page 73 Fitting the covers — designer version B (cont.) Screw spacing (e.g. with 3 type SV collectors in a row) When installing just one collector, type SV: Dimension h = 400 mm Collector type h in mm k in mm l in mm 1203 1326 m in mm...
- Page 74 Fitting the covers — designer version B (cont.) n = 30 mm o = 150 mm...
-
Page 75: Covering The Roof
Fitting the covers — designer version B (cont.) Affix the diagonal sealing strip to the external edge of the flashing frame array: ■ Butt joints should not be located at cor- ners. ■ The vertical side of the strip should point inwards. - Page 76 Covering the roof (cont.) M Nocky panel...
-
Page 77: Covering The Collector Array
"Vitosol" there. Metal seal connections, locking service instructions. ring fittings or Viessmann plug-in con- nections with double O-rings are the ■ If operating without a Solar-Divicon, most suitable. only use safety valves designed for If other seals such as flat gaskets are 120 °C, a maximum pressure of 6 bar,... -
Page 78: Commissioning And Adjustment
B Solar-Divicon K Fill valve (F, G, L) C Drip pan L Drain D Expansion vessel M Air separator E Stagnation heat sink N DHW cylinder F Shut-off tap O Solar control unit G Filling Commissioning and adjustment "Vitosol-F" service instructions... - Page 80 Viessmann Werke GmbH&Co KG Viessmann Limited D-35107 Allendorf Hortonwood 30, Telford Telephone: +49 6452 70-0 Shropshire, TF1 7YP, GB Fax: +49 6452 70-2780 Telephone: +44 1952 675000 www.viessmann.com Fax: +44 1952 675040 E-mail: info-uk@viessmann.com...
Need help?
Do you have a question about the VITOSOL-F and is the answer not in the manual?
Questions and answers