
Related Manuals for Tenda A27


Summary of Contents for Tenda A27
- Page 1 Version1.0 AC2100 Dual Band WiFi Repeater · RSD0617 User Guide WiFi 6 Range Extender A27&A33 User Guide...
- Page 2 Tenda does not assume any liability that may occur due to the use or application of the product described herein. Every effort has been made in the preparation of this document to ensure...
- Page 3 Preface Thank you for choosing Tenda! Please read this user guide carefully before you start. This user guide applies to A27 and A33. Unless otherwise specified, A33 is taken as an example in this guide. Conventions The typographical elements that may be found in this document are defined as follows.
- Page 4 Canada: 1-888-998-8966 (Toll Free: Mon - Fri 9 am - 6 pm PST) support@tenda.cn Email Revision History Tenda is constantly searching for ways to improve its products and documentation. The following table indicates any changes that might have been made since the extender was introduced. Version Date Description V1.0...
-
Page 5: Table Of Contents
Version1.0 Contents Get to know your device ....................... 1 1.1 Overview ..........................1 1.2 Appearance ..........................1 1.2.1 LED indicator ....................... 1 1.2.2 Port & buttons ......................2 Quick setup ........................... 4 2.1 Overview ..........................4 2.2 Extender mode ........................5 2.3 AP mode .......................... - Page 6 Version1.0 7.5 Hide the WiFi extender’s WiFi networks ................47 7.6 Connect to the hidden WiFi network ................... 48 Client management ........................50 8.1 Overview ..........................50 8.2 View all online wireless clients/the blacklist ............... 52 8.3 Add a wireless client to the blacklist ..................53 8.4 Remove a wireless client from the blacklist .................
- Page 7 Version1.0 A.2 Default parameter values ....................85 A.3 Acronyms and Abbreviations ....................86...
-
Page 8: Get To Know Your Device
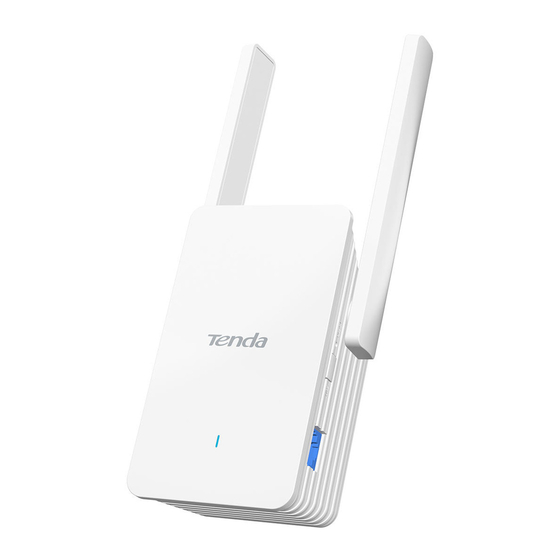
Get to know your device Overview Tenda WiFi 6 dual-band WiFi extender offers dual-band antennas to expand wireless network, efficiently delivering superspeed and seamless connectivity to every corner of your home. It supports dual-band integration technology, and the two frequency bands use the same WiFi name and password, selecting the WiFi with the best network quality for users. -
Page 9: Port & Buttons
Version1.0 LED Indicator Status Description The WiFi extender has connected to your existing router and is at a Solid yellow fair position. You are recommended to move it towards the router. The WiFi extender has connected to your existing router, but is too Solid red far away from the router. - Page 10 Version1.0 Button/Port Description In repeater mode, it is used to connect to devices, such as computer. In AP mode, it is used to connect to a router to provide wireless network for WiFi enabled devices.
-
Page 11: Quick Setup
Version1.0 Quick setup Overview The WiFi extender supports two working modes: the extender mode and the AP mode. In extender mode, you can extend your existing WiFi network for broader WiFi coverage. While in AP mode, you can connect the WiFi extender to a router through an Ethernet cable to convert the wired network to the wireless one. -
Page 12: Extender Mode
Version1.0 Extender mode This WiFi extender supports two network extending methods. If your router has a WPS button, you are recommended to use Method Method 1: Extend your WiFi network using web UI Scenario 1: Mobile phone as the WiFi enabled device (An Android phone is used for illustration) Step 1 Plug the WiFi extender into a power outlet near the router in the same room. - Page 13 Ensure that your device has connected to the WiFi network of the WiFi repeater: Tenda_EXT, and the Cellular Data (if any) function is disabled. Then manually start a web browser, enter re.tenda.cn in the address bar and visit the address. Reset the WiFi extender and try again. ...
- Page 14 Version1.0 Set a login password for network security (recommended) and tap Next. Select Extender Mode, then tap Next.
- Page 15 Version1.0 Select the WiFi network you want to extend, which is Tenda_1 in this example. Enter the WiFi password of the WiFi network you selected, and modify the extender WiFi name as necessary (The WiFi name has been modified in the following example), then tap Next.
- Page 16 Version1.0 Configuration on the web UI completed. Step 3 Relocate the WiFi extender. For better performance, you can relocate the WiFi extender as suggested below: Place the WiFi extender within the range of your existing WiFi network. Place it at a spacious position without obstacles. ...
- Page 17 Version1.0 Adjust the antennas straight upward and vertical to the ground LED indicator solid blue WiFi extender Internet WiFi router ---End Connect your WiFi enabled devices to the extended network of the WiFi extender to access the internet. WiFi Name: WiFi name you set or WiFi name of the router WiFi Password: Wifi password of the router ...
- Page 18 Version1.0 Step 1 Plug the WiFi extender into a power outlet near the router in the same room. Wait until the LED indicator of the WiFi extender turns blinking red. LED indicator blinks red Step 2 Extend your WiFi network Connect your laptop to the WiFi network of the WiFi extender: Tenda_EXT, or connect your desktop computer to the LAN port of the WiFi extender with an Ethernet cable.
- Page 19 Ensure that your computer has set to Obtain an IP address automatically and Obtain DNS server address automatically. You can manually start a web browser, enter re.tenda.cn in the address bar and visit the address. Set a login password for network security (recommended) and click Next.
- Page 20 Version1.0 Set the Working Mode of the WiFi extender as Extender Mode, select the WiFi network you want to extend, which is Tenda_1 in this example, and click Next. Enter the WiFi password of the WiFi network you selected, modify the extender WiFi name as necessary (The WiFi name has been modified in the following example), and click Next.
- Page 21 Version1.0 You will see a progress bar, then wait until the following page appears. Configuration completed. Step 3 Relocate the WiFi extender. For better performance, you can relocate the WiFi extender as suggested below: Place the WiFi extender within the range of your existing WiFi network. ...
- Page 22 Version1.0 Adjust the antennas straight upward and vertical to the ground LED indicator solid blue WiFi extender Internet WiFi router ---End Connect your WiFi enabled devices to the extended network of the WiFi extender to access the internet. WiFi Name: WiFi name you set or WiFi name of the router WiFi Password: WiFi password of the router ...
- Page 23 If your WiFi router has a WPS button, which may be indicated by , or , or support Tenda WiFi + Mesh technology, this method is recommended to extend WiFi networks, sparing the trouble to enter WiFi password. Otherwise, use Method Step 1 Plug the WiFi extender into a power outlet near the router in the same room.
- Page 24 Version1.0 Step 3 Relocate the WiFi extender. For better performance, you can relocate the WiFi extender as suggested below: Place the WiFi extender within the range of your existing WiFi network. Place it at a spacious position without obstacles. ...
-
Page 25: Ap Mode
Version1.0 AP mode This section uses an Android phone for illustration. You can also perform the following steps for configuration on a tablet or laptop. Step 1 Use an Ethernet cable to connect the Ethernet port of the WiFi extender to a LAN port of the router. - Page 26 Ensure that your device has connected to the WiFi network of the WiFi repeater: Tenda_EXT, and the Cellular Data (if any) function is disabled. Then manually start a web browser, enter re.tenda.cn in the address bar and visit the address. Reset the WiFi repeater and try again. ...
- Page 27 Version1.0 Step 5 Select AP Mode, then tap Next. Step 6 Set a WiFi name and password for the WiFi extender, then tap Save.
- Page 28 Version1.0 Configuration completed. ---End Connect your WiFi enabled devices to the WiFi network of the WiFi extender to access the internet. WiFi name: WiFi name you set WiFi password: Password you set Ethernet cable WiFi enabled devices such as mobile phone...
-
Page 29: Login To The Web Ui
Use an Ethernet cable to connect your computer to the Ethernet port of the WiFi extender. Ethernet Cable Computer Step 2 Start a web browser on the computer connected to the WiFi extender, and enter re.tenda.cn in the address bar (not search box) to access the web UI of the WiFi extender. - Page 30 Version1.0 Step 3 Enter your login password, then click Login. ---End If the above page does not appear, please try the following solutions: Ensure that your WiFi extender is powered on properly. Ensure that your computer has been set to Obtain an IP address automatically and Obtain DNS ...
- Page 31 Version1.0...
-
Page 32: Login With A Mobile Phone/Tablet
Step 2 Start a web browser on the mobile phone connected to the WiFi extender, and enter re.tenda.cn in the address bar (not search box) to access the web UI of the WiFi extender. Step 3 Enter your login password, then tap Login. - Page 33 Version1.0 If the above page does not appear, please try the following solutions: Ensure that your mobile phone has connected to the WiFi network of the WiFi extender. Ensure that the Cellular Data (if any) function of your mobile phone is disabled. ...
-
Page 34: Web Ui
Version1.0 Web UI Web UI layout The Web UI of the WiFi extender is composed of two parts, including navigation bars and configuration area. See the following figure: Functions or parameters in grey on the web UI are not supported by the WiFi extender or cannot be modified with the current configuration. -
Page 35: Common Buttons
Version1.0 Common buttons The following table describes the common buttons available on the web UI. Common Buttons Description It is used to save the configuration on the current page and enable the configuration to take effect. It is used to go back to the original configuration without saving the configuration on the current page. -
Page 36: Network Status
Version1.0 Network Status In this module, you can: View whether the network is extended successfully View network status of the WiFi extender View the number of WiFi enabled devices in the network View the WiFi name of the WiFi extender ... - Page 37 Version1.0 It indicates: The WiFi extender has extended the WiFi network of the upstream device. You can connect your network devices to the WiFi network or Ethernet port (with an Ethernet cable) of the WiFi extender to access the internet. However, if you see Failed to extend between Upstream Router/Modem and the Extender, which is shown as below: It indicates:...
- Page 38 Version1.0 In the AP mode, if you see normal connection between the Upstream Router/Modem and the Extender, which is shown as below: It indicates: The WiFi extender has been connected to the upstream device with an Ethernet cable. You can connect your network devices to the WiFi network of the WiFi extender to access the internet.
- Page 39 Version1.0 It indicates: The WiFi extender is not properly connected to the upstream device. You are recommended to check the Ethernet cable between the WiFi extender and the upstream device to ensure that the Ethernet cable is connected to the LAN port of the upstream device and the Ethernet port of the WiFi extender properly.
-
Page 40: View Network Status Of The Wifi Extender
Version1.0 View network status of the WiFi extender To access the page, choose Network Status. In the extender mode, if you see Disconnected between Internet and the Upstream Router/Modem, which is shown as below: It indicates: The upstream device is disconnected from the internet, and the WiFi extender fails to access the internet. - Page 41 Version1.0 In the AP Mode, if you see Disconnected between Internet and the Upstream Router/Modem, which is shown as below: It indicates: The upstream device is disconnected from the internet, and the WiFi extender fails to access the internet. You are recommended to check the network status of the upstream device.
-
Page 42: View The Number Of Wifi Enabled Devices In The Network
Version1.0 View the number of WiFi enabled devices in the network To access the page, choose Network Status. On this page, you can view the number of existing WiFi enabled devices connected to the WiFi network of the WiFi Extender. Click icon, then you can access the Client Management page to... -
Page 43: View The Wifi Name Of The Wifi Extender
WiFi information about the WiFi extender. Start a web browser on the computer connected to the WiFi extender, and enter re.tenda.cn in the address bar to access the web UI of the WiFi extender. You can view the WiFi name of the WiFi... -
Page 44: Re-Extend
Re-extend your WiFi network. Start a web browser on the computer connected to the WiFi extender, and enter re.tenda.cn in the address bar to access the web UI of the WiFi extender. Click Re-extend. If you want to re-extend 2.4 GHz WiFi, please select the WiFi name of 2.4 GHz WiFi to be extended, for example, “Tenda-123456”, and click Next. - Page 45 Version1.0 If you want to re-extend 5 GHz WiFi, please select the WiFi name of 5 GHz WiFi to be extended, e.g. “Tenda_123456_5G”, and click Next. Otherwise, you can click Skip 5 GHz. You must choose a WiFi network at least in one frequency band. Enter the WiFi name of the network to be extended, and modify the extender WiFi name of the 2.4 GHz &...
- Page 46 Version1.0 You will see a progress bar, then wait until the following page appears. Configuration completed. Re-log in to the web UI of the WiFi extender, and click Network Status. The WiFi extender has successfully extended the WiFi network of the upstream device if you see the upstream WiFi signal strength between the Upstream Router/Modem and the Extender, which is shown as below:...
- Page 47 Version1.0 Step 3 Relocate the WiFi extender. For better performance, you can relocate the WiFi extender as suggested below: Place the WiFi extender within the range of your existing WiFi network. Place it at a spacious position without obstacles. ...
-
Page 48: Wifi Settings
Version1.0 WiFi Settings Overview To access the page, choose WiFi Settings. On this page, you can set basic WiFi parameters, including enabling/disabling Unify 2.4 GHz & 5 GHz function, changing the WiFi extender’s WiFi name and password and hiding the WiFi network. Parameter description Parameter Description... - Page 49 Version1.0 Parameter Description WiFi name It specifies the wireless network name of the WiFi extender. With this function enabled, no WiFi enabled device can find the corresponding WiFi name, and you need to manually enter the WiFi name on the WiFi enabled device to Hide access the wireless network.
-
Page 50: Unify 2.4 Ghz And 5 Ghz
Configuration procedure: Step 1 Start a web browser on the computer connected to the WiFi extender, and enter re.tenda.cn in the address bar to access the web UI of the WiFi extender. Step 2 Click WiFi Settings. Step 3 Enable the Unify 2.4 GHz &... -
Page 51: Separate 2.4 Ghz And 5 Ghz
Configuration procedure: Step 1 Start a web browser on the computer connected to the WiFi extender, and enter re.tenda.cn in the address bar to access the web UI of the WiFi extender. Step 2 Click WiFi Settings. Step 3 Disable the Unify 2.4 GHz &... -
Page 52: Modify Wifi Names And Passwords
Configuration procedure: Step 1 Start a web browser on the computer connected to the WiFi extender, and enter re.tenda.cn in the address bar to access the web UI of the WiFi extender. Step 2 Click WiFi Settings. Step 3 Disable the Unify 2.4 GHz &... - Page 53 Version1.0 Step 6 Click Save. ---End After the configuration completes, you need to connect your mobile phone and other network devices to the new WiFi for internet access.
-
Page 54: Hide The Wifi Extender's Wifi Networks
WiFi network. Configuration procedure: Step 1 Start a web browser on the computer connected to the WiFi extender, and enter re.tenda.cn in the address bar to access the web UI of the WiFi extender. Step 2 Click WiFi Settings. Step 3 Tick Hide under the input box after WiFi Name. -
Page 55: Connect To The Hidden Wifi Network
Version1.0 Connect to the hidden WiFi network To connect to the hidden WiFi network of the WiFi extender, you need to manually enter its WiFi name and password on your WiFi enabled devices. Suppose that you have enabled Unify 2.4 GHz & 5 GHz function of the WiFi extender, and set relevant parameters as follows: WiFi name: Alice ... - Page 56 Version1.0 Step 7 Tap Connect. ---End Wait until your mobile phone connects to the WiFi network of the WiFi extender, then you can access the internet.
-
Page 57: Client Management
Version1.0 Client management Overview To access the page, choose Client Management. On this page, you can view the wireless clients currently connected to the WiFi network of the WiFi extender, view the blacklist, and add a wireless client to the blacklist or remove a wireless client from the blacklist. - Page 58 Version1.0 After entering the Client Management page, click Blacklist, then you can view all blacklisted devices. Parameter description Parameter Description Device Name It specifies the name of the wireless client. Mac Address It specifies the Mac address of the wireless client. Operation Click Remove, then the corresponding wireless client is removed from the blacklist.
-
Page 59: View All Online Wireless Clients/The Blacklist
Step 1 Start a web browser on the computer connected to the WiFi extender, and enter re.tenda.cn in the address bar to access the web UI of the WiFi extender. Step 2 Click Client Management. You will enter All Client module, where you can view all wireless clients currently connected to the WiFi network of the WiFi extender. -
Page 60: Add A Wireless Client To The Blacklist
Configuration procedure: Step 1 Start a web browser on the computer connected to the WiFi extender, and enter re.tenda.cn in the address bar to access the web UI of the WiFi extender. Step 2 Click Client Management. Step 3 Find the client you want to blacklist, then click Add to Blacklist. -
Page 61: Remove A Wireless Client From The Blacklist
Configuration procedure: Step 1 Start a web browser on the computer connected to the WiFi extender, and enter re.tenda.cn in the address bar to access the web UI of the WiFi extender. Step 2 Click Client Management, then click Blacklist. -
Page 62: Operating Mode
AP mode. Configuration procedure: Step 1 Start a web browser on the computer connected to the WiFi extender, and enter re.tenda.cn in the address bar to access the web UI of the WiFi extender. Step 2 Click Working Mode. Step 3... - Page 63 Version1.0 Step 4 Confirm the prompt message and click OK. The system will reboot to effectuate the configuration. Step 5 Use an Ethernet cable to connect the Ethernet port of the WiFi extender to the LAN port of the upstream device. WiFi router Ethernet cable ---End...
- Page 64 Version1.0 You can re-log in to the web UI of the WiFi extender to check whether the WiFi extender has connected to the upstream device on Network Status page: If the configuration succeeds, mobile phone and other wireless clients connected to the WiFi network of the WiFi extender can access the internet.
-
Page 65: Switch The Wifi Extender From Ap Mode To Extender Mode
Please remove the Ethernet cable (if any) connecting the WiFi extender with the upstream device. Step 2 Start a web browser on the computer connected to the WiFi extender, and enter re.tenda.cn in the address bar to access the web UI of the WiFi extender. Step 3 Click Working Mode. Step 4 Find Extender Mode, then click Switch Mode. - Page 66 Version1.0 After switching to the extender mode, the system will try connecting to the WiFi it once connected. You can re-log in to web UI of the WiFi extender, and check whether the network has extended successfully on the Network Status page. If it fails to extend the WiFi network of the upstream device, please access the Re-extend page to re-extend the network.
-
Page 67: More Settings
Version1.0 More settings On the More page, you can: View/modify the extender IP address Configure OFDMA function Enable/disable LED indicator Set/modify login password View/set system time Configure DST Perform maintenance operations on the WiFi extender, including reboot, reset, system log ... - Page 68 Ethernet port of the WiFi extender, then enter re.tenda.cn in the address bar to access the web UI of the WiFi extender. It specifies the IP address, as well as the management IP address of the WiFi extender.
-
Page 69: Ofdma
Version1.0 10.2 OFDMA Before 802.11ax, Orthogonal Frequency Division Multiplexing (OFDM), a modulation mode is used for data transmission. OFDM divide the whole channel into several sub-channels (sub-carriers), and transmit data through these sub-channels, differentiating different data. At some point, data sent by users will occupy the whole channel. - Page 70 Version1.0 To access the page, choose More > OFDMA. OFDMA is disabled by default. After enabling the function, you will see:...
-
Page 71: Led Indicator
Configuration procedure: Step 1 Start a web browser on the computer connected to the WiFi extender, and enter re.tenda.cn in the address bar to access the web UI of the WiFi extender. Step 2 Choose More > LED Indicator. Step 3... - Page 72 Version1.0 Step 4 Set the time period for turning off the LED indicator, which is 22:00-7:00 in this example. Step 5 Click Save. ---End After the configuration completes, the LED indicator of the WiFi extender will turn off during 22:00 to 07:00 every day.
-
Page 73: Login Password
Configuration procedure: Step 1 Start a web browser on the computer connected to the WiFi extender, and enter re.tenda.cn in the address bar to access the web UI of the WiFi extender. Step 2 Choose More > Login password. Step 3 In the Old Password text box, enter the current login password of the WiFi extender. - Page 74 Version1.0 You will be led to the login page. Enter the new login password, and click Login. Then, you can log in to the web UI of the WiFi extender.
-
Page 75: System Time
Version1.0 10.5 System time 10.5.1 Overview To access the page, choose More > System Time. On this page, you can set the system time of the WiFi extender. To ensure time-based functions of the WiFi extender can work normally, you need to ensure the accuracy of the system time of the WiFi extender. - Page 76 Version1.0 Parameter Description It specifies the time of the client managing the WiFi extender, and is specific to Local Time Sync with local time. It is a time system implemented for resources conservation. The uniform time used when the system is implemented is the Daylight Saving Time. If the WiFi extender is used in a country or area where DST is implemented, please enable DST.
-
Page 77: Sync System Time With Internet Time
Configuration procedure: Step 1 Start a web browser on the computer connected to the WiFi extender, and enter re.tenda.cn in the address bar to access the web UI of the WiFi extender. Step 2 Choose More > System time. Step 3 Select Sync with internet time in the drop-down list of Sync Mode. -
Page 78: Sync System Time With Local Time
Configuration procedure: Step 1 Start a web browser on the computer connected to the WiFi extender, and enter re.tenda.cn in the address bar to access the web UI of the WiFi extender. Step 2 Choose More > System time. Step 3 Select Sync with local time in the drop-down list of Sync Mode. -
Page 79: Enable Dst
Configuration procedure: Step 1 Start a web browser on the computer connected to the WiFi extender, and enter re.tenda.cn in the address bar to access the web UI of the WiFi extender. Step 2 Choose More > System time. Step 3 Enable DST. -
Page 80: System Management
Step 1 Start a web browser on the computer connected to the WiFi extender, and enter re.tenda.cn in the address bar to access the web UI of the WiFi extender. Step 2 Choose More > Maintenance, then find Reboot module. - Page 81 Version1.0 Step 4 Confirm the prompt message and click Reboot. The system will reboot to effectuate the configuration. ---End...
-
Page 82: Reset The Wifi Extender
Step 1 Start a web browser on the computer connected to the WiFi extender, and enter re.tenda.cn in the address bar to access the web UI of the WiFi extender. Step 2 Choose More > Maintenance, then find Reset module. - Page 83 Version1.0 Step 4 After confirming the prompt message, click Reset. The system will be reset to effectuate the configuration. ---End Reset the WiFi extender through Web UI After the WiFi extender completes startup, hold down RESET button using a needle-like item (such as a pin) for about 1 to 3 seconds.
-
Page 84: Export System Logs
Step 1 Start a web browser on the computer connected to the WiFi extender, and enter re.tenda.cn in the address bar to access the web UI of the WiFi extender. Step 2 Choose More > Maintenance, then find System Log module. -
Page 85: Upgrade Firmware System
Step 1 Start a web browser on the computer connected to the WiFi extender, and enter re.tenda.cn in the address bar to access the web UI of the WiFi extender. Step 2 Choose More > Maintenance, then find Firmware Upgrade module. - Page 86 Step 2 On the computer connected to the extender, open the browser to visit re.tenda.cn to access the web UI of the extender. Step 3 Choose More >...
- Page 87 Version1.0 Step 5 Click Choose File, and select the upgrade file in the corresponding directory (the file suffix is .bin). Step 6 Click Upgrade. ---End The upgrade progress prompt will appear on the page. After the upgrade is complete, log in to the web UI of the extender again, and check the Current firmware version in the Firmware Upgrade module to confirm that it is the same as the firmware version you just upgraded.
-
Page 88: Appendix
Version1.0 Appendix Set the computer IPV4 address Here takes Windows 10 as an example for setting instructions. Step 1 On the computer desktop, Click Start , Settings , and choose Network & Internet. Step 2 Click Network and Sharing Center. - Page 89 Version1.0 Step 3 Click Ethernet. Step 4 Click Properties.
- Page 90 Version1.0 Step 5 Locate and double-click Internet Protocol Version 4 (TCP/IPv4).
- Page 91 Version1.0 Step 6 Select Obtain an IP address automatically and Obtain DNS server address automatically, and click OK. Step 7 When the page automatically returns to the Internet Properties, click OK again. ---End...
- Page 92 Version1.0 Default parameter values The following table lists the default parameter values of the WiFi repeater. Parameter Default Value Login address re.tenda.cn Login password None 192.168.0.254 IP address After expanding the network of the WiFi router successfully, the WiFi repeater obtains an IP address automatically from the DHCP server of the upstream device.
- Page 93 Version1.0 Acronyms and Abbreviations Acronym and Abbreviation Full Spelling Advanced Encryption Standard Access Point DHCP Dynamic Host Configuration Protocol Domain Name System Daylight Saving Time Greenwich Mean Time Internet Protocol Media Access Control OFDM Orthogonal Frequency Division Multiplexing OFDMA Orthogonal Frequency Division Multiple Access Management Frame Protection Simultaneous Authentication of Equals WPA PSK...
Need help?
Do you have a question about the A27 and is the answer not in the manual?
Questions and answers