Table of Contents
Advertisement
Advertisement
Table of Contents

Subscribe to Our Youtube Channel
Related Manuals for Tenda PH10


Summary of Contents for Tenda PH10
- Page 1 AV1000 AC Wi-Fi Powerline Extender Kit Model: PH10 User Guide...
- Page 2 Tenda does not assume any liability that may occur due to the use or application of the product described herein. Every effort has been made in the preparation of this document to ensure accuracy of the contents, but all statements, information and recommendations in this document do not constitute a warranty of any kind, express or implied.
- Page 3 Preface Thank you for choosing Tenda! Please read this user guide before you start with PH10. Conventions The typographical elements that may be found in this document are defined as follows. Item Presentation Example Cascading menus > System > Live Users...
- Page 4 Technical Support If you need more help, contact us by any of the following means. We will be glad to assist you as soon as possible. USA hotline: 1-800-570-5892 Canada hotline: 1-888-998-8966 support@tenda.com.cn Hotline Email HongKong Hotline: 00852-81931998 http://www.tendacn.com tendasz...
-
Page 5: Table Of Contents
Contents Introduction .............................. 1 1.1 Overview ................................1 1.2 Features ................................1 1.3 LED Indicators, Port and Button ......................... 2 Hardware Installation ..........................3 2.1 Installation Instruction ............................3 2.2 Plug and Play ..............................4 2.3 WiFi Clone (Optional) ............................5 Pair the Devices ............................ -
Page 6: Introduction
AV1000 AC Wi-Fi Powerline Extender Kit extends 650 Mbps dual band WiFi to any room in your house using existing electrical wiring. With 1000 Mbps Homeplug AV2 powerline technology and gigabit Etherner port, PH10 can offer better HD/UHD IPTV and online gaming experiences. Features ... -
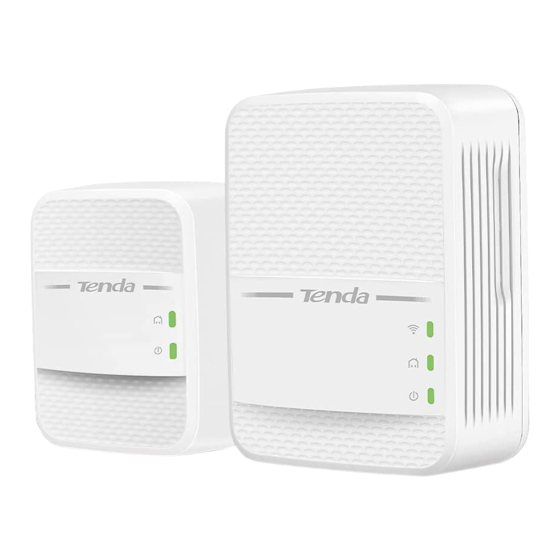
Page 7: Led Indicators, Port And Button
LED Indicators, Port and Buttons LED Indicator Color Status Description Solid on The WiFi is enabled. Green Blinking The device is performing WiFi cloning. *Available only The WiFi is disabled. The device is connected to a powerline network, and in good Solid on condition. -
Page 8: Hardware Installation
Hardware Installation Installation Instruction To ensure optimum performance of PH10 and significantly improve the transmission capacity of the network, use PH10 in the following environment: Operating Temperature: 0 °C - 40°C Operating Humidity: (10% - 90%) RH, non-condensing Plug P3 and PA7 directly into wall receptacles. -
Page 9: Plug And Play
Plug and Play Step 1 Connect P3 to a LAN port of your router, and plug it into a wall receptacle nearby. Step 2 Connect PA7 to your wired device, such as a set-top box of a TV, and plug it to a wall receptacle nearby. After the LED indicator turns solid on, connect your wireless devices to... -
Page 10: Wifi Clone (Optional)
WiFi Clone (Optional) If your router has no WPS button, this function is not available. If you want to set only one WiFi signal in your house, perform the following procedure: Step 1 Plug PA7 into a wall receptacle near your wireless router, wait until LED lights up, then press the Wi-Fi button on PA7. - Page 11 When the LED on PA7 turns solid on again, the WiFi name and password of PA7 have been changed to the same as those of your wireless router. Then move PA7 to a place where you need WiFi coverage. Now, you can connect to the WiFi network using the WiFi name and password of your wireless router for internet access.
-
Page 12: Pair The Devices
Pairing the Devices PH10 can automatically set up a powerline network with other HomePlug AV/Homeplug AV2 compliant powerline adapters in the same electrical circuit. If you only want specified powerline adapters to set up a secure powerline network, or set up several different powerline networks under the same electrical circuit, you can use the Pair button. -
Page 13: Configuring Via Web Ui
Configuring via Web UI You can manage WiFi network of PA7 and powerline network including PA7 using the web UI. Or you can download Tenda PLC utility (and User Guide of Tenda PLC Utility if necessary) from http://www.tendacn.com to manage PH10. -
Page 14: Internet Status
Internet Status You can check internet status, WiFi network name and password, wireless devices connected to PA7, and powerline devices including to the current powerline network here. Meanwhile, you can also blacklist the unknown devices connected to the WiFi network of PA7, change WiFi name or password, and log in to the web UI of your wireless router. - Page 15 4.2.2 Removing a Device from Blacklist If you want a wireless device in blacklist to access the internet via the WiFi network of PA7, choose Internet Status > Blacklist, and click Remove. 4.2.3 Changing the WiFi Settings of PA7 Choose Internet Status and click to enter the WiFi settings page.
- Page 16 4.2.4 Logging in to the Wireless Router You can log in to the wireless router by clicking the icon of Router on the page. 4.2.5 Powerline Devices Choose Internet Status and click the icon of Powerline Devices . You can check the information of powerline devices belonging to the same network as PA7.
- Page 17 Parameters Description Parameter Description Device Name It specifies the name of the powerline device. MAC Address It specifies the MAC address of the powerline device. Tx Rate It specifies the transmit rate of the powerline device. Rx Rate It specifies the receive rate of the powerline device. 4.2.6 Basic Information of PA7 Choose Internet Status and click the icon of PA7...
-
Page 18: Wi-Fi
Parameters Description Parameter Description It displays the basic information of PA7 including system time, running time and Information firmware version. 2.4G Wi-Fi Status It displays the basic information of 2.4 GHz WiFi network. 5G Wi-Fi Status It displays the basic information of 5 GHz WiFi network. Wi-Fi Wi-Fi page allows you to change 2.4 GHz and 5GHz WiFi names and passwords, and set a WiFi schedule and other wireless parameters. - Page 19 4.3.1 Changing WiFi Name and Password Step 1 Choose Wi-Fi to enter the configuration page. Step 2 Customize your 2.4 GHz or 5 GHz WiFi name and WiFi password. Step 3 Click OK on the bottom of this page to apply the settings. --End You need to reconnect your wireless device to the WiFi network of PA7 after you change the WiFi settings.
- Page 20 4.3.2 Setting a WiFi Schedule You can use the Wi-Fi Schedule function to specify when to disable the WiFi network. Step 1 Choose Wi-Fi, and locate the Wi-Fi Schedule part. Step 2 Click the button. Step 3 Specify a period when you want to disable the WiFi, which is 11:00 pm - 06:30 am in this example. Step 4 Select the days to which this rule applies, which are Sunday to Saturday in this example.
- Page 21 Parameters Description Parameter Description 11b/g/n: Only 802.11b, 802.11g, and 802.11n devices are allowed to connect the WiFi. 11b/g: Only 802.11b and 802.11g devices are allowed to connect the WiFi. 11b: Only 802.11b devices are allowed to connect the WiFi. Mode 11g: Only 802.11g devices are allowed to connect the WiFi.
-
Page 22: Guest Network
Guest Network A guest network is a network dedicated to guests. Clients connected to a guest network can access the internet, but cannot access the router web UI or the non-guest network. This enables guests to access the internet and meanwhile ensures security of the non-guest network. -
Page 23: Powerline
Parameters Description Parameter Description Guest Network Click this button to enable/disable the guest network. 2.4G Wi-Fi Name/5G It specifies the wireless network name at 2.4 GHz/5 GHz. Wi-Fi Name It specifies the wireless password for 2.4 GHz wireless network and 5 GHz wireless Wi-Fi Password network. -
Page 24: System Settings
Parameters Description Powerline Network Settings Parameter Description It specifies the name of the powerline network where PA7 resides. The default powerline network name is HomePlugAV which indicates an unencrypted powerline network. The powerline devices that share a same network name belong to a same Network Name powerline network. - Page 25 Step 2 Set Old Password to the current password admin. Step 3 Set New Password to a new password. Step 4 Set Confirm Password to the new password again. Step 5 Click OK on the bottom of this page to apply the settings. --End 4.6.2 Configuring Network Settings...
- Page 26 4.6.3 LED Control The following figure shows the available LED indicator control modes. Select one of the modes as required and click OK. Parameters Description Parameter Description Always On It indicates that all the LED indicators of PA7 are in ordinary states. Always Off It indicates that all the LED indicators of PA7 are turned off.
- Page 27 You forget the login password of the web UI of PA7. PA7 does not work well, and you want to reconfigure it. You cannot access the internet, and Tenda technical support recommends you to restore factory default settings.
- Page 28 4.6.7 Upgrading PA7 Tenda website offers the latest firmware version for PA7. Perform the following steps to upgrade PA7: Online Upgrade: The device is set to online upgrade by default. The device will detect whether your firmware is latest. If not, you can update it to the latest.
- Page 29 Step 6 Select the firmware you saved, and click Upgrade. --End 4.6.8 Exporting System Logs When encountering a problem, you can export the system logs and send them to Tenda technical support for troubleshooting. Step 1 Choose System. Step 2 Move to the Export System Log part, and click Export.
-
Page 30: Appendix
Appendix Q1: The LEDs are off when both P3 and PA7 are powered on. What should I do? A1: Try the following methods: Verify that P3 and PA7 use a same electric meter. Press the Pair button on P3, and its LED blinks. - Page 31 RJ45 cable. Declaration of Conformity Hereby, SHENZHEN TENDA TECHNOLOGY CO. LTD. declares that the radio equipment type PA7 is in compliance with Directive 2014/53/EU. The full text of the EU declaration of conformity is available at the following internet address: http://www.tendacn.com/en/service/download-cata-101.html...
- Page 32 FCC Statement This equipment has been tested and found to comply with the limits for a Class B digital device, pursuant to Part 15 of the FCC Rules. These limits are designed to provide reasonable protection against harmful interference in a residential installation.
Need help?
Do you have a question about the PH10 and is the answer not in the manual?
Questions and answers