Tenda AV1000 User Manual
Hide thumbs
Also See for AV1000:
- User manual (39 pages) ,
- User manual (42 pages) ,
- User manual (45 pages)
Table of Contents
Advertisement
Advertisement
Table of Contents

Related Manuals for Tenda AV1000


Summary of Contents for Tenda AV1000
- Page 2 Copyright Statement © 2017 Shenzhen Tenda Technology Co., Ltd. All rights reserved. Tenda is a registered trademark legally held by Shenzhen Tenda Technology Co., Ltd. Other brand and product names mentioned herein are trademarks or registered trademarks of their respective holders.
- Page 3 Copyright Statement Conventions The typographical elements that may be found in this document are defined as follows. Item Presentation Example Cascading menus > System > Live Users Parameter and Bold Set User Name to Tom. value Variable Italic Format: XX:XX:XX:XX:XX:XX UI control Bold On the Policy page, click the OK button.
-
Page 4: Table Of Contents
Contents Contents 1 Get to Know Your Extender ......................1 1.1 Package Contents ........................1 1.2 LEDs & Buttons & Interfaces ....................2 1.3 Place the Wireless Extender ....................... 3 2 Access the Internet .......................... 4 2.1 Plug and Play ..........................4 2.2 Clone WiFi .......................... - Page 5 Contents 3 FAQs ............................33 4 Technical Support ........................35 5 Safety and Emission Statement ....................36...
-
Page 6: Get To Know Your Extender
Get to Know Your Extender 1 Get to Know Your Extender AV1000 2-Port Gigabit Wi-Fi Powerline Extender extends your wireless network to every room of your house through your home’s existing electrical circuitry. With WiFi button, the wireless extender can copy your wireless router’s WiFi name and password, giving you a seamless roaming wireless networking experience. -
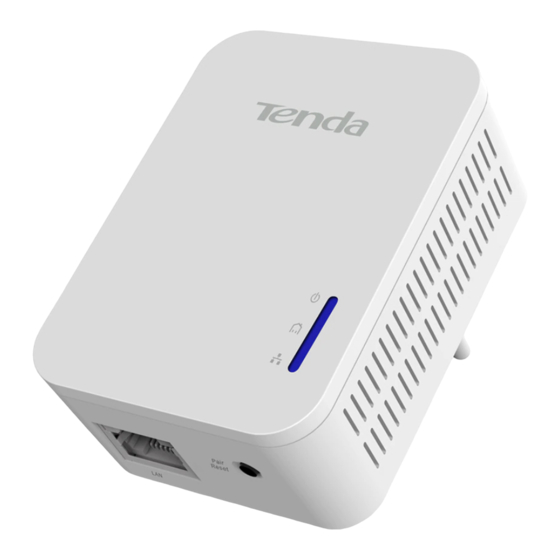
Page 7: Leds & Buttons & Interfaces
Get to Know Your Extender 1.2 LEDs & Buttons & Interfaces The wireless extender varies by region. Color Status Description The device doesn’t pair with other powerline devices, Green or is powered off. Green Solid The device is connected to a powerline network. Green Blinking quickly The device is pairing with other powerline devices. -
Page 8: Place The Wireless Extender
Get to Know Your Extender Pair Button Press and then release it to start pairing process. Press and hold it for about 1 second to wake up the extender from standby mode. WiFi Button Press and then release it to start WiFi cloning if the WiFi is enabled. Press and hold it for about 6 seconds to disable WiFi. -
Page 9: Access The Internet
Access the Internet 2 Access the Internet 2.1 Plug and Play 1. Plug a powerline adapter (P3) into a wall socket and connect it with the Ethernet cable included. 2. Plug this powerline extender into an available wall socket, and wait until both of the PLC LED indicators on the powerline adapter and powerline extender turn solid. -
Page 10: Clone Wifi
Access the Internet Tips If you cannot access the internet after the operation above, refer to to address the problem. Use a powerline adapter whose wireless speed is equal to the powerline extender (1000Mbps) to work with the extender, such as P3, to make sure the average wireless speed is equal or greater than 1000Mbps. -
Page 11: Secure Your Powerline Network
Access the Internet 3. Then press the WiFi button on the powerline extender (PA6), and wait until the WiFi LED blinks quickly for a few seconds. 4. Relocate the extender (PA6) to your chosen position after successful cloning. --End Tips ... -
Page 12: Add More Powerline Adapters
Access the Internet 2.4 Add More Powerline Adapters If you want to add more powerline adapters to a private powerline network, follow the steps below: 1. Press the Pair button of any powerline device in the security powerline network. 2. Press the Pair button on the new powerline device. --End When the PLC LED indicators on both powerline devices turn solid green, the new powerline device is added to the powerline network successfully. -
Page 13: Configure The Extender
Configure the Extender 3 Configure the Extender In this section, it describes how to use the web UI to configure the extender. 3.1 Login 1. Connect your computer to the extender wirelessly, via an Ethernet cable, or via powerline. 2. Launch a web browser, type plc.tendawifi.com in the address bar of the browser, and tap Enter on the keyboard. -
Page 14: Wireless
Configure the Extender 3.2 Wireless In the wireless settings part, you can configure the WiFi name and password manually, and specify the time that you want to enable/disable your WiFi. 3.2.1 Change the WiFi Name & Password Log in to the extender’s web UI, and click Wireless. 2. -
Page 15: Schedule Your Wifi
Configure the Extender Tips There is no default WiFi password. So the No Password Set option is checked by default. Uncheck it before you customize a WiFi password. If the Hide Wireless Network option is checked, the wireless clients cannot search the WiFi name of the router. -
Page 16: Deny An Unknown Wireless Device
Configure the Extender Tips If you don’t want to use this feature, click Disable > OK to disable it. 3.2.3 Deny an Unknown Wireless Device Log in to the extender’s web UI, and click Wireless. 2. Move to Wireless Access Control part. You can see the wireless devices connected to the extender. -
Page 17: Change The Wireless Parameters
Configure the Extender 3.2.4 Change the Wireless Parameters Log in to the extender’s web UI, and click Wireless. 2. Move to Wireless Parameters part, you can change the mode, channel and channel width in this part. 3. Click OK to apply your settings after configuration. --End Parameters Description Mode... -
Page 18: Powerline
Configure the Extender Select any of these channel bandwidths to accommodate higher transmission speeds: 40MHz: Select this bandwidth to maximize the wireless throughput. 20MHz: Select this bandwidth if you encounter some issues with your wireless connection. Auto: Select this bandwidth if you want it to change the channel bandwidth automatically according to needs. -
Page 19: Change The Device Name
Configure the Extender Tips You can click Default to restore the default network name, and click OK to save it. The powerline devices paired with each other have a same network name. So you can use the pair button to change their network names to a same one. 3.2 Change the Device Name Log in to the extender’s web UI, and click Powerline. -
Page 20: Administration
Configure the Extender 4 Administration This section describes how to administer and maintain the extender. 4.1 Change the Login Password Log in to the extender’s web UI, and click Administration. 2. Type the old password, new password, and retype the new password respectively in the corresponding field. -
Page 21: Select A Time Zone
Configure the Extender the extender which is obtained from the connected router), subnet mask, default gateway, and DNS server. When you uncheck the option before Enable, you can set up them manually. 4.3 Select a Time Zone Log in to the extender’s web UI, and click Administration. 2. -
Page 22: Reboot The Extender
Configure the Extender Tips The extender is still working when the LED indicators are off. Don’t forget to turn LED indicators on if you need observe them. To turn on the LED indicators, just click the Enable button on the web 4.5 Reboot the Extender Rebooting the extender activates any modified settings on the extender. -
Page 23: Reset The Extender
Configure the Extender --End 4.6 Reset the Extender Log in to the extender’s web UI, and click Administration. 2. Move to Device Management part, and click Reset. 3. Click OK on the pop-up window. --End... -
Page 24: Upgrade
You have to access the extender but you forget the login password. Your extender does not work well, and you want to reconfigure it. You cannot access the internet, and Tenda technical support recommends you to restore it to factory default. -
Page 25: Backup The Configuration
Configure the Extender --End 4.8 Backup the Configuration If you find the current settings can maintain a good performance for your extender, you can back up the configurations on time in case of need. Log in to the extender’s web UI, and click Administration. 2. -
Page 26: Restore The Configuration
Configure the Extender 4. Save the file (with suffix .conf) to your host. --End 4.9 Restore the Configuration If you reset the extender carelessly, and don’t want to reconfigure it, you can restore it using the configuration file you saved before. Log in to the extender’s web UI, and click Administration. -
Page 27: Export The Syslog
4.10 Export the Syslog If you want to have a good knowledge of system operation, or when you have difficulties in surfing the internet, you need to send your system logs to Tenda technical supporters. Log in to the extender’s web UI, and click Administration. -
Page 28: Appendix
Appendix Appendix This Chapter provides you with more information about how to configure your computer, join your WiFi, common questions and answers, and etc. 1 Configure Your Computer We take Windows Windows 7, and Windows XP as examples here. Windows 8 ❶... -
Page 29: Windows 7
Appendix ❸ Find and double click Internet Protocol Version 4(TCP/IPv4). Select Obtain an IP address automatically and Obtain DNS server address automatically and click OK. ❹ ❸ Click OK on the Ethernet Properties window (see for the screenshot). Windows 7 ❶... - Page 30 Appendix ❷ Click Local Area Connection > Properties. ❸ Find and double click Internet Protocol Version 4(TCP/IPv4). Select Obtain an IP address automatically and Obtain DNS server address automatically and click OK. ❹ ❸ Click OK on the Local Area Connection Properties window (see for the screenshot).
-
Page 31: Windows Xp
Appendix Windows XP ❶ Right click My Network Places on your desktop and select Properties. Right click Local Area Connection and select Properties. ❷ Scroll down to find and double click Internet Protocol (TCP/IP). Select Obtain an IP address automatically and Obtain DNS server address automatically and click OK. - Page 32 Appendix ❸ ❷ Click OK on the Local Area Connection Properties window (see for the screenshot).
-
Page 33: Join Your Wifi
Appendix 2 Join Your WiFi This part instructs you how to connect to your wireless network via your computer or wireless clients. We take Windows Windows 7, iPad/iPhone, and Android as examples here. Choose the corresponding configuration steps according to your needs. Windows 8 ... -
Page 34: Windows 7
Appendix Windows 7 Click the icon on the bottom right corner of your desktop. Select your WiFi from the list, click Connect and then follow onscreen instructions. Tips If you cannot find the icon , please move your mouse to the bottom left corner of your desktop, select Start >... -
Page 35: Ipad/Iphone
Appendix iPad/iPhone Click on Settings. Click Wi-Fi, and choose your SSID. Enter your Wireless password, and click Join. -
Page 36: Android
Appendix Android Click on Settings. Click WLAN to enter your WLAN settings. - Page 37 Appendix Enable your WLAN, and select your SSID. Enter your wireless password, and click Connect. When your WiFi is connected successfully, it displays Connected.
- Page 38 Appendix 3 FAQs Q1: I cannot access the Internet after finishing the operations in Plug and Play, what should I A1: Please follow the instructions below step by step. a. Verify that your wireless router, the adapter (P3), and the extender (PA6) are well-connected. b.
- Page 39 Appendix successfully.
- Page 40 Appendix 4 Technical Support If you still have some problems, please contact our technical support. Country Hotline United States 1-800-570-5892 HongKong 00852-81931998 Canada Hotline 1-888-998-8966 Type Details Skype Tendasz website http:// www.tendacn.com E-mail support@tenda.com.cn...
- Page 41 RJ45 cable. Declaration of Conformity Hereby, SHENZHEN TENDA TECHNOLOGY CO. LTD. declares that the radio equipment type PA6 is in compliance with Directive 2014/53/EU. The full text of the EU declaration of conformity is available at the following internet address: http://www.tendacn.com/en/service/page/ce.html...
- Page 42 Appendix RECYCLING This product bears the selective sorting symbol for Waste electrical and electronic equipment (WEEE). This means that this product must be handled pursuant to European directive 2012/19/EU in order to be recycled or dismantled to minimize its impact on the environment. User has the choice to give his product to a competent recycling organization or to the retailer when he buys a new electrical or electronic equipment.
- Page 43 Appendix compliance could void the user's authority to operate this equipment. This transmitter must not be co-located or operating in conjunction with any other antenna or transmitter. The manufacturer is not responsible for any radio or TV interference caused by unauthorized modifications to this equipment.
Need help?
Do you have a question about the AV1000 and is the answer not in the manual?
Questions and answers