Table of Contents
Advertisement
Advertisement
Table of Contents

Related Manuals for Tenda A300


Summary of Contents for Tenda A300
- Page 1 Wireless N300 Universal Range Extender...
- Page 2 Copyright of the whole product as integr ation, including its accessories and software, belongs to Shenzhen Tenda Technology Co., Ltd. No part of this publication can be reproduced, transmitted, transcribed, stored in a retrieval system, or translated into any language in any form or by any means without the prior written permission of Shenzhen Tenda Technology Co., Ltd.
-
Page 3: Technical Support
Wireless N300 Universal Range Extender Preface Thank you for purchasing Tenda wireless range extender. This guide applies to A300/A301. As they share many similarities in many aspects, here we take A300 for example. Before configuring it, please read this user guide carefully. -
Page 4: Table Of Contents
Wireless N300 Universal Range Extender Contents Chapter 1 Product Overview ................ 1 1.1 Pack age Contents ................. 1 1.2 Getting to Know Your W ireless Range Extender ........1 LED ......................2 Port & Button ..................2 Label ...................... 2 1.3 Position Your W ireless Range Extender .......... - Page 5 Wireless N300 Universal Range Extender Appendix 2 Default Settings ..............29 Appendix 3 FAQs ..................30 Appendix 4 Rem ove W ireless Network from your PC ........31 Appendix 5 Safety and Em ission Statem ent ..........33...
-
Page 6: Chapter 1 Product Overview
• Wireless Range Extender • Install Guide • Ethernet Cable • Resource CD If any of the above items are incorrect, missing, or damaged, please contact your Tenda reseller for immediate replacement. 1.2 Getting to Know Your Wireless Range Extender... -
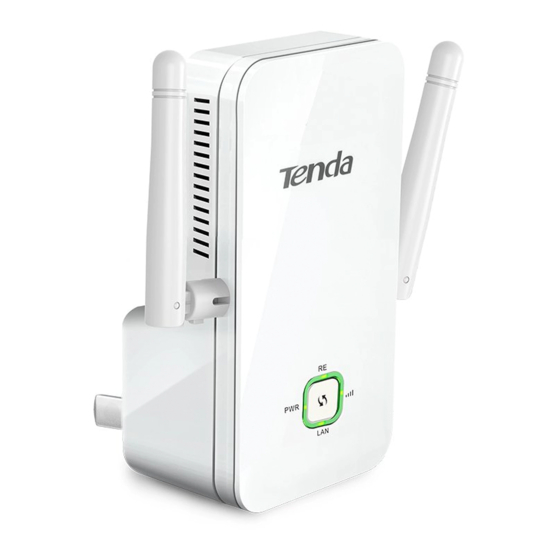
Page 7: Led
Chapter 1 Product Overview Status Description PW R Solid Proper connection to power supply Solid Bridged successfully RE(Range Blinking Negotiating key Extender) Not bridged Solid Green Strong signal (Signal Solid Orange Weak signal Strength) Not bridged Proper connection is established on the Solid LAN port. - Page 8 Chapter 1 Product Overview The Best Way is Half -Way Generally, the ideal location for the range extender is half-way between your wireless router and your W i -Fi enabled devices. If that is not impossible, placing the range extender closer to your wireless router will ensure better performance.
-
Page 9: Chapter 2 Internet Connection Setup
Chapter 2 Internet Connection Setup Chapter 2 Internet Connection Setup 2.1 Hardware Installation 1. Position the wireless range extender close to a wireless router or access point and then plug it into a power outlet nearby. 2. Connect your W ireless Clients (such as notebook, pad, smart phone, etc.) to the range extender wirelessly. - Page 10 Chapter 2 Internet Connection Setup Security Key: 12345678 LAN IP Address: 192.168.0.1 Configuration procedures: On the W izard screen, click Open Scan, select the remote router's wireless network (SSID), say Tenda_ 881218, click OK. Enter the remote device’s security key and click Save; In the appearing dialogue box click OK;...
- Page 11 Chapter 2 Internet Connection Setup Click System Status to check the bridge status. W hen the b ridge status displays Connected, bridged successfully. Tip ------------------------------------------------------------------------------------- 1. If the wireless range extender is connected to the remote router within 20 seconds, the wireless range ex tender ’s DHCP server will be disabled automatically.
-
Page 12: Method Two: Setup By Button
Chapter 2 Internet Connection Setup Method Two: Setup by Button By pressing the R E button, you can achieve wireless bridging for extending wireless network withou t complicated procedures. Configuration procedures: Press the W PS or QSS button on your wireless router for 1~3 seconds ; Press the RE button on the wireless range extender for 1~3 seconds within 2 minutes;... -
Page 13: Internet Connection Setup
Chapter 2 Internet Connection Setup When the RE LED displays a solid light, the wireless range extender will be connected to your desired router successfully. You can also login to the web management interface to che ck bridge status. Note ------------------------------------------------------------------------------------- 1. - Page 14 Chapter 2 Internet Connection Setup Enter the default password admin and click OK. Then the following page will appear. Internet Connection Setup Wireless bridging allows a wireless network to be expanded u sing multiple access points. The network topology is shown below:...
-
Page 15: Verify Internet Connection
Chapter 2 Internet Connection Setup Tip-------------------------------------------------------------------------------------- Before configuring it by web-based management page, make sure you have the following information: 1. Remote router's SSID, security mode, cipher type and security key. 2. Remote router's LAN IP address. ----------------------------------------------------------------------------------------------- As for specific procedures, please refer to Method One: Setup by Web-based Management Page. -
Page 16: Join Your Wireless Connection
Chapter 2 Internet Connection Setup Tip -------------------------------------------------------------------------------------- If ping failed, repair the IP address on your PC to ensure the gateway is assigned from the remote router. ----------------------------------------------------------------------------------------------- 2.5 Join Your Wireless Connection Having finished above settings, you can search for the device's default wireless network (SSID) from your wireless devices (notebook, iPad, iPhone, etc) and enter a security key to connect to it wirelessly. - Page 17 Chapter 2 Internet Connection Setup Select the wireless network you wish to connect and click Connect. Enter the security key and click OK.
-
Page 18: Windows Xp Os
Chapter 2 Internet Connection Setup When you see Connected displayed next to th e wireless network you selected, you have connected to the wireless network successfully. Windows XP OS Right click My Network Places from your PC's desktop and select Properties. - Page 19 Chapter 2 Internet Connection Setup Right click Wireless Network Connection and select View Available Wireless Networks . Double click the wireless network you wish to connect. Enter the security key and click Connect. When you see Connected displayed next to the wireless network you selected, you have connected to the wireless network successfully.
-
Page 20: Chapter 3 Advanced Settings
Chapter 3 Advanced Settings Chapter 3 Advanced Settings 3.1 Wizard Here configure device’s working mode. specific configurations, please refer to Chapter 2 Internet Connection Setup 3.2 System Status This section displa ys the device’s current system info. -
Page 21: Wireless
Chapter 3 Advanced Settings 3.3 Wireless 3.3.1 Wireless Basic Settings This section allows you to manage your wireless network. SSID: This is the public name of your wireless network. It is preset to "Tenda_XXXXXX" (where "XXXXXX" represents the last six characters in device MAC address.) by default. -
Page 22: Wireless Security
Chapter 3 Advanced Settings AP Isolation: W hen it’s enabled, clients connected to the same SSID will be isolated. Channel: For optimal wireless performance, you may select the least used channel. It is advisable that you select an unused channel from the drop down list, or “Auto”... -
Page 23: Access Control
Chapter 3 Advanced Settings Open: W ireless speed rate can reach up to 54Mbps if Open is selected. Shared: W ireless speed rate can reach up to 54Mbps if Shared is selected. Default Key: Select a key to be effective for the current W EP encryption. For example, if you select Key 1, wireless clients must join your wireless network using this Key 1. - Page 24 Chapter 3 Advanced Settings to enter the configuration screen. There are three options available: Disable, Forbid and Permit . Wireless Access Control Application Example: To only allow your own notebook at the MAC address of C8:3A:35:C2:CA:E7 to join your wireless network. Configuration procedures: 1.
-
Page 25: Wireless Connection Status
Chapter 3 Advanced Settings 3.3.4 Wireless Connection Status Click Wireless > Wireless Connection Status , here you can see a list of wireless devices connected to the range extender. Tip ------------------------------------------------------------------------------------- You can know whether there are unauthorized accesses to your wireless network by viewing the wireless client list. -
Page 26: Upgrade
Chapter 3 Advanced Settings Tip-------------------------------------------------------------------------------------- When the device is disconnected from power supply, time settings on this page will be lost. However, it will be updated automatically when the device reconnects to the Internet. ---------------------------------------------------------------------------------------------- 3.4.2 Upgrade Upgrade is released periodically to improve the functionality of your device, and also to add any new features. -
Page 27: Backup/Restore
Chapter 3 Advanced Settings 3.4.3 Backup/Restore This feature allows you to backup and restore current settings. Once you have configured the range extender, you can save these settings to a configuration file on your local hard drive. The configuration file can later be imported to your range extender in case the range extender is reset to factory default settings. -
Page 28: Change Password
Chapter 3 Advanced Settings Click the Restore To Factory Default button to reset the range extender to its factory default settings. Default IP Address: 192.168.0.254 Default Subnet Mask: 255.255.255.0 Default Password: admin Note------------------------------------------------------------------------------------- 1. Once this device is restored to factory default, you need to reconfigure the device for Internet access as well as many other settings includ ing wireless settings. -
Page 29: Syslog
Chapter 3 Advanced Settings 2. Only numbers and alphabets can be included in the password ( 1~12 characters). If no character entered, it has no password. ---------------------------------------------------------------------------------------------- 3.4.6 Syslog Here you can view the history of the device’s actions. After 150 entries, the earliest logs will be cleared automatically. -
Page 30: Chapter 4 Appendix
Chapter 4 Appendix Chapter 4 Appendix Appendix 1 Configure IP In this section we explain how to configure your PC’s TCP/IP settings. Win7 OS 1. Click Start ->Control Panel; 2. Enter Control Panel and click Network and Internet; 3. Click Network and Sharing Center ;... - Page 31 Chapter 4 Appendix 4. Click Change adapter settings ; 5. Right click Local Area Connection and select Properties; 6. Select Internet Protocol Version 4(TCP/IPv4) and click Properties;...
-
Page 32: Windows Xp Os
Chapter 4 Appendix 7. Select Obtain an IP address automatically and click OK to save the configurations. Windows XP OS 1. Right click My Network Places and select Properties; 2. Right click Local and select Properties;... - Page 33 Chapter 4 Appendix 3. Select Internet Protocol (TCP/IP) and click Properties; 4. Select Obtain an IP address automatically and click OK to save the settings.
-
Page 34: Appendix 2 Default Settings
Chapter 4 Appendix Appendix 2 Default Settings Parameters Default Settings Default Access http://re.tendacn.com Web Login Default admin Password Wireless Setup Enabled Tenda_XXXXXX (XXXXXX is the last 6 Primary SSID characters of the MAC address) Working Mode 11/b/g/n Mixed SSID Broadcast Enabled AP Isolation Disabled... -
Page 35: Appendix 3 Faqs
Read the following if you are running into problems. If your problem is not covered here, please feel free to go to www.tendacn.com to find a solution or email your problems to: support@tenda.com.cn. We will be more than happy to help you out as soon as possible. -
Page 36: Appendix 4 Remove Wireless Network From Your Pc
Chapter 4 Appendix Appendix 4 Remove Wireless Network from your If you change wireless settings on your wireless device, you must remove them accordingly from your PC; otherwise, you may not be able to wirelessly connect to the device. If you are using Windows XP, do as follows: 1. - Page 37 Chapter 4 Appendix If you are using Windows 7, do as follows: 1. Click Network from your desktop and select Properties. 2. Select Manage Wireless Networks . 3. Click the wireless connection and select Remove network.
-
Page 38: Appendix 5 Safety And Emission Statement
Chapter 4 Appendix Appendix 5 Safety and Emission Statement CE Mark Warning This is a Class B product . In a domestic environment, this product may cause radio interference, in which case the user may be required to take adequate measures. - Page 39 Chapter 4 Appendix The manufacturer is not responsible for any radio or TV interference caused by unauthorized modifications to this equipment. Radiation Exposure Statement This equipment complies with FCC radiation exposure limits set forth for an uncontrolled environment. This equipment should be installed and operated with minimum distance 20cm between the radiator &...
Need help?
Do you have a question about the A300 and is the answer not in the manual?
Questions and answers