Tenda 11N Wireless AP User Manual
Wireless n range extender
Hide thumbs
Also See for 11N Wireless AP:
- User manual (68 pages) ,
- User manual (81 pages) ,
- User manual (89 pages)
Table of Contents
Advertisement
Advertisement
Table of Contents

Subscribe to Our Youtube Channel
Related Manuals for Tenda 11N Wireless AP


Summary of Contents for Tenda 11N Wireless AP
- Page 2 All photos and product specifications mentioned in this manual are for references only. Upgrades of software and hardware may occur; Tenda reserves the right to revise this publication and to make changes in the content hereof without obligation to notify any person or organization of such revisions or changes.
-
Page 3: Table Of Contents
11N Wireless AP User Manual Table of Contents TABLE OF CONTENTS...................... 2 CHAPTER 1 PRODUCT OVERVIEW ................ 4 1.1 P ACKAGE ONTENTS ....................4 1.2 P ANEL VERVIEW ......................5 CHAPTER 2 INSTALLATION ..................7 CHAPTER 3 SETUP......................9 3.1 C... - Page 4 11N Wireless AP User Manual APPENDIX 1: GLOSSARY ..................36 APPENDIX 2: FEATURES ..................38 APPENDIX 3: TROUBLESHOOTING ..............39 APPENDIX 4: REMOVE WIRELESS NETWORK ON YOUR PC....41 APPENDIX 5: SECURITY STATEMENT ............... 44 ...
-
Page 5: Chapter 1 Product Overview
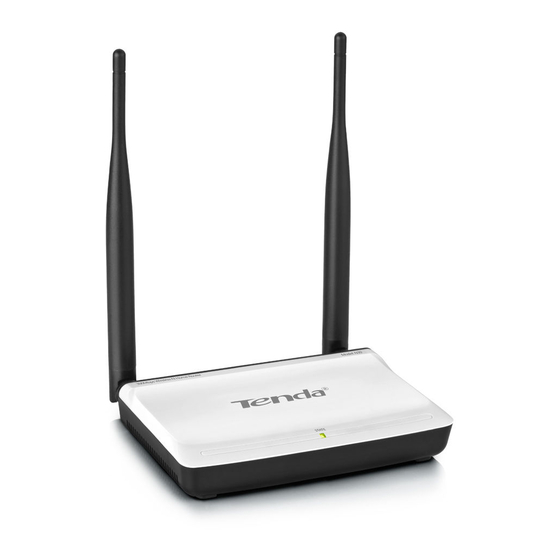
11N Wireless AP User Manual Chapter 1 Product Overview The Tenda AP is a Wireless N Range Extender which is designed to extend the coverage and improve the signal strength of an existing wireless network using either AP mode or WDS mode. -
Page 6: Panel Overview
11N Wireless AP User Manual 1.2 Panel Overview LED overview (Take A3 as an example): Status Description STATE Blinking System is functioning properly Port/Button Overview: (A3 is used in the figure below): 5 ... - Page 7 11N Wireless AP User Manual Port/Button Description For connection to a computer or router. RESET Pressing this button for 7 seconds restores the device to factory default settings. Power receptor. Do not use a different power adapter than the included one.
-
Page 8: Chapter 2 Installation
11N Wireless AP User Manual Chapter 2 Installation 1. Connect one end of the included power adapter to the AP and then plug the other end into a wall outlet nearby. (Using a power supply with a different voltage rating than the one included with the AP will cause damage to the product.) - Page 9 11N Wireless AP User Manual .3. Connect your PC to the AP wirelessly. 8 ...
-
Page 10: Chapter 3 Setup
11N Wireless AP User Manual Chapter 3 Setup 3.1 Connecting to AP Wirelessly 3.1.1 In Windows XP 1. Right click “My Network Places” and select “Properties”. 2. Right click “Wireless Network Connection” and select “View Available Wireless Networks”. 9 ... - Page 11 11N Wireless AP User Manual 3. Select the AP’s SSID. 4. Click “Connect Anyway”. 10 ...
-
Page 12: In Windows 7
11N Wireless AP User Manual 3.1.2 In Windows 7 1. Click network icon on your desktop. 2. Select AP’s SSID and click “Connect”. 3. You have successfully connected your PC to the AP wirelessly 11 ... - Page 13 11N Wireless AP User Manual when you see “Connected” next to the AP’s SSID. 4. Choose your network location. 12 ...
-
Page 14: Login To Ap
11N Wireless AP User Manual 3.2 Login to AP 1 、 Open a web browser, enter http:// 192.168.0.254 in the address bar and then press “Enter” to go to interface below: 3.3 Quick Encryption Use the interface below to fast secure your wireless network (Only a catchy security key is required) or go to Advanced (click the "Advanced"... - Page 15 11N Wireless AP User Manual 14 ...
-
Page 16: Chapter 4 System Status
11N Wireless AP User Manual Chapter 4 System Status This section allows you to view the AP’s information. 4.1 Wireless ◆ Wireless Working Mode: Displays AP’s current working mode: AP or WDS mode. ◆ Network Mode: Displays AP’s current IEEE802.11 mode: 11n/g/b. -
Page 17: Lan
11N Wireless AP User Manual 4.2 LAN ◆ Address Mode: Displays AP’s current IP mode: Dynamic IP or Static IP. ◆ MAC Address: Displays AP’s LAN MAC address. ◆ IP Address: Displays AP’s current IP address. ◆ Subnet Mask: Displays AP’s current IP subnet mask. -
Page 18: System Status
11N Wireless AP User Manual 4.3 System Status ◆ System Time: Displays the time customized by you or obtained from Internet. ◆ Running Time: Displays device’s up time. ◆ Connected client : Displays the number of connected computers. ◆ Software Version:Displays router’s firmware version. -
Page 19: Chapter 5 Wireless Settings
11N Wireless AP User Manual Chapter 5 Wireless Settings 5.1 Basic Settings ◆ Enable Wireless Functions: Check/uncheck enable/disable the wireless feature. When unchecked, all wireless related features will be disabled. ◆ Wireless Working Mode: Select either AP or WDS according to your practical needs. - Page 20 11N Wireless AP User Manual ◆ 11g mode: Select it if you have only Wireless-G clients in your wireless network. ◆ 11b/g mixed mode: Select it if you have only Wireless-B and Wireless-G clients in your wireless network. ◆ 11b/g/n mixed mode: Select it if you have Wireless-B, Wireless-G and Wireless-N clients in your wireless network.
- Page 21 Open Scan option. Application example: Implement the WDS feature using Tenda products of A3 (Wireless AP) and W316R (Wireless Router). 1. Change the default wireless working mode of AP on A3 to WDS as shown in the figure below: 20 ...
- Page 22 11N Wireless AP User Manual 2. Add W316R’s MAC address to A3 and change A3’s SSID and channel respectively to those of W316R. a. If you already know W316R’s MAC address, SSID and channel settings, then you can manually configure the same settings on b.
- Page 23 11N Wireless AP User Manual 2. Click OK to save your settings. 3. Configure wireless security settings. For this step, refer to section 5.2 hereof. 4. Repeat steps 1-3 on W316R. Note: SSID, channel, security settings and security key must be the same on both A3 and W316R for successful WDS implementation.
-
Page 24: Wireless Security
11N Wireless AP User Manual respectively to those of link partner as well as add link partner’s MAC address. So we recommend you to use this Open Scan option for easy WDS settings. 2. Using WEP encryption improves WDS compatibility. For this reason, we recommend you to encrypt your wireless network with WEP when using the WDS feature. -
Page 25: Wpa-Psk
11N Wireless AP User Manual ◆ Default Key: Select one key from the 4 preset keys. You can either select ASCII, which allows 5 or 13 characters, or hexadecimal, which allows 10 or 26 characters for WEP key format. 5.2.2 WPA-PSK The WPA protocol implements the majority of the IEEE 802.11i... -
Page 26: Wpa2-Psk
11N Wireless AP User Manual 5.2.3 WPA2-PSK The later WPA2 protocol features compliance with the full IEEE 802.11i standard and uses Advanced Encryption Standard (AES) in addition to TKIP encryption protocol to guarantee better security than that provided by WEP or WPA. - Page 27 11N Wireless AP User Manual ◆ MAC Address:Enter the MAC addresses of a wireless client and click “Add”. ◆ MAC Address List: Displays the MAC addresses added by you. You can delete any entry by clicking on the “Delete” button next to it.
-
Page 28: Connection Status
11N Wireless AP User Manual 5.4 Connection Status This interface displays the information of currently connected wireless clients including MAC addresses and bandwidth. ◆ MAC Address: Displays the MAC addresses of the PCs that have been wirelessly connected to your AP ◆... -
Page 29: Chapter 6 Lan Settings
11N Wireless AP User Manual Chapter 6 LAN Settings Click “LAN Settings” to enter the interface below. The AP’s LAN IP can either be static or dynamic. 6.1 Static IP ◆ MAC Address: Displays the AP‘s LAN MAC address, which cannot be changed. -
Page 30: Dynamic Ip (Dhcp)
11N Wireless AP User Manual 6.2 Dynamic IP (DHCP) Select this option only if you have a DHCP-enabled router on your network to assign an IP address to your AP. Otherwise use the static IP option. Note: 1. If you change the device’ LAN IP address, you have to enter the new one in your browser to get back into the web-based configuration utility. -
Page 31: Chapter 7 Tools
11N Wireless AP User Manual Chapter 7 Tools 7.1 Time Settings This section assists you in setting the device’s system time; you can either select to set the time and date manually or automatically obtain the GMT time from Internet. NOTE: The configured time information loses once the device is powered off. - Page 32 11N Wireless AP User Manual ◆ Backup Settings: Once you have configured the device the way you want it, you can save these settings to a configuration file on your local hard drive that can later be imported to your device in case that the deivce is restored to factory default settings.
-
Page 33: Restore To Factory Default Settings
11N Wireless AP User Manual hard drive. And then click the "Restore" button to reset your device to previous settings.' 7.3 Restore to Factory Default Settings To restore all settings to the device's factory default values, click the "Restore to Factory Default” button on the interface below: Factory Default Settings: ◆... -
Page 34: Firmware Upgrade
If you run into a problem with a specific feature of the device, log on to our website(www.tenda.cn)to download the latest firmware to update it. ◆ Browse: Click this button to select an upgrade file. -
Page 35: Change Password
11N Wireless AP User Manual And LAN connection will be cut automatically during this process. 7.6 Change Password On the screen below, you can change the password for login to the device's Web-based interface. ◆ Old Password: Enter the old password. (If you have not changed the login password before, then just leave this field blank, for there is no preset password by default.) -
Page 36: Syslog
11N Wireless AP User Manual change default login password. 7.7 SysLog The Syslog option allows you to view all events that occur upon system startup and check whether there is attack on your network. ◆ Refresh: Click this button to update the log. -
Page 37: Appendix 1: Glossary
11N Wireless AP User Manual Appendix 1: Glossary Channel A communication channel, also known as channel, refers either to a physical transmission medium such as a wire or to a logical connection over a multiplexed medium such as a radio channel. It is used to transfer an information signal, such as a digital bit stream, from one or more transmitters to one or more receivers. - Page 38 11N Wireless AP User Manual users can access the wireless network. The later WPA2 protocol features compliance with the full IEEE 802.11i standard and uses Advanced Encryption Standard (AES) in addition to TKIP encryption protocol to guarantee better security than that provided by WEP or WPA.
-
Page 39: Appendix 2: Features
11N Wireless AP User Manual Appendix 2: Features Compliant with IEEE802.11n/g/b,IEEE802.3/3u Wireless speed up to 300Mbps/150Mbps Supports Wi-Fi Multimedia (WMM) to smooth video and audio High gain antenna(s) for better coverage Supports WEP/WPA-PSK/WPA2-PSK encryptions Supports WDS to seamlessly expand your wireless network... -
Page 40: Appendix 3: Troubleshooting
11N Wireless AP User Manual Appendix 3: Troubleshooting 1. Q: I can’t log in to AP’s web-based management interface after entering 192.168.0.254 in the browser’s address bar, what should I do? A: 1). Verify that your PC’s IP address is set to any value between 192.168.0.2-192.168.0.253. - Page 41 11N Wireless AP User Manual If you still have some problems, please contact our technical support. Technical Support Toll Free: 400-6622-666 (For Mainland China Only) Toll Free: 1-800-570-5892 (For USA only) Tel: +86 (755) 2344 2820 Skype: tendasz MSN: tendasz@hotmail.com Email: support@tenda.com.cn...
-
Page 42: Appendix 4: Remove Wireless Network On Your Pc
11N Wireless AP User Manual Appendix 4: Remove Wireless Network on Your PC Changing wireless settings on AP while keeping them unchanged on your PC may lead to connection failure when trying connecting to the AP wirelessly. So, do remember to delete the wireless settings on your PC when you have changed them on the AP. - Page 43 11N Wireless AP User Manual 3. Click “Wireless Networks”, select the item under “Preferred networks” and click the Remove button. In Windows 7 1. Click network icon on your desktop and select Properties. 42 ...
- Page 44 11N Wireless AP User Manual 2. Select “Manage Wireless Networks”. 3. Click the wireless connection and select “Remove network”. 43 ...
-
Page 45: Appendix 5: Security Statement
11N Wireless AP User Manual Appendix 5: Security Statement FCC Statement This equipment has been tested and found to comply with the limits for a Class B digital device, pursuant to part 15 of the FCC rules. These limits are designed to provide reasonable protection against harmful interference in a residential installation. - Page 46 Such modifications could void the user authority to operate the equipment. Eu Declaration or Declaration of Conformity Hereby, SHENZHEN TENDA TECHNOLOGY CO.,LTD, declares that this wireless device is in compliance with the essential requirements other...
Need help?
Do you have a question about the 11N Wireless AP and is the answer not in the manual?
Questions and answers