Viessmann Vitocell 100-E Installation And Service Instructions Manual
Hide thumbs
Also See for Vitocell 100-E:

Related Manuals for Viessmann Vitocell 100-E


Summary of Contents for Viessmann Vitocell 100-E
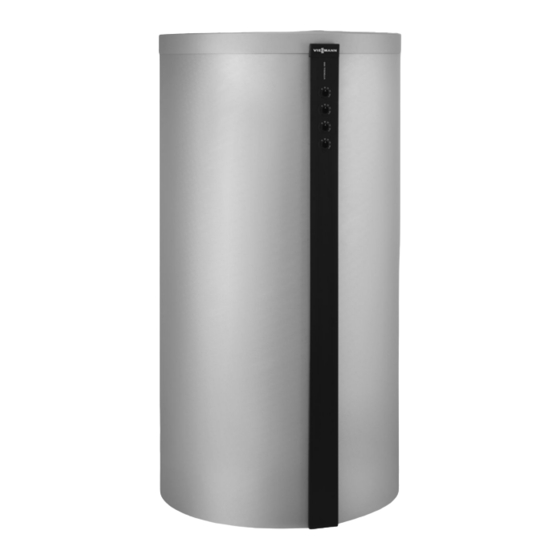
- Page 1 VIESMANN Installation and service instructions for contractors Vitocell 100-E Type SVPB Heating water buffer cylinder 1500 and 2000 l For applicability, see the last page VITOCELL 100-E Please keep safe. 5788 112 GB 9/2017...
- Page 2 Repair work Please note Repairing components that fulfil a safety func- tion can compromise the safe operation of the system. Replace faulty components only with genuine Viessmann spare parts.
- Page 3 Installing non-authorised components and making non-approved modifications or con- versions can compromise safety and may inva- lidate our warranty. For replacements, use only original spare parts supplied or approved by Viessmann.
-
Page 4: Table Of Contents
Index Index Information Disposal of packaging ................Symbols ....................Intended use ..................Product information ................Preparing for installation Connections ................... Siting ...................... Installation sequence Levelling the heating water buffer cylinder ..........Fitting the thermometer sensors and cylinder temperature sensors ..10 Fitting the 2-part thermal insulation ............ -
Page 5: Information Disposal Of Packaging
Please dispose of packaging waste in line with statu- tory regulations. DE: Use the disposal system organised by Viessmann. AT: Use the ARA statutory disposal system (Altstoff Recycling Austria AG, licence number 5766). CH: Packaging waste is disposed of by the HVAC contractor. -
Page 6: Intended Use
Information Intended use The appliance is only intended to be installed and Any usage beyond this must be approved by the man- operated in sealed unvented systems that comply with ufacturer for the individual case. EN 12828 / DIN 1988, or solar thermal systems that comply with EN 12977, with due attention paid to the Incorrect usage or operation of the appliance (e.g. -
Page 7: Preparing For Installation Connections
Preparing for installation Connections Fig. 2 Back Fig. 1 Front Heating water flow 1 Max. 4 thermometers (accessories) Heating water flow 2/heating water return 1 Heating water return 2 Heating water return 3 Mounting for thermometer sensor (below thermal insulation) Clamping system for cylinder temperature sensor 1 (behind thermal insulation) Mounting for thermometer sensor (below thermal... -
Page 8: Siting
Preparing for installation Siting Please note To prevent material losses, install the heating water buffer cylinder in a room free from the risk of frost and draughts. Otherwise the heating water buffer cylinder will need to be drained when not in use and there is a risk of frost. -
Page 9: Installation Sequence Levelling The Heating Water Buffer Cylinder
Installation sequence Levelling the heating water buffer cylinder Note Seal connections that are not required with caps. Fig. 3 Type plate 3 adjustable feet 3. Insert the adjustable feet into the legs as far as they will go. Use the adjustable feet to level the cyl- inder body. -
Page 10: Fitting The Thermometer Sensors And Cylinder Temperature Sensors
Installation sequence Fitting the thermometer sensors and cylinder temperature sensors Fig. 4 1. Guide the thermometer sensors (if supplied) 3. Release the nuts. through the cover strip and insert the thermome- ters. 4. Push the clamping system onto the threaded studs and align. -
Page 11: Fitting The 2-Part Thermal Insulation
Installation sequence Fitting the 2-part thermal insulation Fitting the thermal insulation jacket sections Please note Number of clip fasteners on each cylinder side The thermal insulation must not come into con- 1500 l: 6 pce tact with naked flames. 2000 l: 9 pce Exercise caution when welding and brazing Note 2 people are required for the following work. -
Page 12: Fitting The Cover Strips
Installation sequence Fitting the 2-part thermal insulation (cont.) Fitting the cover strips Fit the thermal insulation jacket evenly around the cyl- inder body by patting it. Fig. 6 Type plate Fitting the cover Fig. 7 Viessmann logo... -
Page 13: Fitting The 3-Part Thermal Insulation
Installation sequence Fitting the 3-part thermal insulation Fitting the thermal insulation jacket sections Please note Number of clip fasteners per left edge section The thermal insulation must not come into con- 1500 l: 6 pce tact with naked flames. 2000 l: 9 pce Exercise caution when welding and brazing Note The work detailed below requires 2 people. - Page 14 Installation sequence Fitting the 3-part thermal insulation (cont.) Fig. 9 1. Push the middle section of the thermal insulation 6. Position the next insulation section against the cyl- jacket between the cylinder connections and posi- inder body. tion it against the cylinder body. 7.
- Page 15 Installation sequence Fitting the 3-part thermal insulation (cont.) 9. Push all clip fasteners as close together as possi- ble. Fig. 10...
-
Page 16: Fitting The Cover Strips
Installation sequence Fitting the 3-part thermal insulation (cont.) Fitting the cover strips 1. Fit the thermal insulation jacket evenly around the cylinder body by patting it. 2. Cut out the perforated openings on the cover strips to allow for the connections. Fig. -
Page 17: Fitting The Cover
Viessmann logo Fleece side of the insulation facing downwards Connections on the heating water side Any number of Vitocell 100-E can be connected either Note in series or in parallel. Connection pipes and air vent For location of connections, see page 7. - Page 18 Installation sequence Connecting the equipotential bonding (cont.)
-
Page 19: Parts Lists Ordering Parts
Parts lists Ordering parts The following information is required: ■ Serial no. (see type plate) ■ Assembly (from this parts list) ■ Position number of the individual part within the assembly (from this parts list) Type plate 2-part thermal insulation 3-part thermal insulation Cylinder body... -
Page 20: 2-Part Thermal Insulation
Parts lists 2-part thermal insulation 0001 0002 0007 0003 0012 0004 0005 0012 0006 0012 0011 0009 0010 0013 0008 Fig. 13... - Page 21 Parts lists 2-part thermal insulation (cont.) Pos. Description 0001 Cover 0002 Thermal insulation mat, top 0003 Thermal insulation jacket, left section 0004 Thermal insulation jacket, right section 0005 Cap with logo 0006 Cover strip 0007 Cover strip 0008 Thermometer cover (grey) 0009 Clip fastener (6 pce) 0010...
-
Page 22: 3-Part Thermal Insulation
Parts lists 3-part thermal insulation 0001 0002 0008 0004 0012 0003 0012 0008 0003 0012 0005 0007 0012 0006 0010 0011 0009 Fig. 14... - Page 23 Parts lists 3-part thermal insulation (cont.) Pos. Description 0001 Cover 0002 Thermal insulation mat, top 0003 Thermal insulation jacket, side 0004 Thermal insulation jacket, centre 0005 Cap with logo 0006 Thermometer cover (grey) 0007 Cover strip 0008 Cover strip 0009 Clip fastener (6 pce) 0010 Thermal insulation mat, bottom...
-
Page 24: Cylinder Body
Parts lists Cylinder body 0001 0005 0002 0003 0006 0004 Fig. 15... - Page 25 Parts lists Cylinder body (cont.) Pos. Description 0001 Adjustable foot 0002 Clamping system for temperature capture 0003 Vitocell type plate 0004 Clamping bracket 0005 Flexible pipe G 2 0006 Vitocell 100-E installation and service instructions...
-
Page 26: Commissioning/Service
Commissioning/service reports Commissioning/service reports Commissioning Maintenance/service Maintenance/service Date: Maintenance/service Maintenance/service Maintenance/service Date: Maintenance/service Maintenance/service Maintenance/service Date: Maintenance/service Maintenance/service Maintenance/service Date: Maintenance/service Maintenance/service Maintenance/service Date:... -
Page 27: Specification Product Characteristics
Specification Product characteristics Vitocell 100-E Cylinder capacity 1500 2000 Thermal insulation standard high efficien- standard high efficiency (2-part) (2-part) (3-part) (3-part) Standby heat loss kWh/24 h 4.55 to EN 12897: 2006 with 45 K temperature differ- ential Energy efficiency class... -
Page 28: Disposal Final Decommissioning And Disposal
Disposal Final decommissioning and disposal Viessmann products can be recycled. Components For decommissioning the system, isolate the system and substances from the system are not part of ordi- from the power supply and allow components to cool nary household waste.
Need help?
Do you have a question about the Vitocell 100-E and is the answer not in the manual?
Questions and answers