
Related Manuals for BYK multi-angle


Summary of Contents for BYK multi-angle
- Page 1 Operating multi-angle Instructions spectrophotometer Betriebsanleitung Mode d’emploi Modo d’uso Instrucciones de uso For Equipment and Service please visit: www.multiangle.net...
- Page 2 Operating instructions multi-angle Betriebsanleitung spectrophotometer Mode d’emploi Manuale d’uso Instrucciónes de uso Patent pending Patent angemeldet Demande de brevet en cours Domanda di brevetto inoltata Patente solicitada...
- Page 3 BYK - Gardner USA BYK - Gardner GmbH 9104 Guilford Road Lausitzer Straße 8 Columbia, MD 21046 82538 Geretsried Germany Phone 800-343-7721 Tel. 0-800-gardner 301-483-6500 (0-800-4273637) 800-394-8215 +49- 8171-3493-0 301-483-6555 +49- 8171-3493-140 www.bykgardner.com...
-
Page 4: Table Of Contents
Table of Contents Contents/Inhaltsverzeichnis/Sommaire/Contenido/Indice English German Français Italiano Español Page Description of the System Safety Instructions General Information Installing the Batteries Controls Getting Started Measurement Techniques Measure Calibrate Delete Joblist Change Names Browse Interface Base Station Technical and Standard Data Delivery Notes Errors and Warning Messages Cleaning and Maintenance... -
Page 5: English
Description of the System The multi-angle spectrophoto- meter is a custom instrument for the use with the DuPont Perfor- mance Coatings computer system. The instrument is an easy to use tool for measuring the color of automotive paint finishes and... -
Page 6: Safety Instructions
Safety Instructions • No claims of product liability or warrantee can be honored if the device is not operated in accordance with the operating instructions or the instructions on the instrument. • If you use the unit and accessories properly, there are no hazards to fear –... - Page 7 Safety Instructions • When working with the batteries and the battery compart- ment, make certain there is no short circuit on the contacts. Me- tallic objects must not come in contact with the bare contacts. • Safety advices for batteries: Do not crush or dismantle, do not heat or incinerate, do not immerse in any liquid.
-
Page 8: General Information
General Information The measurement unit consists of sensitive optical and electronic precision parts. Treat the unit as an expensive camera. Prevent it from being dropped, bumped or shaken! Do not hold the unit by the measurement aperture. You should not allow any foreign objects to get into this opening. -
Page 9: Installing The Batteries
Installing the Batteries Before putting the unit in Changing the battery operation, read the operating To insert or change the batteries, instructions and pay attention to open the lid of the battery the safety instructions and compartment (1) and take out the general instructions in Section 2. - Page 10 Installing the Batteries Insert the new batteries. Make sure that the batteries are correctly oriented in the battery box according to the (+) and (-) marks. Insert the battery box into the battery compartment and press it inside with one finger. Set the battery compartment cover in the guidance again.
-
Page 11: Controls
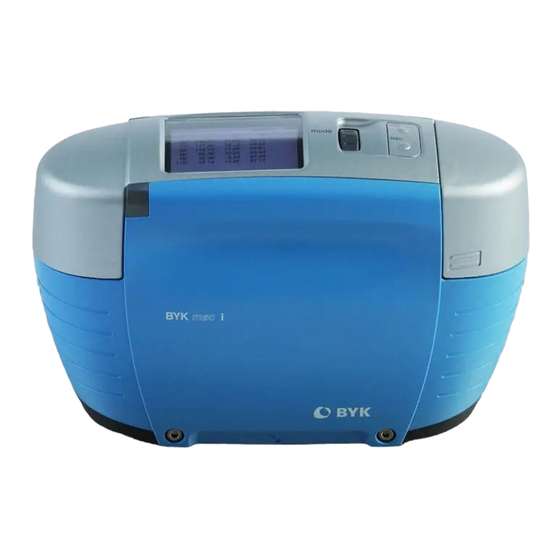
Controls Measurement unit Menu scroll wheel: turn on and menu selection Display for user guidance and displaying measurement values Operate button (measurement button): turn on and measure Alignment mark Interface for connecting to a PC Micro switches for detection of correct placement during measurement Protective cap... -
Page 12: Getting Started
Getting Started Turning on the unit To turn on the unit, press the menu scroll wheel or the operate button. The selection menu appears: Navigation The operate button and scroll wheel are used to control the system. Pressing the wheel or the operate button turns the unit on. -
Page 13: Measurement Techniques
Measurement Techniques Measurement techniques In order to obtain accurate and repeatable measurements, the bottom of the instrument must be aligned flat on the surface to be measured. Do not move the instrument while measuring. This can cause the measurement angles to vary, greatly affecting measurement values on metallic paint finishes. -
Page 14: Measure
Measure Measure Select the menu item Measure by pressing the operate button. The display indicates the number of the current reading and the step within the reading itself. If you haven’t positioned your instrument until now, place it on the spot you intend to measure and press the operate button. -
Page 15: Calibrate
Calibrate Calibration Information The device must be calibrated every 7 calender days. When calibration is required, the device will display a message to calibrate before allowing the user to read a vehicle. You should recalibrate the device if ambient conditions have changed. This applies especially when changing location and if major changes in temperature and relative humidity may be expected as a result (for example inside/outside). - Page 16 Calibrate Black Trap Hole Plug The black trap is used to perform Measurement the zero reflectance measurement. Opening Remove the hole plug and position the instrument over the opening. The instrument snaps into the indentation of the black trap and can only be positioned in one direction.
- Page 17 Calibrate Calibrate Turn the unit on by pressing either the menu scroll wheel or the operate button. Choose the menu item Calibrate from the main menu with the menu scroll wheel and activate it by pressing the operate button. Read Black is displayed. Place the instrument on the black trap.
- Page 18 Calibrate When Reading Black is completed, the instrument must be placed on the white standard. Read White is indicated in the display. Position the instrument as thoroughly on the white standard as it is described for the black trap and press the operate button. You get an indication of the reading process in the display.
-
Page 19: Delete
Delete Delete In case of a measurement error you can delete measurements. Select the menu item Delete by turning the menu scroll wheel and pressing the operate button. The number of the last measurement is displayed together with the delete function. -
Page 20: Joblist
Joblist Joblist Measure # 004 Delete # 003 In case you must enforce test series with recurrent courses, you Calibrate can select names from a pre- Joblist defined joblist. This list must be Browse created on a PC and be sent to the instrument in advance. -
Page 21: Change Names
Change Names Change names Before the instrument is storing the measurement data, you are asked to enter a name. In case a job is selected from the joblist, the corresponding name appears as default in the display. The arrow pointing upward marks the position, that can be altered. -
Page 22: Browse
Browse Browse Delete # 003 Calibrate To get an overview over all measured samples, you can use Joblist the Browse function. Browse Select the menu item Browse by turning the menu scroll wheel and pressing the operate button. All measurements are shown in the display. -
Page 23: Interface
Interface The measurement device is equipped with a serial interface that allows direct communication with a PC. Measurement data can be transferred from the instrument to the PC according to the software used. You can make the connection to your PC with the enclosed PC cable. -
Page 24: Base Station
Base Station The base station is designed to keep all the accessories enclosed together and handy. With the white standard and black trap inserted it makes calibration very easy. In the closed position it is a stand for the instrument. The instrument fits into the indentation of the cover. -
Page 25: Technical And Standard Data
Technical and Standard Data General technical data: Temperature range - 10 °C to +60 °C (14 °F to 140 °F ) for storage +15 °C to +40 °C (59 °F to 104 °F) for operation Rel. humidity Up to 85% non-condensing/35°C (95 °F) Measurement unit: Geometry Illumination 45°, observation 15°, 45°,... - Page 26 Technical and Standard Data DIN 5033 Colorimetry;basic concepts. DIN 5036 Radiometric and photometric properties of materials; definitions characteristic. DIN 6174 Colorimetric evaluation of colour differences of surface colours according to the CIELAB formula. ISO 7724 Paints and varnishes - Colorimetry ASTM D 2244 Standard Test Method for Calculation of Color Differences From Instrumentally Measured Color Coor- dinates.
-
Page 27: Delivery Notes
Delivery Notes Description Order number Spectrophotometer according to DIN, ISO, ASTM multi-angle spectrophotometer 6320 Comes complete with: Measurement device, protectice cap, PC cable, operating instructions, 4 AA batteries, carrying case, base station. Calibration standards Black Trap 6322 White Calibration Standard... -
Page 28: Errors And Warning Messages
Errors and Warning Messages Appears when bottom pins are not pressed before or during a reading Appears when instrument has not been lifted up between two readings Appears when Black or White calibration is done on a wrong standard Appears when memory is full... - Page 29 Errors and Warning Messages Appears when "Delete" is selected and memory is empty Appears when instrument is not calibrated on Black and White standard Appears when Battery is empty Appears when temperature is out- side the range of +10°C to +40°C (50°F to 104°F) Do not attempt to make any repairs yourself! If a malfunction occurs on your measuring device, our Customer Service department will be hap-...
-
Page 30: Cleaning And Maintenance
Cleaning and Maintenance • Do not insert any objects into the measurement aperture for cleaning. The instrument could get damaged - affecting a pro- per and safe operation. • The instrument housing is resistant to a number of solvents, but cannot be guaranteed to withstand all chemicals. - Page 31 Cleaning and Maintenance It is highly recommended to hand- le the standards with great care. They should always be stored enclosed. You can use either the carrying case or the base station for storage. Cleaning the White Calibration Standard The ceramic standard should be cleaned using a mild soap and warm water solution, thoroughly rinsed with warm water, and...
-
Page 32: German
EC Directive 89/336/EEC: Electromagnetic Compatibility Design type of product: multi-angle spectrophotometer was developed, constructed and manufactured in conformity with the EC directives cited above. The corresponding relevant standards were taken into consideration. This are especially EN55022 B, EN 55024, EN 61000-4-6/-3/-2 Technical documentation is available. - Page 33 Sinne der EG-Richtlinien 89/336/EWG: Elektromagnetische Verträglichkeit Die Bauart des Produktes: multi-angle spectrophotometer ist entwickelt, konstruiert und gefertigt in Übereinstimmung mit vorge- nannten EG-Richtlinien. Entsprechende angewandte Normen wurden berücksichtigt. Diese sind im speziellen EN55022 B, EN 55024, EN 61000-4-6/-3/-2 Eine technische Dokumentation ist vorhanden.
- Page 34 à la directive CE 89/336/CEE Compatibilité électromagnétique, que les produits suivants: multi-angle spectrophotometer ont été développés, conçus et fabriqués conformément à la directive européenne susnommée. Les niveaux pertinents correspondants ont été prises en considération. C'est surtout, EN55022 B, EN 55024, EN 61000-4-6/-3/-2, Une documentation technique est disponible.
- Page 35 CE 89/336/EEC: Compatibilità elettromagnetica Tipo del disegno di prodotto: multi-angle spectrophotometer fu sviluppato, progettato e prodotto nel rispetto delle sudette norme Gli standard attinenti e corrispondenti furono presi nell'esame. Questo è EN55022 B, EN 55024, EN 61000-4-6/-3/-2 specialmente.
- Page 36 CEE 89/336/EEC: La compatibilidad electromagnética El modelo de producto: multi-angle spectrophotometer se ha desarrollado, construido y fabricado en consonancia con la directiva de CEE mencionada. Las normas pertinentes correspondientes se tuvieron en la cuenta. Éste es sobre todo EN55022 B, EN 55024, EN 61000-4-6/-3/-2, La documentación técnica está...
- Page 37 CEE indicadas. EU-yhteensopivuusjulistus Me, BYK-Gardner GmbH, julistamme, että yllä mainittu tuote/laite on kehitetty, rakennettu ja valmistettu asetettujen EU-Direktiivien mukaisesti. Dichiarazione di Conformità Noi, BYK-Gardner GmbH, dichiariamo che il suddetto prodotto/strumento è stato sviluppato, costruito e prodotto in conformità...
- Page 38 253 017 659 EDFIS 0408 Europe...
Need help?
Do you have a question about the multi-angle and is the answer not in the manual?
Questions and answers