Table of Contents
Advertisement
Quick Links
Advertisement
Table of Contents

Related Manuals for BYK micro-TRI-color 345 000 015 Series


Summary of Contents for BYK micro-TRI-color 345 000 015 Series
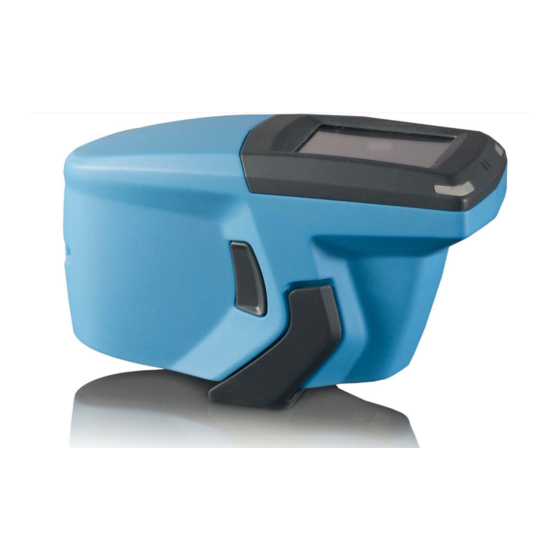
- Page 1 Measure what you see micro-TRI-color Type 345 000 015 Operating Instructions...
- Page 2 BYK-Gardner GmbH © Copyright 2021 BYK-Gardner GmbH All rights reserved 300 100 114 E 2103 micro-TRI-color...
-
Page 3: Table Of Contents
BYK-Gardner GmbH Table of Contents Table of Contents 1 Introduction..............................1.1 For Your Safety ............................1.2 Disclaimer .............................. 1.3 Disposal ..............................1.4 Copyright............................... 1.5 Declarations ............................1.5.1 EU Declaration of Conformity...................... 1.5.2 FCC Declaration (USA)......................... 1.5.3 IC Declaration (Canada)....................... 1.5.4 Japanese Declaration........................ - Page 4 Table of Contents BYK-Gardner GmbH 5.2.4 Store Worklist ..........................30 5.3 Displayed Values ............................ 31 6 Browse ................................33 6.1 View Measurement Values ........................33 6.2 Delete Measurement Values........................34 7 Configuration ............................... 35 7.1 Turn Beeper On / Off..........................36 7.2 Activate WiFi............................
-
Page 5: Introduction
• Application and Technical Seminars • Repair & Certification Service BYK-Gardner is part of the Altana Group and a direct subsidiary of BYK, the world- wide leader of additives for coatings and plastics. Together we offer complete and unique solutions for you, our customer. -
Page 6: For Your Safety
1 | Introduction BYK-Gardner GmbH 1.1 For Your Safety CAUTION Familiarization with safety instructions is necessary Absence of knowledge of safety instructions threatens your health and can dam- age the instrument. Read the safety instructions before you use the instrument the first time. -
Page 7: Disclaimer
Information on Copyright Specific properties and structural characteristics of the instrument are intellectual property of BYK-Gardner. The copyright of this manual remains with BYK-Gardner. This document must not be reproduced fully or in party, published or used for any other competitive purposes, no matter whether against payment or not, without prior written authorization from BYK-Gardner. -
Page 8: Declarations
1 | Introduction BYK-Gardner GmbH 1.5 Declarations 1.5.1 EU Declaration of Conformity Hereby, BYK Gardner GmbH Lausitzer Strasse 8 D-82538 Geretsried declares, that this instrument complies with the requirements of the following EU directives: • 2014/30/EU - Electromagnetic Compatibility • 2014/35/EU - Low Voltage •... -
Page 9: Ic Declaration (Canada)
BYK-Gardner GmbH Introduction | 1 This device complies with part 15 of the FCC Rules. Operation is subject to the fol- lowing two conditions: 1. This device may not cause harmful interference. 2. This device must accept any interference received, including interference that may cause undesired operation. -
Page 10: Intended Use
1 | Introduction BYK-Gardner GmbH 1.6 Intended Use The instrument is designed to measure color on different surfaces. By placing the base plate of the unit onto a surface and pressing either the button Operate on the side of the instrument or triggering the measurement on the dis- play, the instrument measures the surface and processes, displays and stores the measured values. -
Page 11: System Description
2.1 Delivery Content The items listed below are contained in the packaging: Instrument with Docking Station [} 12] Instrument without Docking Station [} 13] Please contact BYK-Gardner if any item is missing or damaged. 300 100 114 E 2103 micro-TRI-color... -
Page 12: Instrument With Docking Station
2 | System Description BYK-Gardner GmbH 2.1.1 Instrument with Docking Station Illustration 1: Arrangement of parts in the case for instrument with docking station 1 Safety and short instructions 6 Instrument carrying case 2 Safety wrist strap 7 USB cables: Type A / B for docking station... -
Page 13: Instrument Without Docking Station
BYK-Gardner GmbH System Description | 2 2.1.2 Instrument without Docking Station Illustration 2: Arrangement of parts in the case for instrument without docking station 1 Safety and short instructions 6 Instrument carrying case 2 USB cable type A / C 7 Plugs for power supply... -
Page 14: Names And Functions Of Parts
2 | System Description BYK-Gardner GmbH 2.2 Names and Functions of Parts 2.2.1 Top View Illustration 3: Top view 1 Status-LEDs Measure: • Light up in blue during measurement. • Light up in red in case of a measurement error. • Light up in green if the measurement was successful. -
Page 15: Side View
BYK-Gardner GmbH System Description | 2 2.2.2 Side View Illustration 4: Side view - right 1 Protective snap closure: 2 Button Operate: Protects the optics against foreign • Turns the instrument on. objects. • Executes a measurement. Illustration 5: Side view - left 3 Open protective snap closure. -
Page 16: Bottom View
2 | System Description BYK-Gardner GmbH 2.2.3 Bottom View 2.2.3.1 Instrument with Docking Station Illustration 6: Bottom view – instrument with contacts for docking station 1 Contact pins for docking station 2 Protective snap closure 2.2.3.2 Instrument without Docking Station Illustration 7: Bottom view – instrument without docking station... -
Page 17: Power Supply
BYK-Gardner GmbH System Description | 2 2.2.4 Power Supply Illustration 8: Power plugs and supply 1 Power plugs: 2 Power supply: Can be clipped on the power • USB C plug for instrument supply. • Proprietary plug for docking station 2.2.5 Combined Standard Illustration 9: Standards for calibration and check... -
Page 18: Safety Wrist Strap
2 | System Description BYK-Gardner GmbH 2.2.6 Safety Wrist Strap The instruments provides a mounting option for the safety wrist strap. Use the hand strap as protection against dropping the instrument. Illustration 10: Safety wrist strap 2.2.7 Docking Station Illustration 11: Docking station... -
Page 19: Usb Docking Station Cable
BYK-Gardner GmbH System Description | 2 2.2.8 USB Docking Station Cable This cable is used to connect the docking station with a PC for data exchange. Illustration 12: USB cable type A / B for docking station 2.2.9 USB Interface Cable This cable is used to connect the instrument with a PC for data exchange. -
Page 20: Measurement Principle
2 | System Description BYK-Gardner GmbH 2.3 Measurement Principle The micro-TRI-color illuminates the sample at an angle of 45° to the sample sur- face. The reflected light is detected at three different angles, calculated from the specular direction in the illumination plane. -
Page 21: Getting Started
BYK-Gardner GmbH Getting Started | 3 3 Getting Started The instrument comes ready to use and no major assembly activities are necessary. Please observe following notes. • Charge the instrument fully before you put it in operation. Consult Charging the Instrument [} 21]... -
Page 22: Main Menu
3 | Getting Started BYK-Gardner GmbH Illustration 15: Charging via docking station The charge LED on the docking station indicates the following states: • Blue: Docking station is power supplied. • Red: Docking station is charging the instrument. • Green: Instrument is fully charged. -
Page 23: Calibration And Check
BYK-Gardner GmbH Calibration and Check | 4 4 Calibration and Check In order to work properly, the instrument needs to be calibrated on a white stan- dard and should be frequently monitored on a green checking standard: • White calibration: Necessary every 30 days. -
Page 24: Perform Green Check
4 | Calibration and Check BYK-Gardner GmbH Illustration 18: Instrument to be placed on white calibration tile 4. Click on the instrument icon or press the button Operate. 5. White calibration is performed, first a color measurement is performed. Illustration 19: White calibration – color measurement 6. - Page 25 BYK-Gardner GmbH Calibration and Check | 4 Illustration 20: Instrument placed on green checking tile 3. The screen below is displayed. Illustration 21: Instrument to be placed on green checking tile 4. Click on the instrument icon or press the button Operate.
- Page 26 4 | Calibration and Check BYK-Gardner GmbH Illustration 23: Color check on green tile successful 7. Click on the checkmark in the upper right corner. Repeat the green check every seven days. Green Check Failed In case of an unsuccessful green check, consult section Troubleshooting [} 49].
-
Page 27: Measure
BYK-Gardner GmbH Measure | 5 5 Measure The measure function is accessible via the Measurement icon in the main menu. The instrument provides two ways to perform measurements. • Measure without Worklist [} 27] • Measure with Worklist [} 28] Both scenarios are explained below. -
Page 28: Measure With Worklist
5 | Measure BYK-Gardner GmbH 6. Repeat step two as many times as you customized the number of single mea- surements for the sample measurement. Default number of measurements is three. 7. The screen below is displayed. Illustration 25: Allocation of a desired name or usage of predefined name 8. -
Page 29: Load Worklist
BYK-Gardner GmbH Measure | 5 5.2.1 Load Worklist You cannot create a worklist directly on the instrument. In order to create a work- list, you have to use your individual software. The instrument needs to be connected with the PC via USB cable or WiFi. The pro- cedure for loading a worklist into the instrument depends on your individual soft- ware. -
Page 30: Store Worklist
5 | Measure BYK-Gardner GmbH Illustration 28: Measure with worklist –worklist item 6. Click on the Measurement icon in the middle of the screen or press the but- ton Operate - analog to Measure without Worklist [} 27]. 7. Perform the requested number of measurements. -
Page 31: Displayed Values
BYK-Gardner GmbH Measure | 5 5.3 Displayed Values The instrument variant that displays values after each measurement shows follow- ing screen after each measurement. Illustration 30: Output of measurement values 1 dE*m: Difference of current 2 Measurement angles reading to the average value for the 15°... - Page 32 6 | Browse BYK-Gardner GmbH micro-TRI-color 300 100 114 E 2103...
-
Page 33: Browse
BYK-Gardner GmbH Browse | 6 6 Browse Measurement values are stored in the instrument memory. The instrument mem- ory is accessible via the Browse icon in the main menu. Stored values are the aver- age values of the measured sample. -
Page 34: Delete Measurement Values
6 | Browse BYK-Gardner GmbH 6.2 Delete Measurement Values 1. Click on the Browse icon in the main menu. 2. Select the sample(s) you want to delete by clicking on the square in front of the sample name. Illustration 33: Select measurement for deletion 3. -
Page 35: Configuration
BYK-Gardner GmbH Configuration | 7 7 Configuration The configuration menu is accessible via the Configuration icon in the main menu. You can change settings or get instrument information here. Illustration 34: Configuration menu – part #1 Illustration 35: Configuration menu – part #2 [} 36]: The instrument... -
Page 36: Turn Beeper On / Off
7 | Configuration BYK-Gardner GmbH 7.1 Turn Beeper On / Off 1. Click on the Configuration icon in the main menu. 2. The configuration menu appears. 3. Click on the switch symbol in order to turn the beeper on or off. - Page 37 BYK-Gardner GmbH Configuration | 7 Illustration 37: WiFi connection – Country selection 3. Select your country from the list and proceed. Illustration 38: WiFi connection – Inactive 4. Click on the switch symbol in the upper right corner in order to turn on WiFi.
- Page 38 7 | Configuration BYK-Gardner GmbH Illustration 40: WiFi connection – Password for network 8. Enter the WiFi key and click on the checkmark in the upper right corner. You can cancel by clicking on the “x” in the upper left corner.
-
Page 39: Disconnect From Wifi
BYK-Gardner GmbH Configuration | 7 7.2.2 Disconnect from WiFi 1. Go to Configuration > WiFi. 2. Click on the switch symbol in the upper right corner in order to turn off WiFi. Illustration 43: Turn off WiFi The instrument is disconnected from WiFi. -
Page 40: Select Language
7 | Configuration BYK-Gardner GmbH 7.3 Select Language The number of selectable languages is extendable up to 20. Approach BYK-Gard- ner if you want to implement a specific instrument language. 1. Go to Configuration > Language. 2. A list with selectable languages appears. -
Page 41: Select Time Zone
BYK-Gardner GmbH Configuration | 7 7.4.1 Select Time Zone 1. Go to Configuration > Date / Time > Time Zone. 2. A list with selectable time zones appears. Illustration 46: Select time zone 3. Use the yellow scroll bar in order to browse the list. -
Page 42: Set Date
7 | Configuration BYK-Gardner GmbH 7.4.3 Set Date 1. Go to Configuration > Date / Time > Date. 2. The screen below is displayed. Illustration 48: Set date 3. Set year, month, day, separator and date format (sequence of day, month and year) by wiping true the displayed options. -
Page 43: Get Instrument Information
BYK-Gardner GmbH Configuration | 7 7.5 Get Instrument Information You have following options: Get General Information [} 43] Get Calibration Information [} 43] Get Network Information [} 44] 7.5.1 Get General Information 1. Go to Configuration > Information. 2. General instrument information is displayed. -
Page 44: Get Network Information
7 | Configuration BYK-Gardner GmbH Illustration 50: Calibration information It shows the date of the last white calibration and the last green check. See also 2 Calibration and Check [} 23] 7.5.3 Get Network Information 1. Go to Configuration > Information. 2. Use the yellow scroll bar in order to browse the list until you reach the section Network. -
Page 45: Perform Factory Reset
BYK-Gardner GmbH Configuration | 7 7.6 Perform Factory Reset A factory reset clears following data in the instrument memory: • All readings • All settings • Calibration details • Connected WiFi networks • Counter for measured samples 1. Go to Configuration > Factory Reset. - Page 46 8 | Appendix BYK-Gardner GmbH micro-TRI-color 300 100 114 E 2103...
-
Page 47: Appendix
BYK-Gardner GmbH Appendix | 8 8 Appendix 8.1 Technical Data 8.1.1 General Memory Up to 500 measurements Power Supply Li-Ion battery pack Interface USB type B, proprietary plug Docking Station Interface USB type C Instrument Power Input ; max. 2 A... -
Page 48: Touch Screen
8 | Appendix BYK-Gardner GmbH 8.1.3 Touch Screen Stylus Pen Input Tip radius ≥ 0.8 polyacetal pen Activation Force 40 (typ.) 80 (max.) gf (gram force) Do not operate it with anything but a polyacetal pen (tip radius ≥ 0.8 mm) or a finger. -
Page 49: Troubleshooting
BYK-Gardner GmbH Appendix | 8 8.2 Troubleshooting Problem/Error message Solution Error! Repeat white calibration. White tile calibration. Error! Please clean Clean white tile and repeat white cali- white tile or call bration. customer service. If white calibration fails again, contact service. -
Page 50: Service And Maintenance
8 | Appendix BYK-Gardner GmbH 8.3 Service and Maintenance 8.3.1 General Information CAUTION Damage by inserting of objects Inserting any objects into the measurement aperture could damage the instru- ment. CAUTION Damage by using acetone for cleaning Do not use acetone for cleaning. Instrument housing, white and green standard tile can be damaged when they get in contact with acetone. -
Page 51: Cleaning The Standard Tiles
Preventive maintenance is recommended every 12 – 24 months depending on us- age and should only be performed by BYK-Gardner technical service centers. For the list of certified service centers see Service Points [} 52]. -
Page 52: Service Points
8 | Appendix BYK-Gardner GmbH 8.3.6 Service Points BYK-Gardner global service centers with ISO / IEC 17025 accredited lab- oratories Headquarter Germany Headquarter USA Headquarter PTE c/o BYK-Gardner GmbH c/o BYK-Gardner USA c/o BYK USA dba Paul N. Gardner Lausitzer Strasse 8, 82538 9104 Guilford Rd., Co-... - Page 53 BYK-Gardner GmbH Notes 300 100 114 E 2103 micro-TRI-color...
- Page 54 BYK-Gardner GmbH micro-TRI-color 300 100 114 E 2103...
- Page 55 BYK-Gardner GmbH 300 100 114 E 2103 micro-TRI-color...
- Page 56 Download your software from: https://www.byk-instruments.com/software Download your manual from the product page: https://www.byk-instruments.com Find more information on our products and services: https://www.byk-instruments.com 300 100 114 E 2103...
Need help?
Do you have a question about the micro-TRI-color 345 000 015 Series and is the answer not in the manual?
Questions and answers