
Related Manuals for DIEBOLD NIXDORF CS 5500


Summary of Contents for DIEBOLD NIXDORF CS 5500
- Page 1 Diebold Nixdorf CS 5500 Front-load Lobby Cash Dispenser Operating Guide TP-821763-001F PD 7326 October 2017...
- Page 2 Diebold, Incorporated or its subsidiaries (collectively “Diebold Nixdorf”) that appear in this document are used for informational purposes only and Diebold Nixdorf claims no rights thereto, nor does such use indicate any affiliation with or any endorsement of Diebold Nixdorf or Diebold Nixdorf products by the owners thereof.
- Page 3 TP-821763-001F 10/2017 Updated information about the enhanced biometric fingerprint reader. Updated the system name to Diebold Nixdorf CS 5500. Updated all references of "terminal" to "system". Copyright ©Diebold, Incorporated (9/2014, 8/2015, 12/2015, 3/2016) - All Rights Reserved Copyright ©Diebold Nixdorf, Inc. (4/2017, 10/2017) - All Rights Reserved...
-
Page 4: Table Of Contents
........Copyright ©Diebold, Incorporated (9/2014, 8/2015, 12/2015, 3/2016) - All Rights Reserved Copyright ©Diebold Nixdorf, Inc. (4/2017, 10/2017) - All Rights Reserved TP-821763-001F... - Page 5 ........Copyright ©Diebold, Incorporated (9/2014, 8/2015, 12/2015, 3/2016) - All Rights Reserved Copyright ©Diebold Nixdorf, Inc. (4/2017, 10/2017) - All Rights Reserved TP-821763-001F...
- Page 6 Figure 3-16 Accessing the Motorized Card Reader, the Receipt Printer and the Processor ..3-23 Copyright ©Diebold, Incorporated (9/2014, 8/2015, 12/2015, 3/2016) - All Rights Reserved Copyright ©Diebold Nixdorf, Inc. (4/2017, 10/2017) - All Rights Reserved TP-821763-001F...
-
Page 7: Introduction
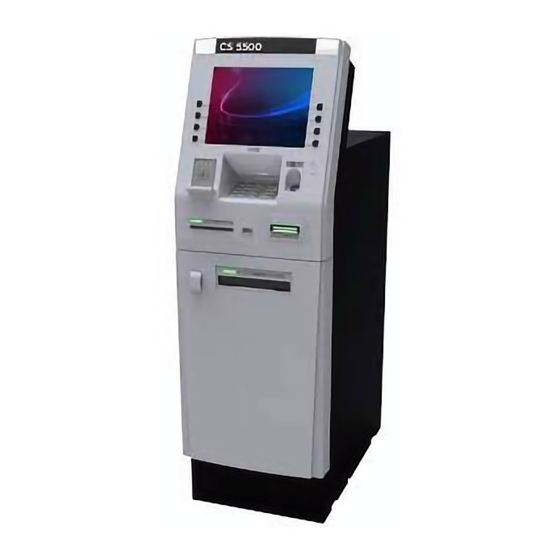
Section 1 Introduction Product Description The CS 5500 front-load cash dispenser is a free-standing system that dispenses cash and printed receipts to the consumer. Supplies are replenished and service is performed from the front of the cash dispenser. The cash dispenser is installed in interior locations, such as bank lobbies, transportation terminals, department stores, or work locations. -
Page 8: Figure 1-1 Cs 5500 Front-Load Lobby Cash Dispenser
View A System with 13 mm UL Safe Figure 1-1 CS 5500 Front-load Lobby Cash Dispenser (sheet 1 of 3) Copyright ©Diebold, Incorporated (9/2014, 8/2015, 12/2015, 3/2016) - All Rights Reserved Copyright ©Diebold Nixdorf, Inc. (4/2017, 10/2017) - All Rights Reserved... - Page 9 View B System with 40 mm CEN Safe Figure 1-1 CS 5500 Front-load Lobby Cash Dispenser (sheet 2 of 3) Copyright ©Diebold, Incorporated (9/2014, 8/2015, 12/2015, 3/2016) - All Rights Reserved Copyright ©Diebold Nixdorf, Inc. (4/2017, 10/2017) - All Rights Reserved...
- Page 10 View C System with 6 mm UL Business Hour Safe Figure 1-1 CS 5500 Front-load Lobby Cash Dispenser (sheet 3 of 3) Copyright ©Diebold, Incorporated (9/2014, 8/2015, 12/2015, 3/2016) - All Rights Reserved Copyright ©Diebold Nixdorf, Inc. (4/2017, 10/2017) - All Rights Reserved...
-
Page 11: Before Performing Maintenance Procedures
• Maintenance procedures (Section 3) • Related documentation (Appendix A) • Cleaning the exterior of the cash dispenser (Appendix B) Copyright ©Diebold, Incorporated (9/2014, 8/2015, 12/2015, 3/2016) - All Rights Reserved Copyright ©Diebold Nixdorf, Inc. (4/2017, 10/2017) - All Rights Reserved TP-821763-001F... -
Page 12: General Safety Precautions
Severe bodily injury, death from electrical shock, or equipment damage could occur. • Always turn off the cash dispenser before removing or installing modules. Copyright ©Diebold, Incorporated (9/2014, 8/2015, 12/2015, 3/2016) - All Rights Reserved Copyright ©Diebold Nixdorf, Inc. (4/2017, 10/2017) - All Rights Reserved TP-821763-001F... -
Page 13: Warning And Caution Labels
High temperatures that can cause pain or High temperature burns are present in the area of this label. hazard Do not touch until cooled. Copyright ©Diebold, Incorporated (9/2014, 8/2015, 12/2015, 3/2016) - All Rights Reserved Copyright ©Diebold Nixdorf, Inc. (4/2017, 10/2017) - All Rights Reserved TP-821763-001F... -
Page 14: Radio Interference Label
Terminology The glossary at the back of this document lists terminology that is commonly used with this product. Copyright ©Diebold, Incorporated (9/2014, 8/2015, 12/2015, 3/2016) - All Rights Reserved Copyright ©Diebold Nixdorf, Inc. (4/2017, 10/2017) - All Rights Reserved TP-821763-001F... -
Page 15: Devices In The Cash Dispenser
Access points used by the consumer are shown in Figure 2-1 and described in Section 2.1.1 through Section 2.1.13. Copyright ©Diebold, Incorporated (9/2014, 8/2015, 12/2015, 3/2016) - All Rights Reserved Copyright ©Diebold Nixdorf, Inc. (4/2017, 10/2017) - All Rights Reserved TP-821763-001F... -
Page 16: Figure 2-1 Access Points Used By The Consumer
Headphone jack Contactless card reader Fingerprint reader Upper fascia lock Figure 2-1 Access Points used by the Consumer Copyright ©Diebold, Incorporated (9/2014, 8/2015, 12/2015, 3/2016) - All Rights Reserved Copyright ©Diebold Nixdorf, Inc. (4/2017, 10/2017) - All Rights Reserved TP-821763-001F... -
Page 17: Fascia Mirror
PIN pad to secure information about the transaction. Copyright ©Diebold, Incorporated (9/2014, 8/2015, 12/2015, 3/2016) - All Rights Reserved Copyright ©Diebold Nixdorf, Inc. (4/2017, 10/2017) - All Rights Reserved TP-821763-001F... -
Page 18: Headphone Jack
Lead-through indicators guide consumers to the next step in the transaction. Copyright ©Diebold, Incorporated (9/2014, 8/2015, 12/2015, 3/2016) - All Rights Reserved Copyright ©Diebold Nixdorf, Inc. (4/2017, 10/2017) - All Rights Reserved TP-821763-001F... -
Page 19: Figure 2-2 Lead-Through Indicators
Example of a guide light Motorized card reader Dip card reader Dispenser Receipt printer Figure 2-2 Lead-through Indicators Copyright ©Diebold, Incorporated (9/2014, 8/2015, 12/2015, 3/2016) - All Rights Reserved Copyright ©Diebold Nixdorf, Inc. (4/2017, 10/2017) - All Rights Reserved TP-821763-001F... - Page 20 Contactless card reader (optional) Section 2.2.8 Consumer display Section 2.3.2 The location of each device is shown in Figure 2-3. Copyright ©Diebold, Incorporated (9/2014, 8/2015, 12/2015, 3/2016) - All Rights Reserved Copyright ©Diebold Nixdorf, Inc. (4/2017, 10/2017) - All Rights Reserved TP-821763-001F...
-
Page 21: Figure 2-3 Consumer Devices In The Top Chassis
Enhanced biometric fingerprint reader (optional) Fingerprint reader (optional) Contactless card reader (optional) Figure 2-3 Consumer Devices in the Top Chassis Copyright ©Diebold, Incorporated (9/2014, 8/2015, 12/2015, 3/2016) - All Rights Reserved Copyright ©Diebold Nixdorf, Inc. (4/2017, 10/2017) - All Rights Reserved TP-821763-001F... -
Page 22: Figure 2-4 Motorized Card Reader
Refer to the Motorized Card Reader (with chip, 123) Operating Guide (TP-820815-001C) for more information. Figure 2-4 Motorized Card Reader Copyright ©Diebold, Incorporated (9/2014, 8/2015, 12/2015, 3/2016) - All Rights Reserved Copyright ©Diebold Nixdorf, Inc. (4/2017, 10/2017) - All Rights Reserved TP-821763-001F... -
Page 23: Dip Card Reader
Refer to the Dip Card Reader (with chip, 123) Operating Guide (TP-820814-001C) for more information. Figure 2-5 Dip Card Reader Copyright ©Diebold, Incorporated (9/2014, 8/2015, 12/2015, 3/2016) - All Rights Reserved Copyright ©Diebold Nixdorf, Inc. (4/2017, 10/2017) - All Rights Reserved TP-821763-001F... -
Page 24: Secure Card Reader (Optional)
Refer to the ActivEdge Secure Card Reader Operating Guide (TP-821629-001A) for more information. Figure 2-6 Secure Card Reader 2-10 Copyright ©Diebold, Incorporated (9/2014, 8/2015, 12/2015, 3/2016) - All Rights Reserved Copyright ©Diebold Nixdorf, Inc. (4/2017, 10/2017) - All Rights Reserved TP-821763-001F... -
Page 25: Receipt Printer
Refer to the One-sided Graphical Thermal Receipt Printer (49-240508-000A) Operating Guide (TP-821718-001A) for more information. Figure 2-7 Receipt Printer 2-11 Copyright ©Diebold, Incorporated (9/2014, 8/2015, 12/2015, 3/2016) - All Rights Reserved Copyright ©Diebold Nixdorf, Inc. (4/2017, 10/2017) - All Rights Reserved TP-821763-001F... -
Page 26: Fingerprint Reader (Optional)
• Resistant to electrostatic discharge • Fingerprint data is encrypted • Counterfeit finger rejection Figure 2-8 Fingerprint Reader 2-12 Copyright ©Diebold, Incorporated (9/2014, 8/2015, 12/2015, 3/2016) - All Rights Reserved Copyright ©Diebold Nixdorf, Inc. (4/2017, 10/2017) - All Rights Reserved TP-821763-001F... -
Page 27: Enhanced Biometric Fingerprint Reader (Optional)
• Fingerprint data is hardware encrypted • Counterfeit finger rejection Enhanced biometric fingerprint reader Figure 2-9 Enhanced Biometric Fingerprint Reader Module 2-13 Copyright ©Diebold, Incorporated (9/2014, 8/2015, 12/2015, 3/2016) - All Rights Reserved Copyright ©Diebold Nixdorf, Inc. (4/2017, 10/2017) - All Rights Reserved TP-821763-001F... -
Page 28: Barcode Scanner (Optional)
Figure 2-10 2D Barcode Scanner 2-14 Copyright ©Diebold, Incorporated (9/2014, 8/2015, 12/2015, 3/2016) - All Rights Reserved Copyright ©Diebold Nixdorf, Inc. (4/2017, 10/2017) - All Rights Reserved TP-821763-001F... -
Page 29: Contactless Card Reader (Optional)
(contact and contactless) Refer to the Contactless Card Reader (CCR2e/CCR2) Operating Guide (TP-821579-001B) for more information. 2-15 Copyright ©Diebold, Incorporated (9/2014, 8/2015, 12/2015, 3/2016) - All Rights Reserved Copyright ©Diebold Nixdorf, Inc. (4/2017, 10/2017) - All Rights Reserved TP-821763-001F... -
Page 30: Figure 2-11 Contactless Card Reader
Main board View A Contactless Card Reader, CCR4-CR (FB-000345-000B) Figure 2-11 Contactless Card Reader (sheet 1 of 3) 2-16 Copyright ©Diebold, Incorporated (9/2014, 8/2015, 12/2015, 3/2016) - All Rights Reserved Copyright ©Diebold Nixdorf, Inc. (4/2017, 10/2017) - All Rights Reserved TP-821763-001F... - Page 31 Main board View B Contactless Card Reader, CCR4-CR (FB-000345-000C) Figure 2-11 Contactless Card Reader (sheet 2 of 3) 2-17 Copyright ©Diebold, Incorporated (9/2014, 8/2015, 12/2015, 3/2016) - All Rights Reserved Copyright ©Diebold Nixdorf, Inc. (4/2017, 10/2017) - All Rights Reserved TP-821763-001F...
- Page 32 View C Contactless Card Reader, CCR2-ID Figure 2-11 Contactless Card Reader (sheet 3 of 3) 2-18 Copyright ©Diebold, Incorporated (9/2014, 8/2015, 12/2015, 3/2016) - All Rights Reserved Copyright ©Diebold Nixdorf, Inc. (4/2017, 10/2017) - All Rights Reserved TP-821763-001F...
-
Page 33: Devices Used By The Operator
• Dual USB port • Maintenance mode switch • Idle power (on/off) switch • Main power (on/off) switch (optional) 2-19 Copyright ©Diebold, Incorporated (9/2014, 8/2015, 12/2015, 3/2016) - All Rights Reserved Copyright ©Diebold Nixdorf, Inc. (4/2017, 10/2017) - All Rights Reserved TP-821763-001F... -
Page 34: Figure 2-12 Power Supply
Hard drive disk (inside of the processor) Consumer display View A ActivPower System Figure 2-12 Power Supply (sheet 1 of 2) 2-20 Copyright ©Diebold, Incorporated (9/2014, 8/2015, 12/2015, 3/2016) - All Rights Reserved Copyright ©Diebold Nixdorf, Inc. (4/2017, 10/2017) - All Rights Reserved TP-821763-001F... - Page 35 Hard drive disk (inside of the processor) Consumer display View B Basic Power System Figure 2-12 Power Supply (sheet 2 of 2) 2-21 Copyright ©Diebold, Incorporated (9/2014, 8/2015, 12/2015, 3/2016) - All Rights Reserved Copyright ©Diebold Nixdorf, Inc. (4/2017, 10/2017) - All Rights Reserved TP-821763-001F...
-
Page 36: Activpower System
The system processor power switch (Figure 2-12) is not for customer operations. If this switch is used inappropriately, data could be lost or damaged. 2-22 Copyright ©Diebold, Incorporated (9/2014, 8/2015, 12/2015, 3/2016) - All Rights Reserved Copyright ©Diebold Nixdorf, Inc. (4/2017, 10/2017) - All Rights Reserved TP-821763-001F... -
Page 37: Basic Power System
Refer to the Agilis 91x XV Maintenance Manual (TP-820744-001L) or other software documentation for more information. 2-23 Copyright ©Diebold, Incorporated (9/2014, 8/2015, 12/2015, 3/2016) - All Rights Reserved Copyright ©Diebold Nixdorf, Inc. (4/2017, 10/2017) - All Rights Reserved TP-821763-001F... -
Page 38: Consumer Display
• If the display is not on, double-check the main power button inside the top chassis (Figure 2-12). Figure 2-13 Consumer Display 2-24 Copyright ©Diebold, Incorporated (9/2014, 8/2015, 12/2015, 3/2016) - All Rights Reserved Copyright ©Diebold Nixdorf, Inc. (4/2017, 10/2017) - All Rights Reserved TP-821763-001F... -
Page 39: Disk Drives
• A solid state disk with 120 GB capacity is supported. • An optional external optical drive, such as a DVD, can also be installed. 2-25 Copyright ©Diebold, Incorporated (9/2014, 8/2015, 12/2015, 3/2016) - All Rights Reserved Copyright ©Diebold Nixdorf, Inc. (4/2017, 10/2017) - All Rights Reserved TP-821763-001F... -
Page 40: Devices In The Safe
Mechanical keylock Safe door locks Dispenser with divert and dispense cassettes Figure 2-15 Devices in the Safe 2-26 Copyright ©Diebold, Incorporated (9/2014, 8/2015, 12/2015, 3/2016) - All Rights Reserved Copyright ©Diebold Nixdorf, Inc. (4/2017, 10/2017) - All Rights Reserved TP-821763-001F... -
Page 41: Dispenser
To prevent this, refer to the software documentation for specific details. 2-27 Copyright ©Diebold, Incorporated (9/2014, 8/2015, 12/2015, 3/2016) - All Rights Reserved Copyright ©Diebold Nixdorf, Inc. (4/2017, 10/2017) - All Rights Reserved TP-821763-001F... -
Page 42: Figure 2-16 Activdispense
View A Four-cassette Dispenser View B Two-cassette Dispenser Figure 2-16 ActivDispense 2-28 Copyright ©Diebold, Incorporated (9/2014, 8/2015, 12/2015, 3/2016) - All Rights Reserved Copyright ©Diebold Nixdorf, Inc. (4/2017, 10/2017) - All Rights Reserved TP-821763-001F... -
Page 43: Divert Cassette And Divert Bin
Refer to the ActivDispense Operating Guide (TP-821761-001C) for more information. Divert/retract cassette (secure) Divert/retract cassette (convenience) Divert bin Figure 2-17 Divert/Retract Cassette and Divert Bin 2-29 Copyright ©Diebold, Incorporated (9/2014, 8/2015, 12/2015, 3/2016) - All Rights Reserved Copyright ©Diebold Nixdorf, Inc. (4/2017, 10/2017) - All Rights Reserved TP-821763-001F... -
Page 44: Dispense Cassettes
Refer to the ActivDispense Operating Guide (TP-821761-001C) for more information. Dispense cassette (tamper indicating) Dispense cassette (convenience) Figure 2-18 Dispense Cassettes 2-30 Copyright ©Diebold, Incorporated (9/2014, 8/2015, 12/2015, 3/2016) - All Rights Reserved Copyright ©Diebold Nixdorf, Inc. (4/2017, 10/2017) - All Rights Reserved TP-821763-001F... -
Page 45: Secure Safe Door Lock
Keylock for mechanical combination lock Single/dual electronic lock One-time-code electronic lock Keylock Class B Figure 2-19 Safe Door Locks 2-31 Copyright ©Diebold, Incorporated (9/2014, 8/2015, 12/2015, 3/2016) - All Rights Reserved Copyright ©Diebold Nixdorf, Inc. (4/2017, 10/2017) - All Rights Reserved TP-821763-001F... -
Page 46: Alarm Sensors
Seismic detectors sense physical or torch attacks on the safe. A network interface must be present for the seismic detectors to function. Figure 2-20 Seismic Detector 2-32 Copyright ©Diebold, Incorporated (9/2014, 8/2015, 12/2015, 3/2016) - All Rights Reserved Copyright ©Diebold Nixdorf, Inc. (4/2017, 10/2017) - All Rights Reserved TP-821763-001F... -
Page 47: Heat Thermostat
Basic alarms panel Heat thermostat Figure 2-21 Heat Thermostat 2-33 Copyright ©Diebold, Incorporated (9/2014, 8/2015, 12/2015, 3/2016) - All Rights Reserved Copyright ©Diebold Nixdorf, Inc. (4/2017, 10/2017) - All Rights Reserved TP-821763-001F... -
Page 48: Maintenance Procedures
NOTE Maintenance procedures that are specific for each module are provided in the documents listed in Appendix A. Copyright ©Diebold, Incorporated (9/2014, 8/2015, 12/2015, 3/2016) - All Rights Reserved Copyright ©Diebold Nixdorf, Inc. (4/2017, 10/2017) - All Rights Reserved TP-821763-001F... -
Page 49: Touch Points On The Cash Dispenser And Devices
Dispenser handle Cassette lock lever Cassette button Cassette handle Figure 3-1 Examples of Touch Points on the Dispenser Copyright ©Diebold, Incorporated (9/2014, 8/2015, 12/2015, 3/2016) - All Rights Reserved Copyright ©Diebold Nixdorf, Inc. (4/2017, 10/2017) - All Rights Reserved TP-821763-001F... -
Page 50: Opening The Top Chassis
Insert the key and turn it clockwise Pull out the top chassis Figure 3-2 Opening the Top Chassis Copyright ©Diebold, Incorporated (9/2014, 8/2015, 12/2015, 3/2016) - All Rights Reserved Copyright ©Diebold Nixdorf, Inc. (4/2017, 10/2017) - All Rights Reserved TP-821763-001F... -
Page 51: Closing The Top Chassis
Turn the key counterclockwise to lock the top chassis and then remove the key Figure 3-3 Closing the Top Chassis Copyright ©Diebold, Incorporated (9/2014, 8/2015, 12/2015, 3/2016) - All Rights Reserved Copyright ©Diebold Nixdorf, Inc. (4/2017, 10/2017) - All Rights Reserved TP-821763-001F... -
Page 52: Opening The Lower Fascia
2. Turn the key clockwise and open the lower fascia. Insert the key and turn it clockwise Open the lower fascia Figure 3-4 Opening the Lower Fascia Copyright ©Diebold, Incorporated (9/2014, 8/2015, 12/2015, 3/2016) - All Rights Reserved Copyright ©Diebold Nixdorf, Inc. (4/2017, 10/2017) - All Rights Reserved TP-821763-001F... -
Page 53: Closing The Lower Fascia
Turn the key counterclockwise to lock the lower fascia and then remove the key Figure 3-5 Closing the Lower Fascia Copyright ©Diebold, Incorporated (9/2014, 8/2015, 12/2015, 3/2016) - All Rights Reserved Copyright ©Diebold Nixdorf, Inc. (4/2017, 10/2017) - All Rights Reserved TP-821763-001F... -
Page 54: Opening And Closing The Door Of The Safe
Keylock UL 437 (optional) Handle to open the door Figure 3-6 Locks and Handles on the Door of the Safe Copyright ©Diebold, Incorporated (9/2014, 8/2015, 12/2015, 3/2016) - All Rights Reserved Copyright ©Diebold Nixdorf, Inc. (4/2017, 10/2017) - All Rights Reserved TP-821763-001F... -
Page 55: Opening Mechanical Combination Locks (Without Mechanical Keylock)
7. Open the door of the safe and complete the maintenance procedures. Refer to the operating guides listed in Appendix A for information about maintenance procedures. Copyright ©Diebold, Incorporated (9/2014, 8/2015, 12/2015, 3/2016) - All Rights Reserved Copyright ©Diebold Nixdorf, Inc. (4/2017, 10/2017) - All Rights Reserved TP-821763-001F... -
Page 56: Figure 3-7 Opening The Safe Door (Mechanical Lock Without Keylock)
Turn the handle clockwise until it stops Open the door of the safe Figure 3-7 Opening the Safe Door (mechanical lock without keylock) Copyright ©Diebold, Incorporated (9/2014, 8/2015, 12/2015, 3/2016) - All Rights Reserved Copyright ©Diebold Nixdorf, Inc. (4/2017, 10/2017) - All Rights Reserved TP-821763-001F... -
Page 57: Closing Mechanical Combination Locks (Without Mechanical Keylock)
7. Pull firmly on the door of the safe to confirm that it is secure. 8. Close the lower fascia. 3-10 Copyright ©Diebold, Incorporated (9/2014, 8/2015, 12/2015, 3/2016) - All Rights Reserved Copyright ©Diebold Nixdorf, Inc. (4/2017, 10/2017) - All Rights Reserved TP-821763-001F... -
Page 58: Figure 3-8 Closing The Safe Door (Mechanical Lock Without Keylock)
Insert the key and turn it counterclockwise Remove the key from the dial Figure 3-8 Closing the Safe Door (mechanical lock without keylock) 3-11 Copyright ©Diebold, Incorporated (9/2014, 8/2015, 12/2015, 3/2016) - All Rights Reserved Copyright ©Diebold Nixdorf, Inc. (4/2017, 10/2017) - All Rights Reserved TP-821763-001F... -
Page 59: Opening Mechanical Combination Locks (With Mechanical Keylock)
8. Open the door of the safe and complete all maintenance. Refer to the appropriate operating guides listed in Appendix A for information about maintenance procedures. 3-12 Copyright ©Diebold, Incorporated (9/2014, 8/2015, 12/2015, 3/2016) - All Rights Reserved Copyright ©Diebold Nixdorf, Inc. (4/2017, 10/2017) - All Rights Reserved TP-821763-001F... -
Page 60: Figure 3-9 Opening The Safe Door (Mechanical Lock With Keylock)
Turn the handle clockwise until it stops Open the door of the safe Figure 3-9 Opening the Safe Door (mechanical lock with keylock) 3-13 Copyright ©Diebold, Incorporated (9/2014, 8/2015, 12/2015, 3/2016) - All Rights Reserved Copyright ©Diebold Nixdorf, Inc. (4/2017, 10/2017) - All Rights Reserved TP-821763-001F... -
Page 61: Closing Mechanical Combination Locks (With Mechanical Keylock)
9. Pull firmly on the door of the safe to confirm that it is secure. 10. Close the lower fascia. 3-14 Copyright ©Diebold, Incorporated (9/2014, 8/2015, 12/2015, 3/2016) - All Rights Reserved Copyright ©Diebold Nixdorf, Inc. (4/2017, 10/2017) - All Rights Reserved TP-821763-001F... -
Page 62: Figure 3-10 Closing The Safe Door (Mechanical Lock With Keylock)
Turn the key counterclockwise 180 degrees to lock the keylock Figure 3-10 Closing the Safe Door (mechanical lock with keylock) 3-15 Copyright ©Diebold, Incorporated (9/2014, 8/2015, 12/2015, 3/2016) - All Rights Reserved Copyright ©Diebold Nixdorf, Inc. (4/2017, 10/2017) - All Rights Reserved TP-821763-001F... -
Page 63: Opening Electronic Combination Locks (Without Mechanical Keylock)
Turn the handle clockwise until it stops Open the door of the safe Figure 3-11 Opening Safe Door (electronic locks without keylock) 3-16 Copyright ©Diebold, Incorporated (9/2014, 8/2015, 12/2015, 3/2016) - All Rights Reserved Copyright ©Diebold Nixdorf, Inc. (4/2017, 10/2017) - All Rights Reserved TP-821763-001F... -
Page 64: Closing Electronic Combination Locks (Without Mechanical Keylock)
Turn the handle counterclockwise until it stops Figure 3-12 Closing the Safe Door (electronic locks without keylock) 3-17 Copyright ©Diebold, Incorporated (9/2014, 8/2015, 12/2015, 3/2016) - All Rights Reserved Copyright ©Diebold Nixdorf, Inc. (4/2017, 10/2017) - All Rights Reserved TP-821763-001F... -
Page 65: Opening Electronic Combination Locks (With Mechanical Keylock)
Turn the handle clockwise until it stops Open the door of the safe Figure 3-13 Opening the Safe Door (electronic locks with keylock) 3-18 Copyright ©Diebold, Incorporated (9/2014, 8/2015, 12/2015, 3/2016) - All Rights Reserved Copyright ©Diebold Nixdorf, Inc. (4/2017, 10/2017) - All Rights Reserved TP-821763-001F... -
Page 66: Closing Electronic Combination Locks (With Mechanical Keylock)
7. Pull firmly on the door of the safe to confirm that it is secure. 8. Close the lower fascia. 3-19 Copyright ©Diebold, Incorporated (9/2014, 8/2015, 12/2015, 3/2016) - All Rights Reserved Copyright ©Diebold Nixdorf, Inc. (4/2017, 10/2017) - All Rights Reserved TP-821763-001F... -
Page 67: Accessing The Dispenser
6. When maintenance on the dispenser is complete, push the dispenser completely into the cash dispenser. Verify that the latch for the slide closes securely. 3-20 Copyright ©Diebold, Incorporated (9/2014, 8/2015, 12/2015, 3/2016) - All Rights Reserved Copyright ©Diebold Nixdorf, Inc. (4/2017, 10/2017) - All Rights Reserved TP-821763-001F... -
Page 68: Figure 3-15 Accessing The Dispenser
8. Close the lower fascia of the cash dispenser. NOTE Four-cassette dispenser shown. Dispenser handle Dispenser module Figure 3-15 Accessing the Dispenser 3-21 Copyright ©Diebold, Incorporated (9/2014, 8/2015, 12/2015, 3/2016) - All Rights Reserved Copyright ©Diebold Nixdorf, Inc. (4/2017, 10/2017) - All Rights Reserved TP-821763-001F... -
Page 69: Accessing The Maintenance Keyboard And Mouse
4. Perform the maintenance procedures. Refer to the operating guides for the modules listed in Appendix A for more information. 5. Close the top chassis. 3-22 Copyright ©Diebold, Incorporated (9/2014, 8/2015, 12/2015, 3/2016) - All Rights Reserved Copyright ©Diebold Nixdorf, Inc. (4/2017, 10/2017) - All Rights Reserved TP-821763-001F... -
Page 70: Figure 3-16 Accessing The Motorized Card Reader, The Receipt Printer And The Processor
Motorized card reader Receipt printer Figure 3-16 Accessing the Motorized Card Reader, the Receipt Printer and the Processor 3-23 Copyright ©Diebold, Incorporated (9/2014, 8/2015, 12/2015, 3/2016) - All Rights Reserved Copyright ©Diebold Nixdorf, Inc. (4/2017, 10/2017) - All Rights Reserved TP-821763-001F... -
Page 71: Appendix A Related Documentation
Consumer Bar Code Scanner Operating Guide TP-820813-001A TP-820817-001A Journal Printer Operating Guide SafeGard Electronic Lock Customer Operating Instructions TP-820466-001A Diebold Nixdorf CS 5500 Front-load Lobby Cash Dispenser Planning and Site Preparation TP-821762-001E Guide One-sided Graphical Thermal Receipt Printer (49-240508-000A) Operating Guide TP-821718-001A In English only. -
Page 72: Appendix B Cleaning The Exterior Of The System
Clean the enhanced biometric fingerprint reader with a solution of 70% isopropyl alcohol or a nonabrasive glass cleaner (such as Windex®) and a clean, soft, non-abrasive cloth. Copyright ©Diebold, Incorporated (9/2014, 8/2015, 12/2015, 3/2016) - All Rights Reserved Copyright ©Diebold Nixdorf, Inc. (4/2017, 10/2017) - All Rights Reserved TP-821763-001F... -
Page 73: Glossary
Glossary Cash dispenser The complete CS 5500 Front-load Lobby Cash Dispenser. Consumer Any person who uses the cash dispenser to conduct transactions. Device The electrical and mechanical components in the cash dispenser. Dispenser The module that takes currency or other dispensable media from the cassettes and presents it to the consumer.
Need help?
Do you have a question about the CS 5500 and is the answer not in the manual?
Questions and answers