
Related Manuals for DIEBOLD NIXDORF CS 5500


Summary of Contents for DIEBOLD NIXDORF CS 5500
- Page 1 Diebold Nixdorf CS 5500 Rear-load Lobby Cash Dispenser Operating Guide TP-821921-001C PD 7714 November 2017...
- Page 2 Diebold, Incorporated or its subsidiaries (collectively “Diebold Nixdorf”) that appear in this document are used for informational purposes only and Diebold Nixdorf claims no rights thereto, nor does such use indicate any affiliation with or any endorsement of Diebold Nixdorf or Diebold Nixdorf products by the owners thereof.
-
Page 3: Table Of Contents
....... Copyright ©Diebold, Incorporated (7/2015) - All Rights Reserved Copyright ©Diebold Nixdorf (11/2017) - All Rights Reserved TP-821921-001C... - Page 4 ........Figure 3-7 Open the Safe Door (CS 5500 original version rear-load system shown) ... . Figure 3-8 Opening the Mechanical Combination Lock .
- Page 5 ......... . 3-27 Figure 3-25 Closing the Upper Chassis (CS 5500 full-height, rear-load system shown) ... 3-29 Copyright ©Diebold, Incorporated (7/2015) - All Rights Reserved...
-
Page 6: Introduction
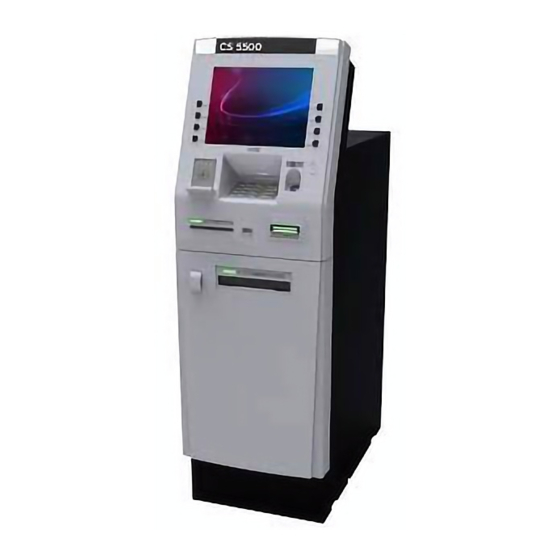
Supplies are replenished and service procedures are performed from the back of the system. There are several styles of CS 5500 rear-load lobby cash dispensers. • Original version of the 5500 Figure 1-1 •... -
Page 7: Figure 1-1 Cs 5500 Original Version Rear-Load Lobby Cash Dispenser
Figure 1-1 CS 5500 Original Version Rear-load Lobby Cash Dispenser Copyright ©Diebold, Incorporated (7/2015) - All Rights Reserved Copyright ©Diebold Nixdorf (11/2017) - All Rights Reserved TP-821921-001C... -
Page 8: Maintenance Tasks
CS 5500 full height rear-load lobby cash dispenser Figure 1-2 CS 5500 Full-Height, Rear-load Lobby Cash Dispenser Standard and Optional Equipment The cash dispenser might not have all the features described in this manual. Refer to the documents in Appendix A for information about specific equipment. -
Page 9: Using This Manual
• Always turn off the cash dispenser before removing or installing modules. Copyright ©Diebold, Incorporated (7/2015) - All Rights Reserved Copyright ©Diebold Nixdorf (11/2017) - All Rights Reserved TP-821921-001C... -
Page 10: Radio Interference Label
A warning label (Figure 1-3) is included on cash dispensers available in Taiwan to meet Taiwan Class A regulatory requirements for radio frequency interference. Copyright ©Diebold, Incorporated (7/2015) - All Rights Reserved Copyright ©Diebold Nixdorf (11/2017) - All Rights Reserved TP-821921-001C... -
Page 11: Terminology
Figure 1-3 Taiwan Class A Label Terminology This document uses the following terminology: • Cash dispenser refers to the complete CS 5500 rear-load lobby cash dispenser. • Note(s) refers to documents of monetary value that are stored in the cassettes and dispensed from the dispenser. -
Page 12: Cash Dispenser Devices
fingerprint has been captured. The scanned data is encrypted before it is sent via the USB device. Copyright ©Diebold, Incorporated (7/2015) - All Rights Reserved Copyright ©Diebold Nixdorf (11/2017) - All Rights Reserved TP-821921-001C... - Page 13 At the end of a transaction, the consumer receives a printed receipt through the printer slot. Dispenser Slot Bank notes and other media are presented to the consumer through the dispenser slot. Copyright ©Diebold, Incorporated (7/2015) - All Rights Reserved Copyright ©Diebold Nixdorf (11/2017) - All Rights Reserved TP-821921-001C...
-
Page 14: Figure 2-1 Features On The Cash Dispenser Fascia
Headphone jack Contactless card reader Fingerprint reader Upper chassis service lock Dip card reader slot Figure 2-1 Features on the Cash Dispenser Fascia Copyright ©Diebold, Incorporated (7/2015) - All Rights Reserved Copyright ©Diebold Nixdorf (11/2017) - All Rights Reserved TP-821921-001C... -
Page 15: Lead-Through Indicators
Dip card reader lead-through indicator Motorized card reader lead-through indicator Active edge card reader indicator Dispenser lead-through indicator Receipt printer lead-through indicator Figure 2-2 Lead-through Indicators Copyright ©Diebold, Incorporated (7/2015) - All Rights Reserved Copyright ©Diebold Nixdorf (11/2017) - All Rights Reserved TP-821921-001C... -
Page 16: Devices In The Top Chassis
These devices shown in Figure 2-3 are described in the rest of this section. Refer to Section 2.1.1 , Figure 2-1 for information about additional devices. Copyright ©Diebold, Incorporated (7/2015) - All Rights Reserved Copyright ©Diebold Nixdorf (11/2017) - All Rights Reserved TP-821921-001C... -
Page 17: Figure 2-3 Consumer Devices In The Top Chassis Of The Cs 5500 Original Version Rear-Load System
Contactless card reader (optional) Contactless card reader (optional) (Asia Pacific only) Figure 2-3 Consumer Devices in the Top Chassis of the CS 5500 Original Version Rear-load System Copyright ©Diebold, Incorporated (7/2015) - All Rights Reserved Copyright ©Diebold Nixdorf (11/2017) - All Rights Reserved... -
Page 18: Figure 2-4 Consumer Devices In The Top Chassis Of The Cs 5500 Full-Height, Rear-Load System
2D barcode scanner (optional) Contactless card reader (optional) (Asia Pacific only) Figure 2-4 Consumer Devices in the Top Chassis of the CS 5500 Full-Height, Rear-load System Copyright ©Diebold, Incorporated (7/2015) - All Rights Reserved Copyright ©Diebold Nixdorf (11/2017) - All Rights Reserved... -
Page 19: Figure 2-5 Motorized Card Reader
Refer to the Motorized Card Reader (with chip, 123) Operating Guide (TP-820815-001C) for more information. Figure 2-5 Motorized Card Reader Copyright ©Diebold, Incorporated (7/2015) - All Rights Reserved Copyright ©Diebold Nixdorf (11/2017) - All Rights Reserved TP-821921-001C... -
Page 20: Figure 2-6 Dip Card Reader
An optional active edge card reader is available. The card is inserted long edge first in this reader. Jitter and Advanced Skimming Detection/Prevention is required. Figure 2-7 Active Edge Card Reader Copyright ©Diebold, Incorporated (7/2015) - All Rights Reserved Copyright ©Diebold Nixdorf (11/2017) - All Rights Reserved TP-821921-001C... -
Page 21: Figure 2-8 Receipt Printer
Refer to the One-sided Graphical Thermal Receipt Printer (49-240508-000A) Operating Guide (TP-821718-001A) for more information. Figure 2-8 Receipt Printer 2-10 Copyright ©Diebold, Incorporated (7/2015) - All Rights Reserved Copyright ©Diebold Nixdorf (11/2017) - All Rights Reserved TP-821921-001C... -
Page 22: Figure 2-9 Fingerprint Reader With Its Cover
• Compatible with Windows® 7, Vista, XP Professional, 2000 and Windows Server 2000, 2003, 2008 Figure 2-9 Fingerprint Reader with its Cover 2-11 Copyright ©Diebold, Incorporated (7/2015) - All Rights Reserved Copyright ©Diebold Nixdorf (11/2017) - All Rights Reserved TP-821921-001C... -
Page 23: Figure 2-10 Biometric Finger Print Reader
CCD (charge coupled device) and imaging technology to read barcodes. The scanner can decode both 1D and 2D bar codes. Figure 2-11 2D Barcode Scanner 2-12 Copyright ©Diebold, Incorporated (7/2015) - All Rights Reserved Copyright ©Diebold Nixdorf (11/2017) - All Rights Reserved TP-821921-001C... -
Page 24: Figure 2-12 Contactless Card Reader
• Embedded protection against dual interface smart card damage with switch feature to select the active interface (contact and contactless) Figure 2-12 Contactless Card Reader 2-13 Copyright ©Diebold, Incorporated (7/2015) - All Rights Reserved Copyright ©Diebold Nixdorf (11/2017) - All Rights Reserved TP-821921-001C... -
Page 25: Devices In The Fascia And Top Chassis Used By The Operator
• Idle power (on/off) switch • Main power (on/off) switch • Hard drive disk (inside of the processor) • External DVD/ROM (optional) 2-14 Copyright ©Diebold, Incorporated (7/2015) - All Rights Reserved Copyright ©Diebold Nixdorf (11/2017) - All Rights Reserved TP-821921-001C... -
Page 26: Figure 2-14 Fascia And Top Chassis Devices Used By The Operator In The Cs 5500 Original Version Rear-Load System
Idle power (on/off) switch DC 4 output (18 pin) Main power (on/off) switch Figure 2-14 Fascia and Top Chassis Devices Used by the Operator in the CS 5500 Original Version Rear-load System 2-15 Copyright ©Diebold, Incorporated (7/2015) - All Rights Reserved Copyright ©Diebold Nixdorf (11/2017) - All Rights Reserved... -
Page 27: Figure 2-15 Fascia And Top Chassis Devices Used By The Operator In The Cs Full-Height 5500 Rear-Load System
Basic power supply (also available) 49-263603-000A) Figure 2-15 Fascia and Top Chassis Devices Used by the Operator in the CS Full-Height 5500 Rear-load System 2-16 Copyright ©Diebold, Incorporated (7/2015) - All Rights Reserved Copyright ©Diebold Nixdorf (11/2017) - All Rights Reserved TP-821921-001C... -
Page 28: Figure 2-16 10.4-Inch Rear Display With Touch Screen
• Yellow light – DC-ON, DVI signal off • Green light – DC-ON, DVI signal On Figure 2-16 10.4-inch Rear Display with Touch Screen 2-17 Copyright ©Diebold, Incorporated (7/2015) - All Rights Reserved Copyright ©Diebold Nixdorf (11/2017) - All Rights Reserved TP-821921-001C... -
Page 29: Figure 2-17 All-In-One Module-Consumer Display
All-in-One Module - Consumer Display For the CS 5500 rear-load lobby cash dispenser, the processor module is attached to the consumer display which is assembled to the all in one module (Figure 2-17). The operator uses the consumer display for routine maintenance, balancing transaction reports, replenishing supplies and monitoring maintenance services. -
Page 30: Figure 2-18 Maintenance Keyboard
AC power to the cash dispenser must be removed at the quick disconnect device (such as a circuit breaker) for the cash dispenser. 2-19 Copyright ©Diebold, Incorporated (7/2015) - All Rights Reserved Copyright ©Diebold Nixdorf (11/2017) - All Rights Reserved TP-821921-001C... - Page 31 Refer to the Journal Printer Operating Guide (TP-820817-001A) for more information. 2-20 Copyright ©Diebold, Incorporated (7/2015) - All Rights Reserved Copyright ©Diebold Nixdorf (11/2017) - All Rights Reserved TP-821921-001C...
-
Page 32: Figure 2-19 Journal Printer
Figure 2-19 Journal Printer 2-21 Copyright ©Diebold, Incorporated (7/2015) - All Rights Reserved Copyright ©Diebold Nixdorf (11/2017) - All Rights Reserved TP-821921-001C... -
Page 33: Devices In The Safe
Secondary mechanical keylock (optional) Safe door locks Dispenser with divert and dispense cassettes Figure 2-20 Safe Devices (CS 5500 original version rear-load system shown) 2-22 Copyright ©Diebold, Incorporated (7/2015) - All Rights Reserved Copyright ©Diebold Nixdorf (11/2017) - All Rights Reserved... -
Page 34: Dispenser
Refer to the software documentation for your cash dispenser for specific details. Figure 2-21 ActivDispense 2-23 Copyright ©Diebold, Incorporated (7/2015) - All Rights Reserved Copyright ©Diebold Nixdorf (11/2017) - All Rights Reserved TP-821921-001C... -
Page 35: Divert Cassette And Divert Bin
Refer to the ActivDispense Operating Guide (TP-821761-001C) for more information. Divert/retract cassette (secure) Divert/retract cassette (convenience) Divert bin AFD 2.0 divert bin Figure 2-22 Divert/Retract Cassette and Divert Bin 2-24 Copyright ©Diebold, Incorporated (7/2015) - All Rights Reserved Copyright ©Diebold Nixdorf (11/2017) - All Rights Reserved TP-821921-001C... -
Page 36: Figure 2-23 Activdispense Cassettes
(tamper indicating cassette). Refer to the ActivDispense Operating Guide (TP-821761-001C) for more information. Dispense cassette (tamper indicating) Dispense cassette (convenience) Figure 2-23 ActivDispense Cassettes 2-25 Copyright ©Diebold, Incorporated (7/2015) - All Rights Reserved Copyright ©Diebold Nixdorf (11/2017) - All Rights Reserved TP-821921-001C... -
Page 37: Secure Safe Door Lock
Refer to Section 3.4 and Section 3.5 for information about using the lock to open and close the safe door. Refer to the appropriate lock operating instructions in Appendix A for more information about your lock. 2-26 Copyright ©Diebold, Incorporated (7/2015) - All Rights Reserved Copyright ©Diebold Nixdorf (11/2017) - All Rights Reserved TP-821921-001C... -
Page 38: Figure 2-24 Safe Door Locks (Cs 5500 Original Version Rear-Load System Shown)
OTC electronic lock - Cencon® system 2000 electronic lock Keylock Class B - S&G 6880 Keylocks Keylock UL 437 - secondary keylock (optional) - LaGard 2270 Keylocks Figure 2-24 Safe Door Locks (CS 5500 original version rear-load system shown) 2-27 Copyright ©Diebold, Incorporated (7/2015) - All Rights Reserved Copyright ©Diebold Nixdorf (11/2017) - All Rights Reserved... -
Page 39: Alarms Sensors
Seismic detectors (Figure 2-25) sense physical blows or torch attacks on the cash dispenser safe. A network interface must be present for the seismic detectors to function. Figure 2-25 Seismic Detector 2-28 Copyright ©Diebold, Incorporated (7/2015) - All Rights Reserved Copyright ©Diebold Nixdorf (11/2017) - All Rights Reserved TP-821921-001C... -
Page 40: Heat Thermostat
Figure 2-26, senses when the temperature inside the safe exceeds a certain level and then initiates an alarm. Basic alarms panel Heat thermostat Figure 2-26 Heat Thermostat 2-29 Copyright ©Diebold, Incorporated (7/2015) - All Rights Reserved Copyright ©Diebold Nixdorf (11/2017) - All Rights Reserved TP-821921-001C... -
Page 41: Top Chassis And Safe Maintenance
NOTE Refer to the module operating guides in Appendix A for information about module procedures. Copyright ©Diebold, Incorporated (7/2015) - All Rights Reserved Copyright ©Diebold Nixdorf (11/2017) - All Rights Reserved TP-821921-001C... -
Page 42: Cash Dispenser And Device Touch Points
Cassette handle Cassette button Cassette lock lever Figure 3-1 Examples of Touch Points on the ActivDispense (CS 5500 original version rear-load system shown) Copyright ©Diebold, Incorporated (7/2015) - All Rights Reserved Copyright ©Diebold Nixdorf (11/2017) - All Rights Reserved TP-821921-001C... -
Page 43: Accessing The Top Chassis (Original Version System)
1. Insert the key for the top chassis into the lock on the rear door. 2. Turn the key clockwise until it stops. Copyright ©Diebold, Incorporated (7/2015) - All Rights Reserved Copyright ©Diebold Nixdorf (11/2017) - All Rights Reserved TP-821921-001C... -
Page 44: Figure 3-3 Opening The Top Chassis (Full-Height System)
8. Refer to the appropriate operating guide in Appendix A for information about completing the maintenance procedures. Swing open the top chassis rear door Figure 3-3 Opening the Top Chassis (full-height system) Copyright ©Diebold, Incorporated (7/2015) - All Rights Reserved Copyright ©Diebold Nixdorf (11/2017) - All Rights Reserved TP-821921-001C... -
Page 45: Figure 3-4 Latch Release Bracket For Fascia And Rear-Load Tray (Full-Height System)
Latch release bracket for rear-load tray in the top chassis Upper top chassis rear-load tray handle Figure 3-4 Latch Release Bracket for Fascia and Rear-load Tray (full-height system) Copyright ©Diebold, Incorporated (7/2015) - All Rights Reserved Copyright ©Diebold Nixdorf (11/2017) - All Rights Reserved TP-821921-001C... -
Page 46: Figure 3-5 Opening The Top Chassis To Extend The Upper Top Chassis Rear-Load Tray (Full-Height System)
Extend the rear-load tray in the top chassis Figure 3-5 Opening the Top Chassis To Extend the Upper Top Chassis Rear-load Tray (full-height system) Copyright ©Diebold, Incorporated (7/2015) - All Rights Reserved Copyright ©Diebold Nixdorf (11/2017) - All Rights Reserved TP-821921-001C... -
Page 47: Opening The Safe Door
Keylock UL 437 (optional) - LaGard 2270 Keylocks Safe handle Can only be used as secondary lock. Figure 3-6 Safe Door Locks and Handles Copyright ©Diebold, Incorporated (7/2015) - All Rights Reserved Copyright ©Diebold Nixdorf (11/2017) - All Rights Reserved TP-821921-001C... - Page 48 2. Refer to Figure 2-24 to verify which primary and secondary locks are used and unlock the safe. 3. Turn the safe opening handle clockwise until it stops (Figure 3-7). 4. Open the safe door. Copyright ©Diebold, Incorporated (7/2015) - All Rights Reserved Copyright ©Diebold Nixdorf (11/2017) - All Rights Reserved TP-821921-001C...
-
Page 49: Figure 3-7 Open The Safe Door (Cs 5500 Original Version Rear-Load System Shown)
Opening the Safe Door Turn the safe opening handle clockwise Open the safe door Figure 3-7 Open the Safe Door (CS 5500 original version rear-load system shown) Copyright ©Diebold, Incorporated (7/2015) - All Rights Reserved Copyright ©Diebold Nixdorf (11/2017) - All Rights Reserved... -
Page 50: Opening The Mechanical Combination Locks (Lagard 3390Ex)
You must open the safe within six seconds after entering the correct combination; otherwise, it will relock. To open the safe, turn the safe handle clockwise until it stops. 3-10 Copyright ©Diebold, Incorporated (7/2015) - All Rights Reserved Copyright ©Diebold Nixdorf (11/2017) - All Rights Reserved TP-821921-001C... -
Page 51: Opening The Cencon® System 2000 Gen 2 Electronic Lock
Spin the dial counterclockwise until EC appears on the display The letters EC appear on the display Figure 3-9 Entering the Combination on the Cencon® System 2000 GEN 2 3-11 Copyright ©Diebold, Incorporated (7/2015) - All Rights Reserved Copyright ©Diebold Nixdorf (11/2017) - All Rights Reserved TP-821921-001C... -
Page 52: Figure 3-10 Operating The Cencon® System 2000 Gen 2 Lock
Turn the dial clockwise until it stops The letters OPr appear on the display Figure 3-10 Operating the Cencon® System 2000 GEN 2 Lock 3-12 Copyright ©Diebold, Incorporated (7/2015) - All Rights Reserved Copyright ©Diebold Nixdorf (11/2017) - All Rights Reserved TP-821921-001C... -
Page 53: Opening The S&G 6880 Keylocks
(Figure 3-12). Insert the key into the keylock and turn it clockwise to open the keylock Figure 3-12 Opening the Lagard 2270 Keylock 3-13 Copyright ©Diebold, Incorporated (7/2015) - All Rights Reserved Copyright ©Diebold Nixdorf (11/2017) - All Rights Reserved TP-821921-001C... -
Page 54: Closing The Safe Door
2. Rotate the safe handle counterclockwise until it stops (Figure 3-13). Close the safe door Rotate the handle counterclockwise until it stops Figure 3-13 Closing the Safe Door (CS 5500 original version rear-load system shown) 3. Close the primary lock (choose the appropriate procedures from Section 3.5.1 to Section 3.5.5). -
Page 55: Closing The Mechanical Combination Locks (Lagard 3390Ex)
If you turn the safe handle to the locked position before you close the door, you might have to reenter the combination and reopen the lock before you can lock the safe door. 3-15 Copyright ©Diebold, Incorporated (7/2015) - All Rights Reserved Copyright ©Diebold Nixdorf (11/2017) - All Rights Reserved TP-821921-001C... -
Page 56: Closing The Cencon Gen 2 Electronic Locks
(Figure 3-16). Insert the key into the keylock and turn it counterclockwise to close the keylock Figure 3-16 Closing the S&G 6880 Keylock 3-16 Copyright ©Diebold, Incorporated (7/2015) - All Rights Reserved Copyright ©Diebold Nixdorf (11/2017) - All Rights Reserved TP-821921-001C... -
Page 57: Closing The Lagard 2270 Keylocks
(Figure 3-17). Insert the key into the keylock and turn it counterclockwise to close the keylock Figure 3-17 Closing the Lagard 2270 Keylock 3-17 Copyright ©Diebold, Incorporated (7/2015) - All Rights Reserved Copyright ©Diebold Nixdorf (11/2017) - All Rights Reserved TP-821921-001C... -
Page 58: Accessing Modules And Components In The Cash Dispenser
3. For additional access to the dispenser, release the dispenser slide plunger and extend the dispenser on its slide assemblies (Figure 3-18). 3-18 Copyright ©Diebold, Incorporated (7/2015) - All Rights Reserved Copyright ©Diebold Nixdorf (11/2017) - All Rights Reserved TP-821921-001C... -
Page 59: Figure 3-18 Accessing The Dispenser (Cs 5500 Original Version Rear-Load System Shown)
Accessing Modules and Components in the Cash Dispenser Sliding the dispenser module Figure 3-18 Accessing the Dispenser (CS 5500 original version rear-load system shown) 3-19 Copyright ©Diebold, Incorporated (7/2015) - All Rights Reserved Copyright ©Diebold Nixdorf (11/2017) - All Rights Reserved... -
Page 60: Accessing The Maintenance Keyboard And Mouse And Rear Operator Display
The upper cabinet rear door will not close properly unless the rear display is returned to its closed position. 5. Close the upper chassis rear door. 3-20 Copyright ©Diebold, Incorporated (7/2015) - All Rights Reserved Copyright ©Diebold Nixdorf (11/2017) - All Rights Reserved TP-821921-001C... -
Page 61: Figure 3-19 Rear Operator Display (Full-Height System Shown)
Direction to turn rear display Flip rear display up Direction to pull rear display release Figure 3-19 Rear Operator Display (full-height system shown) 3-21 Copyright ©Diebold, Incorporated (7/2015) - All Rights Reserved Copyright ©Diebold Nixdorf (11/2017) - All Rights Reserved TP-821921-001C... -
Page 62: Accessing The Lower Door
3. Remove the lower door away the system. Removing the two mounting screws Removing the lower door assembly Figure 3-20 Removing the Lower Door (CS 5500 original version rear-load system shown) 3-22 Copyright ©Diebold, Incorporated (7/2015) - All Rights Reserved Copyright ©Diebold Nixdorf (11/2017) - All Rights Reserved... -
Page 63: Accessing The Motorized Card Reader, Receipt Printer, And Processor
Remove the top chassis rear cabinet with rear maintenance display attached. c. If necessary, remove the rear maintenance display from the rear cabinet. 3-23 Copyright ©Diebold, Incorporated (7/2015) - All Rights Reserved Copyright ©Diebold Nixdorf (11/2017) - All Rights Reserved TP-821921-001C... -
Page 64: Figure 3-21 Accessing The Motorized Card Reader, Receipt Printer, And Processor (Cs 5500 Original Version Rear-Load System Shown)
Removing the top chassis rear cabinet mounting screws Journal printer Motorized card reader Figure 3-21 Accessing the Motorized Card Reader, Receipt Printer, and Processor (CS 5500 original version rear-load system shown) 3-24 Copyright ©Diebold, Incorporated (7/2015) - All Rights Reserved Copyright ©Diebold Nixdorf (11/2017) - All Rights Reserved... -
Page 65: Figure 3-22 Closing The Top Chassis Door (Cs 5500 Original Version Rear-Load System Shown)
Push in top chassis Turn key counterclockwise and then remove key Figure 3-22 Closing the Top Chassis Door (CS 5500 original version rear-load system shown) 3-25 Copyright ©Diebold, Incorporated (7/2015) - All Rights Reserved Copyright ©Diebold Nixdorf (11/2017) - All Rights Reserved... -
Page 66: Accessing The Motorized Card Reader, Receipt Printer, And Processor (Full-Height System)
(Figure 3-23). All-in-one module (including the processor and consumer display) Motorized card reader Figure 3-23 Accessing the Motorized Card Reader and Processor (CS 5500 full-height, rear-load system shown) 3-26 Copyright ©Diebold, Incorporated (7/2015) - All Rights Reserved Copyright ©Diebold Nixdorf (11/2017) - All Rights Reserved... - Page 67 Accessing Modules and Components in the Cash Dispenser Rear maintenance display in rear door Receipt printer Journal printer Figure 3-24 Accessing the Receipt Printer, Journal Printer and Rear Display (CS 5500 full-height, rear-load system shown) 3-27 Copyright ©Diebold, Incorporated (7/2015) - All Rights Reserved Copyright ©Diebold Nixdorf (11/2017) - All Rights Reserved...
- Page 68 (AFD) and cause the cash dispenser to be out of service. 10. Shut the rear door. 3-28 Copyright ©Diebold, Incorporated (7/2015) - All Rights Reserved Copyright ©Diebold Nixdorf (11/2017) - All Rights Reserved TP-821921-001C...
- Page 69 Push in fascia Shut the rear door after pushing in the tray Push in the rear-load tray in the top chassis Figure 3-25 Closing the Upper Chassis (CS 5500 full-height, rear-load system shown) 3-29 Copyright ©Diebold, Incorporated (7/2015) - All Rights Reserved Copyright ©Diebold Nixdorf (11/2017) - All Rights Reserved...
-
Page 70: Appendix A Related Documentation
TP-820813-001A Journal Printer Operating Guide TP-820817-001A SafeGard Electronic Lock Customer Operating Instructions TP-820466-001A CS 5500 Rear-load Lobby Cash Dispenser Planning and Site Preparation Guide TP-821922-001C One-sided Graphical Thermal Receipt Printer (49-240508-000A) Operating Guide TP-821718-001A In English only. Copyright ©Diebold, Incorporated (7/2015) - All Rights Reserved Copyright ©Diebold Nixdorf (11/2017) - All Rights Reserved... - Page 71 • DO NOT use high-pressure cleaning systems such as power washers • On systems not rated for weather exposure, use caution when cleaning exterior surfaces. DO NOT use more liquids than necessary. Copyright ©Diebold, Incorporated (7/2015) - All Rights Reserved Copyright ©Diebold Nixdorf (11/2017) - All Rights Reserved TP-821921-001C...
Need help?
Do you have a question about the CS 5500 and is the answer not in the manual?
Questions and answers