Table of Contents
Advertisement
Quick Links
FRENIC Loader VG
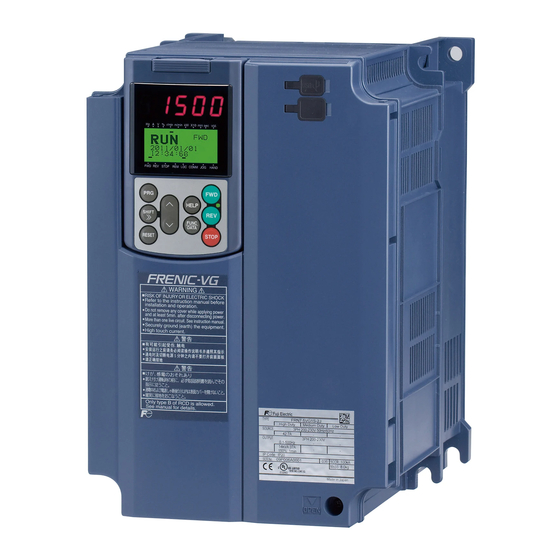
Thank you for purchasing our high-performance, vector control FRENIC-VG series of inverters.
• This manual provides all the information on Fuji's inverter support software FRENIC Loader VG.
Read this manual carefully for correct use of FRENIC Loader VG
• This manual does not contain information on the inverter itself. Read the inverter user's manual, inverter
instruction manual in conjunction with this manual.
• Incorrect handling may prevent Loader from operating correctly, shorten the inverter service life, or cause
problems.
Fuji Electric Co., Ltd.
Inverter Support Software
(WPS-VG1-PCL)
Instruction Manual
INR-SI47-1589d-E
Advertisement
Table of Contents

Related Manuals for Fuji Electric FRENIC


Summary of Contents for Fuji Electric FRENIC
- Page 1 (WPS-VG1-PCL) Thank you for purchasing our high-performance, vector control FRENIC-VG series of inverters. • This manual provides all the information on Fuji’s inverter support software FRENIC Loader VG. Read this manual carefully for correct use of FRENIC Loader VG • This manual does not contain information on the inverter itself. Read the inverter user's manual, inverter instruction manual in conjunction with this manual.
- Page 2 Copyright © 2013 Fuji Electric Co., Ltd. All rights reserved. No part of this publication may be reproduced or copied without prior written permission from Fuji Electric Systems Co., Ltd. Microsoft and Windows are registered trademarks of Microsoft Corporation in the United States. All other products and company names mentioned in this manual are trademarks or registered trademarks of their respective holders.
-
Page 3: Preface
Preface This manual provides all the information on Fuji’s inverter support software FRENIC Loader VG. Read this manual carefully for correct use of FRENIC Loader VG This manual does not contain information on the inverter itself. Read the inverter user's manual, inverter instruction manual in conjunction with this manual. -
Page 4: Table Of Contents
Contents Preface ..................................i Chapter 1 Before Using FRENIC Loader VG ......................1 1.1. Overview................................1 1.1.1. Features ..............................1 1.1.2. Warranty ..............................1 1.2. Connecting Inverters to a PC..........................2 1.2.1. Connection ...............................2 1.2.2. Configuring USB network .........................3 1.2.2.1. Example of networking ........................3 1.2.3. Configuring an RS-485 communications network..................4 1.2.3.1. - Page 5 1.4.6. Connection settings ..........................40 [ 1 ] For connection to USB port........................ 40 [ 2 ] For connection to RS-485 port......................41 [ 3 ] For connection to Communication board (Ethernet) ................42 Chapter 2 Description of Functions ........................43 2.1. Main Window ..............................43 2.2.
- Page 6 2.3.3.7. Print Trace Data..........................76 2.3.3.8. Sub Window .............................77 [ 1 ] Cursor ..............................77 [ 2 ] Adjust graph position ......................... 78 2.3.3.9. Waveform Detail Settings .........................80 [ 1 ] Channel configuration setting ......................80 [ 2 ] Ch1 to Ch8 (analog setting) ....................... 80 [ 3 ] Ch1 to Ch16 (digital setting) ......................
-
Page 7: Chapter 1 Before Using Frenic Loader Vg
Chapter 1 Before Using Chapter 1 Before Using FRENIC Loader VG This chapter gives an overview of the inverter support software FRENIC Loader VG and provisions for its installation and operation. 1.1. Overview 1.1.1. Features ・ Loader enables a PC to support remote operation of inverters either individually or collectively via the RS-485 port or the USB port on the inverters. -
Page 8: Connecting Inverters To A Pc
1.2. Connecting Inverters to a PC 1.2.1. Connection The table below lists the connection methods available for connecting inverters to a PC. PC : On PC On inverter Connection Inverters Using a USB cable RS-485 Via a USB / RS-485 converter 1 : 1 COM port Via an RS-232C / RS-485 converter... -
Page 9: Configuring Usb Network
Connection using the USB connector For connection using the USB connector, refer to Section 1.4.5. "Setting up communications parameters." connector USB miniB FRENIC-VG connector USB A USB cable MAX. 5m Figure 1.2.2-1 USB Network Using a USB Cable (mini B) Table 1.2.2-1 Specifications of USB Network... -
Page 10: Configuring An Rs-485 Communications Network
FRENIC-VG user's manual Section 5.1.4 "Communications support devices for RS-485". When you connect the FRENIC Loader VG with FRENIC5000VG7S series, please refer to Chapter 6 of FRENIC5000VG7S USER'S MANUAL. -
Page 11: Communications Support Devices For Rs-485
Chapter 1 Before Using 1.2.3.2. Communications support devices for RS-485 Description of the equipment needed when connecting to a PC not equipped with an RS485 interface, refer to FRENIC-VG user's manual Section 5.1.4 "Communications support devices for RS-485". 1.2.3.3. Noise suppression Depending on the operating environment, instruments may malfunction due to the noise generated by the inverter. -
Page 12: Installation
Manager of VG7 loader uninstall it. [FRENIC Loader VG Setup.exe] and [MsgMgr USB Setup. exe] are contained in the CD that comes with Fuji Inverter FRENIC VG. Copy these setup files to any folder. To use FRENIC Loader VG, you need to install two setup files: the loader software main program [FRENIC Loader VG Setup.exe] and the message manager [MsgMgr... -
Page 13: Installing Frenic Loader Vg
Chapter 1 Before Using 1.3.1.1. Installing FRENIC Loader VG [ 1 ] Windows 7 / Windows Vista Follow the wizard and install Loader as shown below. Double-click the FRENIC Loader VG Setup.exe icon. The exe automatically starts the installation wizard. - Page 14 * Windows Vista only To continue, click Allow. To continue, click Next. Carefully read the license agreement. To view the entire contents of the agreement, scroll the screen up and down using the Page Up/Down keys or the scroll bar. If you agree, click Next to proceed.
- Page 15 Chapter 1 Before Using Enter your user name and company name. After entry, click Next to proceed. Select the destination folder to install. A default folder has appeared. To select a different folder, click Browse…. Click Next to proceed. The screen confirming your selection appears.
- Page 16 To continue, click Yes. Upon completion of the installation, the screen at left appears. To exit the installation wizard and return to Windows, click Finish.
-
Page 17: 2 ] Windows Xp
Chapter 1 Before Using [ 2 ] Windows XP Follow the wizard and install Loader as shown below. Double-click the FRENIC Loader VG Setup.exe icon. The exe automatically starts the installation wizard. To continue, click Install. To abort the installation, click... - Page 18 To continue, click Next. Carefully read the license agreement. To view the entire contents of the agreement, scroll the screen up and down using the Page Up/Down keys or the scroll bar. If you agree, click Next to proceed. Enter your user name and company name.
- Page 19 If you want to change the selection, click Back to return to the previous screen. When it is ready to restart, click Yes Install. *If you do not restart FRENIC Loader VG, the program cannot be normally installed. The installation progress bar appears.
- Page 20 Upon completion of the installation, the screen at left appears. To exit the installation wizard and return to Windows, click Finish. When it is ready to restart, click Yes. *If you do not restart FRENIC Loader VG, the program cannot be normally installed.
-
Page 21: Installing Message Manager
Chapter 1 Before Using 1.3.1.2. Installing Message Manager Follow the wizard and install Message Manager as shown below. Double-click the MsgMgr USB icon. Setup.exe The exe automatically starts the installation wizard. To continue, click Yes. To continue, click Next. - Page 22 To select a different folder, click Browse…. Click Next to proceed. Select the start menu folder that the shortcut to FRENIC Loader is to be added to. You can select one from existing folders in the list or create a new one.
- Page 23 Chapter 1 Before Using The screen confirming your selection appears. If you want to change the selection, click Back to return to the previous screen. If OK, click Next to proceed. To abort the installation, click Cancel. Upon completion of the installation, the screen at left appears.
-
Page 24: Installing Usb Driver
1.3.1.3. Installing USB driver Using the USB interface for accessing the inverter(s) requires installing the USB driver to your PC. The driver installation is required only once at the first use of the USB interface. If the USB driver has not been installed correctly, no communication via the USB interface is possible. - Page 25 Chapter 1 Before Using On the Device Manager window, right-click Unknown device to show the drop-down list. Click Update Driver Software…. Click Browse my computer for driver software. Click Browse….
- Page 26 In the folder in which FRENIC Loader has been installed, select ¥Driver¥MICREXSX and then click OK. The default folder is C:¥Fuji Electric ¥FRENIC_Loader_VG¥Driver¥ MICREXSX when the OS drive is C. To continue, click Next. Click Install this driver software anyway.
-
Page 27: 2 ] Windows Vista
Chapter 1 Before Using [ 2 ] Windows Vista When the OS finds a USB device of the Loader, it displays the following. Follow the wizard and install Loader as shown below. Click Locate and install driver software. Click Continue to proceed. Click Don’t search online. - Page 28 Click Browse my computer for driver software (advanced). Click Browse…. In the folder in which FRENIC Loader has been installed, select ¥Driver¥MICREXSX and then click OK. The default folder is C:¥ Fuji Electric ¥FRENIC Loader VG¥Driver¥ MICREXSX when the OS drive is C.
- Page 29 Chapter 1 Before Using Click Install this driver software anyway. Upon completion of the installation, the screen at left appears. To exit the installation wizard and return to Windows, click Close. This message appears when the USB driver has been successfully installed.
-
Page 30: 3 ] Windows Xp
[ 3 ] Windows XP When the OS finds a USB device of the Loader, it displays the following. Follow the wizard and install Loader as shown below. Wait for this screen to appear, select Yes, now and every time I connect a device, then click Next. - Page 31 Chapter 1 Before Using In the folder in which FRENIC Loader has been installed, select ¥Driver¥MICREXSX and then click OK. The default folder is C:¥Fuji Electric ¥FRENIC Loader VG¥Driver¥ MICREXSX when the OS drive is C. Click Next. Installation starts.
-
Page 32: Checking The Installation Of The Usb Driver
1.3.1.4. Checking the installation of the USB driver To check whether the USB driver has been installed correctly, open Device Manager. If FRENIC is added to the sub-tree of Loader USB device, the driver has been installed correctly. Installation finished successfully... -
Page 33: Uninstallation
Chapter 1 Before Using 1.3.2. Uninstallation 1.3.2.1. Uninstalling FRENIC Loader VG [ 1 ] Windows 7 / Windows Vista From the Start menu, select All Programs | FRENIC Loader VG | FRENIC Loader VG Uninstall. The confirmation screen at left appears. Click Yes. -
Page 34: 2 ] Windows Xp
Cancel. In the above procedure, perform the uninstallation. [ 2 ] Windows XP From the Start menu, select All Programs | FRENIC Loader VG | FRENIC Loader VG Uninstall. The uninstallation confirmation screen appears as shown left. To proceed and uninstall Loader, click Yes. -
Page 35: Before Uninstalling Message Manager
If this happens, first delete the folder (including its contents) named Fuji Electric Shared in the file path as shown below, and then reinstall Loader. C:¥Program Files¥Common Files¥Fuji Electric Shared (In the file path shown above, "C" represents the drive letter of the partition or hard disk where Windows is installed. -
Page 36: 2 ] Windows Vista / Xp
[ 2 ] Windows Vista / XP Right-click the Message Manager icon to display Exit MessageManager, then click it. The confirmation window appears. Click Yes to quit Message Manager. 1.3.2.3. Uninstalling Message Manager [ 1 ] Windows 7 / Windows Vista From the Start menu, select All Programs | Message Manager | Message Manager Uninstall. -
Page 37: 2 ] Windows Xp
Chapter 1 Before Using The confirmation screen at left appears. To continue the uninstallation procedure, click Yes. In the above procedure, perform the uninstallation. When it is ready to restart, click Finish. [ 2 ] Windows XP From the Start menu, select All Programs | Message Manager | Message Manager Uninstall. The uninstallation confirmation screen appears as shown left. -
Page 38: Configuring The Settings For Inverter(S) And Loader
Set the H34 data to the same value as the baud rate setting made in Loader's Communication Setting window. (see Section 1.4.5. ) H40:Protocol Set the H40 data to "1" (FRENIC Loader protocol). In the case of USB connection, the above function code setting is not required. -
Page 39: Checking The Com Port On The Pc (When Using A Communications Level Converter)
Chapter 1 Before Using 1.4.2. Checking the COM port on the PC (when using a communications level converter) Loader running on the PC uses the RS-232C communications port (COM) to interface with inverters. When an RS-232C / RS-485 converter is connected to the PC, check what COM port number (COM#) on the PC is assigned to the RS-232C / RS-485 converter. -
Page 40: Loader Start
1.4.3. Loader Start When Loader has been installed on your PC, selecting All Programs | FRENIC Loader VG | FRENIC Loader VG Start from the Start menu starts Loader. - Page 41 Chapter 1 Before Using The password entry window appears after the installation, when you start the loader for the first time. Enter the password that is listed on the back of the CD jacket. Loader starts when you successfully enter the password. Boot loader after success in the password entry, password entry window does not appear.
-
Page 42: Configuring Loader
1.4.4. Configuring Loader If Loader starts, the Quick Access Menu first appears as shown below. This menu contains the 7 quick-start icons for the programs contained in Loader. To start a program, simply click the corresponding icon. Details of the programs are described in Chapter 2. When using Loader for the first time or after having changed the supporting inverter(s), you need to configure the operating environment by setting up the communications parameters (COM Setting). -
Page 43: Communication Settings
Chapter 1 Before Using 1.4.5. Communication Settings Click [COM.Setting.] icon in the left row in Simple Menu to display the screen which sets the methods to connect the loader, targets to be connected and communication conditions. Enter the data by referring to the following descriptions. Alternatively, by selecting Setup | Communication Settings from Main Menu, you can display the communication setting screen without using Simple Menu. -
Page 44: 3 ] Port
[ 3 ] Port You can do settings on communications. (In the initial status, you can establish communications without changing any setting because the PC initial settings are well matched with those of the inverter.) RS-485 Select this method when connecting your PC to the inverter via RS-485. ・Port setting Select the communication port of the PC to which the RS-232C / RS-485 converter is connected. -
Page 45: 4 ] Communication Conditions
Chapter 1 Before Using [ 4 ] Communication Conditions Do the settings on the communication retry. ・ Retry count This sets how many times communication allows retry in case of failure. As the retry count increases, the possibility to succeed communications may increase. However, it will take time until the error dialog appears. -
Page 46: Connection Settings
1.4.6. Connection settings Click COM setting | Connection Setting to display the Connection Settings screen. [ 1 ] For connection to USB port When "USB: Data in inverter" is selected Only a single line appears as shown below. After making sure that the equipment name and RS-485 num. -
Page 47: 2 ] For Connection To Rs-485 Port
Chapter 1 Before Using [ 2 ] For connection to RS-485 port When "RS-485: Data in inverter" is selected The Device connection list window shows the inverters available for RS-485 communication. Double-clicking (or use the Advance… button) the row where the inverter to be modified or added is listed calls up Advanced dialog shown below. -
Page 48: 3 ] For Connection To Communication Board (Ethernet)
[ 3 ] For connection to Communication board (Ethernet) When " Communication board (Ethernet)" is selected Only a single line appears as shown below. After making sure that the equipment name and RS-485 num. (station address) are correct, click the Browse button to monitor the current communications link status. -
Page 49: Chapter 2 Description Of Functions
Chapter 2 Description of Functions Chapter 2 Description of Functions 2.1. Main Window Main Window is the first screen appearing after starting the loader. Simple Menu is displayed on Main Window. (The following example omits the display.) Main Menu Tool Bar You can select all the Loader functions. -
Page 50: File
This function creates a new file of function code data. Function selection tab This tab displays the type of the Inverter model selected. FRENIC VG : VG1 FRENIC VG7 : VG7 Area Specification You can select the specification by area. -
Page 51: Close
Chapter 2 Description of Functions 2.2.3. Close This function closes the active window. 2.2.4. Save This function overwrites and saves the active function code setting. If the data has not been saved before, the Save function does the same operation for the data as “5) Save As…”. 2.2.5. -
Page 52: Print Preview
2.2.7. Print Preview This function displays the print preview of the printable data of the active function code setting. 2.2.8. Page Setup Make settings for the paper. 2.2.9. End This function terminates the loader. -
Page 53: Menu
Chapter 2 Description of Functions 2.3. Menu You can select Function Code Setting or Simple Menu Function. 2.3.1. Function Code Setting Click [Menu] -> [Function Code Setting] or select Simple Menu and click [simple Menu] -> [Function Code Setting]. Then, [Select Edit Data] dialog will open. Select the items to be read from [Select Edit Data] dialog. -
Page 54: Edit List
2.3.1.4. Edit List This function allows you to list the function code setting values and setting ranges and edit them. You can display the function codes by various classifications. [Edit] menu on Menu Bar is displayed only when the Edit List window opens. ・Function : Display the function codes by group. -
Page 55: 1 ] Read The Function Code Setting Values From The Inverter
Chapter 2 Description of Functions [ 1 ] Read the function code setting values from the inverter When you want to update the function code setting values read from the inverter Click [Read] button to open the following dialog. Click [OK] to read the function code setting values from the inverter again. -
Page 56: 3 ] Change The Setting Value
[ 3 ] Change the setting value The method to change the setting values varies depending on the function code. (1) For the function codes which set speed, time, voltage or other numeric values, double-click the field of the function code setting value to be changed. When [Set Values] dialog appears, set the new value. -
Page 57: 4 ] Save
Chapter 2 Description of Functions [ 4 ] Save To save the function code settings opening on the loader, select [File] -> [Save] or [Save As …] from Main Menu. When selecting [Save] for the data for the first time, the following dialog will open in the same manner as when selecting [Save As …]. - Page 58 *.FN1 : File format specific to the loader. Files in this format can be opened only on the FRENIC Loader VG. *.CSV : Comma delimiter format. Files in this format can be opened on Microsoft Excel or...
-
Page 59: 5 ] Print
Chapter 2 Description of Functions [ 5 ] Print The items selected from the tree in the left pane on the Edit List tab are target to be printed. When selecting “Function” or “Code group” from the tree in the left pane on the Edit List tab, function codes such as F, E, C, …... -
Page 60: 6 ] Compare
[ 6 ] Compare You can compare the function code setting data being edited to the data saved in the file or the data set in the inverter that is selected in [Target Inverter] and display the results. Compared with inverter Compare the function code setting data being edited to the function code setting data in the inverter. -
Page 61: 7 ] User Definition (Display Desired Function Codes Only)
Chapter 2 Description of Functions [ 7 ] User Definition (Display desired function codes only) Select the function code from the Edit List window and right-click it to display the window related to “User Definition”. Select one of User Definition 1 to 5 and left-click it to register the selected function code to “User Definition”. - Page 62 To unregister the function code, select the target one and right-click it to display the window related to “User Definition”. Then, select Reset User Definition and left-click it to unregister the target function code from “User Definition”. To unregister the function code from all the user definition groups (1 to 5), select “Relese User Definition”...
- Page 63 Click the [OK] button, and send "Limited function code information" to the inverter. If it is sent successfully, the following dialog will be displayed. About the operation of the touch panel of the inverter, Refer to FRENIC-VG user's manual Section 3.4.4.13 Limiting function codes to be displayed -- Menu #14 "LIMITED...
-
Page 64: 8 ] Search (Search Function Code Terminologically)
[ 8 ] Search (Search function code terminologically) Select [Edit] -> [Search] from Main Menu to display [Search] dialog. From among words on the Edit List window, enter the key word to be searched, for example, speed or gain, and click [OK] button. -
Page 65: Auto Tuning
Chapter 2 Description of Functions 2.3.1.5. Auto Tuning This function automatically measures the motor constants and saves them to the inverter as parameters of Motor 1 to Motor 3. Function code H01: Function to perform motor auto tuning using the tuning operation selection and display the tuning results. ・... -
Page 66: File Information
2.3.1.6. File Information This function displays the information which may affect the function codes. You can change “Type”, “Voltage”, “Capacity” and “Definition File” as you want. ・ When reading the information codes from the inverter, the information on that inverter is displayed. - Page 67 [ 1 ] Change models(VG7 → VG1, or VG1 → VG7) To use the function code data read from the inverter of "FRENIC-VG7" for the inverter of "FRENIC-VG", it is necessary to change a "model" into "VG1" from "VG7." It is also the same as when using the function code data of "VG1" for "VG7."...
- Page 68 [ 2 ] Change of inverter capacity Change the "capacity inverter" of the current function code list. It will be changed into the value of the capacity as which the "preset value" of the following function code and the "factory-shipments value" were chosen if "Inverter capacity"...
- Page 69 Chapter 2 Description of Functions [ 3 ] Change of definition file "Definition file" of the function code list is a one-to-one correspondence to the inverter ROM version. The inverter ROM version is displayed in the "MAIN" on the fifth page of the Key pad of the "5.
- Page 70 Select the definition file that corresponds to the ROM version of the inverter. Then, click the [Open] button. The function code which exists in the definition file before conversion and does not exist in the definition file after conversion is displayed on the dialog of a file reading error. (The following figure is a case where it changes into "fnc_vg_1_0000b28a.csv"...
-
Page 71: Read And Write (Sf Code) Code Safety Functions
Chapter 2 Description of Functions 2.3.2. Read and write (SF code) code safety functions In order to conform to the functional safety standards, writing of code safety functions, you must follow the instructions in the instruction manual of functional safety card. For details, Refer to "INR-SI47-1541-JE OPC-VG1-SAFE instruction manual."... - Page 72 Write the safety function codes after unlocking the functional safety password. Safety function codes are only temporarily stored in the functional safety card (OPC-VG1-SAFE). To save the safety function codes even when the power is turned off, Select "Send all save command" when closing a list edit display. then click "OK". Make a selection of whether to save settings to a file function code.
-
Page 73: Change Of The Functional Safety Password
Chapter 2 Description of Functions 2.3.2.3. Change of the functional safety password Select the "menu" -> "Functional safety", then the functional safety password entry screen is opened. And, Click the "Change" button. In order to change the functional safe password, it is necessary to unlock the password. -
Page 74: Safety Function Code Initialization
2.3.2.4. Safety function code initialization To initialize the safety function code, open the edit screen of function code list, click the [Initialization...] button, display the dialog of initialization selection. Then, select the "Initialization the safety function code", click the [OK] button. ・Safety function code will be initialized even if the functional safety password is not unlocked. -
Page 75: Trace
Chapter 2 Description of Functions 2.3.3. Trace The operation status of an inverter can be observed as continuous waveform data. The trace (shown below) provides the following three types functions. : The inverter operation status at occurrence of alarm is saved into the ・... -
Page 76: Trace Back
2.3.3.1. Trace Back Click [Menu] -> [Trace] -> [Trace Back] or select Simple Menu and click [Simple Menu] -> [Trace Back] . Then, [Select Edit Data] dialog will open. The following shows the Trace Back window. Sub window Trace type Trace operation Waveform monitor Cursor... -
Page 77: 1 ] Read Waveform Data
Chapter 2 Description of Functions [ 1 ] Read Waveform Data You can read the trace back waveform data saved in the memory within the inverter. Follow the steps below: (1) Select [Bank Setting] tab. (2) Select the alarm to be read from [Select Trace Back Data] up to the past three times and click [Update] button. -
Page 78: Real-Time Trace
2.3.3.2. Real-time trace Click [Menu] -> [Trace] -> [Real-time trace] or select Simple Menu and click [Simple Menu] -> [Real-time trace] . Then, [Select Edit Data] dialog will open. The following shows the Real-time trace window. Trace type Waveform monitor Cursor Sub window Trace operation... -
Page 79: Historical Trace
Chapter 2 Description of Functions 2.3.3.3. Historical trace Click [Menu] -> [Trace] -> [Historical trace] or select Simple Menu and click [Simple Menu] -> [Historical trace] . Then, [Select Edit Data] dialog will open. The following shows the Historical trace window. Trace type Waveform monitor Cursor... -
Page 80: Monitor Start, Stop (Only The Real-Time Trace, Historical Trace)
2.3.3.4. Monitor start, stop (Only the Real-time trace, Historical trace) To start monitoring each trace, click the START/STOP button at the bottom left of the screen. To stop it, click the button again. Upon start of monitoring, the "Type of trace" box (Real-time trace or Historical trace) at the top center of the screen flashes. -
Page 81: Save Trace Data
Chapter 2 Description of Functions 2.3.3.5. Save Trace Data To save each trace data, click [Save] button in the upper center in the trace window or select [File] -> [Save As…]. When selecting [Save] for the data for the first time, the following dialog will open in the same manner as when selecting [Save As …]. -
Page 82: Print Trace Data
2.3.3.7. Print Trace Data To print the trace data, set the trace screen in the active state and select [File] -> [Print]. The trace data is printed as shown below. -
Page 83: Sub Window
Chapter 2 Description of Functions 2.3.3.8. Sub Window [ 1 ] Cursor Each box in the cursor sub window shows the channel setting values or status at each cursor position. Cursor values at analog Channel Settings on cursors Cursor values at Cursor value monitor Cursor A Cursor B... -
Page 84: 2 ] Adjust Graph Position
[ 2 ] Adjust graph position Each box in the cursor sub window shows the channel setting values or status at each cursor position. You can use the boxes to adjust the graph position at each channel. Select CH Select the channel at which the graph position is adjusted. - Page 85 Chapter 2 Description of Functions Optimize Y axis graph Arrange the Y axis display position and scale of the displayed channels without overlapping by channel. Reset the amplitude setting to the initial value. ・Y axis display position: Ch1=100 and the value increments by +100 for the subsequent channels.
-
Page 86: Waveform Detail Settings
2.3.3.9. Waveform Detail Settings [ 1 ] Channel configuration setting You can set the configuration of analog channels and digital channels to be traced. See [2] to [5] for detail settings of each channel. Target inverter Select No. of the inverter registered in Connection Setting. [ 2 ] Ch1 to Ch8 (analog setting) You can set the analog channels. - Page 87 Chapter 2 Description of Functions Filter setting You can do settings on filters of each channel. Not used Select this when no file is used. Manual filter Low path filter with filter time constant freely set. Set the filter time constant using numeric values. The setting range is from 1 [ms] to 1 [s].
- Page 88 Signal selection The information items of the inverters that can be monitored are as shown below. Analog channel signal selection items (Real-time trace / Historical trace) Item Note Speed detected value 1 (No polarity) Speed detected value 1 (With polarity) Speed setting 2 (before calculating acceleration/deceleration) Speed setting 4 (ASR input)
- Page 89 Chapter 2 Description of Functions Analog channel signal selection items (trace back) Fast Item Note /Lower Speed setting 2 (before calculating Lower acceleration/deceleration) Speed setting 4 (ASR input) Lower Speed detected value Lower Torque command Lower 100%:Rated motor torque Torque current command Lower 100%:Rated motor torque (P09,A11,A111) 100%:Motor rated torque current...
-
Page 90: 3 ] Ch1 To Ch16 (Digital Setting)
[ 3 ] Ch1 to Ch16 (digital setting) You can set the digital channels. Trigger Specify the trigger for each channel as shown below. Trigger setting Select Low level, High level, Rising edge () or Falling edge (). For a digital channel, specifying more than one trigger is possible. Triggers can be ORed or ANDed in detection. - Page 91 Chapter 2 Description of Functions Signal selection block Real-time trace Signal selection block Trace back / Historical trace Input terminal (FWD, REV, X1 – X14, RST) Y: Low speed Input 1 X terminal function (0 – 15) Input 2 X terminal function (16 – 31) Input 3 X terminal function (32 –...
- Page 92 Signal selection block “Input1 X terminal (0 - 15)” items (Only Real-time trace / Historical trace) Item 0:Multistep speed selection[SS1] 1:Multistep speed selection[SS2] 2:Multistep speed selection[SS4] 3:Multistep speed selection[SS8] 4:ASR and ACC/DEC time[RT1] 5:ASR and ACC/DEC time[RT2] 6:3-wire operation stop command[HLD] 7:Coast-to-stop command[BX] 8:Alarm reset[RST] 9:Trip command(External fault)[THR]...
- Page 93 Chapter 2 Description of Functions Signal selection block “Input4 X terminal (48 - 63)” items (Only Real-time trace / Historical trace) Item 48:Inverse mode of PID input[PID-INV] 49:PG alarm cancel[PG-CCL] 50:Undervoltage cancel[LU-CCL] 51:Ai torque bias hold[H-TB] 52:STOP1(Normal deceleration time)[STOP1] 53:STOP2(Deceleration time 4)[STOP2] 54:STOP3(Max torque)[STOP3] 55:DIA data latch(DIA option)[DIA] 56:DIB data latch(DIB option)[DIB]...
- Page 94 Signal selection block “Output terminal (Y1 - Y5, Y11 - Y18)” items Item Signal selection block “Output 1 Y terminal function (0 - 15)” items Item 0:Inverter running[RUN] 1:Speed existence signal[N-EX] 2:Speed agreement 1[N-AG1] 3:Speed arrival signal[N-AR] 4:Speed level detection 1[N-DT1] 5:Speed level detection 2[N-DT2] 6:Speed level detection 3[N-DT3] 7:Stopping on undervoltage[LU]...
- Page 95 Chapter 2 Description of Functions Signal selection block “Output 3Y terminal function (32 - 47)” items Item 32:Motor OH. early warning[M-OH] 33:Motor OL. early warning[M-OL] 34:DB OL. early warning[DB-OL] 35:Link transmission error[LK-ERR] 36:Load adaptive control under limit[ANL] 37:Load adaptive control under calc.[ANC] 38:Analog torque bias hold[TBH] 39:Custom Do1[C-DO1] 40:Custom Do2[C-DO2]...
- Page 96 Signal selection block “Output 6Y terminal function (80 - 95)” items Item 80:EN terminal detected circuit Err.[DECF] 81:EN terminal OFF[ENOFF] 82:Safety func. operating[SF-RUN] 83: - 84:STO under testing[SF-TST] 85: - 86: - 87: - 88: - 89: - 90: - 91: - 92: - 93: -...
-
Page 97: 4 ] Ch Setting Check (Analog/Digital)
Chapter 2 Description of Functions [ 4 ] Ch setting check (analog/digital) The data set in each channel is listed. To reflect the setting, click OK button. To cancel the setting, click Cancel button. -
Page 98: 5 ] Other Settings (Including Sampling Time Setting)
[ 5 ] Other settings (including sampling time setting) In the Trace Back operation, you can change the sampling time only. Sampling time setting Sampling time setting is as shown below: Real-time Historical Sampling time setting Trace back Time set 1 * ( 50.00 to 83.36us) Y : Fast Time set 2 * (100.00 to 166.72us) Y : Fast... - Page 99 Chapter 2 Description of Functions Trigger position Specify the number of sampling points preceding the trigger point. Detection conditions Specify the trigger detection conditions--"OR" or "AND." Analog: Only one channel Digital: Channels 1 to 16 Set trace start date and time Set the date and time to start tracing.
-
Page 100: Operation Monitor
2.3.4. Operation monitor Monitors the running status of the inverter. 2.3.4.1. I/O monitor (for control terminal input/output signal status of the inverter) The I/O monitor allows monitor the ON/OFF states of the programmable terminals (digital inputs, transistor outputs) of the selected inverter. Refresh Select inverter “Terminal functional”... -
Page 101: System Monitor (For Current Setup Info And Maintenance Info Of Inverter)
Chapter 2 Description of Functions 2.3.4.2. System monitor (for current setup info and maintenance info of inverter) The System monitor allows you to check the inverter ROM version, inverter type, current setup information, and maintenance information of the selected inverter. CSV Save Select inverter Saves the system monitor data in CSV format. -
Page 102: Alarm Monitor (For Monitor The Alarm Information Of The Inverter)
2.3.4.3. Alarm monitor (for monitor the alarm information of the inverter) The Alarm monitor shows the alarm status of the selected inverter. In this window, you can check the content of the current alarm and the various running information recorded when the alarm has occurred. -
Page 103: Setup
Chapter 2 Description of Functions 2.4. Setup 2.4.1. Communication Setup Refer to "1.4.4 Communication Settings". 2.4.2. Language Sets the language of the loader. Select the [Setup] → [Language] → [Japanese] or [English], then exit the loader. You can select "English" and "Japanese" language. After you have selected a language, exit the loader and restart the loader. -
Page 104: Date Time
2.4.3. Date time Allow the setting of the date and time of the inverter from the loader. Select the [Setup] → [Date time], then setting dialog is opened. Setting the date and time, perform from the following dialog. * If you check the mark of "send the date and time of the OS", the date and time which is managed by OS are sent to the inverter. -
Page 105: View
Chapter 2 Description of Functions 2.5. View Selecting View | Toolbar | Main shows or hides the toolbar. Selecting View | Status Bar shows or hides the status bar. Toolbar Status bar 2.5.1. Toolbar The toolbar, which is usually located at the top of the Loader window, contains program icons and allows you to access the desired function (program) with a single click. -
Page 106: Window
2.6. Window Specify how to display the Loader windows on the Loader top window. This facility becomes active only if any window is opened on the top window. 2.6.1. Cascade windows Selecting Window | Cascade arrange multiple windows, overlapping each other. You can call an inactive window up by clicking its title bar. -
Page 107: Tile Windows
Chapter 2 Description of Functions 2.6.2. Tile windows Selecting Window | Tile tiles multiple windows so that all windows are seen together. 2.6.3. Tile windows vertically Selecting Window | Tile vertically tiles multiple windows vertically. -
Page 108: Arrange Icons
2.6.4. Arrange icons Selecting Window | Arrange Icons arranges icons of the active windows or programs at the bottom of the Loader top window. 2.7. Help 2.7.1. Version Information Version Information shows the Loader version, copyright. -
Page 109: Chapter 3 Frequently Asked Questions (Faq)
Manager icon sample given below). If no Message Manager icon is displayed in the task bar, Message Manager has not been installed correctly. Delete the folder (including its contents) named Fuji Electric Shared in the file path as shown below, and then Uninstall Loader. -
Page 110: Usb Driver Not Installed Correctly
3.1.2. USB driver not installed correctly To communicate with the inverter via the USB connector, the USB driver (Loader USB device) should be installed. If the USB driver has not been installed correctly, Unknown device appears as shown below. Installation finished successfully Installation failed [ 1 ] Windows 7 Refer to Section 1.3.1.3. - Page 111 Chapter 3 Troubleshooting [ 2 ] Windows Vista Follow the wizard and install the USB driver as shown below. From the Start menu, select Control Panel | Hardware and Sound | Device Manager to open Device Manager as shown at left. Right-click Unknown device to show the drop-down list.
- Page 112 Click Browse…. In the folder in which FRENIC Loader has been installed, select ¥Driver¥MICREXSX and then click OK. ¥ The default folder is C: Fuji Electric ¥FRENIC Loader3 EN¥Driver¥ MICREXSX when the OS drive is C. To continue, click Next.
- Page 113 Chapter 3 Troubleshooting Click Install this driver software anyway Installation starts. Upon completion of the installation, the screen at left appears. To exit the installation wizard and return to Windows, click Close.
- Page 114 [ 3 ] Windows XP Follow the wizard and install the USB driver as shown below. From the Start menu, select Control Panel | System | Hardware | Device Manager to open Device Manager as shown at left. On the sub-tree of Other devices, right-click USB Device to show the drop-down list.
-
Page 115: Usb Driver Installed Correctly
Chapter 3 Troubleshooting 3.1.3. USB driver installed correctly Although the USB driver has been installed correctly, Loader cannot communicate with the inverter. This problem is considered to be caused by installing the USB driver when Message Manager is running. In this case, Message Manager is no longer able to recognize the USB driver, so it is necessary to quit both Loader and Message Manager and then start Loader again. -
Page 116: Usb Communication Impossible After The Pc Has Gone Standby Or To Sleep)
3.1.4. USB communication impossible after the PC has gone standby or to sleep) If Windows 7 or Windows Vista goes standby or to sleep, Loader cannot recognize the USB driver so that it cannot communication with the inverter. Follow the instructions given below. [ 1 ] Windows 7 Turn the PC power OFF and ON, then restart Loader. -
Page 117: Chapter 4 Specifications
Chapter 4 FRENIC Loader VG Standard Specifications Chapter 4 Specifications Item Specifications Remarks Name of software FRENIC Loader VG Supported inverter FRENIC-VG,FRENIC-VG7 No. of supported For USB connection: Only one inverter inverters For RS-485 connection: Up to 31 inverters cable... - Page 118 MEMO...
- Page 119 In no event will Fuji Electric Co., Ltd. be liable for any direct or indirect damages resulting from the application of the information in this manual.
- Page 120 Fuji Electric Co., Ltd. Gate City Ohsaki, East Tower, 11-2, Osaki 1-chome, Shinagawa-ku, Tokyo, 141-0032, Japan URL http://www.fujielectric.com/ 2013-9...
Need help?
Do you have a question about the FRENIC and is the answer not in the manual?
Questions and answers