Advertisement
Available languages
Available languages
Quick Links
Advertisement

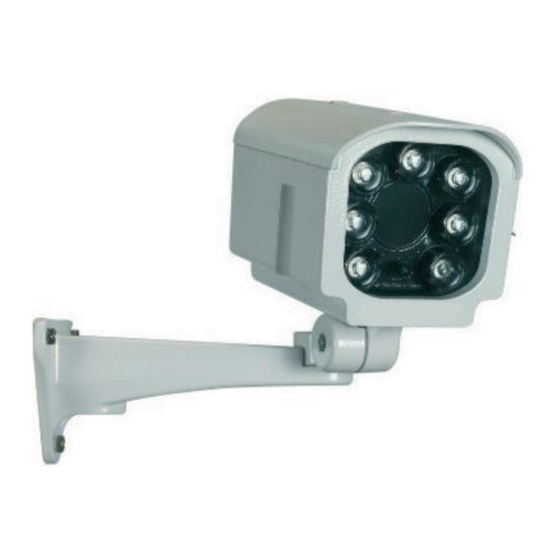
Summary of Contents for Bticino 391891
- Page 1 391891 Proiettore a infrarossi 50 m Manuale Di Istruziono Guida Radipa...
- Page 2 Before carrying out the installation, read the instructions and take account of the product’s specific mounting location. Do not open up, dismantle, alter or modify the device except where specifically required to do so by the instructions. All Bticino products must be opened and repaired exclusively by personnel trained and approved by Bticino.
-
Page 3: Table Of Contents
Proiettore a infrarossi 50 m Indice Contenuto del kit ..........................4 Descrizione ............................4 Installazione ............................5 Illuminatore fissato separatamente dalla cassa ................... 5 Illuminatore fissato sotto la cassa ......................... 6 Impostazione della potenza ......................... 9... -
Page 4: Contenuto Del Kit
1 Contenuto del kit Proiettore a infrarossi 50 m Kit di montaggio su cassa Piede di fissaggio 2 Descrizione 1. Vetro temperato 2. LED a infrarossi super alta potenza con rifrattore 3. Circuito a infrarossi e supporto di circuito 4. Circuito di controllo a infrarossi 5. -
Page 5: Installazione
Proiettore a infrarossi 50 m 3 Installazione Illuminatore fissato separatamente dalla cassa Questo montaggio consiste nel posizionare l'illuminatore in un punto diverso dalla cassa. Vista dall'alto. Vantaggio: il punto mirato dalla telecamera è perfettamente illuminato. Inconveniente: l'illuminazione a infrarossi illumina un'area ridotta del campo visivo della telecamera. -
Page 6: Illuminatore Fissato Sotto La Cassa
Illuminatore fissato sotto la cassa Questo montaggio consiste nel posizionare l'illuminatore direttamente sotto la cassa. 1 - Contenuto del kit di montaggio su cassa 2 - Fissare il supporto sul proiettore 3 - Fissare il proiettore sotto la cassa 4 - Fare passare il cavo sul supporto della cassa... - Page 7 Proiettore a infrarossi 50 m Nessuno fuori dal fascio Nessuno nel fascio dell'illuminatore dell'illuminatore Vista laterale. Vantaggio: l'illuminatore viene facilmente fissato sotto la cassa e può essere orientato nella stessa direzione della telecamera. Inconveniente: il fascio centrale può essere scostato rispetto dal punto mirato. Se una persona si pone al di fuori del fascio dell'illuminatore, non verrà...
- Page 8 Note: i due casi presentati in precedenza possono essere combinati in base alle esigenze. Per ingrandire l'angolo di scansione a infrarossi, si possono montare due illuminatori affiancati. Angolo di scansione con un solo illuminatore: Distanza di illuminazione a infrarossi 70 m Angolo del fascio a LED a infrarossi 45°: 40 m + 15°: 70 m Avvio/arresto dell'illuminazione a infrarossi...
-
Page 9: Impostazione Della Potenza
Proiettore a infrarossi 50 m 4 Impostazione della potenza l'impostazione di fabbrica della potenza è sulla potenza massima. Si può regolare la potenza dell'illuminatore grazie alla vite posta sulla scheda elettronica all'interno dell'apparecchio. Questo parametro modifica la distanza dell'illuminazione a infrarossi. Con un cacciavite, far ruotare la vite di regolazione: - in senso orario per aumentare la potenza. - Page 11 Infrared projector 50 m Index Contents of kit ............................ 12 Description ............................12 Installation ............................13 Illuminator fixed separately from the case ....................13 Illuminator fixed under the case ........................14 Adjustment of the power ........................17...
- Page 12 1 Contents of kit Infrared projector 50m Assembly kit for case Mounting 2 Description 1. Toughened glass 2. Super high power infrared LED with refractor 3. Infrared circuit and circuit mounting 4. Infrared control circuit 5. Adjustment of infrared lighting 6.
- Page 13 Infrared projector 50 m 3 Installation Illuminator fixed separately from the case This assembly consists of placing the illuminator in a different place from the case. View from above. Advantage: The target of the camera is perfectly illuminated. Disadvantage: The infrared lighting illuminates a restricted area of the camera's field of vision.
- Page 14 Illuminator fixed under the case This assembly consists of placing the illuminator directly under the case. 1 - Contents of the assembly kit for case 2 - Fix the mounting on the projector 3 - Fix the projector under the case 4 - Pass the cable over the case mounting...
- Page 15 Infrared projector 50 m Person outside Person in the the beam of the beam of the illuminator illuminator Side view. Advantage: The illuminator is easily fixed under the case, which allows it to be oriented in the same direction as the camera.
- Page 16 Comments: The two cases presented above may be combined according to needs. To increase the infrared sweep angle, two illuminators can be mounted side by side. Sweep angle with a single illuminator: Infrared (IR) light distance 70 m Beam angle of the infrared LEDs 45°: 40 m + 15°: 70 m On/Off for infrared lighting Control by automatic light level detector...
- Page 17 Infrared projector 50 m 4 Adjustment of the power The factory power adjustment is set to maximum power. The illuminator power can be adjust with the screw located on the circuit board inside the device. This parameter will modify the infrared distance. Turn the screw with a screwdriver: - clockwise to increase the power.
- Page 19 Infrared projector 50 m...


Need help?
Do you have a question about the 391891 and is the answer not in the manual?
Questions and answers