Table of Contents
Advertisement
Available languages
Available languages
Quick Links
Advertisement
Chapters
Table of Contents

Related Manuals for Bticino 391780


Summary of Contents for Bticino 391780
- Page 1 391780 IP Speed Dome Ext. Guida Rapida • Quick Start Guide...
- Page 2 IP Speed Dome Ext. ITALIAN ENGLISH...
-
Page 3: Table Of Contents
Prima di effettuare l’installazione, leggere le istruzioni e prendere in considerazione il luogo specifico in cui il prodotto sarà montato. Non aprire, smontare, alterare o modificare il dispositivo salvo specificatamente richiesto dalle istruzioni. Tutti i prodotti Bticino devono essere aperti e riparati esclusivamente da personale qualificato ed approvato da Bticino. -
Page 4: Accessori
1 Accessori Nome Qtà IP Dome Staffa Borsa accessori Guida rapida all'installazione Alimentazione... -
Page 5: Introduzione Generale
Speed Dome IP Ext. 2 Introduzione generale 2.1 Panoramica Questo dispositivo integra una telecamera tradizionale e la tecnologia dei video in rete. Consente la raccolta, la trasmissione e l'archiviazione di dati audio e video. Può collegarsi direttamente alla rete senza alcun dispositivo ausiliario. Questo dispositivo usa la tecnologia di compressione video H.264 standard, che garantisce la massima qualità... - Page 6 Questa serie di speed dome presenta le seguenti caratteristiche: - Menu su schermo Il menu del prodotto di questa serie supporta varie lingue. È facile visualizzare informazioni sulla dome, configurare la dome e i suoi parametri. - Supporta svariati protocolli Si possono usare svariati dispositivi (come matrice, tastiera di controllo e DVR) e protocolli per utilizzare la speed dome.
- Page 7 Speed Dome IP Ext. - Modalità Day/Night (modalità bianco/nero e colori) Passa automaticamente/manualmente da una modalità all'altra in base all'illuminazione. . Automatico: la telecamera regola automaticamente il livello di luce CCD. . Manuale: usare i tasti funzione o il menu per selezionare la modalità Day/Night. Questa funzione richiede che la telecamera della speed dome sia supportata.
-
Page 8: Specifiche
2.3 Specifiche 2.3.1 Specifiche delle prestazioni La telecamera smart dome di rete, ad alta velocità, da 1.3 megapixel integra le funzioni della sorveglianza remota basata su rete e della smart dome ad alta velocità, facile da installare e da usare. Questo prodotto ha un'elevata risoluzione che soddisfa le esigenze dei clienti in materia di sorveglianza ad alta definizione. - Page 9 Speed Dome IP Ext. 2.3.2 Specifiche tecniche Alimentazione CA 24 V/3 A (±10%) (comprende circuito di controllo della temperatura) Consumo driver 15 W della telecamera Decodificatore Integrato Motore Motore passo passo 255 (nel protocollo PELCOD, PELCOP). Predefinite 80 (nel protocollo industriale). Si noti che il valore può...
- Page 10 2.3.3 Impostazione predefinita di fabbrica Tipo di configurazione delle Nome elemento Impostazione predefinita funzioni Date format (Formato data) D-M-Y (G-M-A) Disable by default (Disabilita in modo predefinito) Date separator (Separatore di data) Time format (Formato ora) General Setup (Configurazione generale) Language (Lingua) English (Inglese) When HDD is full (Quando l'HDD è...
- Page 11 Speed Dome IP Ext. Tipo di configurazione delle Nome elemento Impostazione predefinita funzioni RS232 com COM01 Funzione Console Data bit (Bit di dati) RS232 Stop bit (Bit di stop) Baud rate (Velocità in baud) 115200 Parity (Parità) None (Nessuna) Ethernet Port 01 (Porta 01) DHCP Disable (Disabilita)
- Page 12 Tipo di configurazione delle Nome elemento Impostazione predefinita funzioni Event type (Tipo evento) Motion detection (Rilevamento movimento) Channel (Canale) Ch01, Disable (Can01, disabilita) Sensibilità Period: (Periodo:) Start time 0:00:00 (Ora di inizio 00:00:00) Time period setup (Impostazione End time:23:59:59 (Ora di fine 23:59:59) periodo di tempo) Period 1:enable (Periodo 1:abilita) Week: (Settimana:) Sunday (Domenica)
- Page 13 Speed Dome IP Ext. Tipo di configurazione delle Nome elemento Impostazione predefinita funzioni Snapshot mode Snapshot-timing (Temporizzazione istan- (Modalità Istantanea) tanea) Frame rate (Frequenza Snapshot 1 S/F fotogrammi) (Istantanea) Resolution (Risoluzione) 720p Advanced (Avanzate) Quality (Qualità) Auto reboot (Riavvio 2.00 each day (2.00 ogni giorno) automatico) Auto maintain (Mantenimen-...
-
Page 14: Telaio
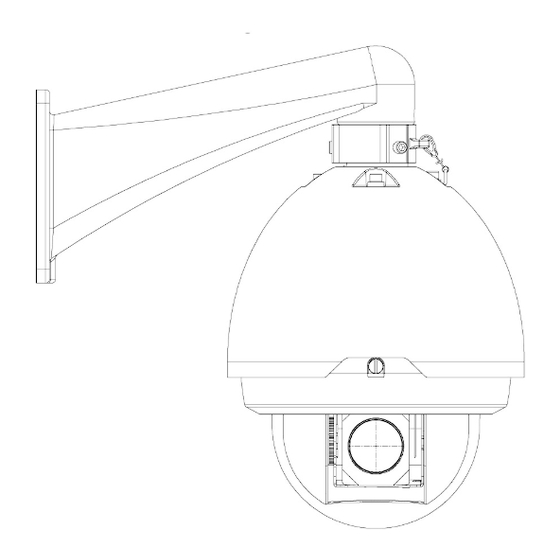
3 Telaio 3.1 Dimensioni 3.1.1 Staffa per installazione a muro Di seguito sono indicate le dimensioni della staffa per montaggio a parete. 3.1.2 Staffa per montaggio ad angolo Di seguito è mostrata la staffa per montaggio ad angolo. - Page 15 Speed Dome IP Ext. 3.1.3 Staffa per montaggio su palo Di seguito è mostrata la staffa per montaggio su palo.
-
Page 16: Installazione
4 Installazione 4.1 Installazione della speed dome Aprire il coperchio trasparente ed estrarre il materiale di imballaggio che circonda il driver della speed dome. Rimuovere il nastro gommato protettivo dal driver ed estrarre il cappuccio della lente della telecamera. Striscia di carta gommata protettiva - Installare la porta a installazione rapida. -
Page 17: Installazione Della Speed Dome Nella Staffa
Speed Dome IP Ext. Porta di installazione rapida Filo di acciaio Cavo di connessione integrato Cavo composito multifunzione Nota: la porta del video è coperta dal tubo termoretraibile a rapporto di retrazione elevato. Dopo aver collegato il video, riscaldare il tubo per verificare che la porta video sia impermeabilizzata. 4.2 Installazione della speed dome nella staffa Al termine delle fasi precedenti, estrarre il cavo di integrazione e il cavo composito multifunzione nella staffa per montaggio a parete. -
Page 18: Installazione Con Staffa A Parete
4.3 Installazione con staffa a parete Di seguito è mostrata la staffa per montaggio a parete. Requisiti di installazione La speed dome installabile a parete può essere montata all'aperto o al chiuso. Prima dell'installazione, verificare che: - la parete sia sufficientemente spessa per accogliere il bullone ad espansione; - la parete deve poter sostenere almeno 4 volte il peso della speed dome. -
Page 19: Installazione Con Staffa Ad Angolo
Speed Dome IP Ext. 4.4 Installazione con staffa ad angolo La staffa per montaggio ad angolo e i suoi componenti sono illustrati di seguito. Requisiti di installazione La speed dome installabile a parete può essere montata all'aperto o al chiuso ovunque vi sia un angolo a 90°. Prima dell'installazione, verificare che: - la parete sia sufficientemente spessa per accogliere il bullone ad espansione;... - Page 20 - Estrarre il cavo dagli accessori del palo e usare una morsa per fissare gli accessori del palo al palo stesso. - Infine, usare colla per vetro sul foro di uscita per garantire l'impermeabilità. Colla per vetro - Dopo aver installato la staffa e il coperchio esterno, allentare le viti imperdibili e aprire il pannello, estrarre il cavo di alimentazione attraverso la staffa e fissare la staffa alla parete.
-
Page 21: Menu
Speed Dome IP Ext. 5 Menu 5.1 Indice del menu dello schermo Nota: ERR significa che la configurazione corrente non è valida..significa che esiste un sottomenu. SET NORTH SYSTEM INFORMATION LANGUAGE: ENGLISH FACTORY DEFAULT RESTART BACK EXIT PRESET TITLE: ON (ON/OFF) AZIMUTH DISP: ON (ON/OFF) TIME DISP:... -
Page 22: Informazioni Sul Sistema Di Diagnostica Automatica
Lo schema precedente illustra la struttura globale del menu di configurazione della speed dome. Nota: - ERR significa che la configurazione corrente non è valida. - Verificare che tutti i collegamenti dei cavi siano corretti. 5.2 Informazioni sul sistema di diagnostica automatica ADDR: 001-H BAUD RATE :... -
Page 23: Funzionamento Del Menu
Speed Dome IP Ext. 5.4 Funzionamento del menu Nel menu principale della speed dome, usare il tasto destra/sinistra sulla tastiera o l'interfaccia Web per configurare il menu di sistema. Prima della configurazione, spostare il cursore sull'elemento corrente che si desidera configurare. - Nel menu principale, fare clic sul pulsante Confirm (Conferma) per andare al sottomenu oppure usare il tasto destra/ sinistra per configurare le impostazioni. - Page 24 Informazioni sull'indirizzo ADDR TYPE: HARD ADDR-HARD: ADDR-SOFT: BACK EXIT - Spostare il cursore su SITE INFORMATION (INFORMAZIONI SITO) e fare clic sul pulsante Confirm (Conferma). - ADDR TYPE (TIPO INDIRIZZO): Esistono due opzioni: soft (software) e hard (hardware). Usare il tasto destra/ sinistra sulla tastiera o il menu del terminale della speed dome per impostare.
- Page 25 Speed Dome IP Ext. - ZOOM DISP (VISUALIZZA ZOOM): Visualizza o meno la velocità dello zoom della dome. Usare il tasto destra/sinistra sulla tastiera o il menu del terminale della speed dome per impostare. - INSIDE TEMPERATURE (TEMPERATURA INTERNA): Visualizza o meno la temperatura interna della dome. Esistono tre opzioni: °C/°F/Off.
- Page 26 Impostazione dell'esposizione AE MODE: AUTOMATICO GAIN SETTING: AGC GAIN LIMIT: SHUTTER: 1/50 SLOW SHUTTER LIMIT: 1/25 SETTING: NOISE REDUCTION: EXPOSURE COMP: BLC: SLOW AE: WDR SETTING: SLOW SHUTTER: BACK NEXT PAGE EXIT BACK EXIT - AE MODE (MODALITÀ AE): Imposta la modalità di esposizione della telecamera. Comprende: auto (automatica)/manual (manuale)/AV (iris priority) (AV (priorità...
- Page 27 Speed Dome IP Ext. - APERTURE RESTRAIN (CONTROLLO APERTURA): Può controllare automaticamente l'apertura in ambienti con illuminazione scarsa e ridurre il rumore. - DIGITAL ZOOM (ZOOM DIGITALE): Usare il tasto destra/sinistra per abilitare/disabilitare la funzione dello zoom digitale. - PICTURE FLIP (ROVESCIA IMMAGINE): Questa funzione consente di ruotare l'immagine di 180°.
- Page 28 Configurazione predefinite PRESET NO: TITLE: PRESET001 SETTING CALL BACK Spostare il cursore sul pulsante PRESET (PREDEFINITA) e fare clic sul pulsante Confirm (Conferma) per impostare l'interfaccia. - PRESET NO. (N. PREDEFINITA): Usare il tasto destra/sinistra per modificare il numero della predefinita. I protocolli diver- si supportano valori diversi della predefinita.
- Page 29 Speed Dome IP Ext. Scansione SCAN NO: SET LEFT LIMIT SET RIGHT LIMIT SCAN SPEED: STOP BACK EXIT Spostare il cursore su SCAN (SCANSIONE) e fare clic sul pulsante Confirm (Conferma). - SCAN NO (SCANSIONE N.): Imposta il numero della scansione automatica. Usare il tasto destra/sinistra sulla tastiera o il menu del terminale della speed dome per impostare.
- Page 30 Fare clic sul pulsante Confirm (Conferma) per uscire dall'installazione. Dopo portare il cursore sul pulsante BACK (INDIETRO) per andare all'interfaccia precedente. - DELETE CRUISE (ELIMINA CROCIERA): Elimina una crociera. Inserire il numero della crociera in CRUISE NO (N. CROCIERA) e spostare il cursore su DELETE CRUISE (ELIMINA CROCIERA), quindi fare clic sul pulsante Confirm (Conferma) per eliminarla.
- Page 31 Speed Dome IP Ext. Movimento inattivo IDLE FUNC: IDLE TIME: 010MIN IDLE ACTION: NONE PARAMETER: SAVE BACK EXIT Quando non vi sono comandi disponibili per un periodo di tempo specificato, la dome automaticamente passa alle funzioni precedentemente impostate. - IDLE FUNCTION (FUNZIONE INATTIVO): Esistono due modalità: ON/OFF. Usare il tasto destra/sinistra per impostare.
- Page 32 TIME ACTION 1 ALL 00:00:00:00 SC001 2 ALL 00:00:00:00 SC001 3 ALL 00:00:00:00 SC001 4 ALL 00:00:00:00 SC001 5 ALL 00:00:00:00 SC001 6 ALL 00:00:00:00 SC001 7 ALL 00:00:00:00 SC001 Pagina successiva Spostando il cursore su NEXT PAGE (PAGINA SUCCESSIVA) e facendo clic sul pulsante Confirm (Conferma) è possibile passare al terzo menu per impostare PTZ SPEED (VELOCITÀ...
- Page 33 Speed Dome IP Ext. Maschera per privacy Spostare il cursore su PRIVACY MASK (MASCHERA PER PRIVACY) e fare clic sul pulsante Confirm (Conferma); il sistema porta all'interfaccia di configurazione della maschera per la privacy. PRIVACY NO: ACTIVATE : RESIZE: DELETE SAVE BACK EXIT...
- Page 34 Accensione Spostare il cursore sull'elemento POWER UP (ACCENSIONE) e fare clic sul pulsante Confirm (Conferma) per passare al quarto menu. POWER UP: NONE PARAMETER: NONE BACK EXIT - POWER UP (ACCENSIONE): Serve per impostare l'azione PTZ quando la speed dome si accende. L'opzione comprende: NONE (NESSUNA)/AUTO (AUTOMATICA)/SCAN (SCANSIONE)/PRESET (PREDEFINITA)/PATTERN (MODELLO)/TOUR (GIRO), eccetera.
-
Page 35: Funzionamento Anomalo Della Dome
Speed Dome IP Ext. 5.5 Funzionamento anomalo della dome 5.5.1 Ripristino della configurazione predefinita di fabbrica Dal menu principale -> SYSTEM INFORMATION (INFORMAZIONI SUL SISTEMA), portare il cursore su FACTORY DEFAULT (PREDEFINITA DI FABBRICA) e fare clic sul pulsante Confirm (Conferma). La dome si riavvia e tutte le configurazioni ritornano ai valori predefiniti di fabbrica. -
Page 36: Strumento Di Configurazione Rapida
6 Strumento di configurazione rapida Lo strumento di configurazione rapida consente di cercare l'indirizzo IP di un dispositivo, anche se si trova in un altro segmento (telecamere, DVR, NVR, encoder e decoder) e di modificarlo. Lo strumento di configurazione è disponibile sul CD fornito con il prodotto. - Page 37 Speed Dome IP Ext. Per collegarsi a un dispositivo e aprire l'applicazione Web: - Evidenziarlo (un clic sull'elenco). - Fare clic con il tasto destro sulla riga evidenziata. - Fare clic su "Open Device Web" (Apri Web del dispositivo). - Si apre la seguente pagina Web: ...
- Page 38 6.1.2 Connessione con lo strumento di configurazione (per cambiare l’indirizzo IP o aggiornare il software interno del dispositivo) Per cercare dispositivi collegati alla rete: - Fare clic sul pulsante «Refresh» (Aggiorna); lo strumento cerca i dispositivi collegati alla rete e li visualizza sotto forma di elenco (consultare il capitolo 6.1.1 per dettagli sull’interfaccia).
- Page 39 Speed Dome IP Ext. - Riavviare la procedura. Si apre la seguente finestra: - Fare clic su Login (Accesso) per accedere alle modifiche dei parametri. Funzione Nota Enable DHCP (Abilita DHCP) Abilita o disabilita la funzione DHCP IP address (Indirizzo IP) Indirizzo IP del dispositivo Subnet mask (Maschera di...
- Page 40 6.1.3 PPPoE Selezionare "PPPoE" sul lato destro dell'interfaccia: Funzione Nota Enable PPPOE Abilita o disabilita la funzione PPPoE (Abilita PPPOE) User Name (Nome Nome utente PPPOE utente) Password Password PPPOE IP address Indirizzo IP del dispositivo nella WAN (Indirizzo IP) Save (Salva) Salva Return (Invio)
- Page 41 Speed Dome IP Ext. 6.1.4 Sistema Selezionare "System Information" (Informazioni sistema) sul lato destro dell'interfaccia. Funzione Nota Numero di serie del dispositivo Software version (Versione Versione del software del dispositivo software) Device name Nome del modello (Nome dispositivo) Synchronization with PC Sincronizzazione della data e dell'ora del PC con la data e l'ora del PC.
- Page 42 6.1.5 Aggiornamento del sistema Selezionare "System Upgrade" (Aggiornamento sistema) sul lato destro dell'interfaccia. Funzione Nota Upgrade file/Open (Aggiorna file/Apri) Fare clic qui per selezionare il file di aggiornamento. Current Progress/Upgrade Fare clic qui per avviare la procedura di aggiornamento. (Avanzamento attuale/Aggiorna) Return (Invio) Riporta all'interfaccia di ricerca...
- Page 43 Speed Dome IP Ext. - Dopo aver trasferito il file, il dispositivo si aggiorna automaticamente. - Dopo aver aggiornato il dispositivo, si apre la seguente casella di dialogo: - Fare clic su OK per completare la procedura.
-
Page 44: Collegamento A Un Dispositivo E Apertura Dell'applicazione Web
7 Collegamento a un dispositivo e apertura dell'applicazione Web 7.1 Configurazione del PC Questo dispositivo supporta l'accesso al Web e la gestione tramite PC. Il Web comprende diversi moduli tra cui l'elenco dei canali del monitor, la ricerca delle registrazioni, la configurazione degli allarmi, la configurazione del sistema, il controllo PTZ, la finestra del monitor, ecc. -
Page 45: Connessione Con Lo Strumento Di Ricerca
Speed Dome IP Ext. 7.2 Connessione con lo strumento di ricerca Per aprire il software, fare doppio clic sull'icona "ConfigTool.exe" nel CD fornito con il prodotto. Per cercare dispositivi collegati alla rete: - Fare clic sul pulsante "Refresh" (Aggiorna); lo strumento cerca i dispositivi collegati alla rete e li visualizza sotto forma di elenco. -
Page 46: Collegamento Con Internet Explorer
7.3 Collegamento con Internet Explorer Impostazione predefinita in fabbrica della telecamera IP: - Indirizzo IP: 192.168.1.108. - Nome utente: admin - Password: admin Aprire Internet Explorer (IE) e digitare l'indirizzo IP della telecamera nella barra dell'indirizzo. Ad esempio, se la vostra telecamera IP è 192.168.1.108, digitare http://192.168.1.108 nella barra dell'indirizzo di IE. Inserisci il tuo indirizzo IP qui Nota:... - Page 47 Speed Dome IP Ext. Dopo l'accesso compare la finestra principale: Nota: se si usa IE8 o superiore utilizzare la Visualizzazione Compatibilità. Per l'interfaccia Web consultare la guida utente dettagliata.
- Page 49 Before carrying out the installation, read the instructions and take account of the product’s specific mounting location. Do not open up, dismantle, alter or modify the device except where specifically required to do so by the instructions. All Bticino products must be opened and repaired exclusively by personnel trained and approved by Bticino.
-
Page 50: Accessories
1 Accessories Name IP Dome Bracket Accessories bag Quick Start Guide Power supply... -
Page 51: General Introduction
IP Speed Dome Ext. 2 General Introduction 2.1 Overview This device integrates traditional camera and network video technology. It adopts audio video data collection, transmission and storage. It can connect to the network directly without any auxiliary device. This device uses standard H.264 video compression technology which maximally guarantees the video quality. It can be used alone or used in a network area. - Page 52 This series speed dome has the following features: - On-Screen Menu This series product menu supports multiple languages. It is easy for you to view dome information and configure dome, camera parameters. - Support multiple protocols Use various devices (such as matrix, control keyboard and DVR) and protocols to operate speed dome. - Proportional Pan and Tilt This function keeps the image from moving too fast when there is a large amount of zoom.
- Page 53 IP Speed Dome Ext. - Day/Night Mode (B/W & Color Mode) Auto/manual switches in low illumination. . Auto: camera will automatically adjust CCD light level. . Manual: use menu or function keys to select day/night mode. This function needs the speed dome driver (camera) supported. - Auto Focus Auto focus allows the lens to remain in focus during zoom-in, zoom-out and motion functions to get vivid image.
-
Page 54: Specifications
2.3 Specifications 2.3.1 Performance Specifications The 1,3 megapixel high speed smart network dome camera integrates the functions of network-based remote surveillance and integrated high-speed smart dome, which makes it convenient to install and easy to use. This product enjoys a megapixel resolution, which meets the customers’... - Page 55 IP Speed Dome Ext. 2.3.2 Technical Specifications Power AC 24V/3A (±10%) (Includes temperature control circuit) Camera Driver Consumption Decoder Built-in Engine Stepper motor 255 (In PELCOD, PELCOP protocol). Preset 80 (In industrial protocol) Please note the value may vary due to different protocols. Auto Tour Auto Pattern Auto Scan...
- Page 56 2.3.3 Factory Default Setup Function configuration type Item Name Default setup Date format D-M-Y Disable by default Date separator ‘/’ Time format General Setup Language English When HDD is full Overwrite Record duration 60 min Device No. Video type Channel Channel01 Encode mode H.264...
- Page 57 IP Speed Dome Ext. Function configuration type Item Name Default setup RS232 com COM01 Function Console Data bit RS232 Stop bit Baud rate 115200 Parity None Ethernet Port 01 DHCP Disable IP address 192.168.1.108 Subnet mask 255.255.0.0 Gateway 192.168.0.1 Device name Device factory default name TCP port 37777...
- Page 58 Function configuration type Item Name Default setup Event type Motion detection Channel Ch01, Disable Sensitivity Period: Start time 0:00:00 Time period setup End time:23:59:59 Period 1:enable Week: Sunday Anti-dither 5 seconds Detection Alarm out Disable Alarm latch 10 seconds Record channel Disable Record latch 10 seconds...
- Page 59 IP Speed Dome Ext. Function configuration type Item Name Default setup Snapshot mode Snapshot-timing Frame rate 1 S/F Snapshot Resolution 720p Advanced Quality Auto reboot 2.00 each day Auto maintain Auto delete old Never files Channel Exposure Mode Auto Day/Night Mode Disable Backlight Compensation Disable...
-
Page 60: Framework
3 Framework 3.1 Dimensions 3.1.1 Wall mount bracket The wall mount bracket dimensions are shown as below. 3.1.2 Corner mount bracket The corner mount bracket is shown as below. - Page 61 IP Speed Dome Ext. 3.1.3 Pole mount bracket The pole mount bracket is shown as below.
-
Page 62: Installation
4 Installation 4.1 Install the speed dome Open the transparent cover and take out the packing material around the speed dome driver. Please remove the protective paster from the driver and take off the camera lens cap. - Install the quick installation port. - Twist Teflon tape around the screw thread of the quick installation port and turn it into the screw thread of the wall mount bracket. -
Page 63: Install The Speed Dome In The Bracket
IP Speed Dome Ext. Note : The video port is covered the heat shrink tube of high shrinking ratio. After the video connection, please heat the tube to make sure the video port is damp proof and water proof. 4.2 Install the speed dome in the bracket After you complete the above steps, please pull the integration cable and multiple-function composite cable to the wall mount bracket. -
Page 64: Wall Mount Bracket Installation
4.3 Wall mount bracket installation Wall mount bracket is shown as below. Installation requirements The wall mount speed dome can be installed in the hard construction wall in the indoor or outdoor environments. Before the installation, please make sure: - The wall is thick enough to install the expansion bolt. - The wall can at least sustain the 4x weight of the speed dome. -
Page 65: Corner Mount Bracket Installation
IP Speed Dome Ext. 4.4 Corner mount bracket installation Corner mount bracket and its components are shown as below. Installation requirements The corner mount speed dome can be installed in the hard construction wall in the indoor or outdoor environments where there is a 90 degrees angle. - Page 66 - Pull the cable out of the pole accessories and then use clamp to fix the pole accessories to the pole. - Finally, use glass cement to the output hole to secure waterproof. - After you installed bracket and external cover, loosen the captive screws and open the panel, pull the power cable through the hanging bracket and then fix the hanging bracket to the wall.
-
Page 67: Menu
IP Speed Dome Ext. 5 Menu 5.1 Screen Menu Index Note: ERR means current setup is invalid..means there is submenu. INITIAL INFORMATION... ADDR INFORMATION... SYSTEM TIME SETTING... SET NORTH SYSTEM INFORMATION LANGUAGE: ENGLISH FACTORY DEFAULT RESTART BACK EXIT PRESET TITLE: ON (ON/OFF) AZIMUTH DISP: ON (ON/OFF) -
Page 68: Self-Diagnosis System Information
The above diagram illustrates the overall structure of the speed dome setup menu. Note: - ERR means current setup is invalid. - Please make sure all the cable connections are right. 5.2 Self-diagnosis system information ADDR: 001-H BAUD RATE: 9600 PARITY: NONE PROTOCOL:... -
Page 69: Menu Operation
IP Speed Dome Ext. 5.4 Menu operation In the speed dome main menu, use the left/right button on the web interface to configure the system menu. Before setup, move the cursor to the current item you want to configure. - In main menu, click confirm button to go to the sub menu or use left/right key to configure setup. - Use up/down button to select back option and then click confirm button to go back to the previous menu. - Page 70 Address Information ADDR TYPE: HARD ADDR-HARD: ADDR-SOFT: BACK EXIT -Move the cursor to SITE INFORMATION and then click confirm button. - ADDR TYPE: There are two options: soft and hard. Use the left/right button on the keyboard or in the speed dome terminal menu to set.
- Page 71 IP Speed Dome Ext. - ZOOM DISP: Display speed dome zoom speed or not. Use the left/right button on the keyboard or in the speed dome terminal menu to set. - INSIDE TEMPERATURE: Display dome internal temperature or not. There are three options: °C/F/Off. Use the left/right button on the keyboard or in the speed dome terminal menu to set.
- Page 72 Exposure Setting AE MODE: AUTO GAIN SETTING: AGC GAIN LIMIT: SHUTTER: 1/50 SLOW SHUTTER LIMIT: 1/25 SETTING: NOISE REDUCTION: EXPOSURE COMP: BLC : SLOW AE: WDR SETTING: SLOW SHUTTER: BACK NEXT PAGE EXIT BACK EXIT - AE MODE: Set the camera exposure mode. It includes: auto/manual/AV (iris priority)/TV (shutter priority).
- Page 73 IP Speed Dome Ext. - APERTURE RESTRAIN: It can automatically control the aperture in the low illumination environments. It can reduce the noise. - DIGITAL ZOOM: You can use the left/right button to enable/disable the digital zoom function. - PICTURE FLIP: This function allows you to turn the image rotation 180 degrees.
- Page 74 Preset Setup PRESET NO: TITLE: PRESET001 SETTING CALL BACK Move the cursor to PRESET button and then click confirm button to go to set interface. - PRESET NO: Use left/right key to modify preset number. The different protocols support different preset values. The PELCOD and PELCOP support 1 to 255.
- Page 75 IP Speed Dome Ext. Scan SCAN NO: SET LEFT LIMIT SET RIGHT LIMIT SCAN SPEED: STOP BACK EXIT Move the cursor to SCAN button and then click confirm button. - SCAN NO: Set auto scan number. Use the left/right button on the keyboard or in the speed dome terminal menu to set. - SET LEFT LIMIT: Set camera left address.
- Page 76 Click confirm button you can exit the setup. After move the cursor to back button to go to the previous interface. - DELETE CRUISE: Delete a cruise. Input cruise number in CRUISE NO and then move the cursor to DELETE cruise, click confirm button to delete.
- Page 77 IP Speed Dome Ext. Idle Motion IDLE FUNC: IDLE TIME: 010MIN IDLE ACTION: NONE PARAMETER: SAVE BACK EXIT When there is no available command for specified time, dome automatically goes on the previous set functions. - IDLE FUNCTION: There are two modes ON/OFF. Use left/right key to set.
- Page 78 TIME ACTION 1 ALL 00:00:00:00 SC001 2 ALL 00:00:00:00 SC001 3 ALL 00:00:00:00 SC001 4 ALL 00:00:00:00 SC001 5 ALL 00:00:00:00 SC001 6 ALL 00:00:00:00 SC001 7 ALL 00:00:00:00 SC001 Next Page Move the cursor to the NEXT PAGE and then click the confirm button, you can go to the third menu to set the PTZ SPEED, SET ZERO, POWER UP and etc.
- Page 79 IP Speed Dome Ext. Privacy Mask Move the cursor to PRIVACY MASK and click confirm button, system goes to privacy mask setup interface. PRIVACY NO: ACTIVATE : RESIZE: DELETE SAVE BACK EXIT Note: For security reasons, please set privacy zone a little bit larger than the privacy object size. Each time, after modifications you need to move the cursor to SAVE button and then click confirm button to get all setup activated.
- Page 80 Power Up Move the cursor to the POWER UP item and then click the confirm button to go to the fourth menu. POWER UP: NONE PARAMTER: NONE BACK EXIT - POWER UP: It is to set the PTZ operation when the speed dome boots up. The option includes: NONE/AUTO/SCAN/PRESET/PATTERN/TOUR and etc.
-
Page 81: Dome Abnormal Phenomenon Operation
IP Speed Dome Ext. 5.5 Dome Abnormal Phenomenon Operation 5.5.1 Restore to Factory Default Setup From main menu-> SYSTEM INFORMATION, move cursor to FACTORY DEFAULT and click confirm button. Dome will reboot and all the setups restore to factory default setup. 5.5.2 PTZ Movement is not smooth From menu to SYSTEM INFORMATION, move cursor to RESTART and click confirm button. -
Page 82: Quick Configuration Tool
6 Quick Configuration Tool The quick configuration tool allows you to search for a device's IP address, even if it is in another segment (cameras, DVR, NVR, encoders and decoders) and to modify it. The configuration tool is available on the CD supplied with the product. It also allows the software to be upgraded or certain parameters to be modified. - Page 83 IP Speed Dome Ext. To connect to a device and open the web application: - Highlight it (single click in the list). - Right click the highlighted line. - Click on "Open Device Web". - The following web page opens: ...
- Page 84 6.1.2 Connection with the configuration tool (to change the IP address or upgrade a device’s internal software) To search for devices connected to the network: - Click the «Refresh» button; the tool will search for devices connected to the network and display them in the form of a list (see chapter 6.1.1 for details of the interface).
- Page 85 IP Speed Dome Ext. - Restart the procedure. The following window should open: - Click Login to access the parameter modifications. Function Note Enable DHCP Enable or disable the DHCP function IP address Device IP address Subnet mask Device subnet mask Gateway Device default gateway...
- Page 86 6.1.3 PPPoE Select "PPPoE" on the right-hand side of the interface: Function Note Enable PPPOE Enable or disable the PPPoE function User name PPPOE user name Password PPPOE password IP address Device IP address in the WAN Save Save Return Return to the search interface - Click the "System Information"...
- Page 87 IP Speed Dome Ext. 6.1.4 System Select "System Information" on the right-hand side of the interface. Function Note Device serial number Software version Device software version Device name Model name Synchronization Synchronisation of the device date and time with the date and time on the PC. with PC Click "Sync"...
- Page 88 6.1.5 System Upgrade Select "System Upgrade" on the right-hand side of the interface. Function Note Upgrade file/Open Click here to select the upgrade file. Current progress/Upgrade Click here to start the upgrade procedure. Return Return to search interface Steps for updating the device's internal software - Click on the "Open"...
- Page 89 IP Speed Dome Ext. - Once the file has been transferred, the device upgrades automatically. - Once the device has been upgraded, the following dialogue box opens: - Click OK to finish the procedure.
-
Page 90: Connecting To A Device And Opening The Web Application
7 Connecting to a Device and Opening the Web Application 7.1 PC Configuration This device supports Web access and management via PC. Web includes several modules including monitor channel list, record search, alarm setup, system configuration, PTZ control, monitor window, etc. The system pops up warning information to ask whether you wish to install the control webrec.cab or not. -
Page 91: Connection With The Search Tool
IP Speed Dome Ext. 7.2 Connection with the Search Tool To open the software, double click the "ConfigTool.exe" icon on the CD supplied with the product. To search for devices connected to the network: - Click the "Refresh" button; the tool will search for devices connected to the network and display them in the form of a list. -
Page 92: Connection With Internet Explorer
7.3 Connection with Internet Explorer IP camera factory default setup: - IP address: 192.168.1.108. - User name: admin - Password: admin Open Internet Explorer (IE) and enter your camera IP address in the address bar. For example, if your camera IP is 192.168.1.108, then enter http://192.168.1.108 in the IE address bar. Input your IP address here Note:... - Page 93 IP Speed Dome Ext. After you log in, the main window appears: Note: Use IE compatibility mode if you are using IE8 or above. See the detailed user guide for the Web interface.
Need help?
Do you have a question about the 391780 and is the answer not in the manual?
Questions and answers